By default, Elest.io automates a 3-2-1 backup strategy for all new services. **3** copies of your data exist at all times. **2** are kept in geographically distinct data centers in your selected region. **1** backup is kept on-site for fast restoring.
- [Automated remote backups](https://docs.elest.io/books/backups/page/automated-remote-backups-borg "Remote Backups") - [Automated VM Snapshots](https://docs.elest.io/books/backups/page/automated-vm-snapshots "VM Snapshots") - [Local backups](https://docs.elest.io/books/backups/page/manual-local-backups "Local backups") - [External Backups](https://docs.elest.io/books/backups/page/automated-external-backups-s3 "External Backups") Each backup type has different retention periods and characteristics. [](https://docs.elest.io/uploads/images/gallery/2022-01/image-1643100276731.png) # Manual Local backups Local backups are useful if you need to take a quick backup of a small dataset locally and want to download the backup to your computer, or just be able to restore it later quickly.Local backups only contain the software's data volume, not the OS or software itself.
### Instructions: From the service dashboard, click on the *Backups* tab, then click on *Manual Local Backups.* From there you can make new manual backups, list existing backups, download, restore or delete previous local backups. [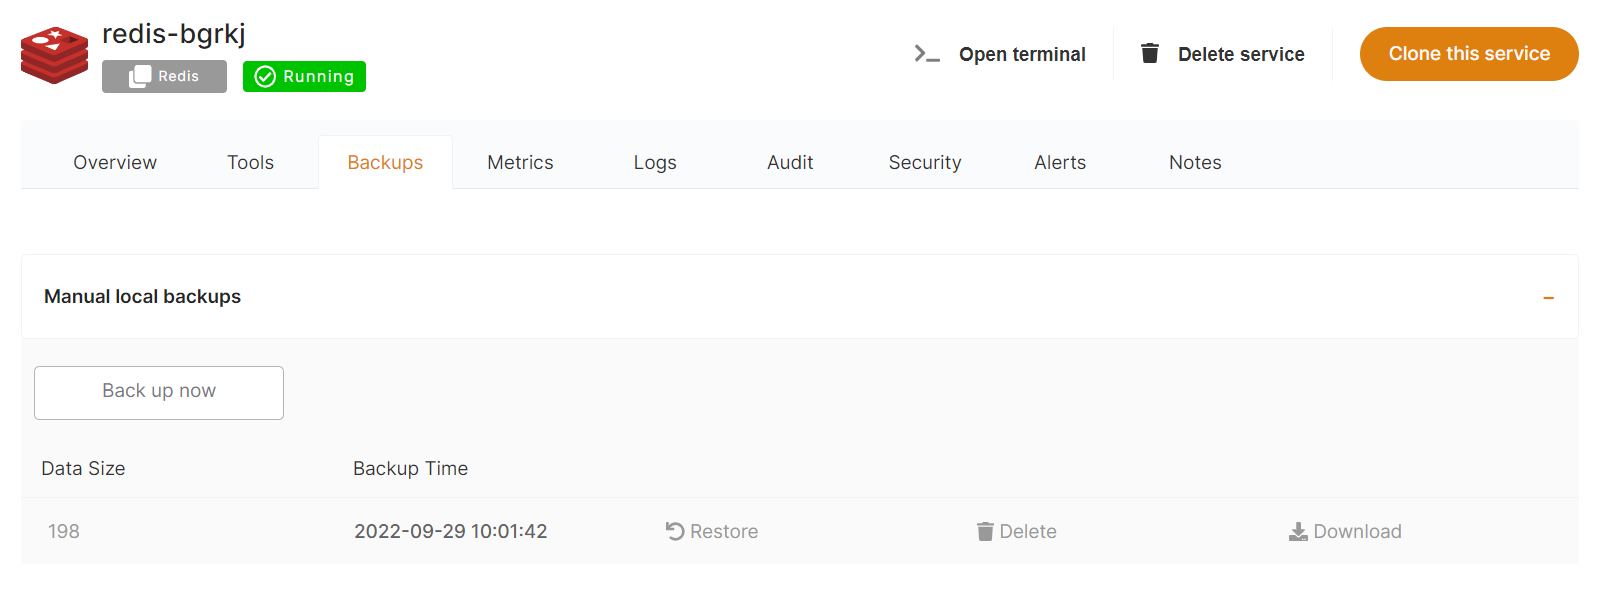](https://docs.elest.io/uploads/images/gallery/2022-01/image-1643050826729.png)You are responsible for deleting manual backups to regain disk space. Elest.io will not automatically delete them.
Manual backups use the available disk space of your service.
# Automated Remote Backups (Borg) Remote backups are sent to another datacenter in the same continent that your service (Ashburn USA for the US, Germany for EU zone and rest of the world). We use [Borg Backups](https://github.com/borgbackup/borg) to do incremental backups with deduplication. It's very fast and efficient. This kind of backup includes only the data, not the software itself. From the Dashboard, click on the *Backups* tab, then click on *Automated Remote Backups*. From there you can make new manual backups, list existing backups or restore a backup. [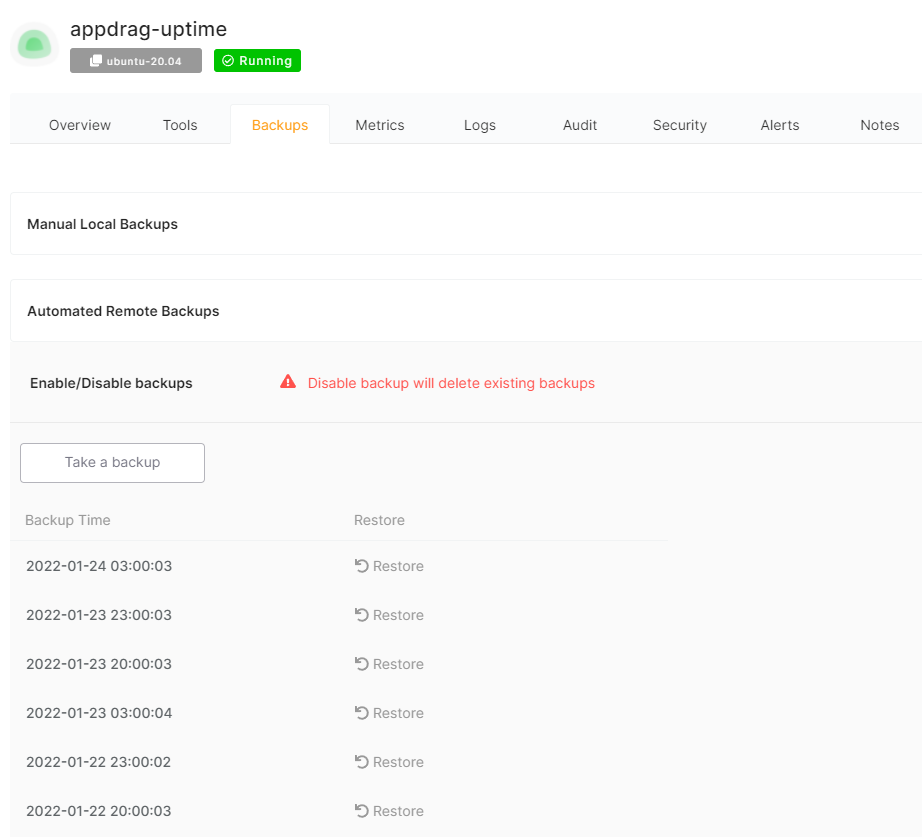](https://docs.elest.io/uploads/images/gallery/2022-01/image-1643051226100.png)Retention periods depend on your support plan: 7 days on Standard, 14 days on Premium and 30 days on Enterprise.
#### Partial restoration / mount backups It's possible to do partial restorations by mounting the backups into the VM and exploring them to copy only few files with this process: 1. Open the terminal and type this: ``` cd /opt/borg; ./backupMount.sh; ``` 2. You can then explore the mounted backups in /mnt/backups-mount from there you can copy some files to your real app folder in /opt/app/ 3. WARNING: do not forget to unmount the backups after usage with this command: ``` cd /opt/borg; ./backupUmount.sh; ``` # Automated VM Snapshots ##### VM snapshots are made using the provider's snapshot API and are stored in the same region where you have your service. It is only available under Support Plans Levels 2 and 3.It's a full snapshot of the VM, meaning it contains everything: OS, Apps, data, etc.
#### To make a snapshot From the Dashboard: 1. Click on the *Backups* tab 2. Click on *Automated Snapshots* [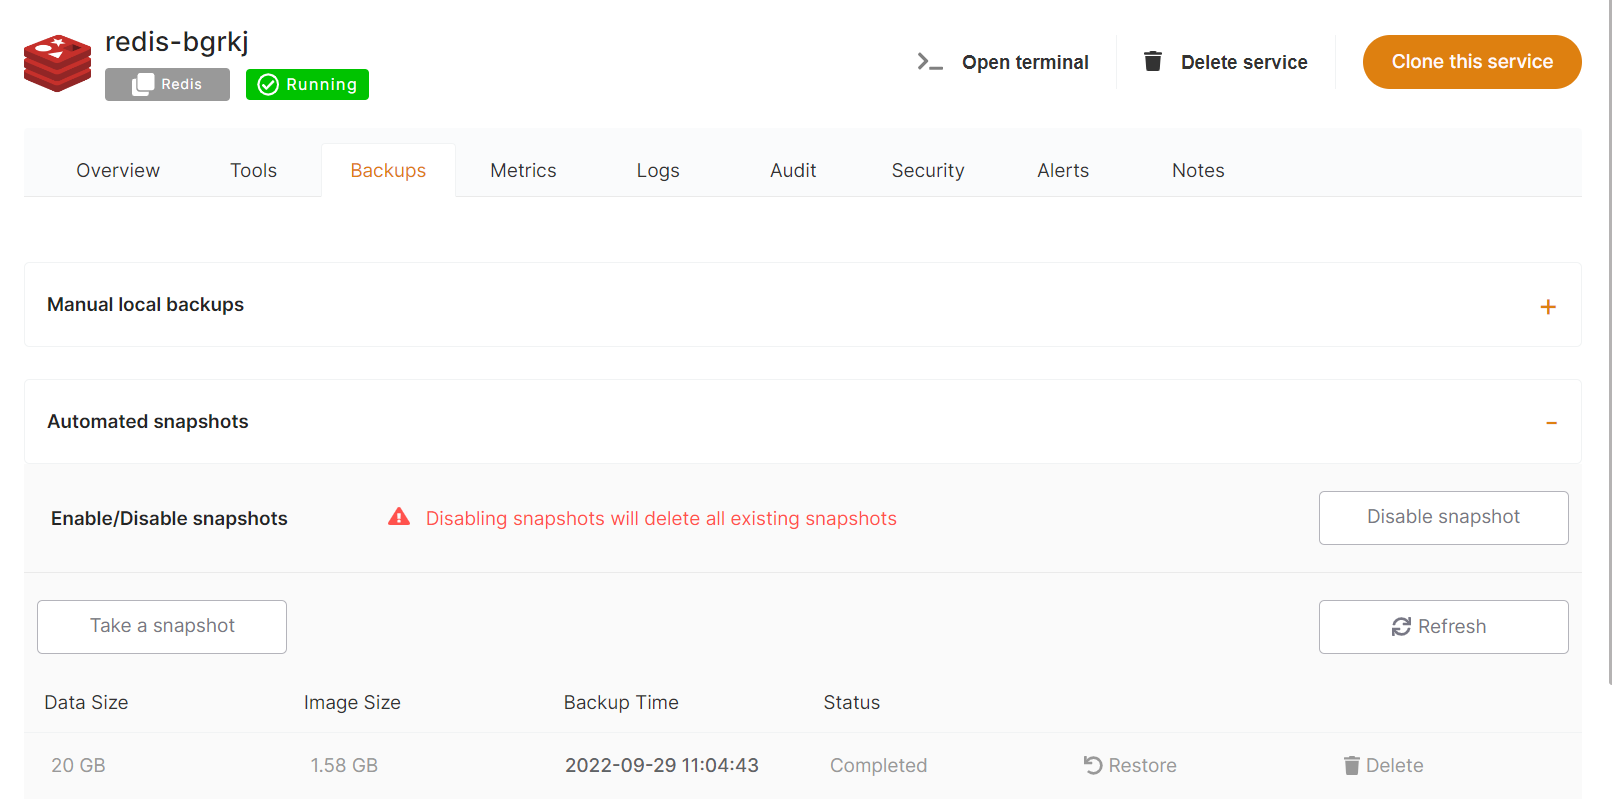](https://docs.elest.io/uploads/images/gallery/2022-01/image-1643051519213.png) From there you can take new a manual snapshot, list existing snapshots or restore a snapshot.Retention periods depend on your support plan: 2 snapshots on Level 2, and 4 snapshots on Level 3.
Restoring from a snapshot will overwrite the whole VM with the selected snapshot.
# Automated External Backups (S3) External backups are stored in your S3 bucket, so **you own your backups** directly. Elestio's external backup service is compatible with AWS S3 and any S3-compatible provider. To enable external backups from the service dashboard click on the *Backups* tab, then click on *Automated External Backups*. You will have to provide your S3 details. (endpoint, bucket name, API key, secret key) Before entering the bucket [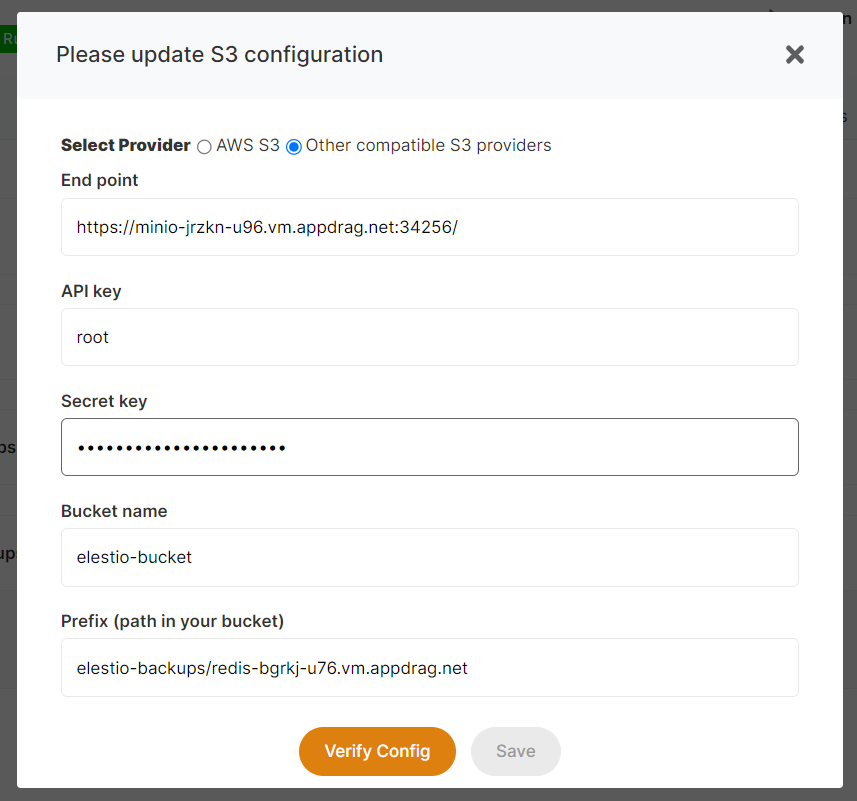](https://docs.elest.io/uploads/images/gallery/2022-03/image-1646731455400.png) You can click on the "Verify Config" button to validate your settings. Once activated, you will be able to click on Settings to configure the backups schedule. You can also take an external backup at any time with the "Take a backup" button. [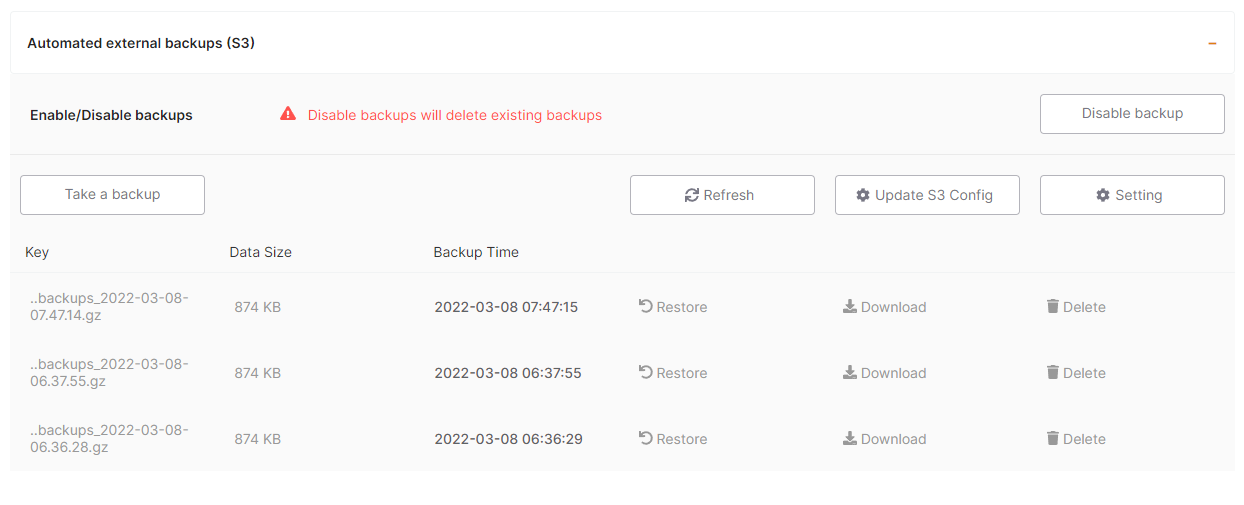](https://docs.elest.io/uploads/images/gallery/2022-03/image-1646726182117.png) If you click on Settings, you can configure the backups schedule and a number of backups to retain. [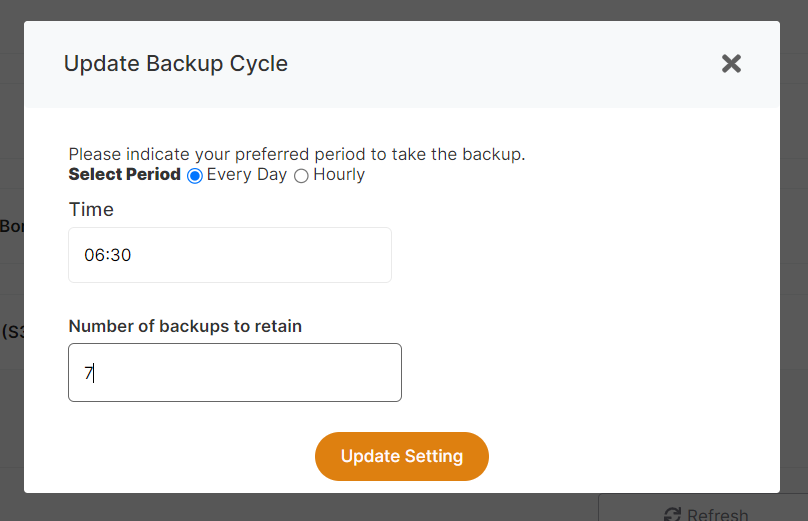](https://docs.elest.io/uploads/images/gallery/2022-03/image-1646760219740.png)If you don't have access to an AWS S3 bucket or an S3 bucket from another provider, you can [deploy Minio](https://elest.io/open-source/minio) to get your own S3 Bucket
# How to Create AWS Access and Secret Key for External backups (S3) ##### To create your AWS Access and Secret Key, follow these steps. - **Step 1**:- Use your AWS account ID or account alias, your IAM user name, and your password to sign in to the *[IAM console](https://console.aws.amazon.com/iam)* - **Step 2**:- In the navigation bar on the upper right, choose your user name, and then choose **Security credentials**. [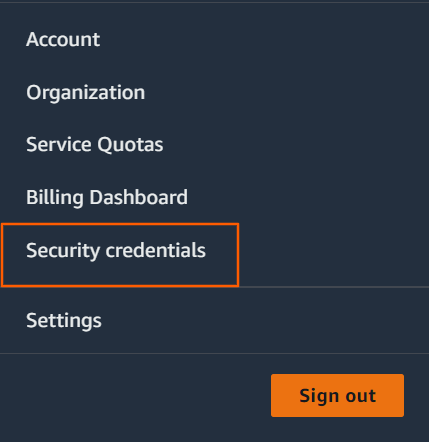](https://docs.elest.io/uploads/images/gallery/2023-02/instances-ec2-management-console-1.png) - **Step 3**:- If you want to create the AWS Access and Secret credentials with the root user, skip to **step 4**; otherwise, click ***Users*** on the left side of access management and then ***Add users***. [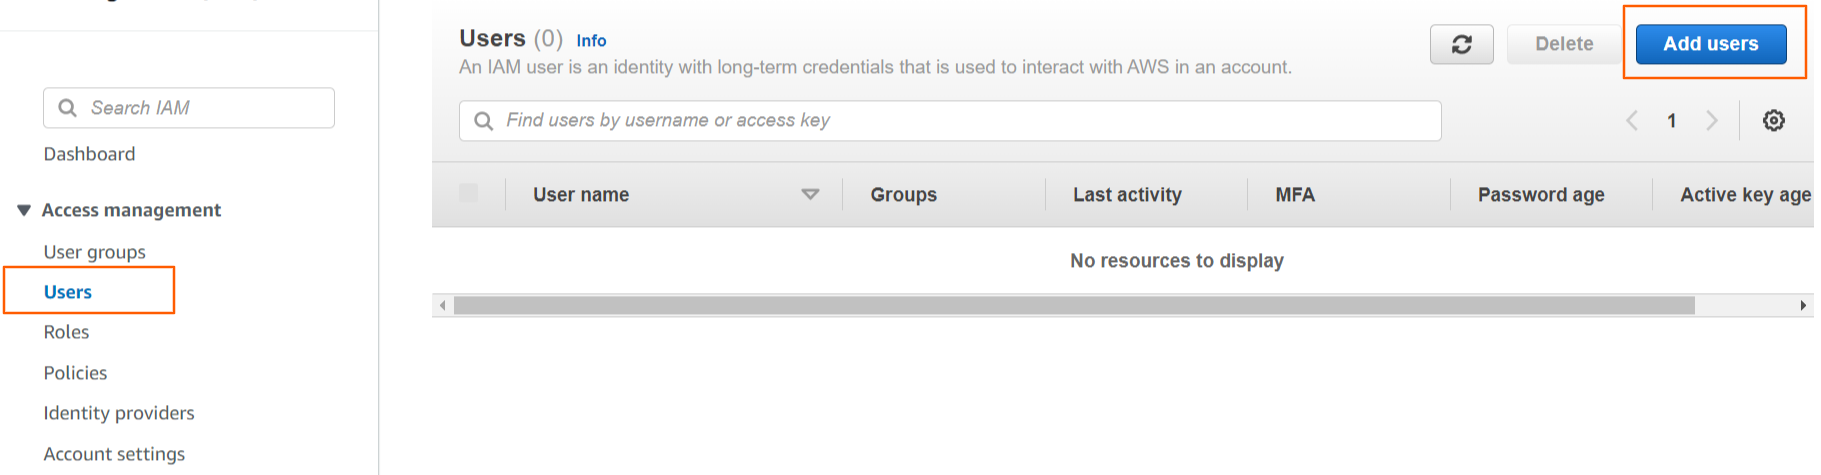](https://docs.elest.io/uploads/images/gallery/2023-02/jGZimage.png) Enter your AWS Account access user name and click Next, Next, Next and Create User to proceed. [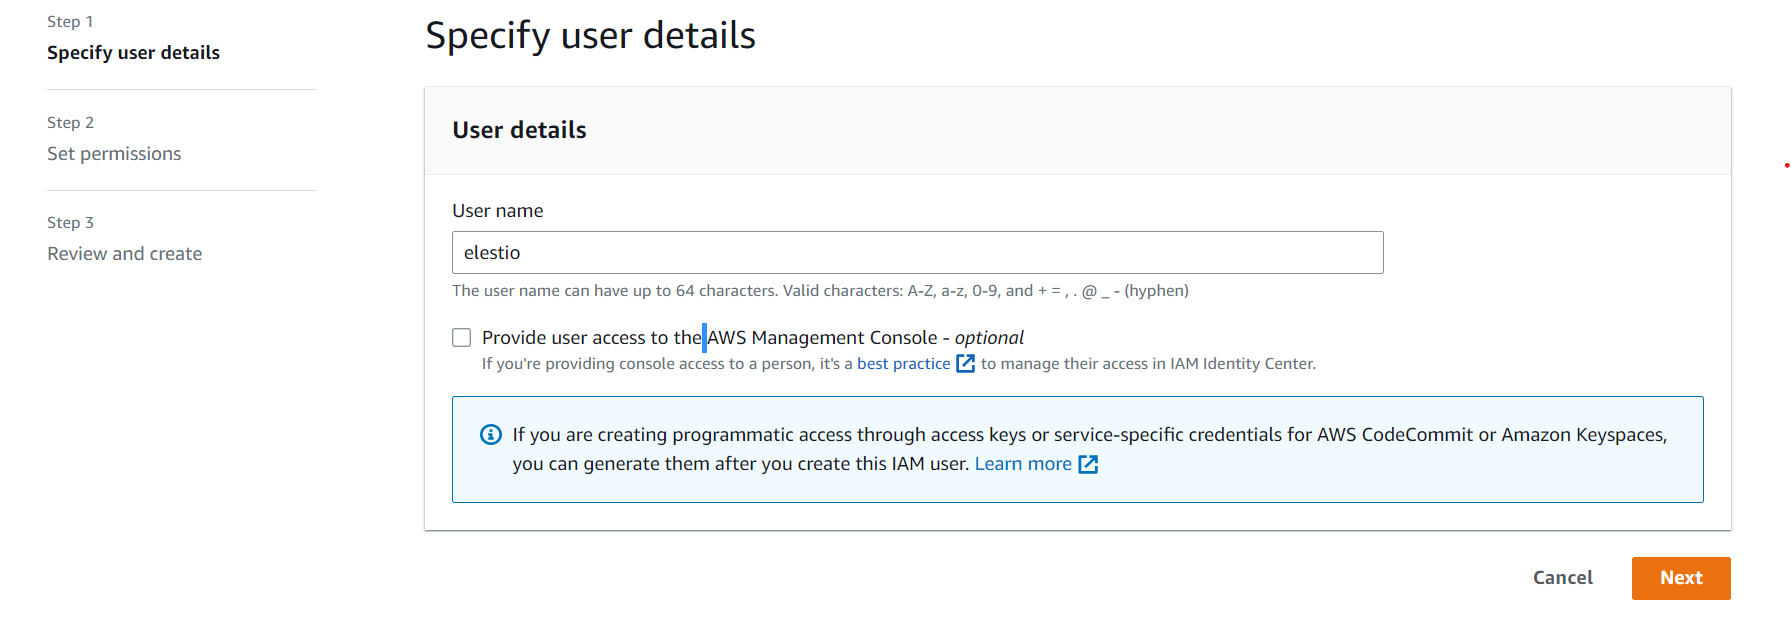](https://docs.elest.io/uploads/images/gallery/2023-02/jkHimage.png) After clicking the Create User button, you will be taken to the user list. Choose your created user name from the user list and click on it. [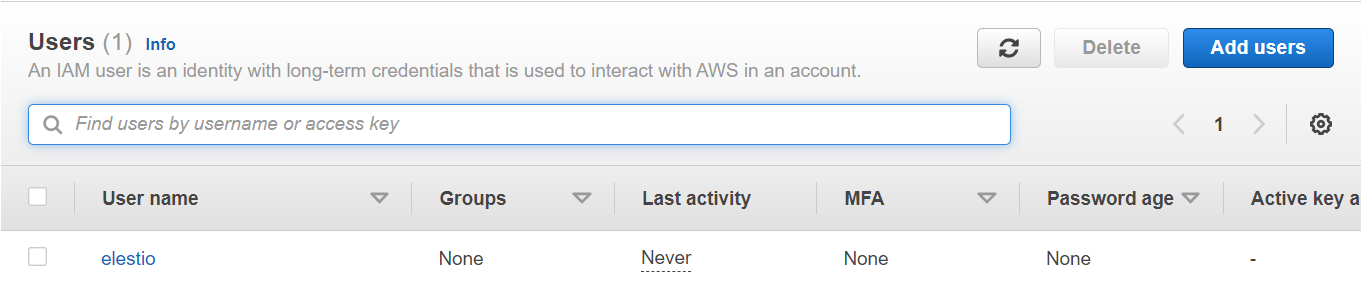](https://docs.elest.io/uploads/images/gallery/2023-02/Llnimage.png) Navigate to **Security Credentials** under User Details. [](https://docs.elest.io/uploads/images/gallery/2023-02/zSTimage.png) - **Step 4**:- Select **Create access key** from the **Access keys section**. If you already have two access keys, this button is disabled, and you must delete one before creating a new one. [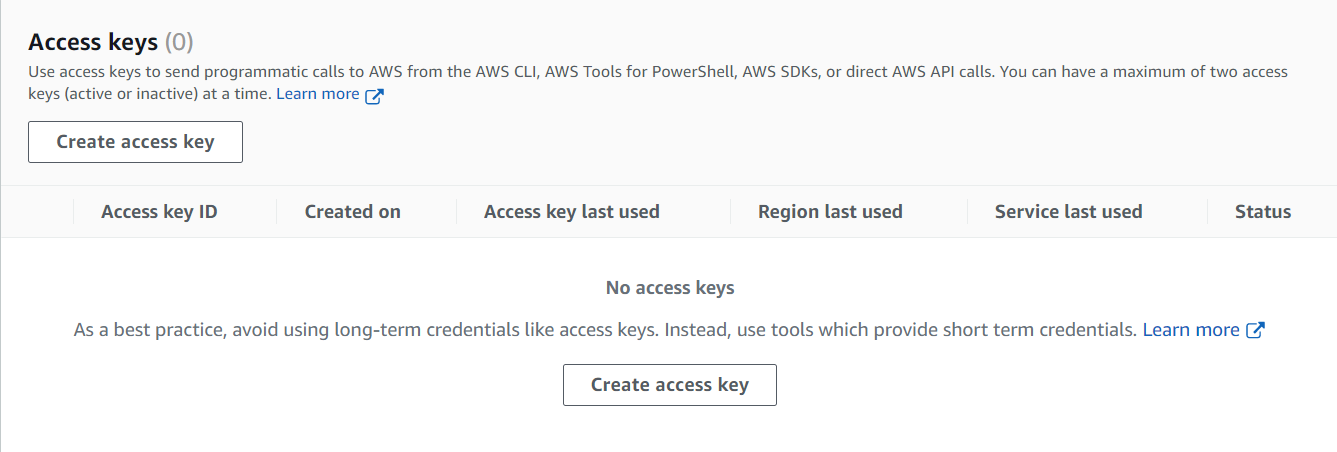](https://docs.elest.io/uploads/images/gallery/2023-02/image.png) - - On the **Access key best practices & alternatives** page, choose your use case to learn about additional options which can help you avoid creating a long-term access key. If you determine that your use case still requires an access key, choose **Other** and then choose **Next**. - (Optional) Set a description tag value for the access key. This adds a tag key-value pair to your IAM user. This can help you identify and rotate access keys later. The tag key is set to the access key id. The tag value is set to the access key description that you specify. When you are finished, choose to **Create access key**. **For Non-Root Users:-** Choose **Command Line Interface** as an alternative and check the box, then click Next and **Create Access Key.** [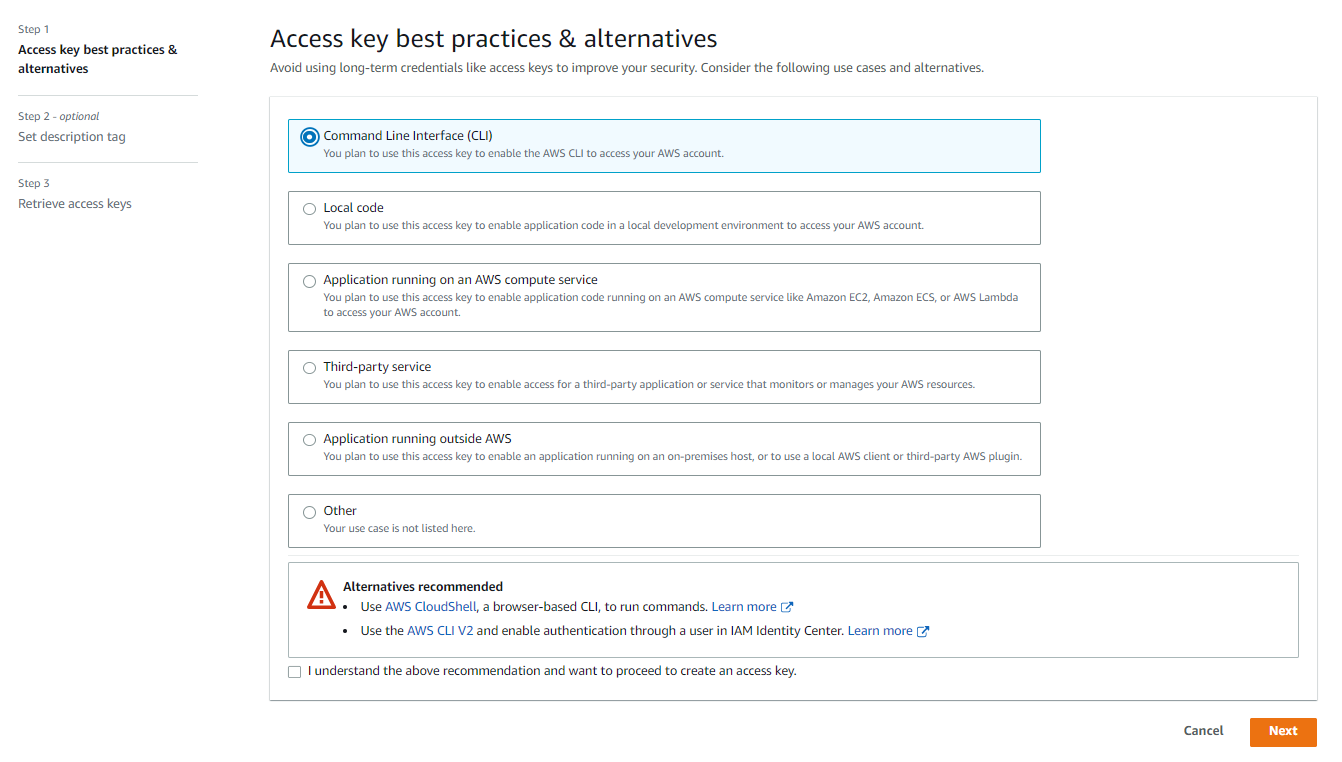](https://docs.elest.io/uploads/images/gallery/2023-02/8Fhimage.png) **For Root User:-** Check the box and click **Create Access Key**. [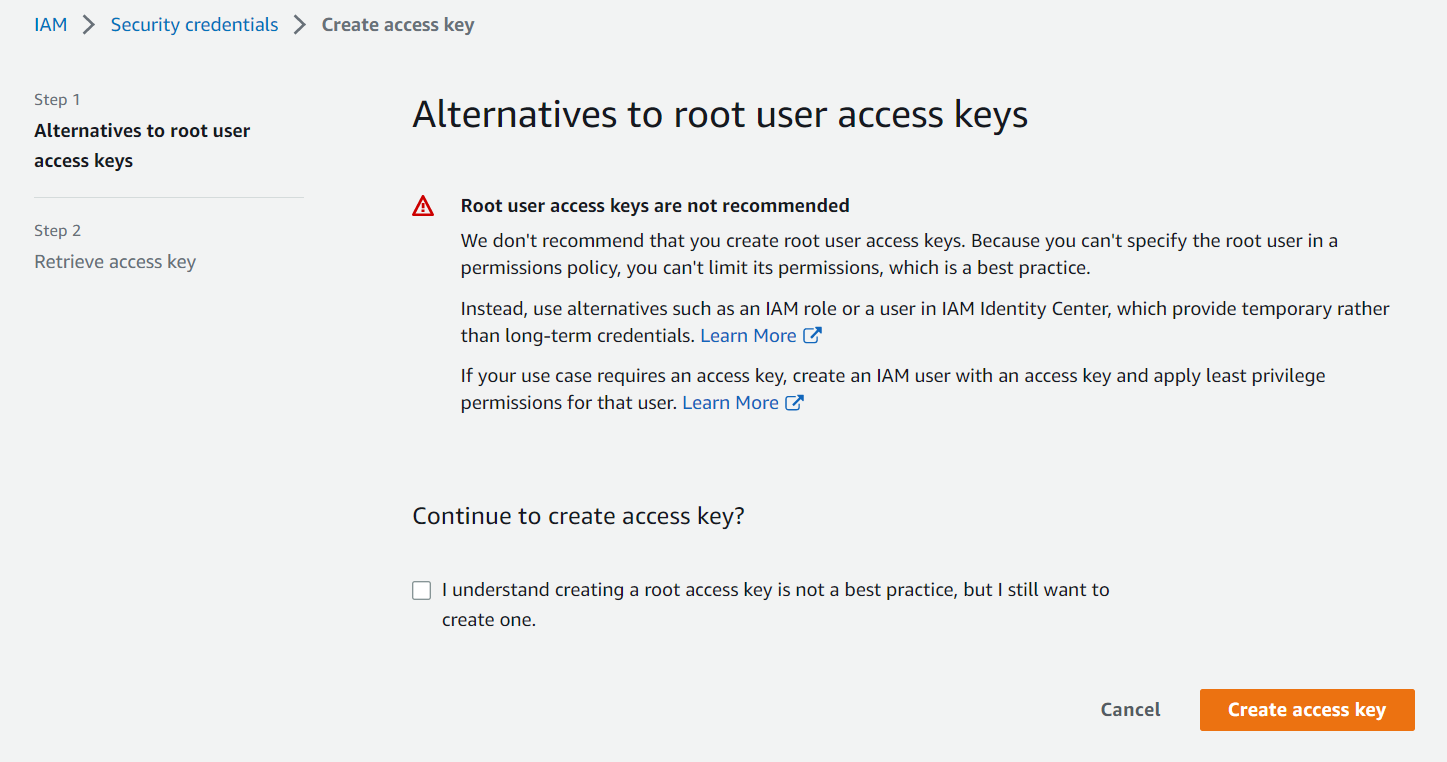](https://docs.elest.io/uploads/images/gallery/2023-02/screenshot-2023-02-20-122937.png) - **Step 5**:- On the **Retrieve access keys** page, choose either **Show** to reveal the value of your user's secret access key, or **Download .csv file**. This is your only opportunity to save your secret access key. After you've saved your secret access key in a secure location, choose **Done**. [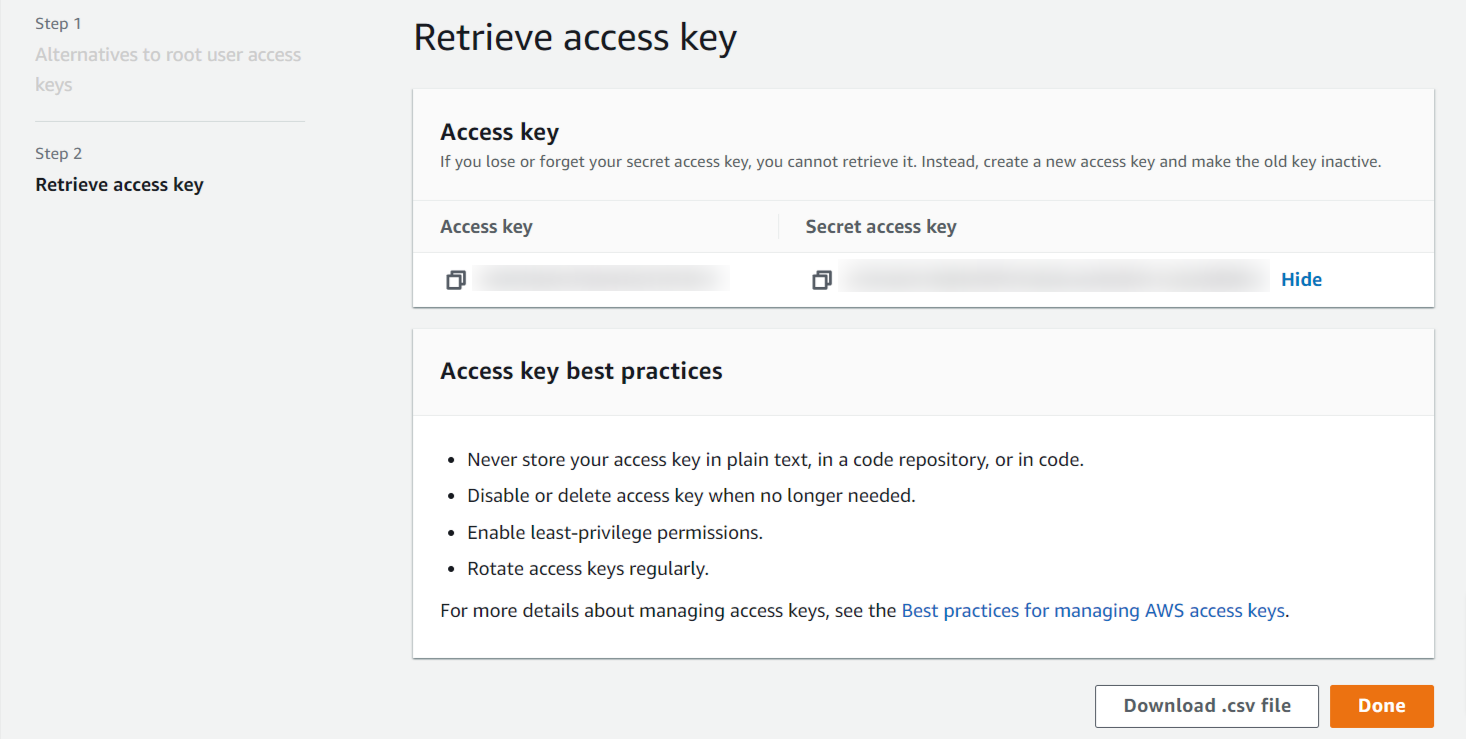](https://docs.elest.io/uploads/images/gallery/2023-02/iam-management-console.png) - **Step 6**:- Now grant **Administration** access to the newly created keys. > Elestio requires a **AmazonS3FullAccess** permission to manage your external backups for service. Navigate to permission in the user details to add the permission and select **Add Permission** [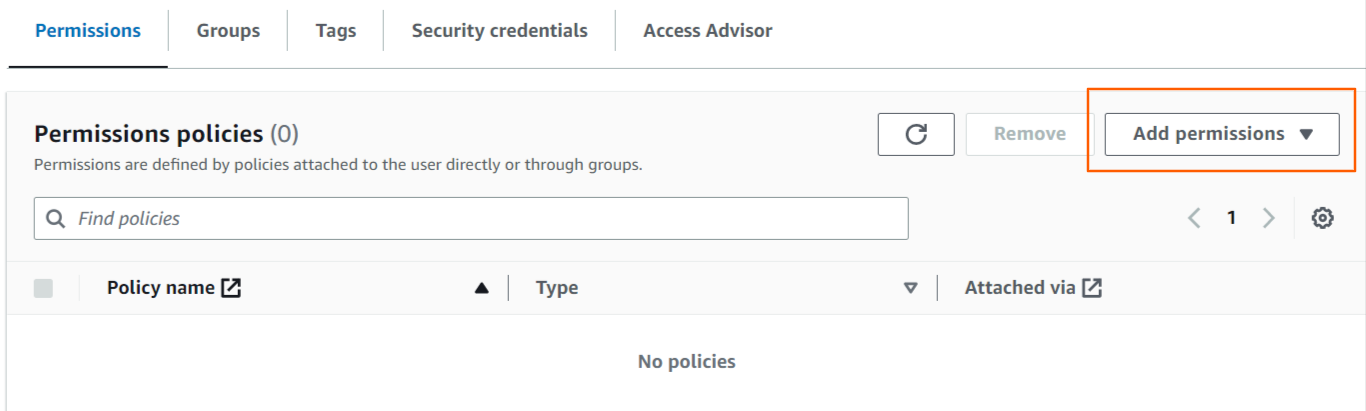](https://docs.elest.io/uploads/images/gallery/2023-02/sLoimage.png) Select the **Attach policies directly** Tab to attach permission. [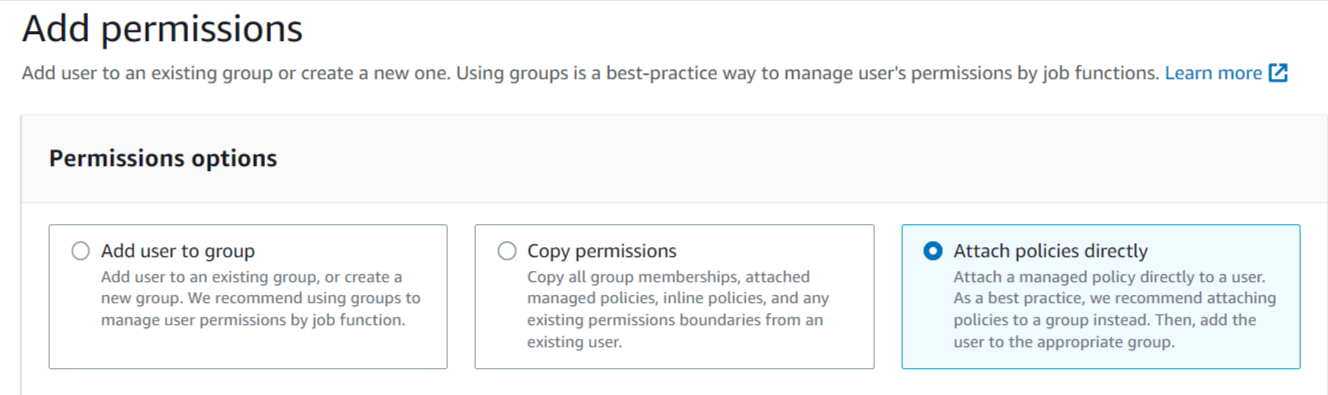](https://docs.elest.io/uploads/images/gallery/2023-02/NgQimage.png) Now Enter AmazonS3FullAccess into the search box and then select the AmazonS3FullAccess permission from the results. [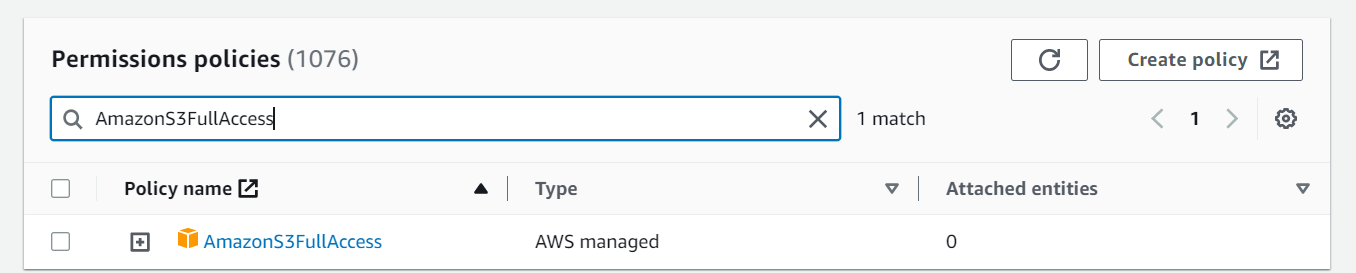](https://docs.elest.io/uploads/images/gallery/2023-02/F8fimage.png) If you only want to grant access to your bucket which you choose for backups instead of AmazonS3FullAccess, click Create Policy, paste this JSON policy in the JSON tab, and attach it. ```json { "Id": "BucketPolicy", "Version": "2012-10-17", "Statement": [ { "Sid": "AllAccess", "Action": "s3:*", "Effect": "Allow", "Resource": [ "arn:aws:s3:::elestio", "arn:aws:s3:::elestio/*" ] } ] } ``` Note:- If your bucket name is not elestio, then put your bucket name in place of elestio. After Selecting both Click **Next** and then click **Add permission** to proceed. [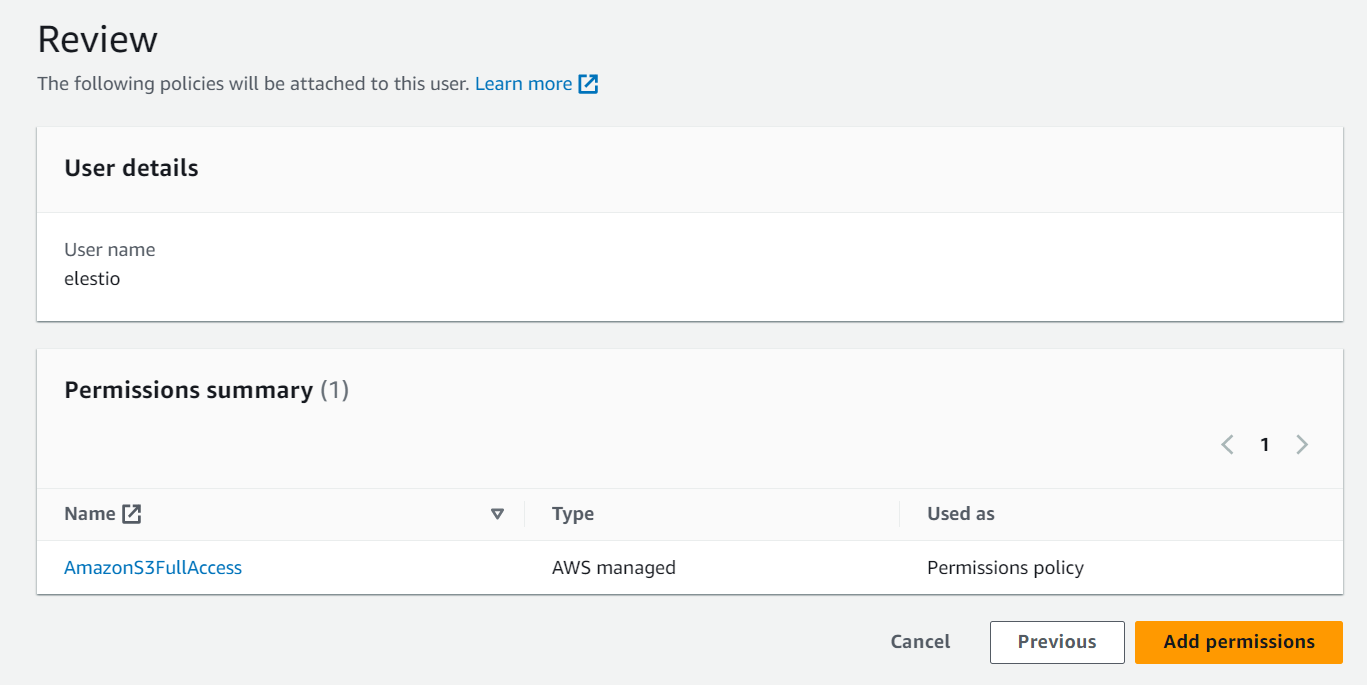](https://docs.elest.io/uploads/images/gallery/2023-02/screenshot-2023-02-20-204006.png) ##### Follow these steps if you already have an access key and want to activate it instead of creating a new one. - In the **Access keys** section, find the key to activate. [](https://docs.elest.io/uploads/images/gallery/2023-02/z5Limage.png) - To activate the key, go to **Actions** and select **Activate**. [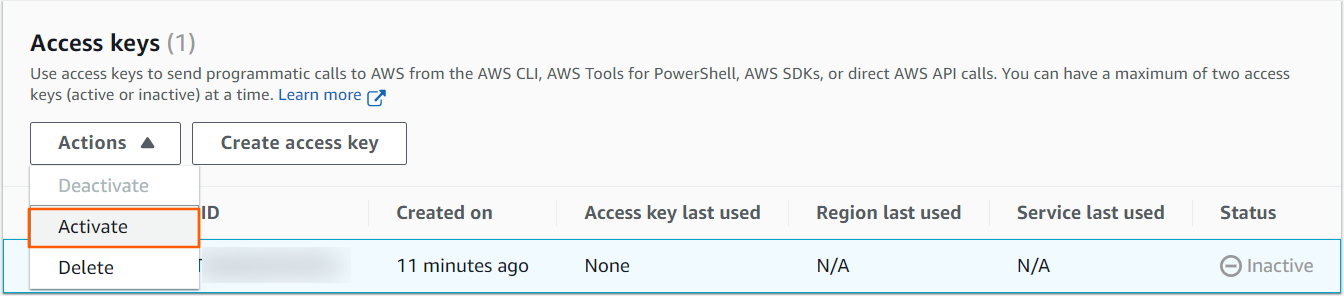](https://docs.elest.io/uploads/images/gallery/2023-02/9pzimage.png)Before adding keys to elestio, you must grant Administration access to them.
> View our ***[documentation ](https://docs.elest.io/books/backups/page/how-to-create-bucket-in-aws-for-external-backups-s3 "https://docs.elest.io/books/backups/page/how-to-create-bucket-in-aws-s3-for-external-backups-s3")***to learn how to create Bucket in AWS S3. # How to Create Bucket in AWS for External backups (S3) ##### To create your bucket for backups, follow these steps. - **Step 1**:- Use your AWS account ID or account alias, your IAM user name, and your password to sign in to the ***[IAM console](https://console.aws.amazon.com/iam)*** - **Step 2**:- Search for S3 in the ***Services*** section of the navigation menu on the top left, or just click *[**here** ](https://s3.console.aws.amazon.com/s3/buckets "https://s3.console.aws.amazon.com/s3/buckets")*to go. - **Step 3**:- Click the ***Create Bucket*** button for the next step. [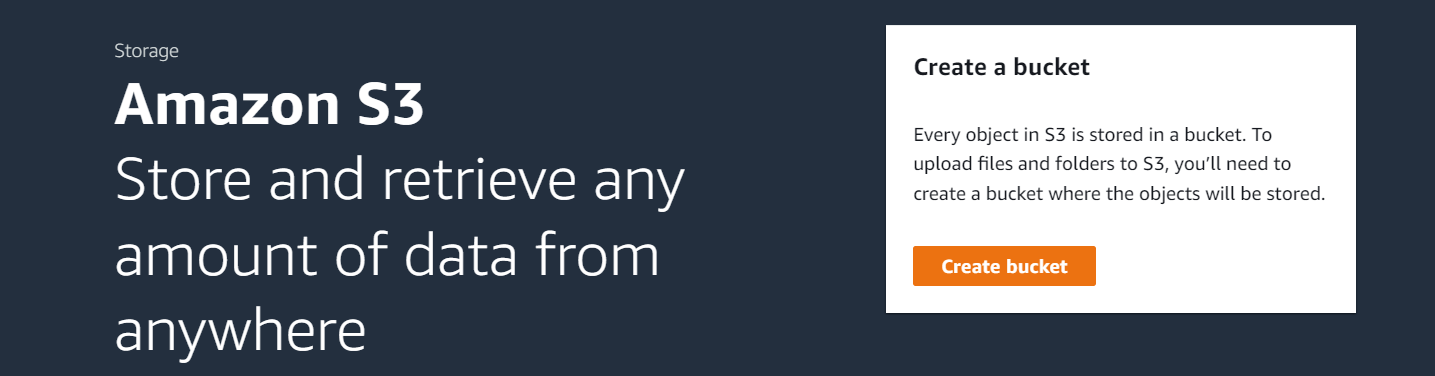](https://docs.elest.io/uploads/images/gallery/2023-04/screenshot-2023-04-21-200134.png) - **Step 4**:- Give your bucket a name in the ***Bucket name*** column, and in the ***AWS Region*** column, choose the region where you want to create it. [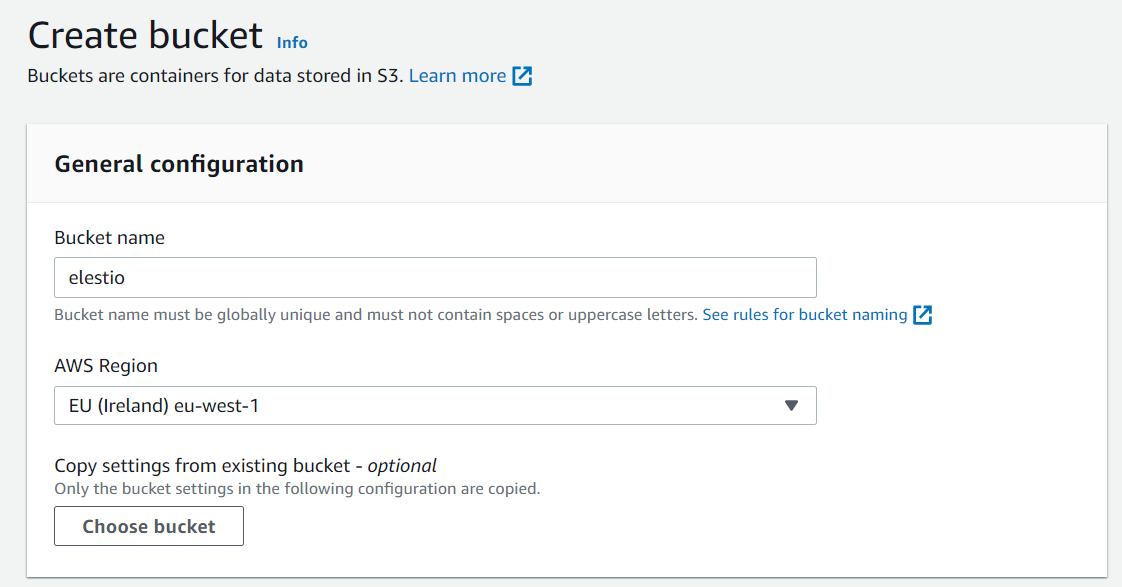](https://docs.elest.io/uploads/images/gallery/2023-04/screenshot-2023-04-21-200703.png) - **Step 5**:- After you've completed both columns, scroll down and click the ***Create Bucket*** button to create it. - **Step 6**:- Your bucket will be created and listed in buckets following these successful steps. [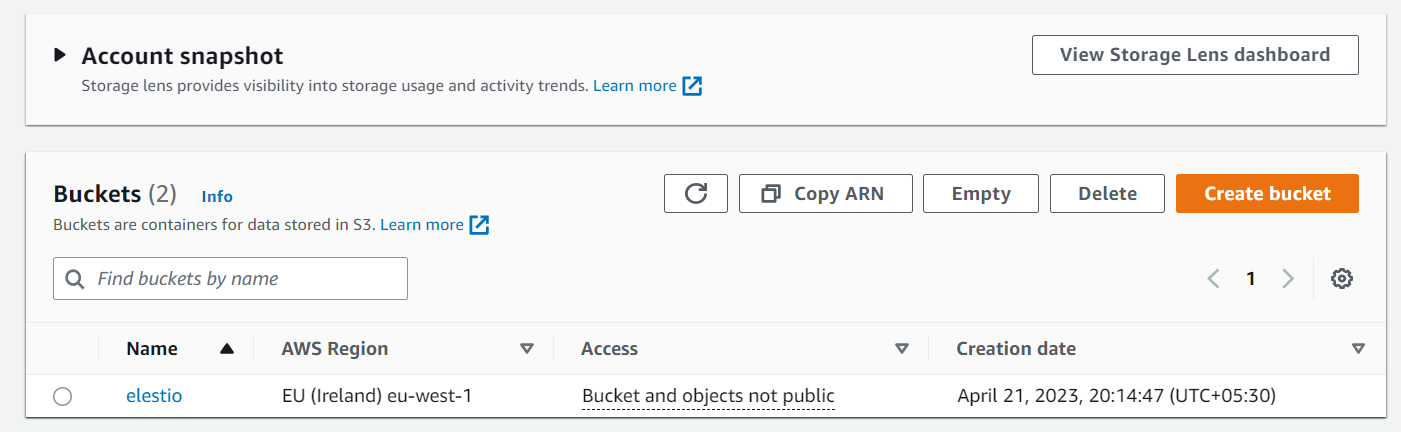](https://docs.elest.io/uploads/images/gallery/2023-04/6ySimage.png)