# Deploy examples & apps on Elestio using the "clone template" feature

This tutorial will show you how to use our clone template feature in CI/CD. We're going to use a Simple Javascript web application, but you can use any template and deploy it in the same way. 🚀

The clone template feature was similar to forking our [<span style="text-decoration: underline; color: rgb(35, 111, 161);">***examples*** </span>](https://github.com/elestio-examples)from GITHUB and deploying it using an **<span style="color: rgb(230, 126, 35);">*import git repository*</span>** tab in Ci/CD, but using the **<span style="color: rgb(230, 126, 35);">*clone template*</span>** was easier because you didn't have to manually fork our template example and then deploy it using our import git repository tab. If you choose a template from the CI/CD clone template feature, Elestio will automatically create an example template repository in your git account and deploy it to the cloud. In this case, all you need to do is choose the template.

You probably heard about Kubernetes (and all its complexity) or various options to deploy your apps like Heroku, Render Fly, or Railways. They all have something in common, those products are building your own source code on every commit from your GIT repository.

Elestio is doing the same ... **but different!** Instead of deploying your app to a shared cluster, we deploy to dedicated VMs.

<p class="callout info">To learn more about the elestio CI/CD, go *<span style="color: rgb(35, 111, 161);">[**here**](https://docs.elest.io/books/cicd-pipelines/page/overview).</span>*</p>

If you're new, sign up for <span style="text-decoration: underline;">*<span style="color: rgb(35, 111, 161); text-decoration: underline;">[Elestio](https://dash.elest.io/)</span>*</span>, otherwise, login to your existing account.

#### **Deploy Elestio apps to the cloud using the CI/CD Clone template feature.**

#### Step 1:

Go to CI/CD from the left sidebar.

#### Step 2:

Now, select the deployment source.

[![Screenshot 2022-11-02 185434.png](https://docs.elest.io/uploads/images/gallery/2022-11/scaled-1680-/screenshot-2022-11-02-185434.png)](https://docs.elest.io/uploads/images/gallery/2022-11/screenshot-2022-11-02-185434.png)
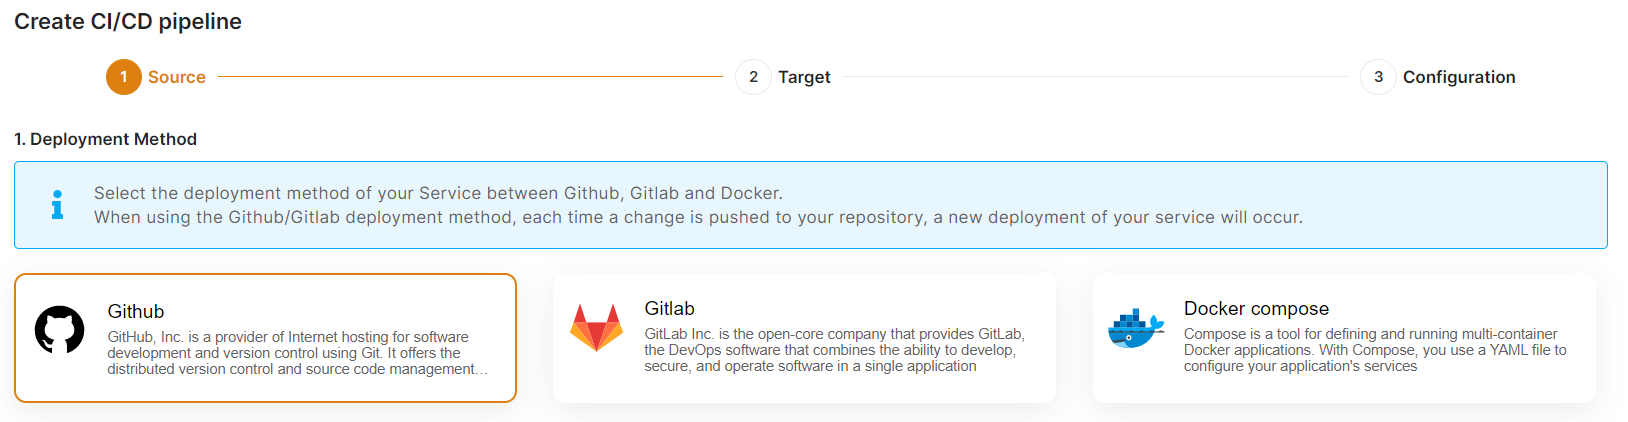
In this tutorial, I'm deploying using GITHUB, but you can also use GITLAB if you have a project there.

#### Step 3:

Select the Clone Template Tab.

[![Managed Service Dashboard (14).png](https://docs.elest.io/uploads/images/gallery/2022-11/managed-service-dashboard-14.png)](https://docs.elest.io/uploads/images/gallery/2022-11/managed-service-dashboard-13.png)
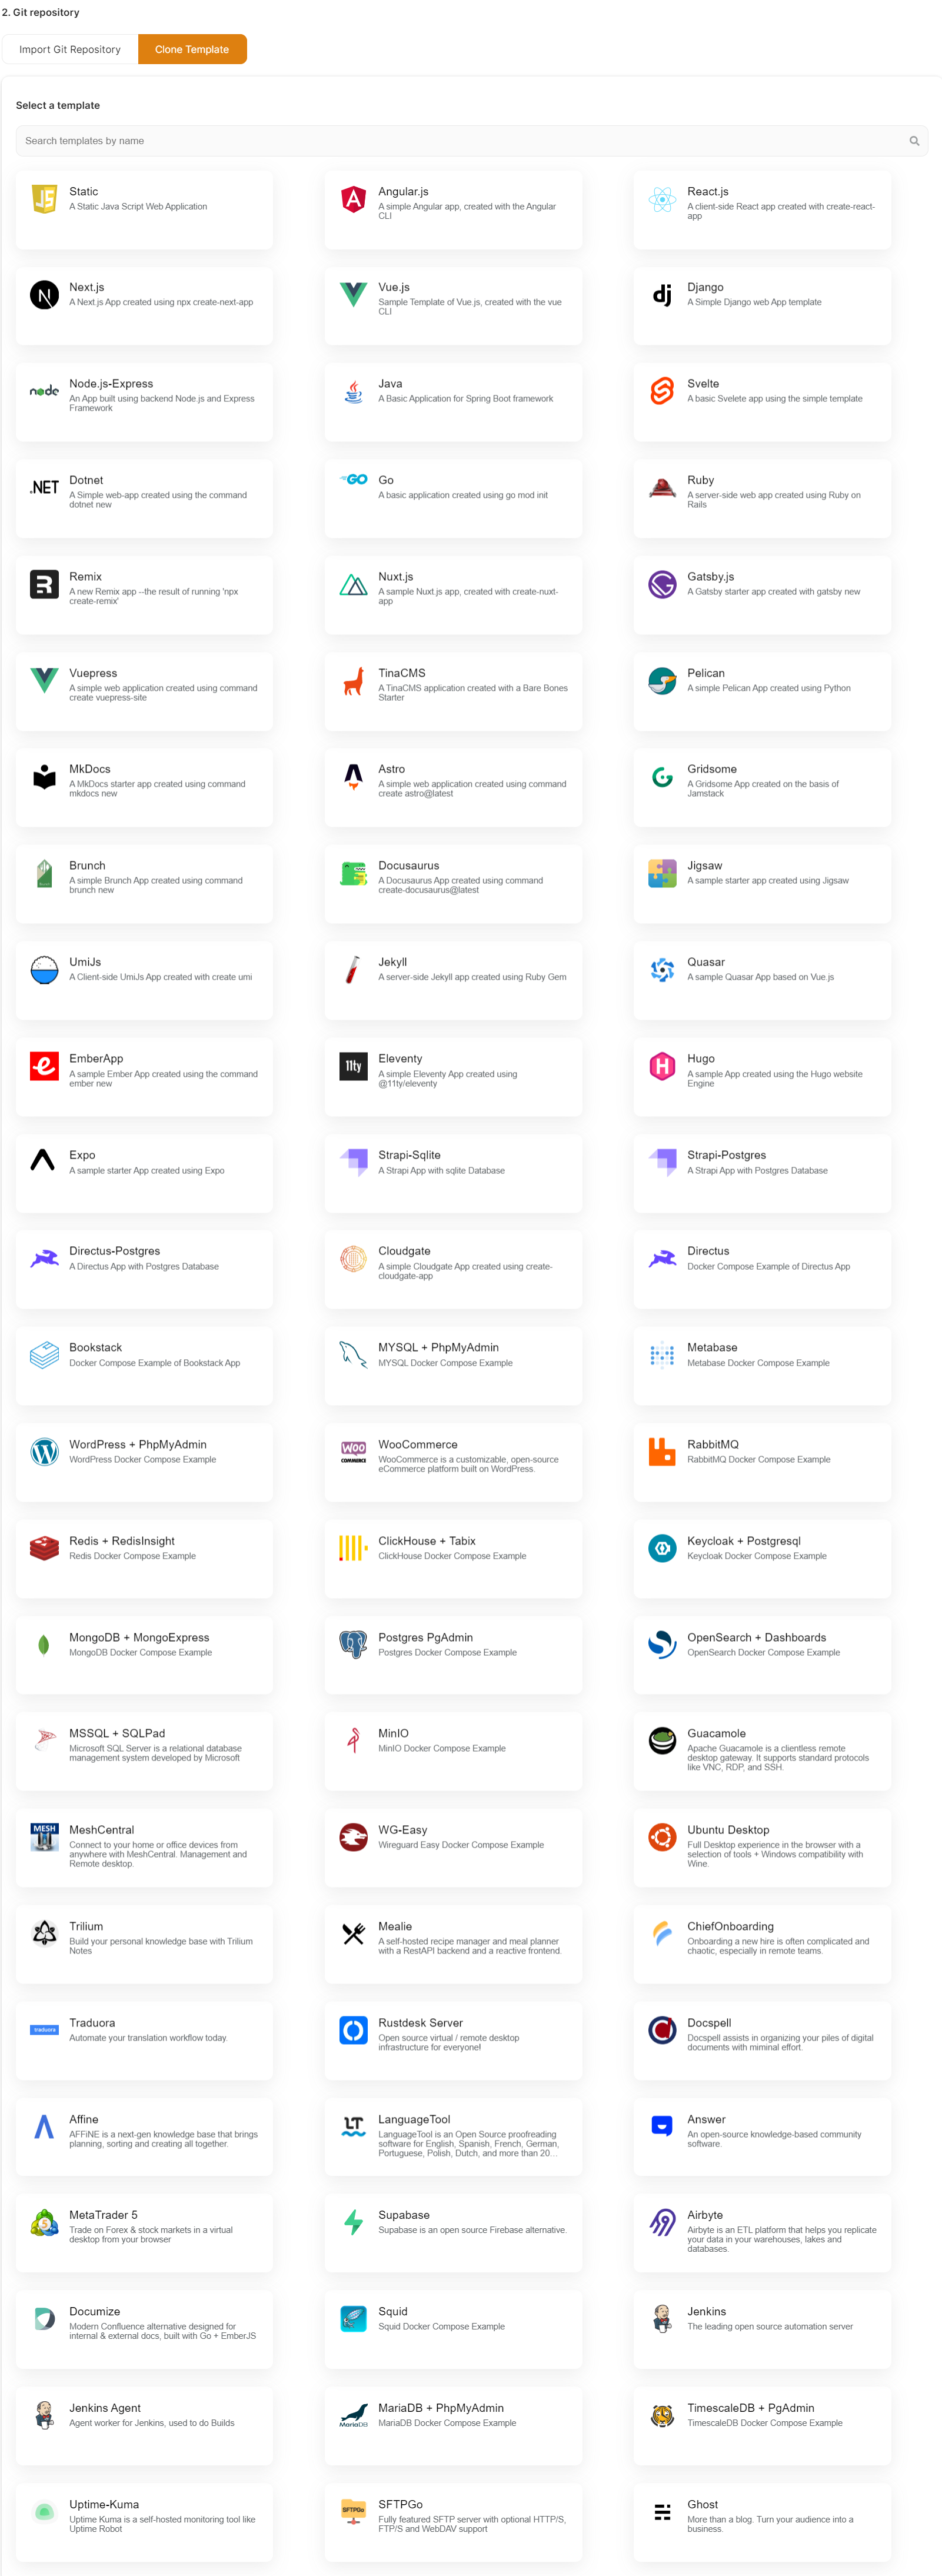
> **<span style="color: rgb(230, 126, 35);">*Here you can see the most interesting and well-liked tech stacks' elestio templates.*</span>**

As I'm deploying a Static Java Script Web Application, I've chosen these, but you can adopt whatever you want.

[![Screenshot 2022-11-04 195057.png](https://docs.elest.io/uploads/images/gallery/2022-11/scaled-1680-/screenshot-2022-11-04-195057.png)](https://docs.elest.io/uploads/images/gallery/2022-11/screenshot-2022-11-04-195057.png)
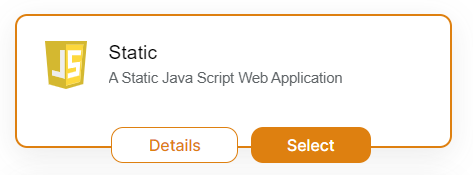
Now click the **<span style="color: rgb(230, 126, 35);">*Select* </span>**button to proceed.

If you have already authenticated your GITHUB or GITLAB account in CI/CD for repository access, you can fill up the below details directly. Otherwise, you must first authenticate your GIT account with elestio CI/CD for repository creation into your account.

We require GIT authentication in order to create these example template repositories in your GIT account.

[![Screenshot 2022-11-04 203052.png](https://docs.elest.io/uploads/images/gallery/2022-11/screenshot-2022-11-04-203052.png)](https://docs.elest.io/uploads/images/gallery/2022-11/screenshot-2022-11-04-200141.png)
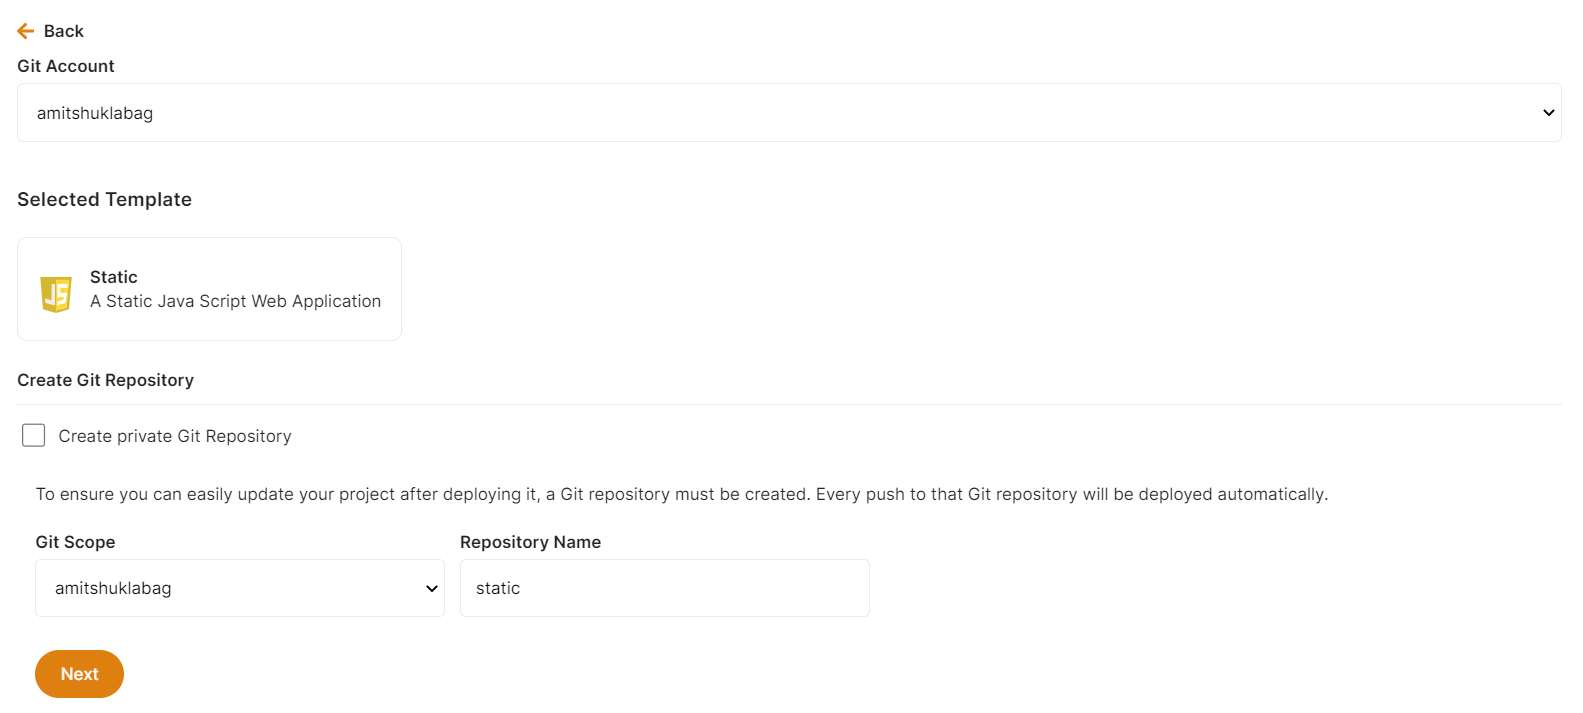
Here you can check the checkbox <span style="color: rgb(230, 126, 35);">*<span style="font-family: -apple-system, BlinkMacSystemFont, 'Segoe UI', Oxygen, Ubuntu, Roboto, Cantarell, 'Fira Sans', 'Droid Sans', 'Helvetica Neue', sans-serif; font-size: 0.94em; font-weight: 400;">**Create private Git Repository** </span>*<span style="font-family: -apple-system, BlinkMacSystemFont, 'Segoe UI', Oxygen, Ubuntu, Roboto, Cantarell, 'Fira Sans', 'Droid Sans', 'Helvetica Neue', sans-serif; font-size: 0.94em; font-weight: 400;"><span style="color: rgb(0, 0, 0);">if you want to make these repo private otherwise leave it unchecked and click the <span style="color: rgb(230, 126, 35);">***Next button***</span> for further steps.</span></span></span>

#### Step 4:

Choose Deployment Targets

[![Screenshot 2022-11-02 191657.png](https://docs.elest.io/uploads/images/gallery/2022-11/scaled-1680-/screenshot-2022-11-02-191657.png)](https://docs.elest.io/uploads/images/gallery/2022-11/screenshot-2022-11-02-191657.png)
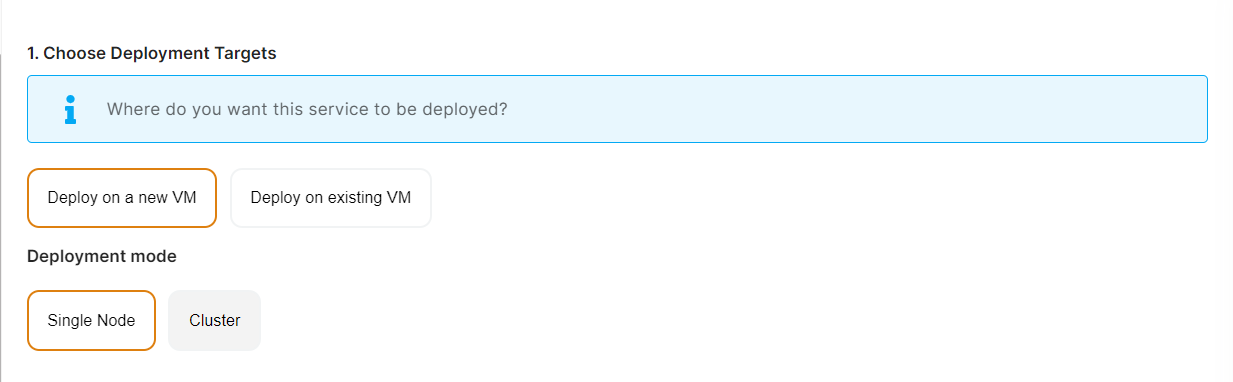
Elestio offers two types of deployment targets "**Deploy on a new VM**" and "**Deploy on an existing VM**".

<p class="callout info">You are allowed to set up n pipelines on each elestio CI/CD target/VM. According to the project configuration you select and the project you're deploying, the number of pipelines varies.</p>

If you want to deploy these projects as a pipeline on a new Target/VM or don't have any installed targets, choose "Deploy on a new VM." If you already have any installed or previously configured CI/CD targets/VMs, choose "Deploy on an existing VM," and then choose the existing target from the targets dropdown.

Follow the steps below only if you select "**Deploy on a new VM**," otherwise click the next button to proceed.

<p class="callout success">CI/CD Pipelines by Elestio are available with our 5 cloud partners (AWS Lightsail, Digital Ocean, Vultr, Linode &amp; Hetzner) in 85 locations over 27 countries but also on any cloud (AWS, Azure, Google, Oracle, ...) and on-premise with [BYOVM.](https://doc.elest.io/books/cloud-providers/page/byovm-bring-your-own-vm)</p>

- <div class="creation__subtitle">Select Service Cloud Provider</div>[![Screenshot 2022-11-02 194154.png](https://docs.elest.io/uploads/images/gallery/2022-11/scaled-1680-/screenshot-2022-11-02-194154.png)](https://docs.elest.io/uploads/images/gallery/2022-11/screenshot-2022-11-02-194154.png)

<div class="creation__block providers" id="bkmrk--5"></div><div class="creation__warning mb-0" id="bkmrk-select-service-cloud-0"><div class="creation__warning mb-0"><div class="creation__warningContainer"><div class="creation__warningText">- Select Service Cloud Region[![Screenshot 2022-11-02 194242.png](https://docs.elest.io/uploads/images/gallery/2022-11/scaled-1680-/screenshot-2022-11-02-194242.png)](https://docs.elest.io/uploads/images/gallery/2022-11/screenshot-2022-11-02-194242.png)
- <div class="creation__subtitle"> Select Service Plan[![Screenshot 2022-11-02 194721.png](https://docs.elest.io/uploads/images/gallery/2022-11/scaled-1680-/screenshot-2022-11-02-194721.png)](https://docs.elest.io/uploads/images/gallery/2022-11/screenshot-2022-11-02-194721.png)</div><div class="creation__subSection"><div class="templateRow">  
    </div></div>
- Now Customize the target name and project (where the CICD Target will be created).

</div></div></div></div>[![Screenshot 2022-11-02 194857.png](https://docs.elest.io/uploads/images/gallery/2022-11/scaled-1680-/screenshot-2022-11-02-194857.png)](https://docs.elest.io/uploads/images/gallery/2022-11/screenshot-2022-11-02-194857.png)

> If you want to deploy it with a different name and a different project, you can customize it. By default, we configure it with a dynamic target name and the current project.

#### Step 5:

Configure your Project

[![Screenshot 2022-11-04 200938.png](https://docs.elest.io/uploads/images/gallery/2022-11/screenshot-2022-11-04-200938.png)](https://docs.elest.io/uploads/images/gallery/2022-11/screenshot-2022-11-02-195655.png)

You can configure the project details by filling up the project name, branch, run time, version, framework, and root directory.

[![Screenshot 2022-11-04 201013.png](https://docs.elest.io/uploads/images/gallery/2022-11/screenshot-2022-11-04-201013.png)](https://docs.elest.io/uploads/images/gallery/2022-11/screenshot-2022-11-02-200718.png)

You can configure your project install, run, and build commands in the Build and output setting.

[![Screenshot 2022-11-02 201628.png](https://docs.elest.io/uploads/images/gallery/2022-11/scaled-1680-/screenshot-2022-11-02-201628.png)](https://docs.elest.io/uploads/images/gallery/2022-11/screenshot-2022-11-02-201628.png)

The configuration of life cycle scripts is always optional; they should only be used if you want to execute a specific command before and after building your project. Otherwise, leave them empty.

[![Screenshot 2022-11-02 201356.png](https://docs.elest.io/uploads/images/gallery/2022-11/scaled-1680-/screenshot-2022-11-02-201356.png)](https://docs.elest.io/uploads/images/gallery/2022-11/screenshot-2022-11-02-201356.png)

You can list all of your project's API keys and secrets here if they were saved in ENV

[![Screenshot 2022-11-04 201102.png](https://docs.elest.io/uploads/images/gallery/2022-11/screenshot-2022-11-04-201102.png)](https://docs.elest.io/uploads/images/gallery/2022-11/screenshot-2022-11-02-202142.png)

[![Screenshot 2022-11-02 202154.png](https://docs.elest.io/uploads/images/gallery/2022-11/scaled-1680-/screenshot-2022-11-02-202154.png)](https://docs.elest.io/uploads/images/gallery/2022-11/screenshot-2022-11-02-202154.png)

The final step is to configure the exposed port and reverse proxy settings. You can specify the port on which your project will run here.

> If your project includes **elestio.yml**, Elestio will auto-fill all of these fields. As in this tutorial, we're using our Simple Javascript web application elestio example, so you can see in the above images that all of our fields are auto-filled.

Refer to these links to learn how to create our own <span style="text-decoration: underline;"><span style="color: rgb(35, 111, 161); text-decoration: underline;">***[elestio.yml](https://docs.elest.io/books/cicd-pipelines/page/create-your-own-template-elestioyml)***</span></span> for the project.

A sample elestio.yml for a Simple Javascript web application is shown below. check it out on <span style="text-decoration: underline; color: rgb(35, 111, 161);">***[github](https://github.com/elestio-examples/static/blob/main/elestio.yml)***</span>

```yaml
config:
  runTime: "static"
  version: ""
  framework: ""
  buildCommand: ""
  buildDir: ""
  runCommand: ""
ports:
  - protocol: "HTTPS"
    targetProtocol: "HTTP"
    listeningPort: "443"
    targetPort: "3000"
    targetIP: "172.17.0.1"
    public: true
    path: "/"
    isAuth: false
    login: ""
    password: ""
exposedPorts:
  - protocol: "HTTP"
    hostPort: "3000"
    containerPort: "80"
    interface: "172.17.0.1"
```

#### Step 6:

Click the ***Create CI/CD pipeline*** button to deploy your pipeline.

[![Screenshot 2022-11-02 203203.png](https://docs.elest.io/uploads/images/gallery/2022-11/scaled-1680-/screenshot-2022-11-02-203203.png)](https://docs.elest.io/uploads/images/gallery/2022-11/screenshot-2022-11-02-203203.png)

*In a couple of moments, your application was successfully deployed on elestio 🚀.*

[![Screenshot 2022-11-04 202011.png](https://docs.elest.io/uploads/images/gallery/2022-11/screenshot-2022-11-04-202011.png)](https://docs.elest.io/uploads/images/gallery/2022-11/screenshot-2022-11-02-205451.png)

[![Untitled-video-Made-with-Clipcha (3).gif](https://docs.elest.io/uploads/images/gallery/2022-11/untitled-video-made-with-clipcha-3.gif)](https://docs.elest.io/uploads/images/gallery/2022-11/untitled-video-made-with-clipcha-2.gif)

You can now view your deployed URL and access your application by going to desired application pipeline details.

Please let us know by contacting our support [<span style="text-decoration: underline; color: rgb(35, 111, 161);">***email***</span>](mailto:support@elest.io) or <span style="color: rgb(35, 111, 161);">**<span style="text-decoration: underline;">*[ticketing](https://dash.elest.io/support/creation)*</span>**</span> system if you give it a shot and encounter any problems or if anything goes wrong.

Join us on <span style="color: rgb(35, 111, 161);">[<span style="text-decoration: underline;">***discord***</span>](https://discord.gg/4T4JGaMYrD)</span> to know more.