Database Migration
- Cloning a Service to Another Provider or Region
- Database Migration Services for ClickHouse
- Manual ClickHouse Migration Using clickhouse-backup
Cloning a Service to Another Provider or Region
Migrating or cloning ClickHouse across cloud providers or geographic regions is essential for optimizing performance, meeting compliance requirements, or ensuring high availability. ClickHouse, being a distributed columnar OLAP database, introduces some unique considerations due to its architecture of shards and replicas. A well-planned migration ensures data consistency, system integrity, and minimal downtime.
Pre-Migration Preparation
Before initiating a ClickHouse migration, it is critical to plan for both the data layout and cluster topology:
- Evaluate the Current Setup: Document the existing ClickHouse configuration, including cluster layout (shards and replicas), table schemas (especially ReplicatedMergeTree tables), user roles, ZooKeeper (or ClickHouse Keeper) setup, and storage configurations. Identify custom functions, dictionaries, and any external dependencies like Kafka or S3.
- Define the Migration Target: Choose the new region or cloud provider. Ensure the target environment supports similar storage and compute characteristics. Plan how the new cluster will be laid out—same shard/replica pattern or adjusted topology. If using cloud-native services (e.g., Elestio), verify feature parity.
- Provision the Target Environment: Deploy the ClickHouse nodes with required hardware specs (high IOPS disks, sufficient RAM/CPU). Set up coordination services (ZooKeeper or ClickHouse Keeper) and prepare the cluster topology in configuration files (remote_servers.xml, zookeeper.xml, etc.).
- Backup the Current Cluster: Use ClickHouse’s built-in backup tools (BACKUP and RESTORE SQL commands, or clickhouse-backup utility) to create consistent snapshots. Ensure backups include both schema and data. Store backups on cloud-agnostic storage (e.g., S3) for ease of access during restoration.
Cloning Execution
To begin cloning ClickHouse, replicate the original cluster’s configuration in the new environment, ensuring that the shard and replica layout, coordination services (ZooKeeper or ClickHouse Keeper), and access controls are all set up identically. This includes copying configuration files such as users.xml, remote_servers.xml, and zookeeper.xml, and verifying that all inter-node communication is functional.
For table data, use ClickHouse’s native BACKUP and RESTORE SQL commands or the clickhouse-backup utility, ideally in combination with cloud object storage like S3 for efficient parallel upload and download. When restoring, ensure that ReplicatedMergeTree tables use new, unique ZooKeeper paths to avoid replication conflicts with the original cluster. In the case of non-replicated tables, manual data export and import (e.g., using INSERT SELECT or clickhouse-client --query) may be necessary.
After the data and schema have been restored, perform thorough validation by running sample queries, verifying performance against expected baselines, and inspecting logs for errors. Finally, ensure all integrations (e.g., Kafka pipelines, distributed tables, user-defined functions) are functional and fully consistent with the original service before proceeding to production traffic cutover.
Cutover and DNS/Traffic Switch
Once the new ClickHouse cluster has been validated, you can proceed with the traffic cutover. Update your application’s client connection strings, service discovery endpoints, or load balancer configurations to direct requests to the new cluster. If you’re using DNS-based routing, update A or CNAME records accordingly, taking into account DNS propagation times.
For setups requiring high availability or a gradual transition, consider using weighted DNS records or a load balancer with health checks to route a portion of traffic to the new cluster while monitoring its performance. Ensure that all downstream applications, dashboards, and data pipelines are updated with the new endpoints and credentials. If feasible, maintain the old cluster temporarily as a fallback until the new environment is confirmed stable in production.
Post-Migration Validation and Optimization
- Validate Application Workflows: Test analytics dashboards, queries, and data pipelines against the new cluster. Ensure integrations (e.g., Grafana, Kafka consumers, exporters) are fully functional.
- Monitor Performance: Use ClickHouse’s system.metrics and system.events tables to monitor performance. Validate disk space usage, query latency, and background merges. Adjust settings like max_threads, merge_max_size, or background_pool_size for the new environment.
- Secure the Environment: Reapply user and role settings with secure password policies. Enable TLS for inter-node and client communications. Restrict access using firewalls, IP allowlists, and RBAC.
- Cleanup and Documentation: Decommission the old cluster only after full confidence in the new setup. Document changes in configuration, node addresses, backup schedules, and operational runbooks.
Benefits of Cloning ClickHouse
Cloning a ClickHouse cluster provides several operational and strategic benefits. It allows teams to test version upgrades, schema changes, and application features on production-like data without impacting live systems. Maintaining a cloned cluster in a separate region or cloud provider also enables robust disaster recovery by providing a ready-to-promote standby.
For organizations with strict compliance or analytics needs, clones can serve as read-only environments for querying and reporting without risking the integrity of live data. Additionally, cloning simplifies cloud migrations by replicating the entire setup schema, configuration, and data into a new environment, thereby minimizing downtime, reducing manual setup, and accelerating cutover with high confidence.
Database Migration Services for ClickHouse
Elestio provides a easy and reliable approach for migrating ClickHouse instances from various environments such as on-premises servers, self-managed cloud deployments, or other managed services into its fully managed ClickHouse platform. This migration process is designed to ensure data consistency, minimize downtime, and simplify the operational complexity of managing ClickHouse infrastructure.
Key Steps in Migrating to Elestio
Pre-Migration Preparation
Before initiating your ClickHouse migration, proper preparation is essential to ensure a seamless and error-free transition:
-
Create an Elestio Account: Sign up on the Elestio platform to access its suite of managed services. This account will serve as the central hub for provisioning and managing your ClickHouse instance.
-
Deploy the Target ClickHouse Service: Create a new ClickHouse service on Elestio to act as the migration destination. Ensure that the version matches your current ClickHouse setup to prevent compatibility issues. Refer to Elestio’s ClickHouse documentation for supported features such as replication, sharding, merge trees, and compression settings.
Initiating the Migration Process
With the target environment ready, proceed with the ClickHouse migration using the Elestio migration interface:
-
Access the Migration Tool: Navigate to your ClickHouse service overview on the Elestio dashboard. Select the “Migrate Database” option to begin the guided migration workflow.
-
Configure Migration Settings: A prompt will appear to verify that the destination ClickHouse instance has sufficient CPU, RAM, and disk space to receive the source data. Once verified, click “Get started” to begin the migration.
-
Validate Source ClickHouse Connection: Enter the connection details for your existing ClickHouse instance, including:
Hostname – IP address or domain of the source ClickHouse server
Port – Default ClickHouse port (9000 for native TCP, 8123 for HTTP)
Username & Password – Use credentials with read permissions on all target tables
Database Name – The specific ClickHouse database you wish to migrate
Click “Run Check” to validate connectivity. Elestio will confirm it can securely access and read from your ClickHouse instance.
-
Execute the Migration: If all checks pass, click “Start migration.” Elestio will begin copying schema definitions, table structures, and all dataset partitions into the new ClickHouse environment. Depending on the dataset size and source performance, this process may take time. Real-time logs and progress indicators will be available to help track progress and address issues promptly.
Post-Migration Validation and Optimization
Once the ClickHouse migration is complete, it’s critical to validate the deployment and ensure optimal performance:
-
Verify Data Consistency: Use clickhouse-client or Elestio’s integrated terminal to compare row counts, table checksums, and sample queries between source and destination. Confirm that partitions, indexes, and materialized views are intact and functioning.
-
Test Application Connectivity: Update your application’s ClickHouse connection settings to use the new host, port, and credentials provided by Elestio. Test query performance, batch insert operations, and any dependent pipelines or BI dashboards.
-
Optimize Performance: Utilize Elestio’s dashboard to monitor CPU, disk IO, and query execution times. Adjust merge tree settings, buffer sizes, and caching parameters to suit your workload. You can also enable sharding or vertical scaling options as needed.
-
Implement Security Best Practices: Secure your ClickHouse instance by configuring IP allowlists, rotating user credentials, and enabling TLS (if applicable). Elestio provides built-in access control and network isolation to reduce the risk of unauthorized access.
-
Clean Up and Document: After successful validation, decommission the old ClickHouse environment if it’s no longer needed. Update internal documentation with new hostnames, credentials, cluster topology (if applicable), and any architectural changes made during migration.
Benefits of Using Elestio for ClickHouse
Migrating ClickHouse to Elestio delivers several operational and strategic benefits:
-
Simplified Management: Elestio handles routine ClickHouse operations like backups, software updates, storage provisioning, and cluster scaling. Its dashboard provides real-time performance insights, query logs, and system metrics all without needing a dedicated database administrator.
-
Security: Elestio keeps ClickHouse up to date with the latest security patches and offers built-in credential management, IP allowlists, and encrypted connections. Scheduled backups and high-availability options ensure data safety and business continuity.
-
Performance: Elestio’s infrastructure is tuned to support large-scale analytical workloads with minimal latency. It supports both single-node and clustered ClickHouse setups, providing flexibility for batch analytics, OLAP queries, and real-time data processing.
-
Scalability: ClickHouse services on Elestio are built to grow with your needs. Users can scale up compute and storage, attach read replicas, or enable distributed clusters. Upgrades and reconfigurations are handled with minimal downtime, making scaling seamless.
Manual ClickHouse Migration Using clickhouse-backup
Manual migrations using ClickHouse’s native tools, such as clickhouse-client, clickhouse-backup, and SQL dump files, are ideal for users who require full control over data export and import, particularly during transitions between providers, ClickHouse version upgrades, or importing existing self-managed ClickHouse datasets into Elestio’s managed environment. This guide walks through the process of performing a manual migration to and from Elestio ClickHouse services using command-line tools, ensuring data portability, consistency, and transparency at every step.
When to Use Manual Migration
Manual migration using native ClickHouse tools is well-suited for scenarios that demand complete control over the migration process. It is especially useful when transferring data from a self-hosted ClickHouse instance, an on-premises server, or another cloud provider into Elestio’s managed ClickHouse service. This method supports one-time imports without requiring persistent connections between source and destination systems.
It also provides a reliable approach for performing version upgrades. Because ClickHouse allows full schema and data exports via SQL or compressed binary backups, it can restore into newer versions with minimal compatibility issues. When Elestio’s built-in migration tools are not applicable such as migrations from isolated environments or partial database exports manual migration becomes the preferred option. It also supports offline backup and archiving, enabling users to store, transport, and restore datasets independent of platform-specific tools.
Performing the Migration
Prepare the Environments
Before starting the migration, ensure that ClickHouse is properly installed on both the source system and your Elestio service. The source ClickHouse server must allow access (if remote) and have a user with sufficient privileges to export databases, tables, and relevant partitions.
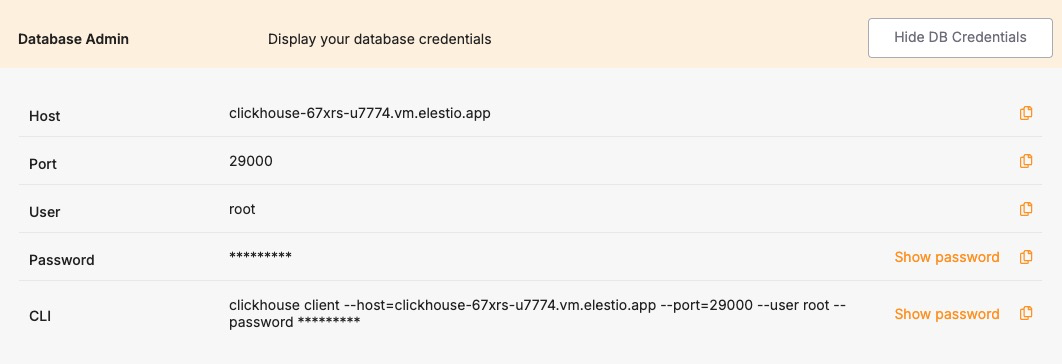
On the Elestio side, provision a ClickHouse service through the dashboard. Once active, retrieve the connection credentials from the Database Info section, which includes host, port (typically 9000 for TCP or 8123 for HTTP), username, and password. Confirm that your public IP is permitted under Cluster Overview > Security > Limit access per IP to ensure the ClickHouse port is reachable.
Create a Backup Using ClickHouse Native Tools
There are two primary methods to export a dataset from a ClickHouse instance:
Option 1: SQL Dump
To generate a schema and data dump, run:
clickhouse-client --host <source_host> --query="SHOW CREATE TABLE <db>.<table>" > schema.sql
clickhouse-client --host <source_host> --query="SELECT * FROM <db>.<table> FORMAT Native" > data.native
Repeat this process for all required tables.
Option 2: Use clickhouse-backup
Alternatively, use the clickhouse-backup tool to create compressed backups that include metadata and data:
clickhouse-backup create migration_snapshot
clickhouse-backup upload migration_snapshot
This tool can also store backups locally or push them to S3-compatible storage.
Transfer the Backup to the Target
Use a secure file transfer utility such as SCP to move exported files to the system that will connect to Elestio:
scp -r /path/to/backup user@host:/path/to/restore-system/If using clickhouse-backup, copy the backup directory or the downloaded archive. These files will be restored into the Elestio-managed ClickHouse instance using the same tools or SQL replay.
Restore the Dataset to Elestio
To restore using SQL:
-
Recreate the schema:
clickhouse-client --host <elestio_host> --port 9000 --user <username> --password <password> < schema.sql-
Import the data:
clickhouse-client --host <elestio_host> --port 9000 --user <username> --password <password> --query="INSERT INTO <db>.<table> FORMAT Native" < data.nativeIf using clickhouse-backup, download the backup onto a local or remote machine with access to Elestio. Then:
clickhouse-backup restore migration_snapshotEnsure the schema is created before restoring data, and verify that all necessary tables and partitions are populated.
Validate the Migration
After the migration, verify that your Elestio ClickHouse instance contains all expected data and performs correctly:
-
Check Row Count
clickhouse-client --host <elestio_host> --port 9000 --user <username> --password <password> --query="SELECT count() FROM <db>.<table>"-
List Tables
clickhouse-client --host <elestio_host> --port 9000 --user <username> --password <password> --query="SHOW TABLES FROM <db>"-
Query Sample Data
Run queries to validate critical business metrics or analytical functions. Check that partitioning, primary keys, and indexes are preserved.
Finally, ensure that application connection strings have been updated to point to the new Elestio-hosted ClickHouse service and that dashboards, ingestion pipelines, or integrations function correctly.
Benefits of Manual Migration
Manual ClickHouse migration using native tools and backup utilities offers several important advantages:
-
Portability and Compatibility: Native ClickHouse formats (SQL, Native, backups) are open and can be restored into any compatible instance across VMs, containers, or cloud providers.
-
Version Flexibility: Easily move between ClickHouse versions using exports that do not rely on replication or binary compatibility.
-
Offline Storage: Backup files can be archived, versioned, and stored offline to support disaster recovery, compliance, and long-term retention.
-
Platform Independence: Elestio supports open standards and does not enforce vendor lock-in. Migrations using native tools provide full control over schema design, data ownership, and performance tuning.