# BYOVM with AWS EC2 (Beta AWS UI)

> This approach is outdated. Instead, you can use our <span style="color: rgb(230, 126, 35); background-color: rgb(255, 255, 255);">[**Bring Your Own AWS Account(BYO-AWS)**](https://docs.elest.io/books/getting-started/page/create-a-new-service-with-bring-your-own-aws-account-byoaws)</span> provider option.

You can deploy an Elestio service on your own AWS account with BYOVM

<iframe allowfullscreen="allowfullscreen" height="453" src="https://www.youtube.com/embed/JkPH-RMCils" style="width: 808px; height: 453px;" width="808"></iframe>

To do it, you will need to create a VM on AWS EC2, first connect to the AWS EC2 dashboard:

[https://console.aws.amazon.com/ec2/v2/home#Instances:instanceState=running](https://console.aws.amazon.com/ec2/v2/home#Instances:instanceState=running)

[![image-1648551097629.png](https://docs.elest.io/uploads/images/gallery/2022-03/scaled-1680-/image-1648551097629.png)](https://docs.elest.io/uploads/images/gallery/2022-03/image-1648551097629.png)

There click on **"Launch instances"** button and select **Ubuntu 26**

[![image-1648551214266.png](https://docs.elest.io/uploads/images/gallery/2022-03/scaled-1680-/image-1648551214266.png)](https://docs.elest.io/uploads/images/gallery/2022-03/image-1648551214266.png)

Scroll down to **Instance type** to select your VM size based on your needs

[![image-1648551260900.png](https://docs.elest.io/uploads/images/gallery/2022-03/scaled-1680-/image-1648551260900.png)](https://docs.elest.io/uploads/images/gallery/2022-03/image-1648551260900.png)

then scroll down to configure **network settings** and **storage**

[![image-1648551341376.png](https://docs.elest.io/uploads/images/gallery/2022-03/scaled-1680-/image-1648551341376.png)](https://docs.elest.io/uploads/images/gallery/2022-03/image-1648551341376.png)

In network settings you should check the 3 checkboxes to allow SSH, HTTP and HTTPS traffic from the internet.

In Storage, you can indicate any disk size above 20GB

If you need to provision multiple VMs, you can change the number of instances in the top right column

Finally click on **Launch instance** button

[![image-1648551520084.png](https://docs.elest.io/uploads/images/gallery/2022-03/scaled-1680-/image-1648551520084.png)](https://docs.elest.io/uploads/images/gallery/2022-03/image-1648551520084.png)

If it's your first time deploying a VM you will be asked to create a new key pair

[![image-1648551559491.png](https://docs.elest.io/uploads/images/gallery/2022-03/scaled-1680-/image-1648551559491.png)](https://docs.elest.io/uploads/images/gallery/2022-03/image-1648551559491.png)

give any key pair name then click on "Create key pair" and SAVE the PEM file preciously on your computer

After a few seconds you will see a confirmation message:

[![image-1648551657247.png](https://docs.elest.io/uploads/images/gallery/2022-03/scaled-1680-/image-1648551657247.png)](https://docs.elest.io/uploads/images/gallery/2022-03/image-1648551657247.png)

There click on **View all instances** button

[![image-1648551707674.png](https://docs.elest.io/uploads/images/gallery/2022-03/scaled-1680-/image-1648551707674.png)](https://docs.elest.io/uploads/images/gallery/2022-03/image-1648551707674.png)

<p class="callout warning">We recommend that you allocate &amp; attach an Elastic IP address to your instance, so the IP address will never change in case you stop the server. [Click here](https://console.aws.amazon.com/ec2/v2/home#Addresses:) to allocate an Elastic IP and then attach it to your VM in EC2.</p>

We are now back on the list of all VMs in EC2, from here right click on your new instance and click on **Connect** in the sub menu

[![image-1648551813396.png](https://docs.elest.io/uploads/images/gallery/2022-03/scaled-1680-/image-1648551813396.png)
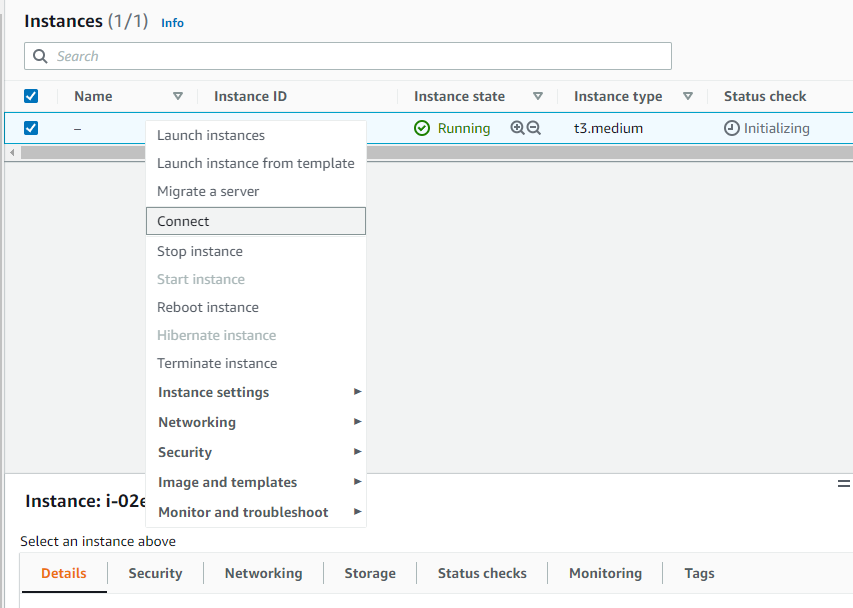
](https://docs.elest.io/uploads/images/gallery/2022-03/image-1648551813396.png)

There change the user name to **root,** then click on Connect button

[![image-1648551863875.png](https://docs.elest.io/uploads/images/gallery/2022-03/scaled-1680-/image-1648551863875.png)
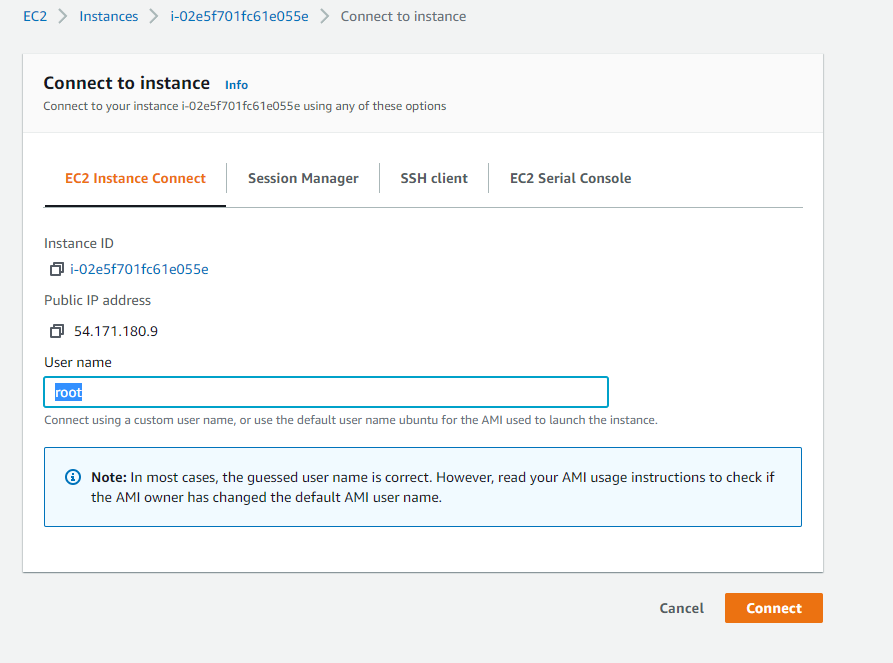
](https://docs.elest.io/uploads/images/gallery/2022-03/image-1648551863875.png)

 You should then see a terminal shell like this

[![image-1648551921125.png](https://docs.elest.io/uploads/images/gallery/2022-03/scaled-1680-/image-1648551921125.png)](https://docs.elest.io/uploads/images/gallery/2022-03/image-1648551921125.png)

There paste this command into the terminal to activate the remote management for Elestio (This is a temporary key used for the deployment phase, it's automatically removed from the VM right after the deployment)

**sudo mkdir -p /root/.ssh/ &amp;&amp; sudo echo "ssh-rsa AAAAB3NzaC1yc2EAAAABJQAAAQEAmAlfBn8fy00sHq4DV2lUDNJ73XNwCtSDgHAAEjVt8lVcPOyb+drHK7TmHtF6mIhax/qeFdS/27bqmuu2/+QyXuvG98WL47cJinVkuUNR1bqKfpjwvlGtPkVQTiz2aN9ktY8+RaKoJUg6YrL23wiRgqibRuRYJgG1tIx7O4pUAK8XPsIVw2kvTuaVWu+iQq968KozJP8t1C6U8eqwbV2H8xpMLAsuIA82S1vGkqx42TBLo8XOgQo1ZIoY4dsO+ElvJZ5sqxAg4GB57OIgpaav/2SkKau6Oh4ndkKTJms5kTc2wUm96VVea2eOrOL0TPNQOhb1uy2MgxS9LLFxm2psmQ== elestio-prod-key" &gt;&gt; /root/.ssh/authorized\_keys**

We also need to allow all traffic to the VM in the AWS EC2 instance list click on your instance, then click on the **security** tab

[![image-1648555261405.png](https://docs.elest.io/uploads/images/gallery/2022-03/scaled-1680-/image-1648555261405.png)](https://docs.elest.io/uploads/images/gallery/2022-03/image-1648555261405.png)

There click on the Security group in blue (launch-wizard-1 in the screenshot above)

[![image-1648555516835.png](https://docs.elest.io/uploads/images/gallery/2022-03/scaled-1680-/image-1648555516835.png)
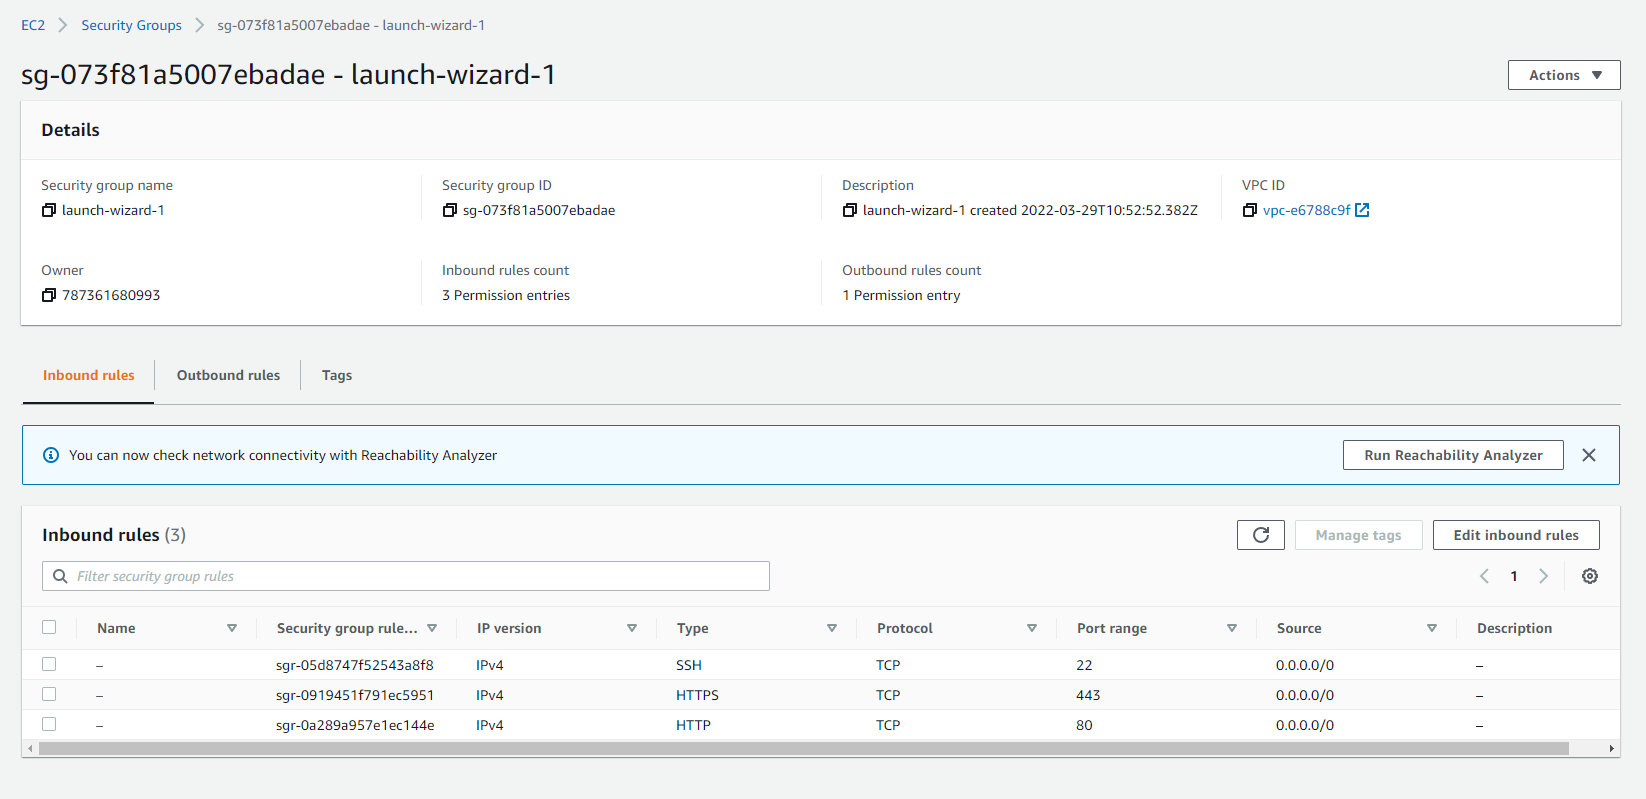
](https://docs.elest.io/uploads/images/gallery/2022-03/image-1648555516835.png)

Click on "Edit inbound rules" to be able to allow all traffic on the VM

[![image-1648556736479.png](https://docs.elest.io/uploads/images/gallery/2022-03/scaled-1680-/image-1648556736479.png)
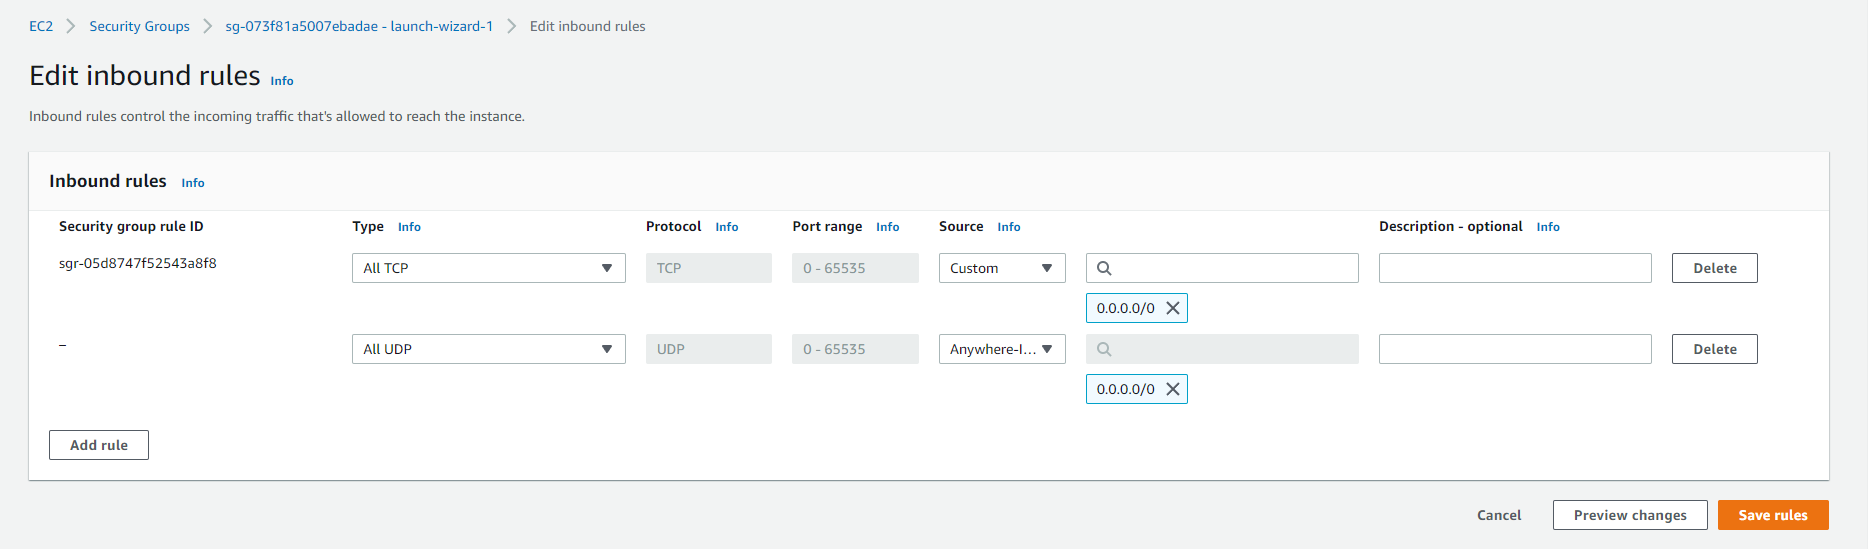
](https://docs.elest.io/uploads/images/gallery/2022-03/image-1648556736479.png)

Here change the rule to allow ALL TCP traffic &amp; ALL UDP traffic from anywhere

Alternatively, you can open just a selection of ports based on your needs, at least ports **TCP:** **22, 80, 443** for basic usage. To allow Elestio tools (File Explorer, VS Code, web terminal) you should also open ports **TCP: 18345,18374,18445.**

If you want to use our global private ip network you should also allow port **UDP: 4242**

Finally, some specific ports are required based on the template you have selected; you can find them in the activation email of the software or in our documentation [here](https://doc.elest.io/books/supported-softwares).

Then go back to Elestio Dashboard to create a new BYOVM service

[![image-1648553680058.png](https://docs.elest.io/uploads/images/gallery/2022-03/scaled-1680-/image-1648553680058.png)
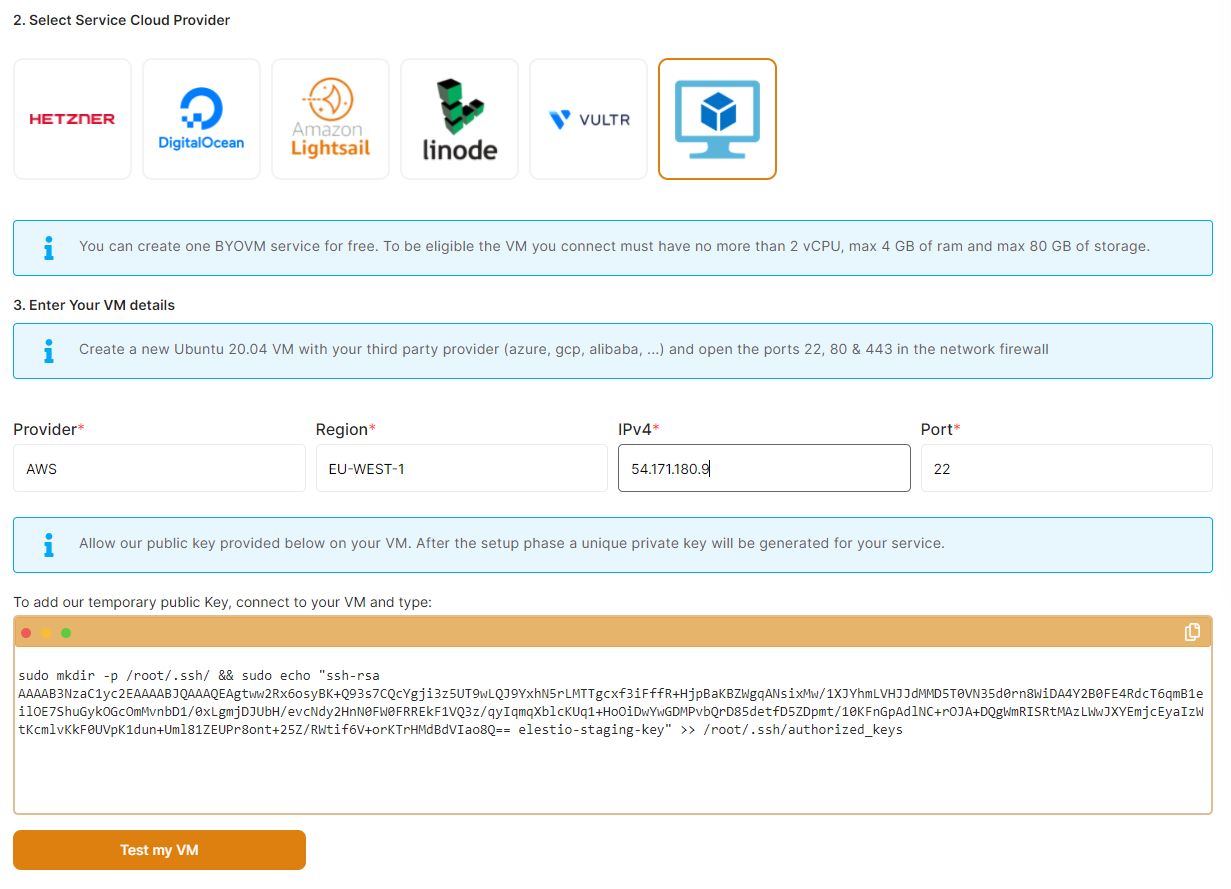
](https://docs.elest.io/uploads/images/gallery/2022-03/image-1648553680058.png)

Indicate the provider name, region name and Public IPV4 found in the AWS dashboard then click on "Test my VM."

[![image-1648553849491.png](https://docs.elest.io/uploads/images/gallery/2022-03/scaled-1680-/image-1648553849491.png)
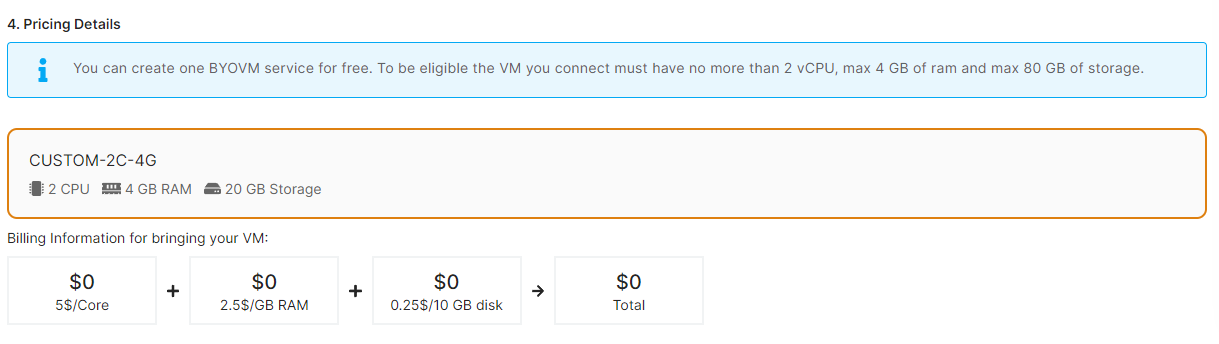
](https://docs.elest.io/uploads/images/gallery/2022-03/image-1648553849491.png)

You'll see the pricing calculated based on the number of CPU/RAM/DISK of your AWS EC2 VM;

You can then click on "Create service," and you are done! Your service will be deployed in less than 3 minutes and you will receive an email with instructions but of course the service is also accessible in the dashboard.

[![image-1648557473027.png](https://docs.elest.io/uploads/images/gallery/2022-03/scaled-1680-/image-1648557473027.png)](https://docs.elest.io/uploads/images/gallery/2022-03/image-1648557473027.png)

From there we will take care of backups, monitoring/alerts, OS/software updates and security for you.

[![image-1648557512849.png](https://docs.elest.io/uploads/images/gallery/2022-03/scaled-1680-/image-1648557512849.png)
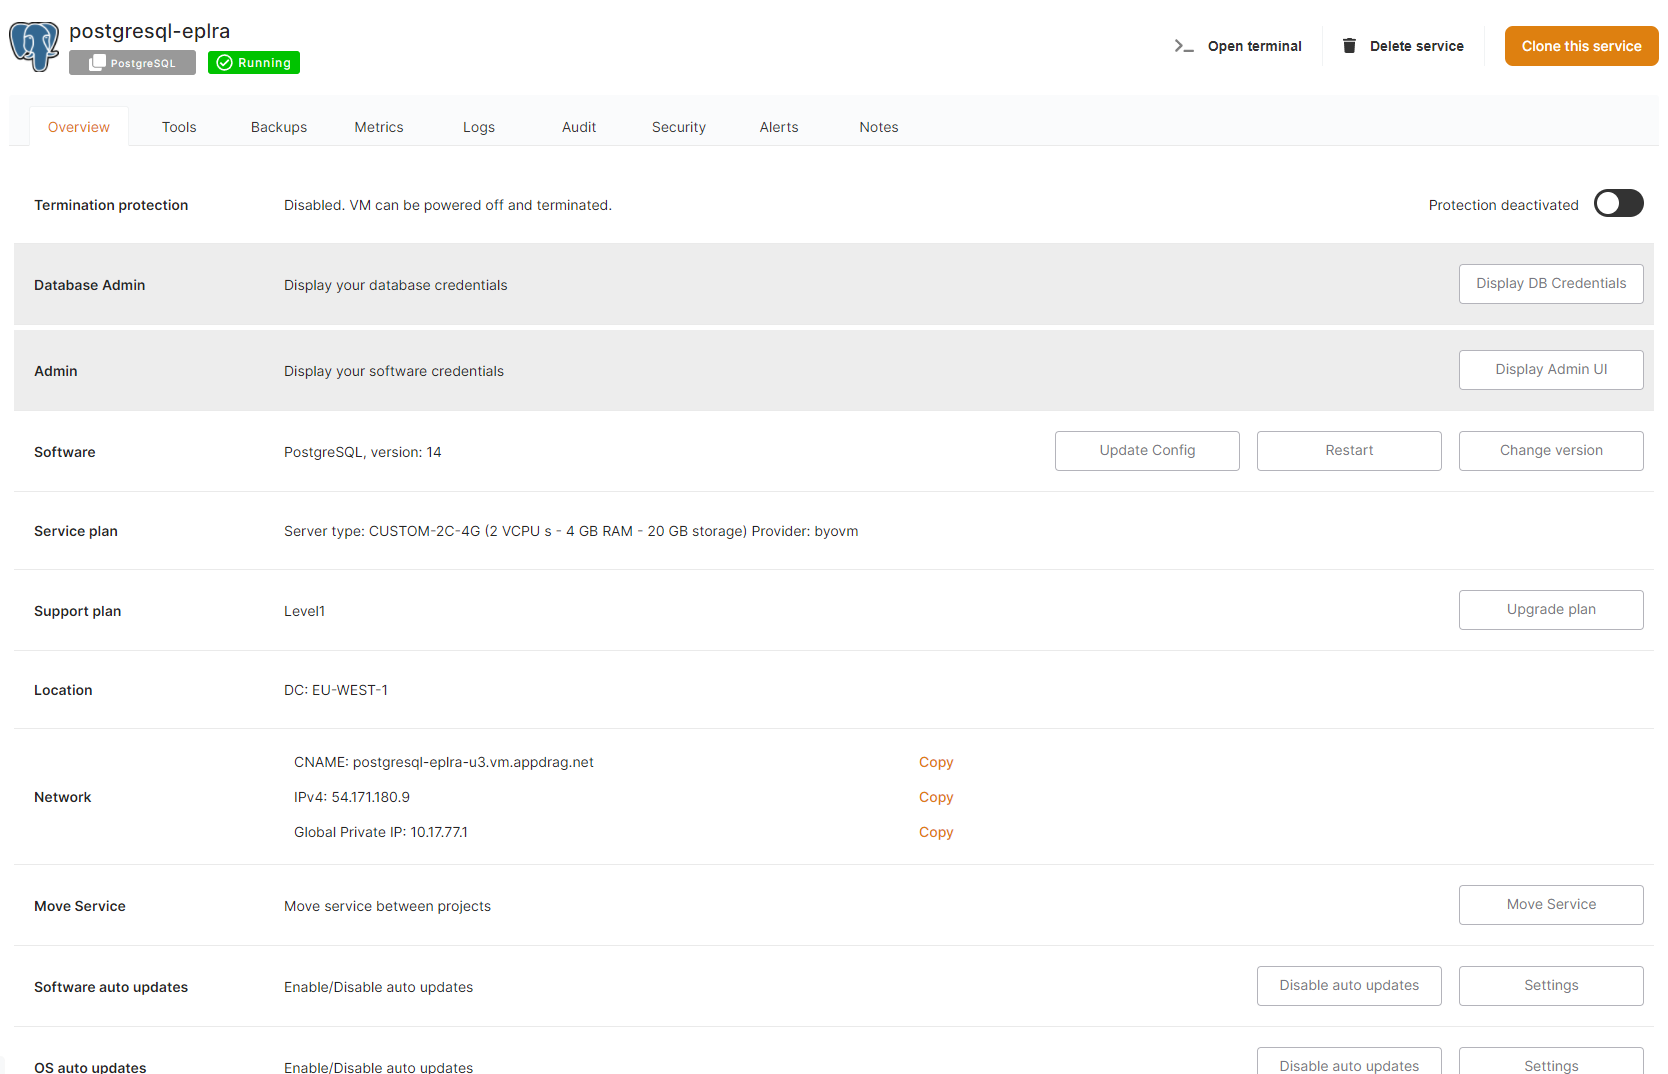
](https://docs.elest.io/uploads/images/gallery/2022-03/image-1648557512849.png)