# Microsoft Azure or BYO-AZURE (Bring Your Own Azure Account)

This guide explains the Azure permissions and configuration required for customers who want to deploy Elestio services in their own Azure subscription. By connecting your Azure account, Elestio will create and manage resources directly in your Azure environment.

---

### Prerequisites

Before connecting your Azure subscription to Elestio, ensure you have:

- An active Azure subscription
- **Global Administrator**, **Privileged Role Administrator**, or **Application Administrator** role in Azure AD
- **Contributor** role on the target Azure subscription (or ability to assign it)

---

### Required Azure Permissions

#### Minimum Required Role

- **Role**: `Contributor`
- **Scope**: Subscription level

**Why**:  
This role allows Elestio to create, manage, and delete resources in your subscription while preventing it from modifying access controls or role assignments.

---

### Alternative: Custom Role (Advanced)

If your organization requires granular permissions, you can create a custom role with the following permissions:

```json
{
  "Name": "Elestio Service Manager",
  "Description": "Custom role for Elestio to manage cloud resources",
  "Actions": [
    "Microsoft.Resources/subscriptions/resourceGroups/*",
    "Microsoft.Compute/virtualMachines/*",
    "Microsoft.Compute/disks/*",
    "Microsoft.Network/virtualNetworks/*",
    "Microsoft.Network/networkInterfaces/*",
    "Microsoft.Network/networkSecurityGroups/*",
    "Microsoft.Network/publicIPAddresses/*",
    "Microsoft.Storage/storageAccounts/*",
    "Microsoft.RecoveryServices/vaults/*",
    "Microsoft.RecoveryServices/register/action",
    "Microsoft.Authorization/locks/*"
  ],
  "NotActions": [],
  "AssignableScopes": [
    "/subscriptions/{your-subscription-id}"
  ]
}

```

---

### What Resources Will Elestio Create?

When you deploy services through Elestio using your Azure subscription, the following resources are created:

<table id="bkmrk-resource-type-purpos"><thead><tr><th>Resource Type</th><th>Purpose</th></tr></thead><tbody><tr><td>**Resource Groups**</td><td>Logical containers for all resources (`elestio-{region}`)</td></tr><tr><td>**Virtual Machines**</td><td>Compute instances for your applications</td></tr><tr><td>**Managed Disks**</td><td>OS and data storage for VMs</td></tr><tr><td>**Virtual Networks**</td><td>Network isolation</td></tr><tr><td>**Network Interfaces**</td><td>VM network connectivity</td></tr><tr><td>**Public IP Addresses**</td><td>IPv4 and IPv6 external access</td></tr><tr><td>**Network Security Groups**</td><td>Firewall rules</td></tr><tr><td>**Storage Accounts**</td><td>Backups and object storage</td></tr><tr><td>**Recovery Services Vaults**</td><td>Backup and disaster recovery</td></tr><tr><td>**Resource Locks**</td><td>Prevent accidental deletion</td></tr></tbody></table>

---

#### OAuth Scope Required

Elestio uses the following OAuth 2.0 scope:

```text
https://management.azure.com/user_impersonation
```

This allows Elestio to act on your behalf via Azure Resource Manager.

---

### Step-by-Step Setup Guide

#### Step 1: Assign Contributor Role

1. Sign in to the <span style="color: rgb(230, 126, 35);">**<span style="text-decoration: underline;">[Azure Portal](https://portal.azure.com/)</span>**</span>
2. Go to **Subscriptions**
3. Select your subscription
4. Open **Access control (IAM)**
5. Click **+ Add** → **Add role assignment**
6. Select **Contributor**
7. Assign it to your user account
8. Click **Review + assign**

<p class="callout info">You can assign the role in the Azure portal by following the steps outlined in the [**<span style="color: rgb(230, 126, 35);">Microsoft documentation.</span>**](https://learn.microsoft.com/en-us/azure/role-based-access-control/role-assignments-portal-subscription-admin#step-1-open-the-subscription)</p>

**Verification**:  
Your account should appear under *Role assignments* with the **Contributor** role.

---

#### Step 2: Register Elestio Application in Azure AD

[![Screenshot 2025-12-24 195252.png](https://docs.elest.io/uploads/images/gallery/2025-12/scaled-1680-/screenshot-2025-12-24-195252.png)
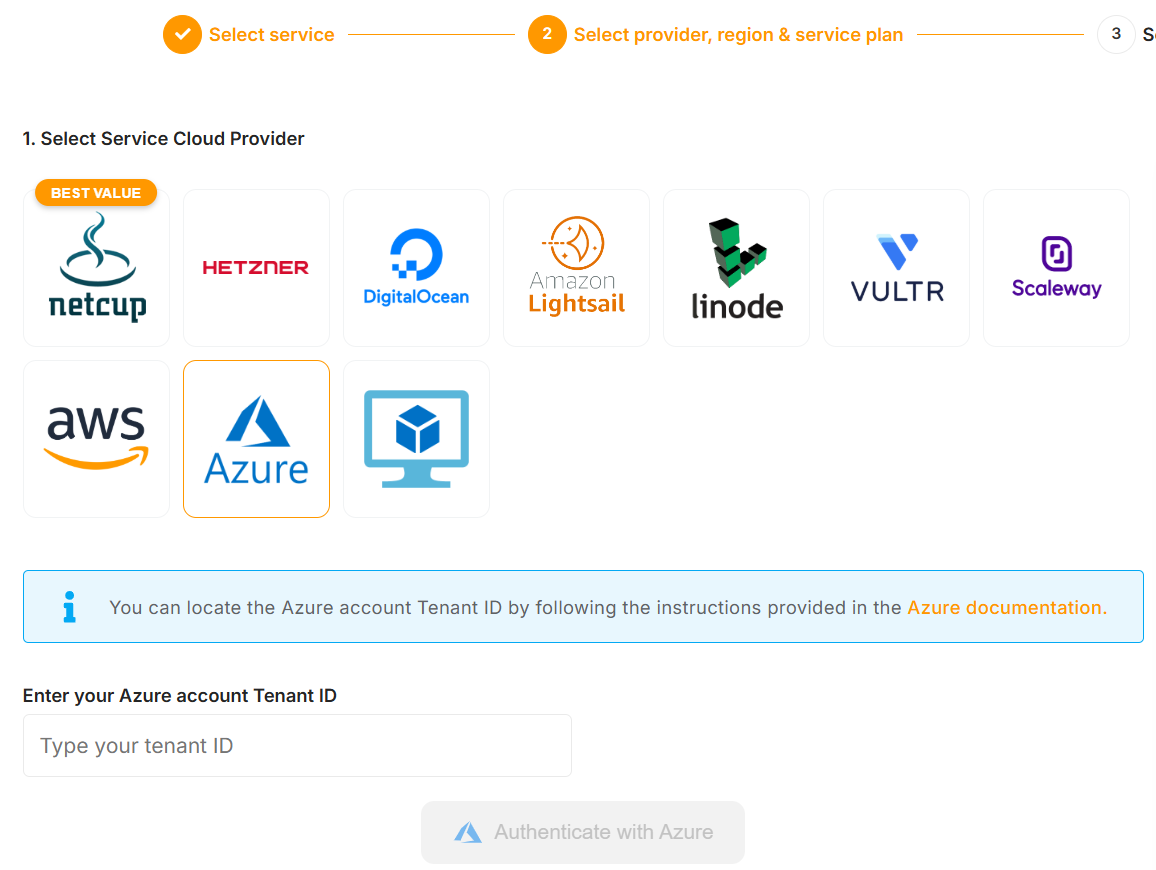
](https://docs.elest.io/uploads/images/gallery/2025-12/screenshot-2025-12-24-195252.png)

1. Log in to the Elestio dashboard
2. Select **Software** inside Services.
3. Go to **Cloud Providers → Azure**
4. Enter your **Azure Tenant ID** (see how to find it in the **<span style="color: rgb(230, 126, 35);">[Azure portal](https://learn.microsoft.com/en-us/azure/azure-portal/get-subscription-tenant-id#find-your-microsoft-entra-tenant)</span>**)
5. Click **Authenticate with Azure**

You will be redirected to the Microsoft login page.

---

#### Step 3: Grant Admin Consent

[![Screenshot-2025-12-24-180102-png-943×880--12-24-2025_08_04_PM (1).png](https://docs.elest.io/uploads/images/gallery/2025-12/scaled-1680-/screenshot-2025-12-24-180102-png-943880-12-24-2025-08-04-pm-1.png)
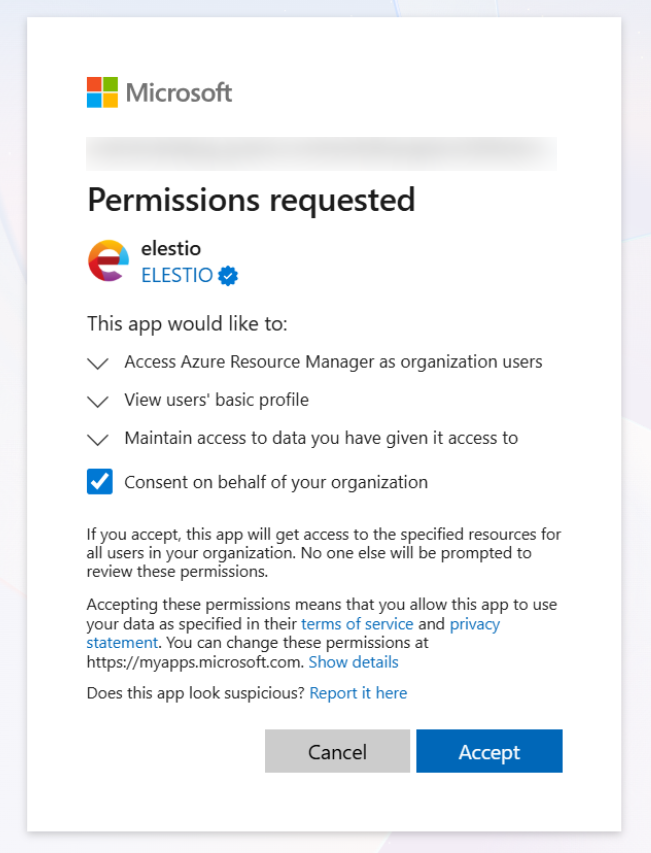
](https://docs.elest.io/uploads/images/gallery/2025-12/screenshot-2025-12-24-180102-png-943880-12-24-2025-08-04-pm-1.png)

1. Review requested permissions:
    
    
    - **Access Azure Service Management as you** (`user_impersonation`)
2. Sign in with an admin account if required
3. Click **Accept**

> **Note**: If you lack privileges, your Azure AD administrator must grant consent.

---

#### Step 4: Select Subscription

[![image.png](https://docs.elest.io/uploads/images/gallery/2025-12/scaled-1680-/image.png)
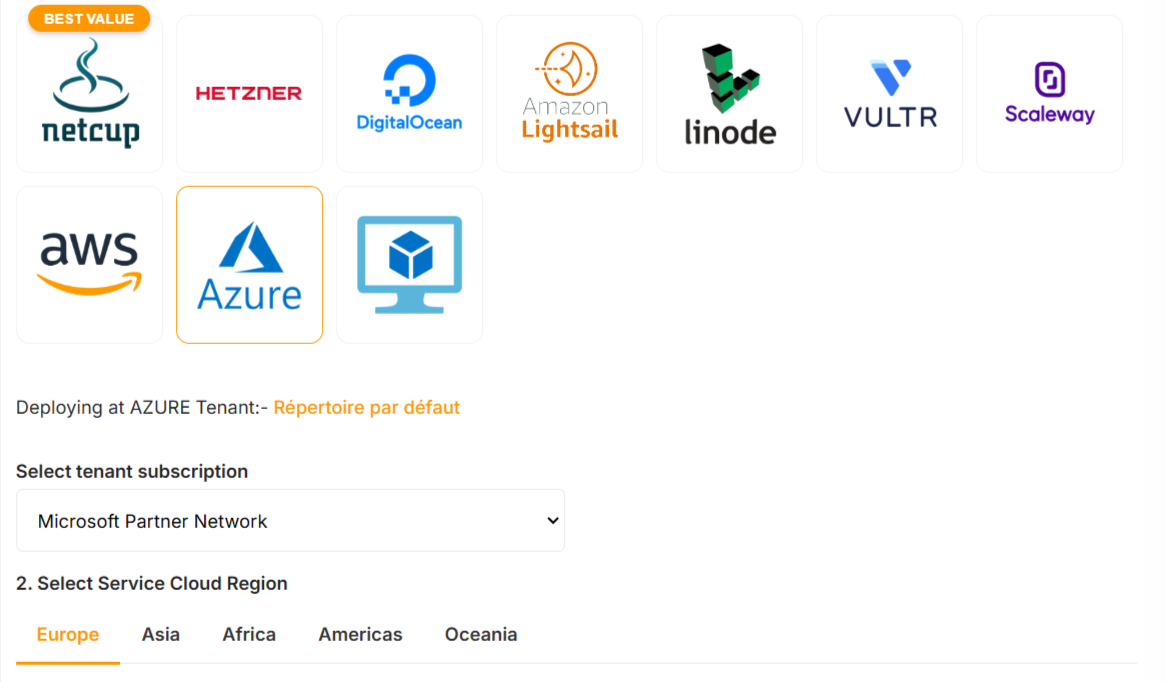
](https://docs.elest.io/uploads/images/gallery/2025-12/image.png)

1. Return to the Elestio dashboard
2. Select the Azure subscription.

Your Azure account is now connected.

---

### Security Best Practices

#### Use Dedicated Subscriptions

Recommended for production to ensure:

- Clear cost tracking
- Workload isolation
- Easier audits and compliance

---

### Resource Naming Conventions

<table id="bkmrk-resource-pattern-exa"><thead><tr><th>Resource</th><th>Pattern</th><th>Example</th></tr></thead><tbody><tr><td>Resource Group</td><td>`elestio-{region}`</td><td>`elestio-eastus`</td></tr><tr><td>VM</td><td>`{service-name}`</td><td>`my-postgres-db`</td></tr><tr><td>Public IPv4</td><td>`{service-name}_ipv4`</td><td>`my-postgres-db_ipv4`</td></tr><tr><td>Public IPv6</td><td>`{service-name}_ipv6`</td><td>`my-postgres-db_ipv6`</td></tr><tr><td>Virtual Network</td><td>`elestio_{region}_vnet`</td><td>`elestio_eastus_vnet`</td></tr><tr><td>Backup Policy</td><td>`elestioBackup`</td><td>`elestioBackup`</td></tr></tbody></table>

---

### Troubleshooting

#### Insufficient Permissions

**Cause**: Missing Contributor role  
**Fix**:

- Assign Contributor at subscription level
- Wait 5–10 minutes for propagation

---

#### Admin Consent Required

**Cause**: Azure AD consent missing  
**Fix**:

- Ask an admin to approve permissions

---

#### Provider Not Registered

**Fix**:

1. Subscriptions → Resource providers
2. Register `Microsoft.RecoveryServices`

---

#### Quota Exceeded

**Fix**:

- Check **Usage + quotas**
- Request an increase via Azure Support