# Frequently Asked Questions
Here are some most commonly asked questions
# Why am I receiving a low credit warning even though auto recharge is enabled?
Users who have credits remaining for less than 7 days receive a low credit warning email once per day.
To avoid this, increase your credit warning limit to a level corresponding to your cash burn rate to satisfy the 7-day credit requirement.
You can change your credit warning limit anytime within your account settings or by visiting [https://dash.elest.io/account/payment-options](https://dash.elest.io/account/payment-options).
# Can I install more than one software on the same VM?
Our dedicated services are running in complete isolation, so one service equals one VM. Using our CI/CD system, you can install multiple software's on a single VM.
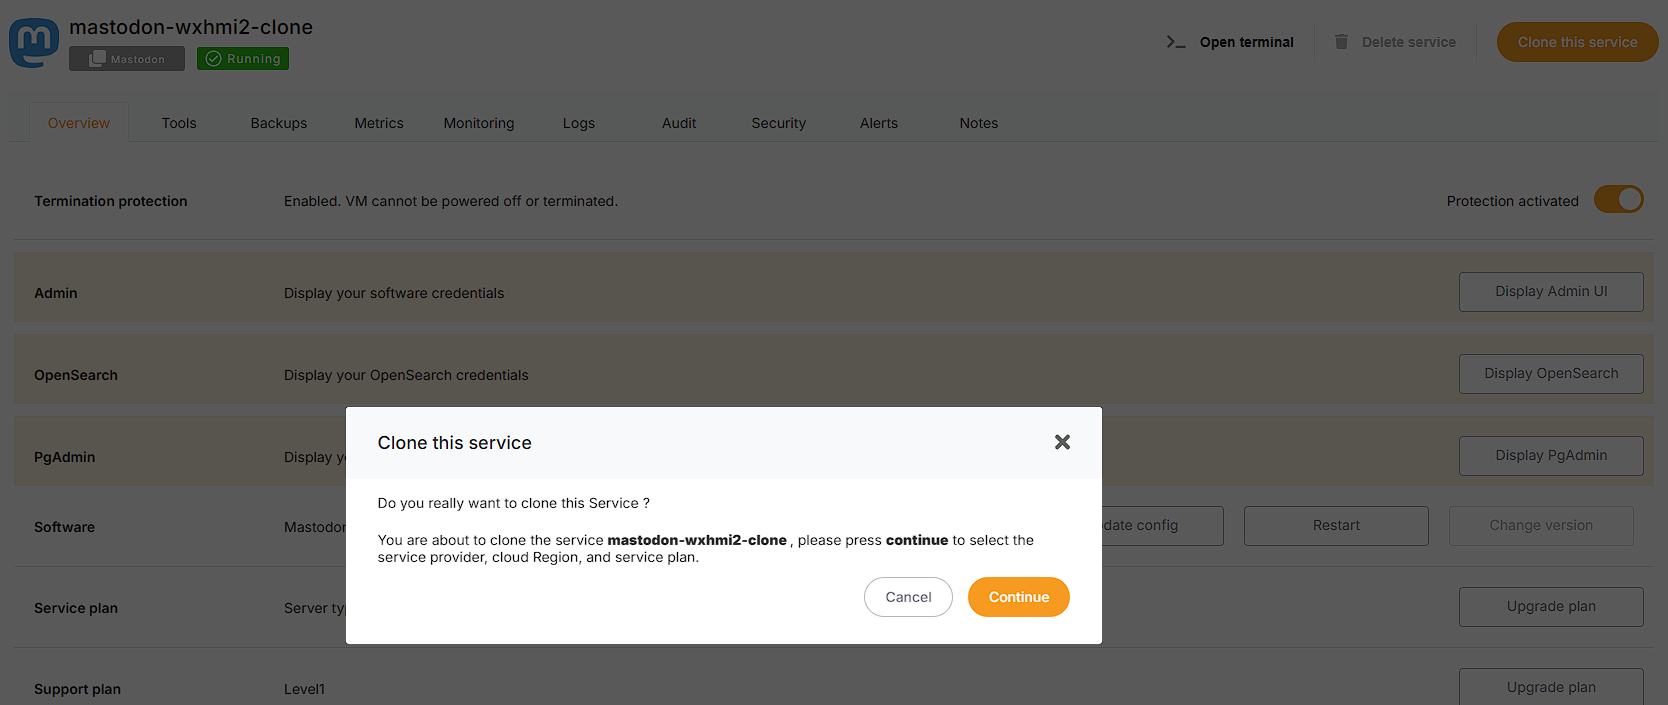
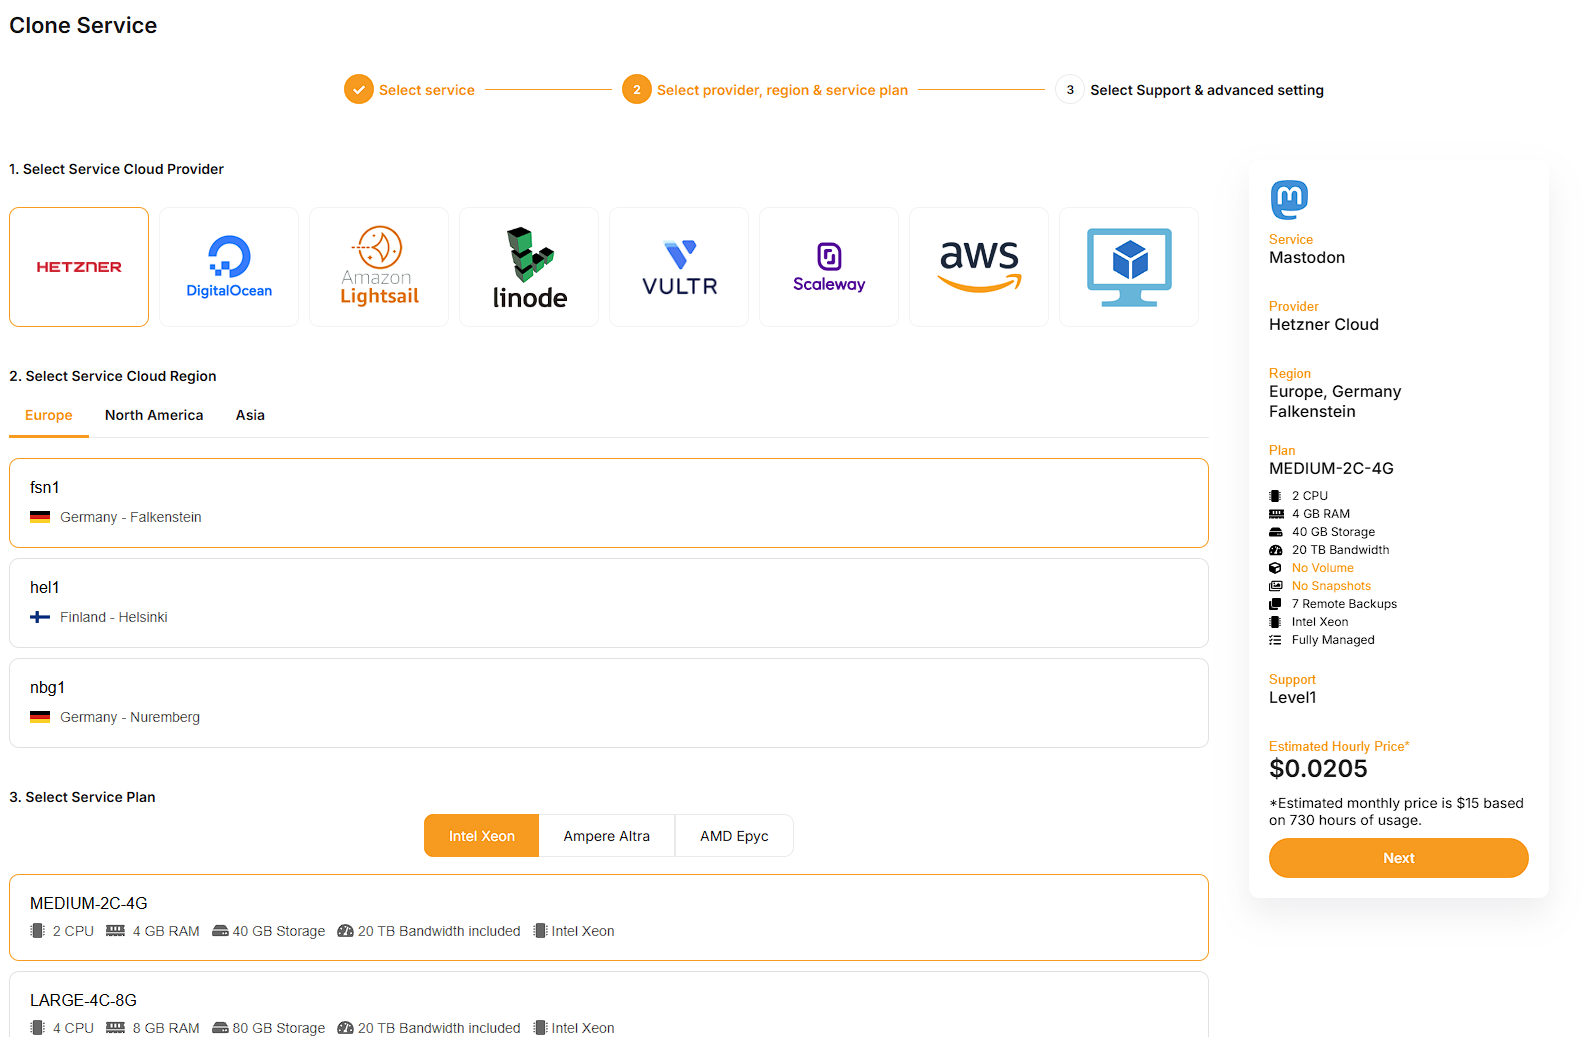
# Can I migrate/clone my service to another cloud or region?
Yes, you can migrate or clone a running service to any other target cloud or region by simply clicking the "clone" button on the service dashboard.
[](https://docs.elest.io/uploads/images/gallery/2025-03/4Htimage.png)
[](https://docs.elest.io/uploads/images/gallery/2025-03/9BPimage.png)
[](https://docs.elest.io/uploads/images/gallery/2025-03/ha2image.png)
# Is it possible to restrict access to my virtual machine (with a firewall)?
Yes, every service has a pre-configured firewall that allows access to the internet through ports specific to certain applications. From the service dashboard, you can easily restrict access to a single or a range of IPs.
[Learn more about setting your firewall](https://docs.elest.io/books/security/page/network-firewall "https://docs.elest.io/books/security/page/network-firewall")
# What type of support does Elestio offer?
Email and community support via our forum is available to everyone with our Test plan, with no SLA.
Staging Support plans offers a guaranteed response within 2 business days and priority queueing for support tickets, and email support.
Production Support plans offer a guaranteed response within 1 business day, highest priority queueing for support tickets, a dedicated customer success manager, and phone and email support.
[Learn more about our support plans](https://docs.elest.io/books/services-dashboard/page/service-support-plans "https://docs.elest.io/books/services-dashboard/page/service-support-plans")
# Can my software services communicate between different cloud providers safely?
Every Elestio project establishes a unique and secure encrypted virtual network, allowing services within the project to communicate through private IPv4 addresses.
This communication occurs with nearly line-speed throughput, regardless of location or service provider.
The driving force behind this distinctive capability is Nebula, initially developed by Slack and released as open-source software in 2020. you can learn about nebula from **[here.](https://github.com/slackhq/nebula)**
It provides a virtual private cloud (VPC) Isolated per project.
##### **How can I Enable/Disable the Global Private IP?**
To toggle the Global Private IP on or off, follow these steps:
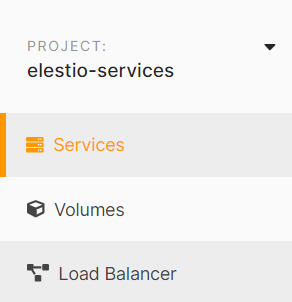
1. Navigate to the services section in the Elestio dashboard using the left sidebar.
2. Choose your specific service.
3. Locate the Network row in the same overview tab.
4. Within the Network row, find the Global Private IP switch on the right side and toggle it to enable or disable the Global Private IP.
[](https://docs.elest.io/uploads/images/gallery/2023-12/HHTimage.png)
#####
##### **How to associate the Service with the Private IP rather than the Public IP?**
Taking the example of the MySQL service, if you want to bind it to the Private IP instead of the Public IP, making it accessible only within the global private network of your project in Elestio, follow these steps:
1. Navigate to the services section in the Elestio dashboard using the left sidebar.
2. Choose your specific MYSQL service.
3. Click the "Update Config" button in the Software row on the Overview tab.
4. Within the docker-compose file, locate the following section:
```bash
ports:
- '24306:3306'
```
Replace it with:
```bash
ports:
- 'GLOBAL_PRIVATE_IP:24306:3306'
```
The value for GLOBAL\_PRIVATE\_IP 10.xx.xxx.x corresponds to your Global Private IP, and you can locate it in the service details.
5. Click the "Update & Restart" button to apply the changes.
Afterward, the MySQL port will only be accessible from the internal network through the global private IP address on port 24306.
This setup is akin to a Virtual Private Cloud (VPC), where all other services deployed in the same Elestio project coexist within the same Virtual VPC.
# Can I deploy Elestio services on-premise or on my existing cloud infrastructure?
Yes, you can connect any on-premises or cloud VM managed services dashboard with our "Bring Your Own VM" (BYOVM) feature. Any software we provide can be installed on your own infrastructure, and it will be handled just like any other virtual machine (VM) we run on your behalf: backed up, updated, and secured.
[Learn more about our BYOWM capability](https://docs.elest.io/books/cloud-providers/page/byovm-bring-your-own-vm "https://docs.elest.io/books/cloud-providers/page/byovm-bring-your-own-vm")
# I'm trying to add AWS keys to Elestio but getting an error "You are not authorized to perform this operation" in BYOAWS
##### This error will appear when adding AWS Access and Secret Credentials keys if your keys do not have AmazonEC2FullAccess access permission on your AWS account.
In order to use these keys, please try to grant permission on your AWS account.
To find out more about generating AWS Access and Secret keys and granting access, see our [***documentation***](https://docs.elest.io/books/getting-started/page/how-to-create-aws-access-and-secret-key-for-byoaws "https://docs.elest.io/books/getting-started/page/how-to-create-aws-access-and-secret-key-for-byoaws").
# Can I use OUTFILE in Managed MySQL?
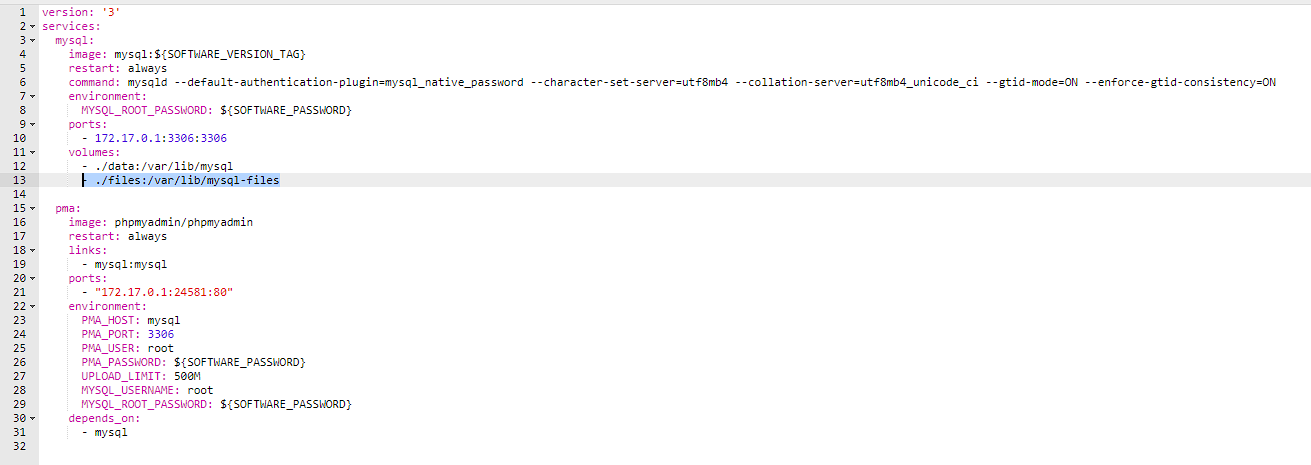
Yes it's possible on Elestio. Since we are running MySQL inside a docker container you will have to modify the stack to mount a new volume in the docker-compose. You can edit it with UPDATE CONFIG button from our dashboard
You will have to add a line like this in the mysql container
\- ./files:/var/lib/mysql-files
[](https://docs.elest.io/uploads/images/gallery/2023-04/image.png)
Then click on the button "Apply & restart"
After that you can use queries like this:
```sql
SELECT * FROM `help_topic` INTO OUTFILE '/var/lib/mysql-files/test1.csv';
```
and your file test1.csv will be present on the host vm in /opt/app/files/test1.csv
You can access it over SSH / SFTP / File Explorer / VS Code ...
If you want to use InFile to import CSV to a Table, you must add another option at end of row 6 (command) of the docker-compose file:
Then also modify the mysql-docker-cli.sh to add "--local-infile" at the end of it
Finally you can start the cli with:
./opt/app/mysql-docker-cli.sh;
from there you can now load data from CSV with a query like this:
use YOUR_DB_NAME_HERE;
LOAD DATA LOCAL INFILE '/var/lib/mysql-files/**yourFile.csv**' INTO TABLE **yourTableNameHere** FIELDS TERMINATED by ',' LINES TERMINATED BY '\n' IGNORE 1 LINES;
You should then see something like:
Query OK, 10634 rows affected, 65535 warnings (0.48 sec)
Records: 10634 Deleted: 0 Skipped: 0 Warnings: 251949
# How can I automatically remove system log files in order to free up disk space?
By default, new instances are automatically configured to delete log files on a daily basis.
However, if your virtual machine (VM) does not have these files at `/opt/maintenance-daily.sh` or if you have deleted them, you can easily configure the deletion process by following the steps below.
To create a script that deletes log files on your VM, begin by accessing the terminal (Open Terminal). You can find it within the service details on the top right side of the dashboard.
Once the terminal is open, copy and paste the provided code below to create the script responsible for deleting log files.
```shell
#Create a script to remove logs every day.
echo 'echo "$(tail -c 30m /tmp/appStack.log)" > /tmp/appStack.log' >> /opt/maintenance-daily.sh
echo 'echo "$(tail -c 30m /tmp/externalBackup.log)" > /tmp/externalBackup.log' >> /opt/maintenance-daily.sh
echo 'echo "$(tail -c 30m /var/log/syslog)" > /var/log/syslog' >> /opt/maintenance-daily.sh
echo 'journalctl --vacuum-time=10d --vacuum-size=500M;' >> /opt/maintenance-daily.sh
#Grant the script executable permissions.
chmod +x /opt/maintenance-daily.sh
#To run these scripts every day, create a cron job on the virtual machine.
crontab -l | { cat; echo "0 1 * * * /opt/maintenance-daily.sh"; } | crontab -
```
You can modify these cron execution times by replacing `0 1 * * *` with your own cron execution times.
We keep a 30-mb log file by default, however, you can change the `30m` number to something else if you wish to keep a larger log file.
# How to resolve the Borg acquire lock in remote backups.
##### If you see the following error when listing, restoring, or taking manual backups for your Borg remote backups.
```bash
Failed to create/acquire the lock /root/.cache/borg/f80e5dfd25cb9/lock.exclusive (timeout).
```
##### You may simply solve it by following the instructions below:
- You can connect with the VM terminal and run the below command.
```bash
borg break-lock BorgRepoName
```
By using the command, you can determine your BorgRepoName
```bash
cd /opt/borg;
cat backupInfo.sh;
#It will return output like these:
BORG_PASSPHRASE=xxxxxxxxxxxxxxxxx borg info ssh://xxxxxxxxxxxx.repo.borgbase.com/./repo;
```
The ssh://xxxxxxxxxxxx.repo.borgbase.com/./repo; is your Borg repo name. You can use that in the command above.
Example: borg break-lock ssh://xxxxxxxxxxxx.repo.borgbase.com/./repo;
# How to resolve the Borg cache error in remote backups.
##### If you see the following error related to the Borg cache when listing, restoring, or taking manual backups for your Borg remote backups.
```bash
Local Exception
Traceback (most recent call last):
File "/usr/lib/python3/dist-packages/borg/archiver.py", line 5089, in main
exit_code = archiver.run(args)
File "/usr/lib/python3/dist-packages/borg/archiver.py", line 174, in wrapper
assert_secure(repository, kwargs['manifest'], self.lock_wait)
File "/usr/lib/python3/dist-packages/borg/cache.py", line 209, in assert_secure
sm.assert_secure(manifest, manifest.key, lock_wait=lock_wait)
File "/usr/lib/python3/dist-packages/borg/cache.py", line 174, in assert_secure
with cache_config:
File "/usr/lib/python3/dist-packages/borg/cache.py", line 334, in _check_upgrade
raise Exception('%s does not look like a Borg cache.' % config_path) from None
Exception: /root/.cache/borg/f80e55dff9886465adf97645/config does not look like a Borg cache.
```
##### You may simply solve it by following the instructions below:
- You can connect with the VM terminal and run the below command.
```bash
borg delete --cache-only BorgRepoName
```
By using the command, you can determine your BorgRepoName
```bash
cd /opt/borg;
cat backupInfo.sh;
#It will return output like these:
BORG_PASSPHRASE=xxxxxxxxxxxxxxxxx borg info ssh://xxxxxxxxxxxx.repo.borgbase.com/./repo;
```
The ssh://xxxxxxxxxxxx.repo.borgbase.com/./repo; is your Borg repo name. You can use that in the command above.
Example: borg delete --cache-only ssh://xxxxxxxxxxxx.repo.borgbase.com/./repo;
# I added fund to my elestio account, but my service is still not running
##### If your service was suspended due to lack of credits and now it is still inactive even after adding the funds to your elestio account then please follow the below steps to active the inactive services.
> If termination protection is enabled on your service, kindly disable it first before proceeding with the action. You can find instructions on how to disable termination protection ***[here](https://docs.elest.io/books/services-dashboard/page/service-protection)***
**Step 1:** Navigate to the **[elest.io](https://dash.elest.io/)** dashboard and access the "***Services***" option in the left sidebar.
[](https://docs.elest.io/uploads/images/gallery/2023-10/screenshot-2023-10-05-204817.png)
**Step 2:** Choose the specific service you wish to activate from the list, and within your service details overview, locate the "***Power***" tab.
[](https://docs.elest.io/uploads/images/gallery/2023-10/image.png)
**Step 3:** Activate the service by clicking the "***Power On***" button. A confirmation prompt will appear; proceed by clicking the "***Accept***" button to confirm the action.
[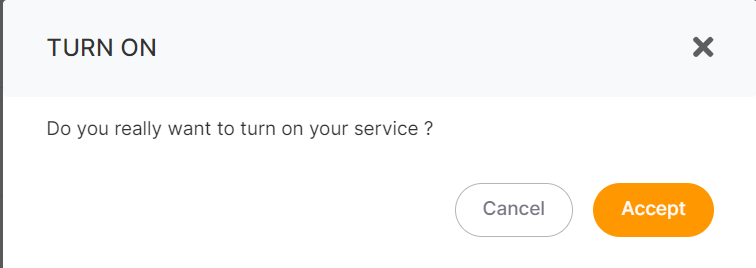](https://docs.elest.io/uploads/images/gallery/2023-10/7n4image.png)
After completing these steps, your service will become active within a matter of seconds.
To prevent service suspension due to insufficient credits, consider enabling the auto-refill setting. For detailed instructions on how to set up auto-refill, ***[please refer to this guide](https://docs.elest.io/books/billing/page/payment-options)***.
# Elestio Domain shows SSL expired or Deceptive Site ahead
**Current Status:** Resolved @ 2023-11-04, 07:11
**Resolution:** Google unflagged our domain in less than 24h in response to our appeal
**Date of incident:** 2023-11-03, 13:22
Dear Valued Customers,
We want to inform you about an incident that has recently affected our website or your services. Some regions are currently experiencing difficulties accessing our website, as Google has temporarily flagged our domain **\*.elestio.app** as unsafe, resulting in a "Deceptive Site Ahead" warning message. We understand that this may have caused some concern, and we would like to provide you with a clear explanation of the situation.
This issue stems from Google's Safe Browsing program, which is designed to protect users from visiting websites that may pose a risk to their online safety. While we have always prioritized the security and trustworthiness of our website, there has been an unfortunate misunderstanding that led to this warning.
Here's what we have done to address this situation:
1. **Immediate Investigation:** As soon as we became aware of the issue, we initiated a comprehensive investigation to determine the root cause of the warning.
2. **Review of Website Security:** We have reviewed our website's security protocols and scanned for any potential vulnerabilities or security threats to ensure the safety of your data.
3. **Communication with Google:** We have contacted Google to clarify the nature of our website and to resolve the issue. We are working closely with their team to have our domain unblocked as soon as possible.
4. **Customer Support:** Our customer support team is available to assist you with any concerns or questions you may have. Please do not hesitate to reach out if you experience any issues related to our website or your services
We want to assure you that our website is safe, secure, and has not been compromised. We value your trust and take the security of your information very seriously. We apologize for any inconvenience this may have caused and appreciate your understanding during this time.
As the situation progresses, we will keep you informed with updates regarding the resolution of this issue. Your safety and peace of mind are of the utmost importance to us, and we are committed to swiftly resolving this matter.
> **Note:** This incident will not have any impact on your custom domain. If you are currently using a custom domain with our services, rest assured that it will function as expected without any disruptions.
If your website does not currently have a custom domain and you wish to add one, please follow the steps provided [***here ***](https://docs.elest.io/books/security/page/custom-domain-and-automated-encryption-ssltls)to initiate the process.
Thank you for your continued support and trust in our services. We look forward to serving you without interruption as soon as this issue is fully resolved.
**Current Status: Resolved @ 2023-11-04, 07:11**
**Resolution:** Google unflagged our domain in less than 24h in response to our appeal
We are pleased to inform you that our services are now up and running smoothly again 🎉 We sincerely appreciate all of your support and cooperation during this period. Your understanding and patience have been invaluable to us.
Sincerely,
Team Elestio.
# How are operating system(OS) upgrades managed?
**Automatic Minor OS Updates:**
Minor operating system updates are automatically performed every Sunday by default. (Note: This **[setting ](https://docs.elest.io/books/services-dashboard/page/software-os-updates-configuration "setting")**can be modified or disabled in the service settings.)
**Major OS Updates:**
- For major updates, utilize our clone feature. This involves cloning the application stack and data from your current instance on an end-of-life OS (e.g., Ubuntu 22.04) and deploying it to a new instance with the latest OS version (e.g., Ubuntu 26.04).
- This cloning feature is accessible to all our customers.
- After cloning, review and ensure everything is functioning properly before redirecting your DNS from the old instance to the new one.
**In-Place Update (with Level 3 Support Plan):**
If you have a Level 3 support plan, our team can perform an in-place update on your existing instance (with up to 1 hour of downtime).
Feel free to contact our [**support team**](https://dash.elest.io/support/creation "support team") if you have any further questions or concerns about OS upgrades.
# Why did the payment fail when I was attempting to add credits?
##### Encountering difficulties with payment failures while attempting to add credits? Fear not, as we've outlined a comprehensive guide to help you address the issue:
#####
**Resolving Payment Failures: A Step-by-Step Guide**
If you've been experiencing payment failures while adding credits from our dashboard, here's what you need to do:
**1. Verify Card Details:**
Ensure the accurate input of your card number, expiry date, and CVV/CVC/CSC during the payment process.
**2. International Payments Check:**
Confirm whether your card allows international payments, as this could be a potential reason for the payment failure.
**3. Account Compatibility:**
Check that your account supports e-commerce transactions and ensure that the set limits are appropriate for a seamless payment process.
#####
**Possible Reasons for Payment Failure:**
If the aforementioned conditions are met and you're still facing issues, consider the following potential reasons:
**1. Unsupported Card:**
It's possible that the card you're using may not be supported for this type of transaction.
**2. Insufficient Funds:**
Ensure that your account has sufficient funds to cover the intended payment amount.
**3. Bank Declined Payment:**
The bank may have declined the card payment for security or other reasons.
For a more accurate understanding of the specific reason behind the payment failure, we recommend reaching out to [***Elestio's support.***](https://dash.elest.io/support/creation)
Our dedicated support team will provide precise information to help you successfully resolve the issue and get back to enjoying our services hassle-free. Feel free to contact us for any assistance you may need!
# How can project ownership or service billing be transferred to another user's account?
This guide explains how to transfer a project ownership from one Elestio account to another.
## Prerequisites
Before starting the transfer:
- The new owner must have an active Elestio account
- The new owner must be added as a member in the project with **Admin** or **Billing Admin** role
- The new owner must have sufficient credit for at least 1 month of service
- Each project can only have one owner
## Transfer Steps
### Step 1: Access Project Settings
Log in to your Elestio account and select the project you want to transfer. Click on the **Project Settings** tab.
[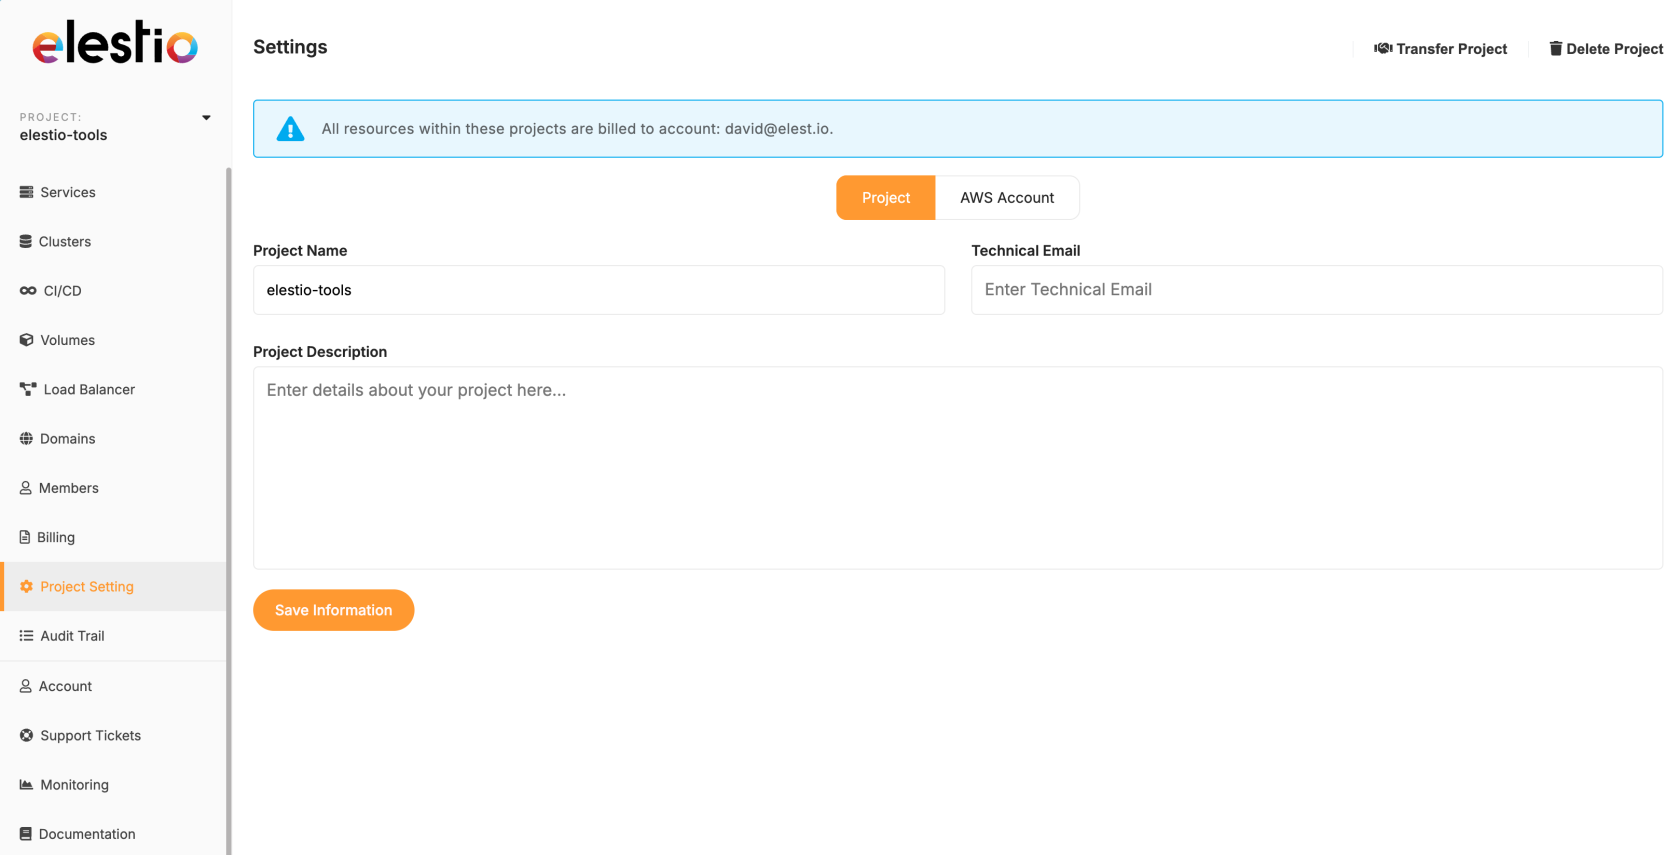](https://docs.elest.io/uploads/images/gallery/2025-09/screenshot-2025-09-07-at-13-28-00.png)
### Step 2: Start the Transfer
In the top right corner of the Project Settings page, click the **Transfer project** button.
[](https://docs.elest.io/uploads/images/gallery/2025-09/screenshot-2025-09-07-at-15-21-02.png)
### Step 3: Enter New Owner Email
A popup window will appear. Enter the email address of the new owner in the **New Owner Email** field.
[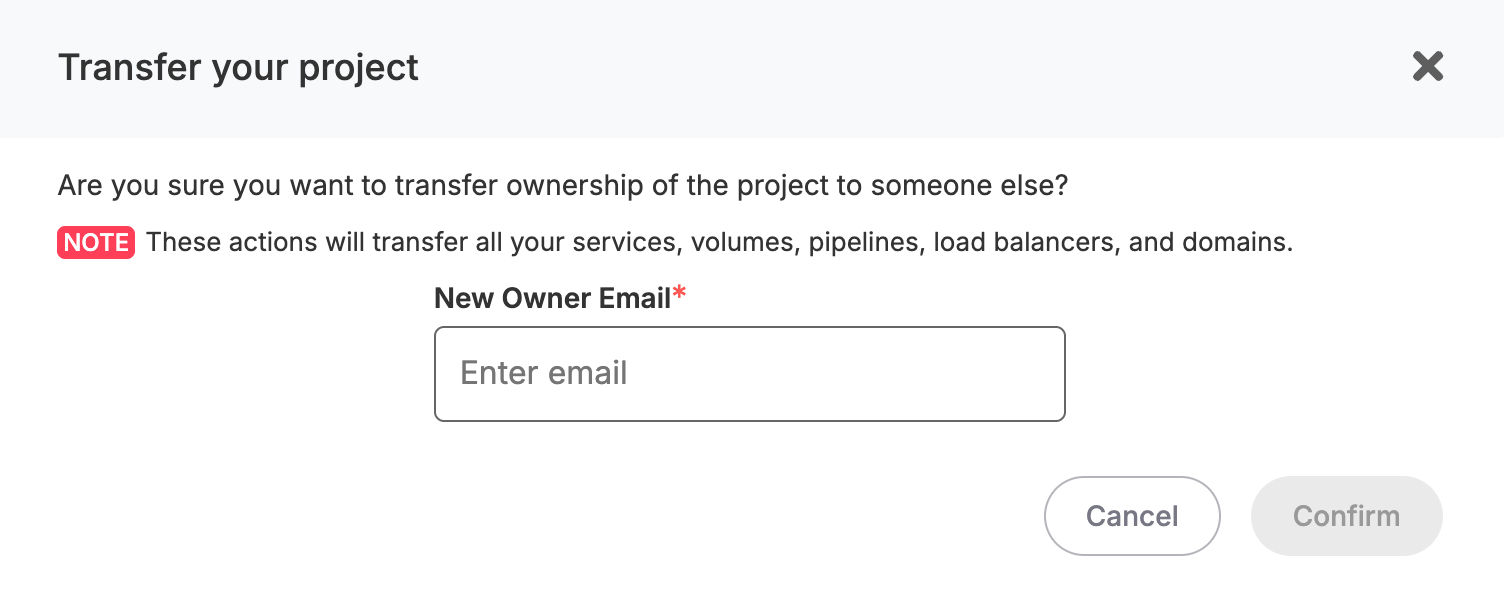](https://docs.elest.io/uploads/images/gallery/2025-09/screenshot-2025-09-07-at-15-21-45.png)
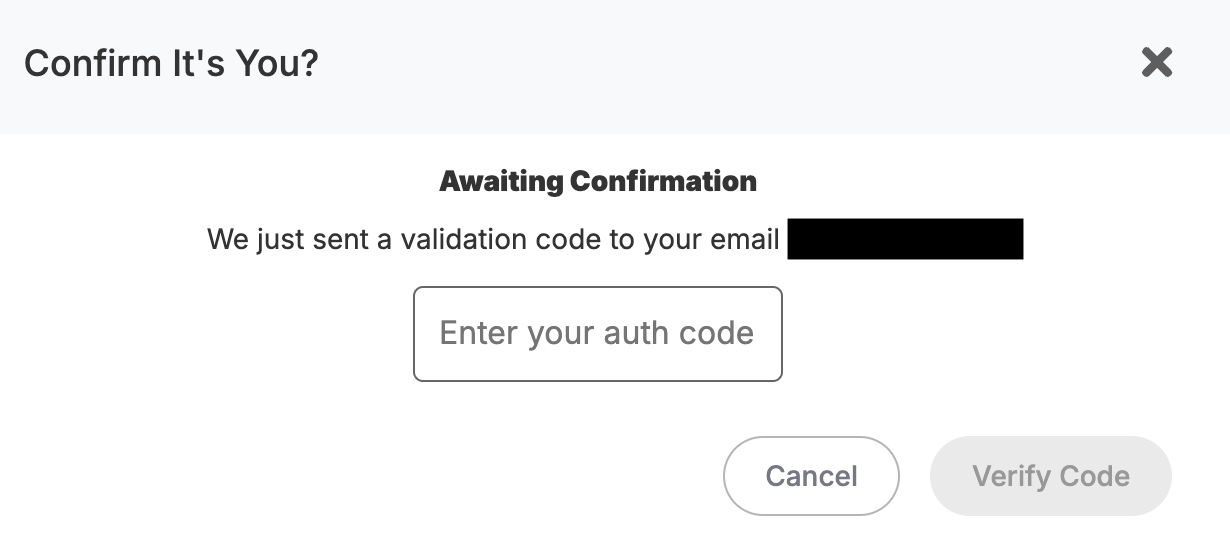
### Step 4: Confirm Your Identity
For security, you'll need to:
1. Enter your current account password
2. Enter the verification code sent to your email
[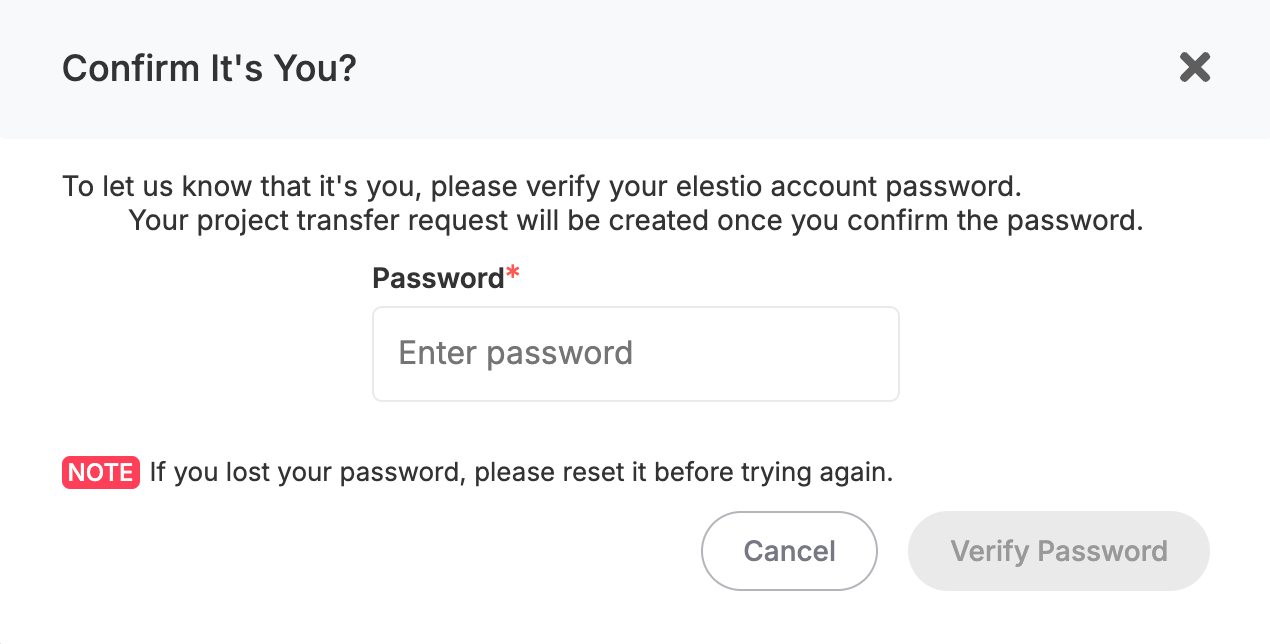](https://docs.elest.io/uploads/images/gallery/2025-09/71yscreenshot-2025-09-07-at-13-32-25.png)
### [](https://docs.elest.io/uploads/images/gallery/2025-09/screenshot-2025-09-07-at-13-38-04.png)
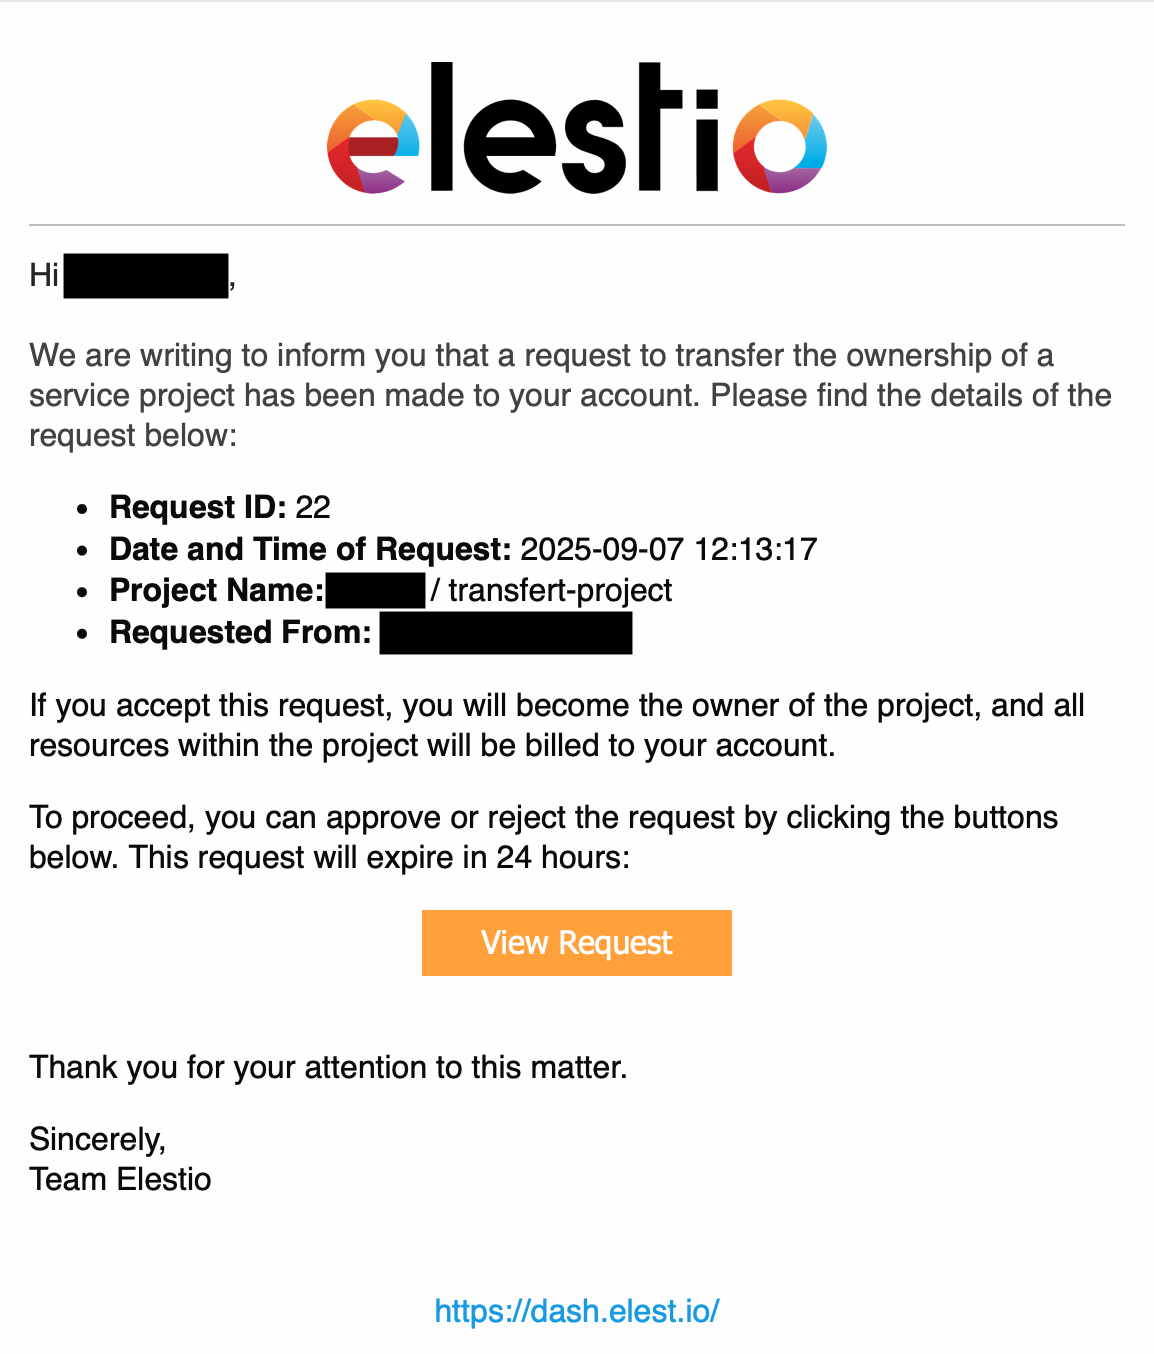
### Step 5: New Owner Confirmation
The new owner will receive an email notification. They must accept the transfer to complete the process.
[](https://docs.elest.io/uploads/images/gallery/2025-09/screenshot-2025-09-07-at-15-13-37.png)
## Important Notes
- The transfer is not complete until the new owner accepts it via email
- Once transferred, all billing responsibilities move to the new owner
- Make sure the new owner has enough credit before initiating the transfer
# How Does Elestio’s Pricing Work?
Elestio offers a flexible cloud hosting platform that allows you to deploy and manage applications with ease. Unlike traditional cloud providers, Elestio's pricing is based on an **hourly billing system** with **prepaid credits**, providing transparency and control over your expenses.
---
## 1. Hourly Billing with Prepaid Credits
Elestio operates on an **hourly billing model**, meaning you are charged for every hour a service exists on your account.
- **Billing continues until deletion:** Shutting down or powering off a service does **not** stop billing.
- **Prepaid credits:** You must add prepaid credits to your account. The hourly costs are automatically deducted.
- **Service plan determines cost**: Pricing is fixed by the plan and does not depend on usage, traffic, or resource consumption.
---
## 2. Service Plans and Pricing
Elestio offers a variety of service plans to cater to different workloads. Each plan specifies the number of CPUs, RAM, storage, and the associated **hourly cost**.
##### Netcup Plans (Hourly & Monthly Approximate Cost)
| Plan | CPUs | RAM | Storage | Hourly Cost | Monthly Cost\* |
|---|
| NC-MEDIUM-2C-4G | 2 | 4 GB | 60 GB | $0.0219 | $16 |
| NC-LARGE-4C-8G | 4 | 8 GB | 100 GB | $0.0411 | $30 |
| NC-XLARGE-8C-16G | 8 | 16 GB | 200 GB | $0.0753 | $55 |
| NC-2XLARGE-16C-32G | 16 | 32 GB | 400 GB | $0.1534 | $112 |
| NC-3XLARGE-16C-64G | 16 | 64 GB | 600 GB | $0.2315 | $169 |
\*Monthly cost is an approximation assuming continuous usage.
> Note: Pricing is **fixed per plan** and does **not** depend on traffic, CPU usage, or number of users.
---
## 3. Support Plans
Support plans are also **charged hourly** and can **change once a month**.
- **Support Levels:** Level 1 (Free), Level 2 ($50/service/month), and Level 3 ($200/service/month).
- **Minimum Period for Level 2 & 3**:
- For Level 2 and Level 3 support plans, you must keep your service for at least **two weeks**.
- If you delete a service **within the first two weeks**, you will be charged a fee:
- Level 2: $25
- Level 3: $100
- Support plans provide features such as service support, high retention periods, automated Borg backups, snapshots, uptime guarantees, and priority assistance.
---
## 4. Billing Continuity
- **Hourly billing** continues regardless of the service power state.
- **Deleting a service** is the only way to stop charges.
- **Partial hours are billed as full hours**, ensuring predictable costs.
---
## 5. Cost Management Tips
1. **Choose the right service plan** – avoid over-provisioning.
2. **Track prepaid credits** – refill before running out.
3. **Delete unused services** – to stop hourly charges.
4. **Plan support subscriptions;** consider a minimum two-week period for Level 2 and 3 plans.
---
## 6. Conclusion
Elestio’s pricing model provides **flexibility, predictability, and control**. By understanding hourly billing, prepaid credits, service plans, and support plan rules, you can manage your cloud resources efficiently and avoid unexpected charges.
For detailed pricing and plans, visit the **[Elestio Pricing Page](https://elest.io/pricing#pricing)**.
# How to host a static frontend website on elestio
**Here is how you can host a static website on Elestio using our CICD service**
This is useful if you want to deploy a static website from a zip file or from a bunch of files, if instead your files are in a [Git repository please check this tutorial instead](https://docs.elest.io/books/cicd-pipelines/page/deploy-your-first-cicd-pipeline-on-elestio).
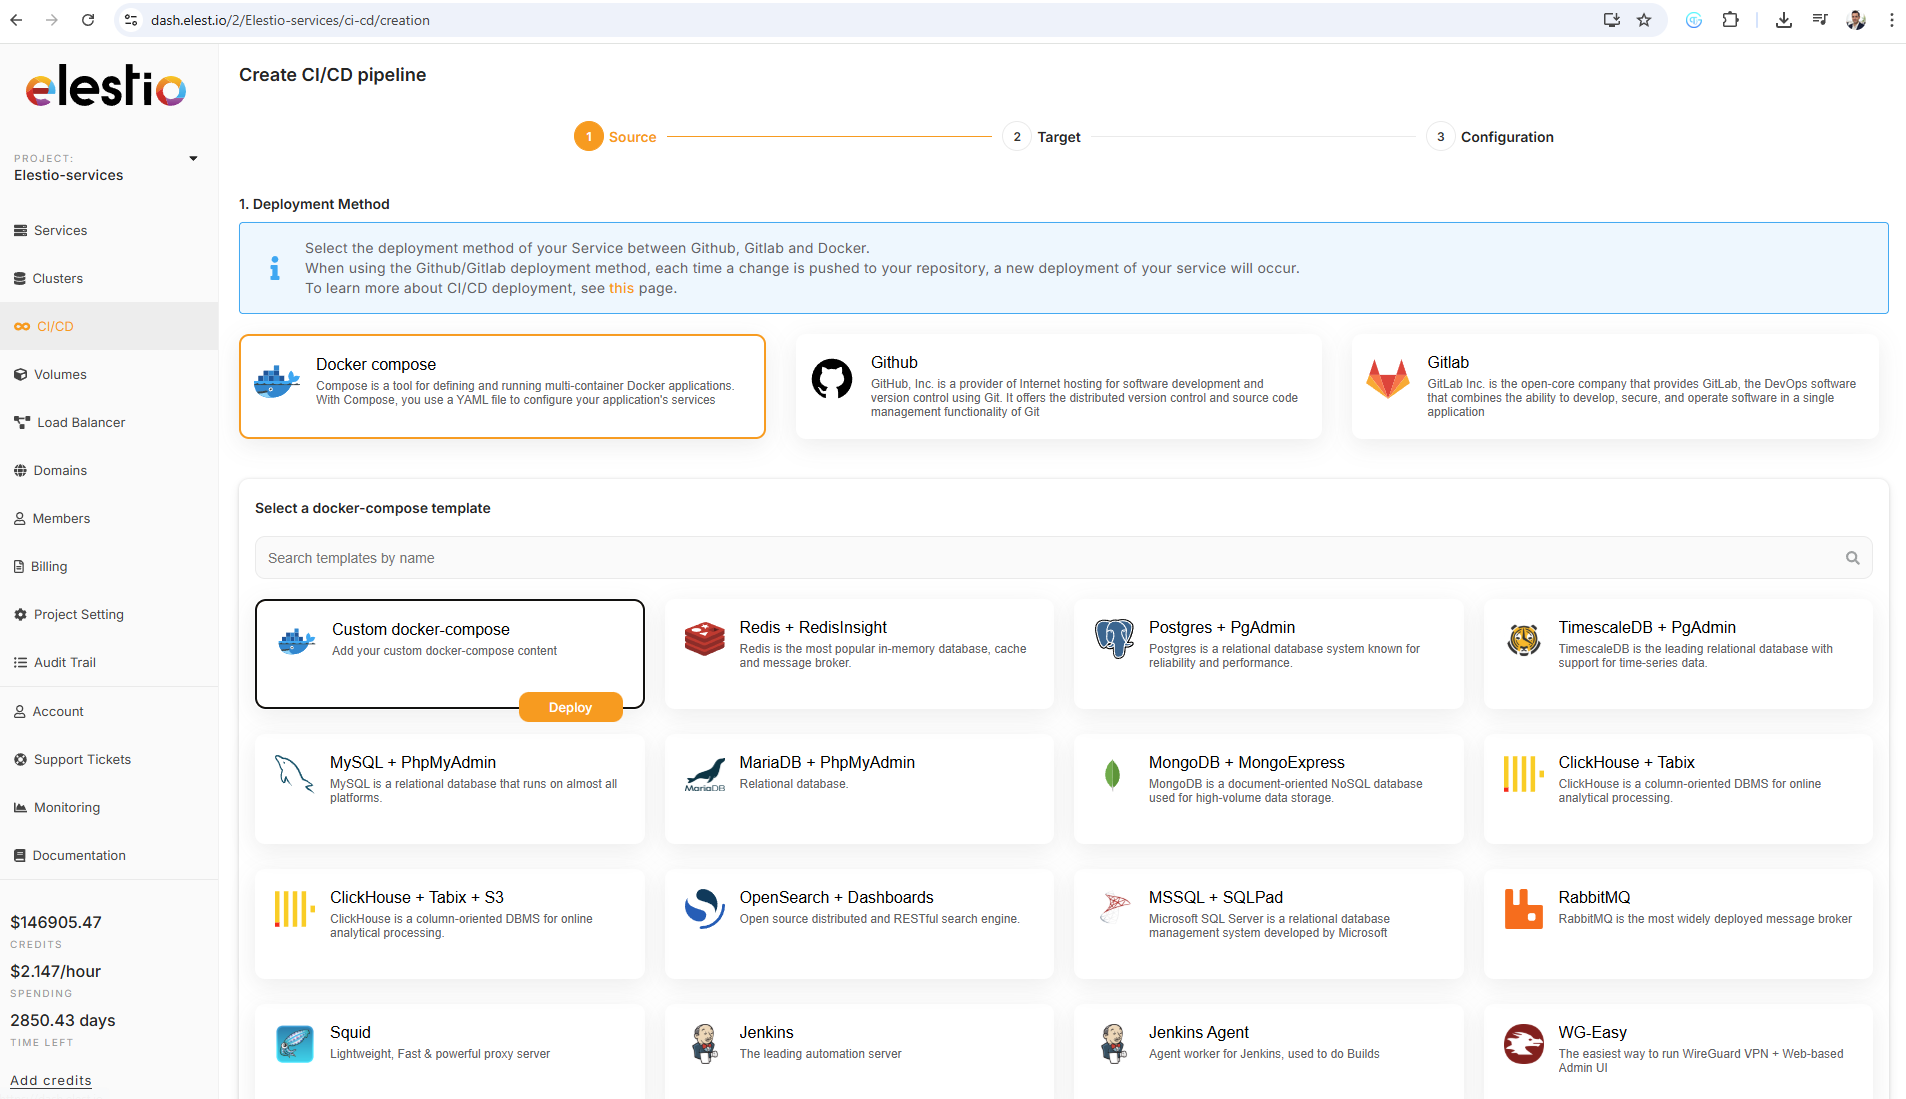
**1)** Open [elestio dashboard](https://dash.elest.io/) and click on CI/CD on the left menu, there click on **Docker Compose > Custom docker compose**
[](https://docs.elest.io/uploads/images/gallery/2026-01/image.png)
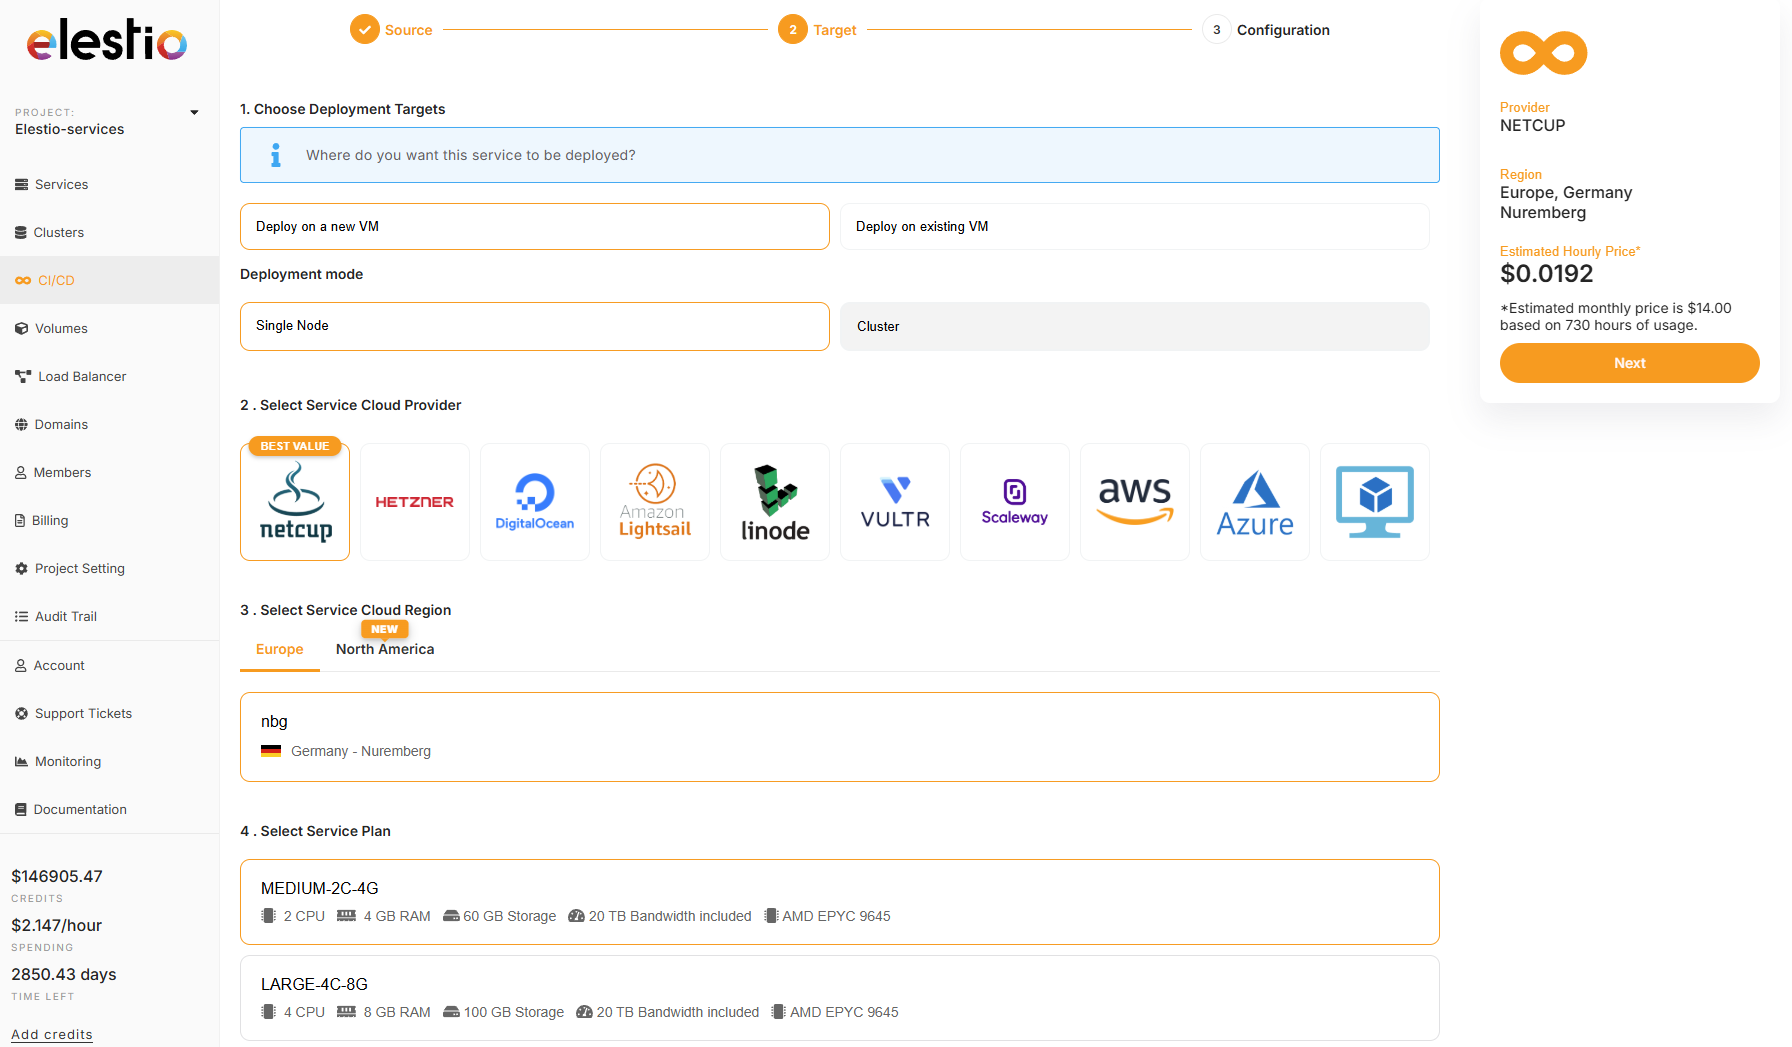
**2)** on the next step select Deploy on a new VM and select your target cloud provider/region (we recommend netcup & hetzner) then click on the Next button on the right side
[](https://docs.elest.io/uploads/images/gallery/2026-01/ZPEimage.png)
**3)** Past in the docker compose the custom stack below then click on Create CI/CD pipeline
[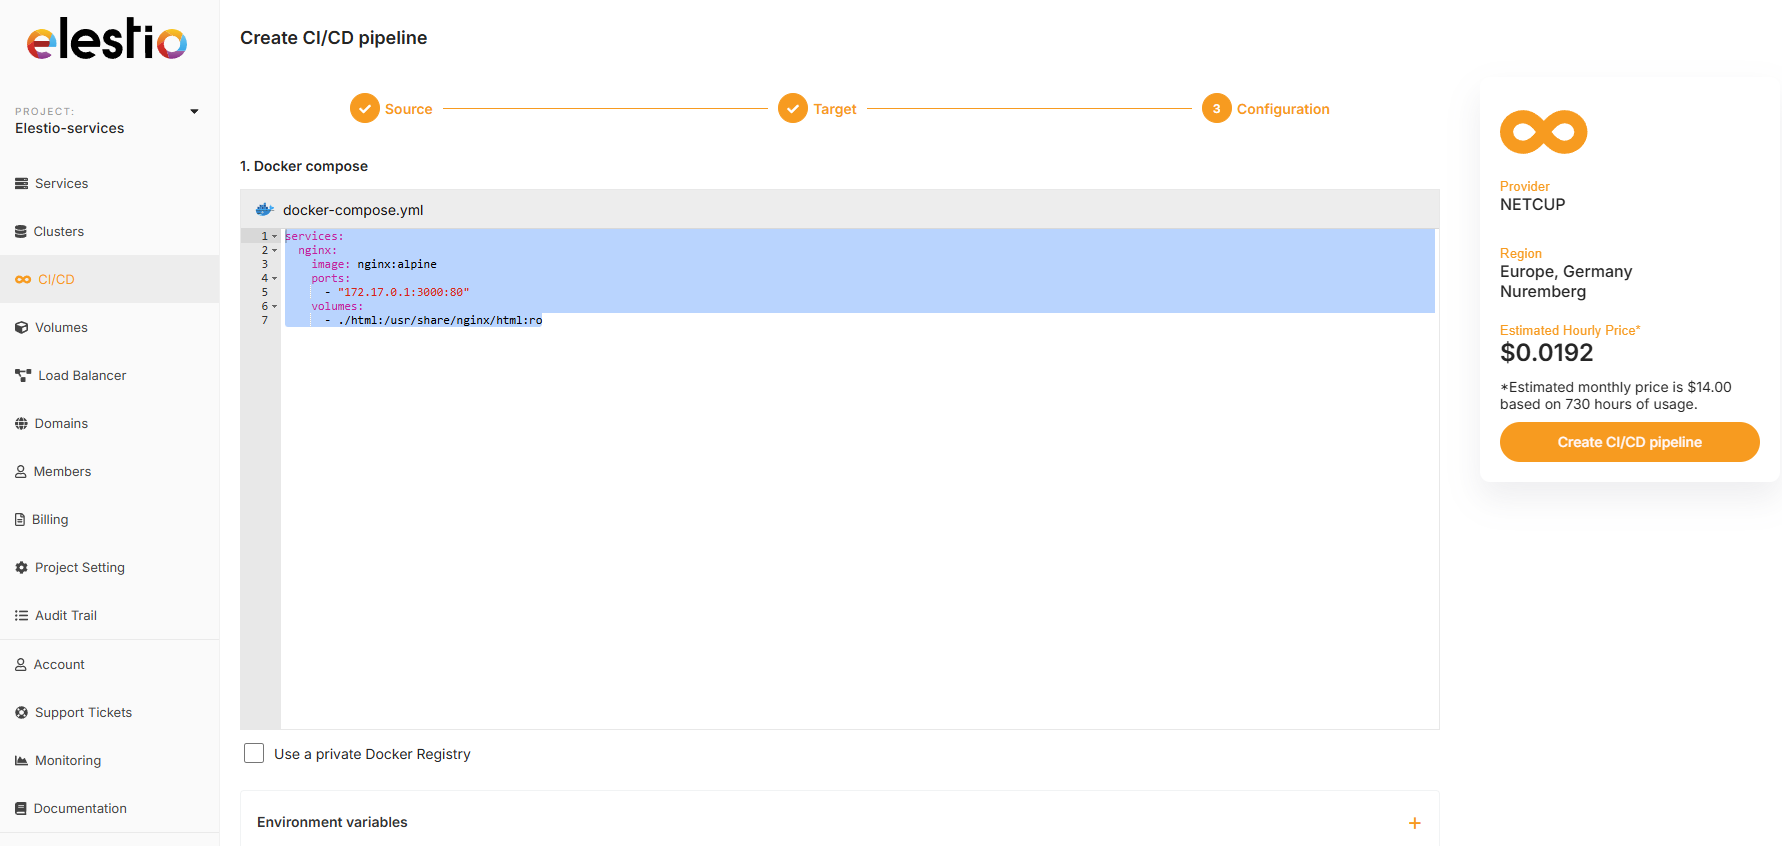](https://docs.elest.io/uploads/images/gallery/2026-01/BTXimage.png)
```
services:
nginx:
image: nginx:alpine
ports:
- "172.17.0.1:3000:80"
volumes:
- ./html:/usr/share/nginx/html:ro
```
**4)** Few minutes later the service will be deployed, then you can then connect with tools provided in Elestio service > VSCode or File Explorer, from there you can place your files in /opt/app/html/ and they will be served on the default url of the pipeline.
**5)** You can also configure a custom domain for your pipeline by following [this documentation](https://docs.elest.io/books/cicd-pipelines/page/custom-domains-on-cicd-pipelines).
# How to Enable Root Login on Your VM (BYOVM)
Elestio’s **BYOVM (Bring Your Own VM)** workflow requires **direct root-level SSH access** to the target host. Many cloud providers disable or restrict root login by default; this document outlines how to safely re-enable it while maintaining a strong security posture.
#### Architectural Requirement for Root Access
Elestio performs **low-level system provisioning and lifecycle management** directly on the host. This includes:
- Writing configuration and state under `/root/` other privileged paths
- Installing and managing system packages and daemons
- Modifying network configuration, firewall rules, and kernel-adjacent settings
- Executing privileged deployment and orchestration tasks
- **Inconsistent `sudo` availability and behavior** across distributions and cloud images
- **Hard dependencies on root-owned paths** (e.g., `/root`, system-level configs)
- **Increased operational complexity** from privilege escalation (TTY requirements, environment differences, edge cases)
- **Higher failure surface** during automated provisioning
- **Password authentication is permanently disabled**
- **Only SSH key-based authentication is permitted**
- **Root login is restricted to key-based access (`prohibit-password`)**
- No password-based login is possible under any circumstances
- Attack vectors such as brute-force or credential stuffing are eliminated
- Access is strictly limited to holders of the corresponding private key
- `prohibit-password`
- ✅ (allows) SSH key authentication
- ❌ (blocks) password authentication
| Provider | Root Access Default | Notes |
|---|
| AWS EC2 (Ubuntu) | Blocked | Requires `authorized_keys` fix |
| AWS EC2 (Amazon Linux) | Blocked | Requires `authorized_keys` fix |
| Google Cloud | Blocked | Requires `authorized_keys` fix |
| Azure | Blocked | Controlled via `sshd_config` |
| DigitalOcean | Enabled | No action required |
| Hetzner | Enabled | No action required |
| Vultr | Enabled | No action required |
| Linode (Akamai) | Enabled | No action required |