Getting started
- What is Elestio?
- Create an account
- Create a new service
- Newsletter
- Create a new service with Bring your own AWS Account (BYOAWS)
- How to Create AWS Access and Secret Key for BYOAWS
- How to Deploy or Integrate a Service with Tor Onion on Elestio
What is Elestio?
Elestio is the simplest way to run Open Source Software.
Deploy any one of over 400+ supported open-source software distributions on a dedicated instance in less than 5 minutes.
Elestio's platform takes care of installation, configuration, encryption, backups, software & OS updates, live monitoring, alerts, and more!
Some companies pay hundreds to thousands of dollars per month in DevOps costs to maintain open-source software projects. Unless you have a top-notch team, it's still an error-prone process: bad updates and migrations happen more often than anyone wants.
Even skilled administrators use our managed services, saving hours and days of work needed each month to maintain their services while avoiding the risks related to manual migrations (downtime, human error, loss of data).
With Elestio you can easily manage your fleet of open-source software solutions on autopilot.
Elestio guarantees your backups are up to date and that you can restore your OS or data from a backup at any time to get back up and running in a worst-case scenario.
This "Get Started" video series is the best method to learn how to Deploy Open-Source Software on Elestio:
Create an account
To create a new account, first, go to elestio signup page
Securely connect elestio to your existing GitHub, GitLab, or Google accounts using OAuth2.

Or sign-up using any valid email address:
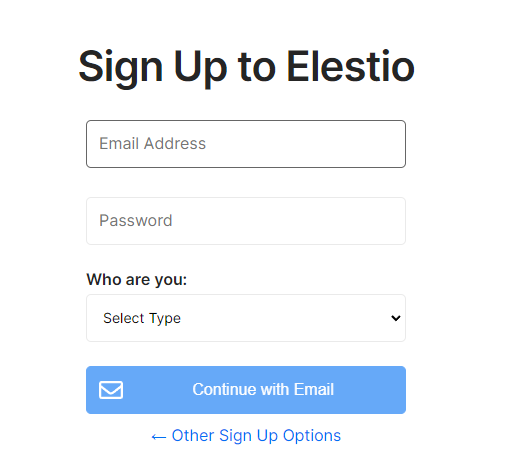
MFA is enabled by default for new accounts created with an email address, and a new code is sent to your email address each time you log in. If you use OAuth, the security of your elestio account is determined by the security of the login provider you choose (Google, GitHub, GitLab), so make sure MFA is enabled!
TOTP-based MFA from Authy, Google, and Microsoft authenticator is also supported by Elestio. You can manage these after signup inside the account setting. Click here to know more!
Create a new service
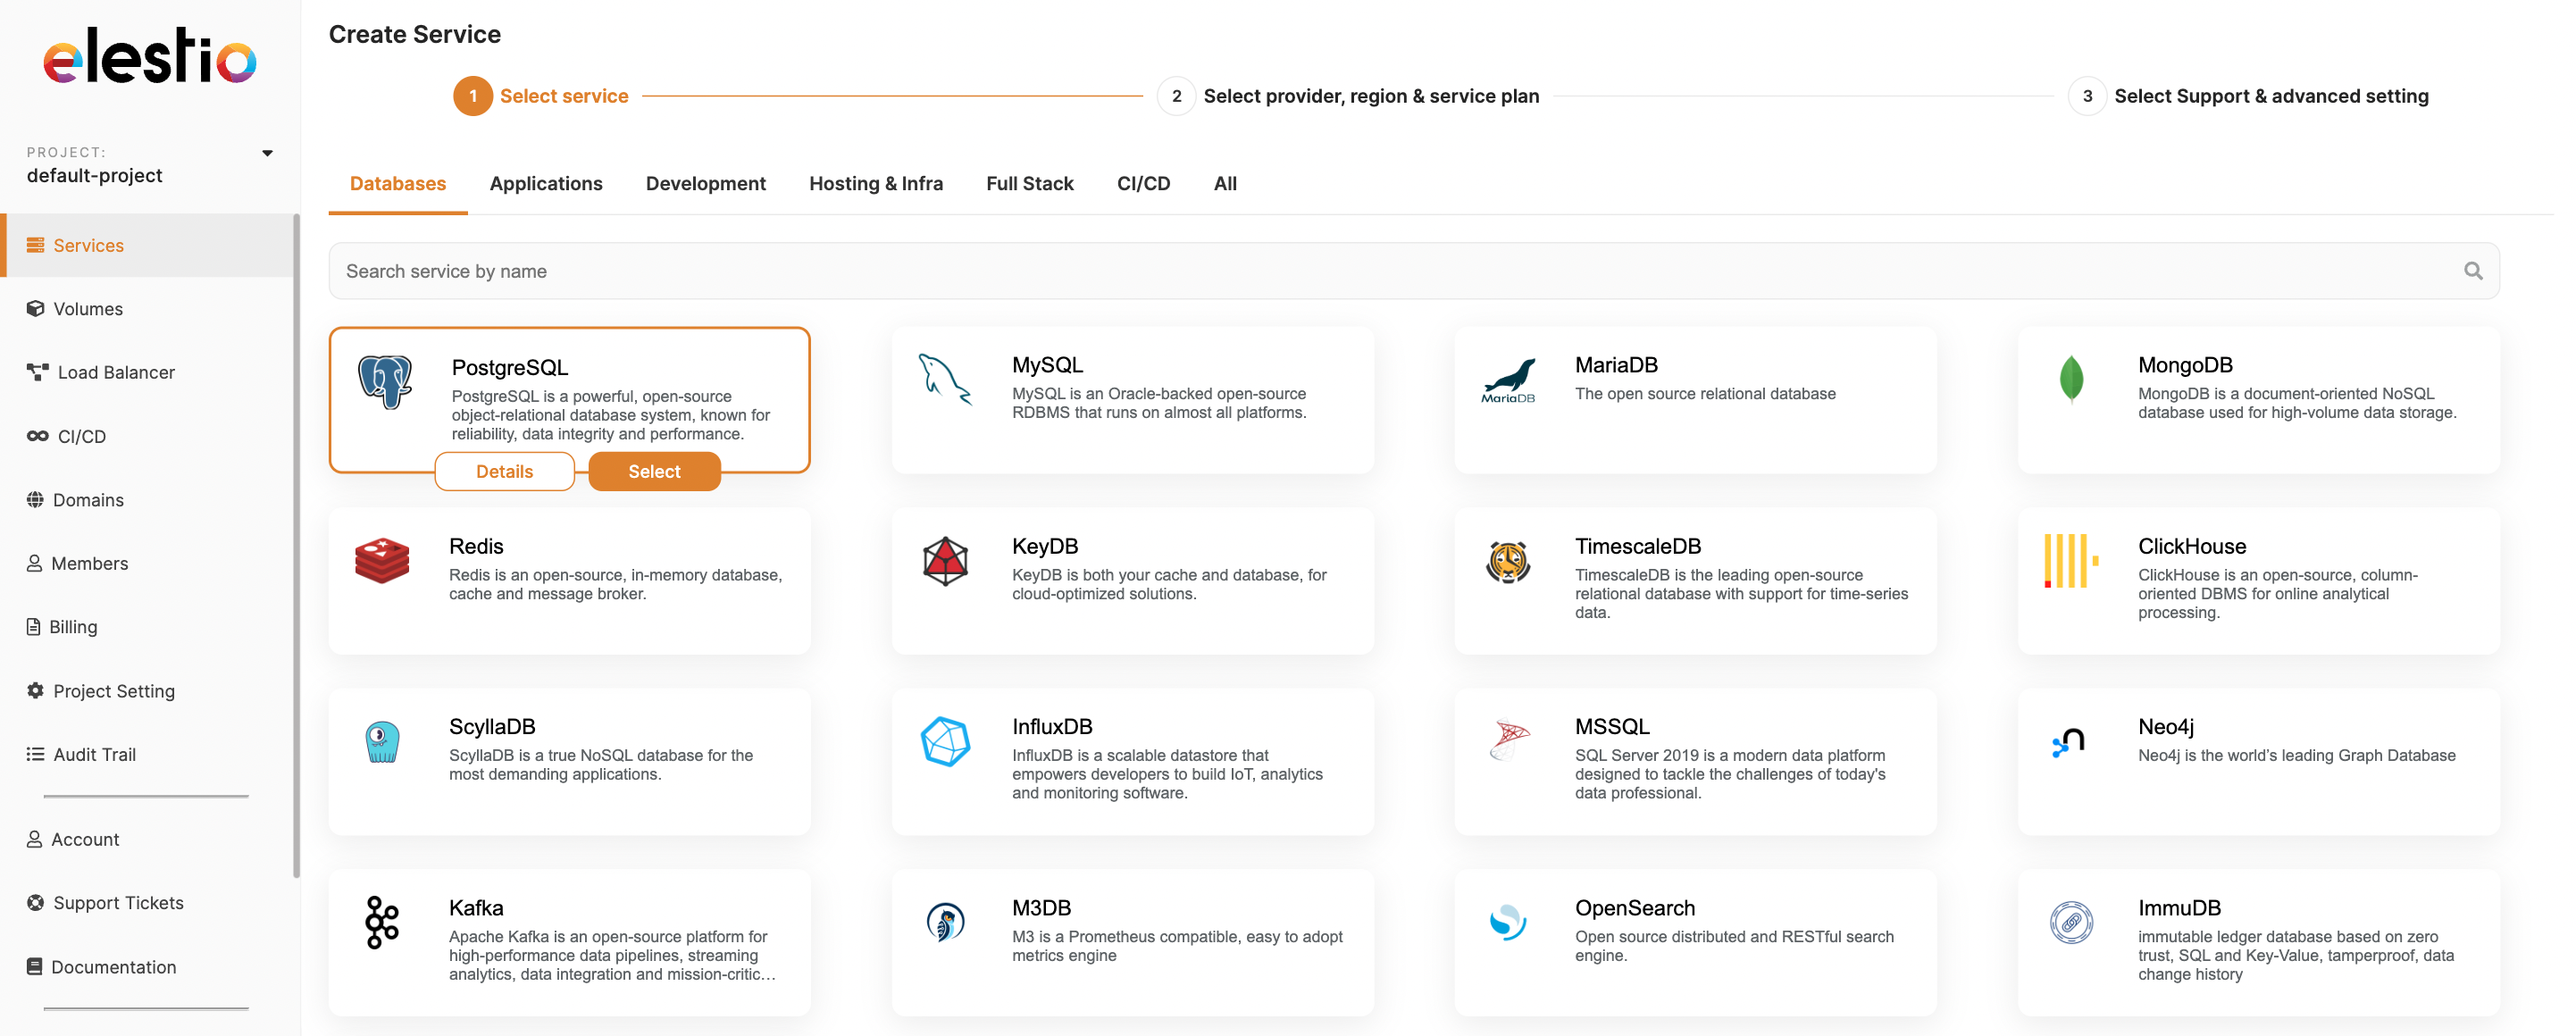
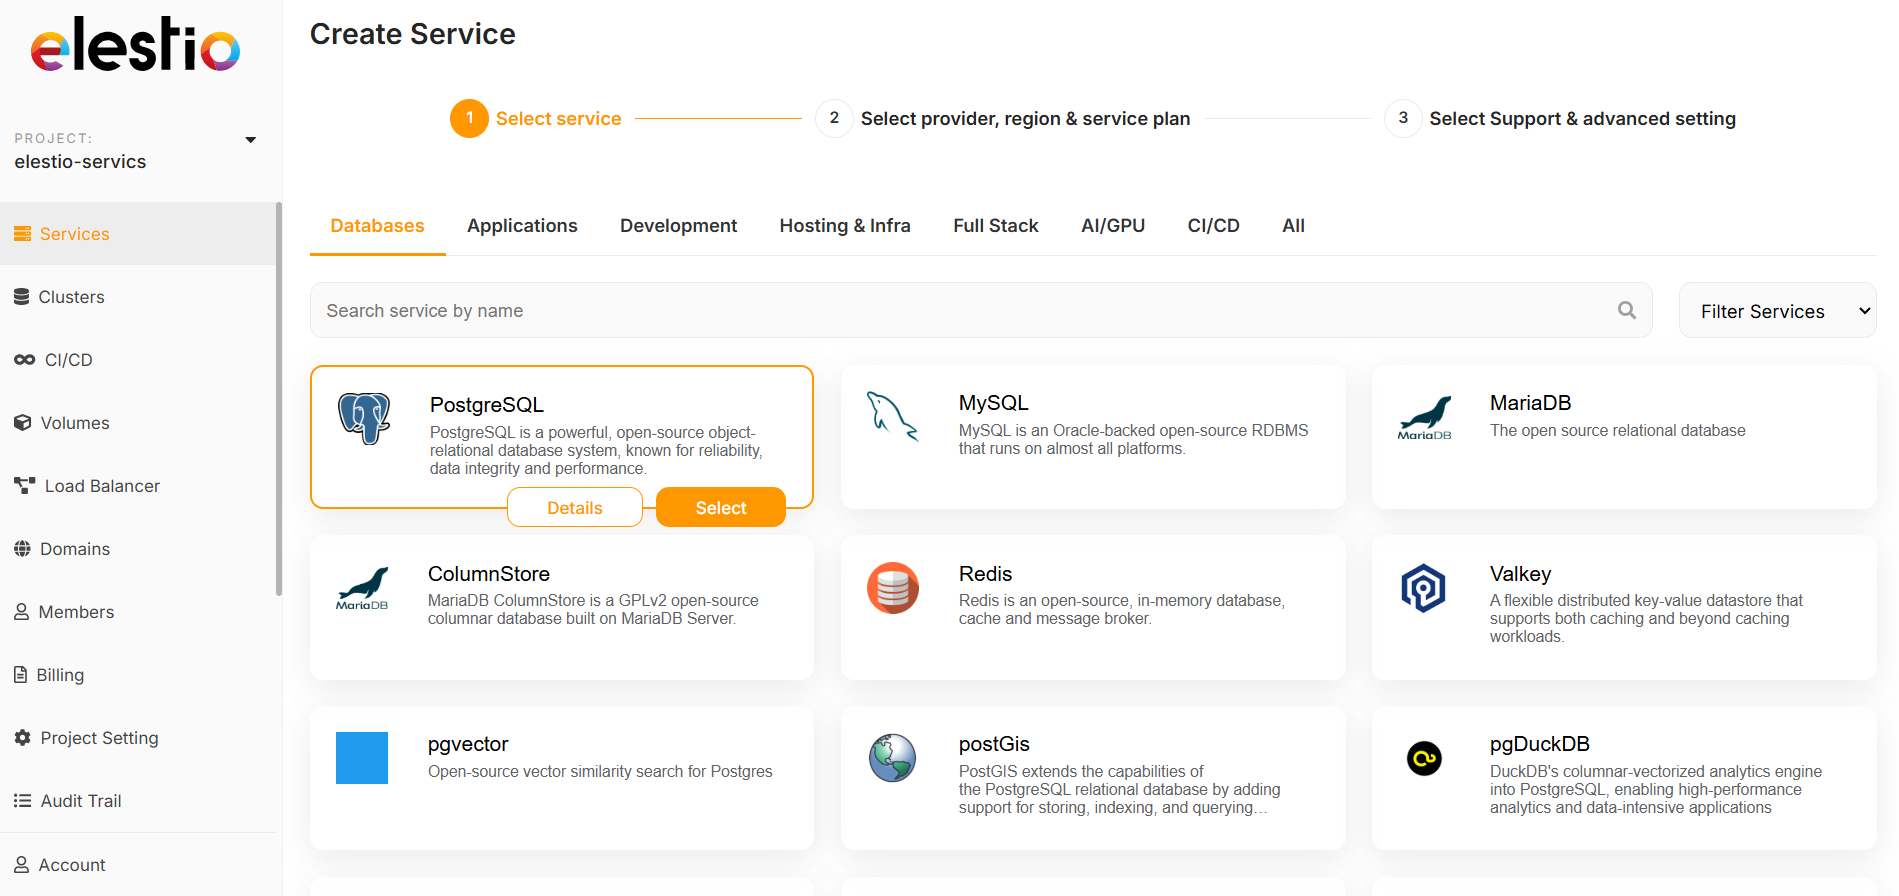
1. To create a new service, first open Elestio Dashboard

Use the category tabs to filter the selection of software.
Choose the template you want to deploy and click the select button for the next step. If you want to learn more about that template, click the details button.
2. Select a provider, region, and data center in which to deploy your service
If you want to deploy the service on AWS, please see our documentation on how to do so.
3. Select the instance size that works for you
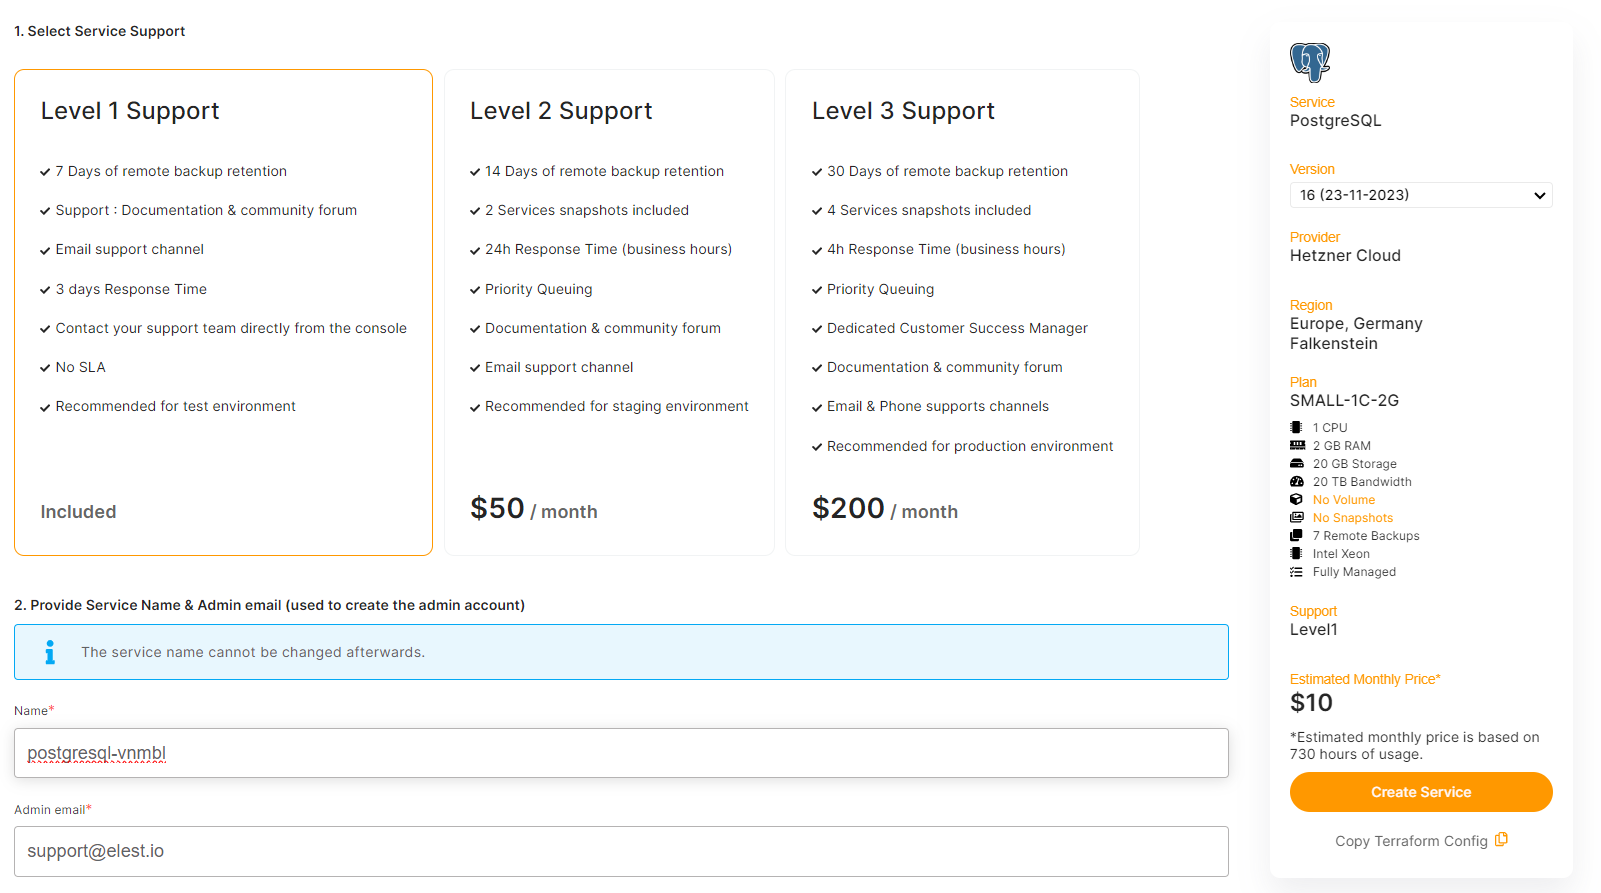
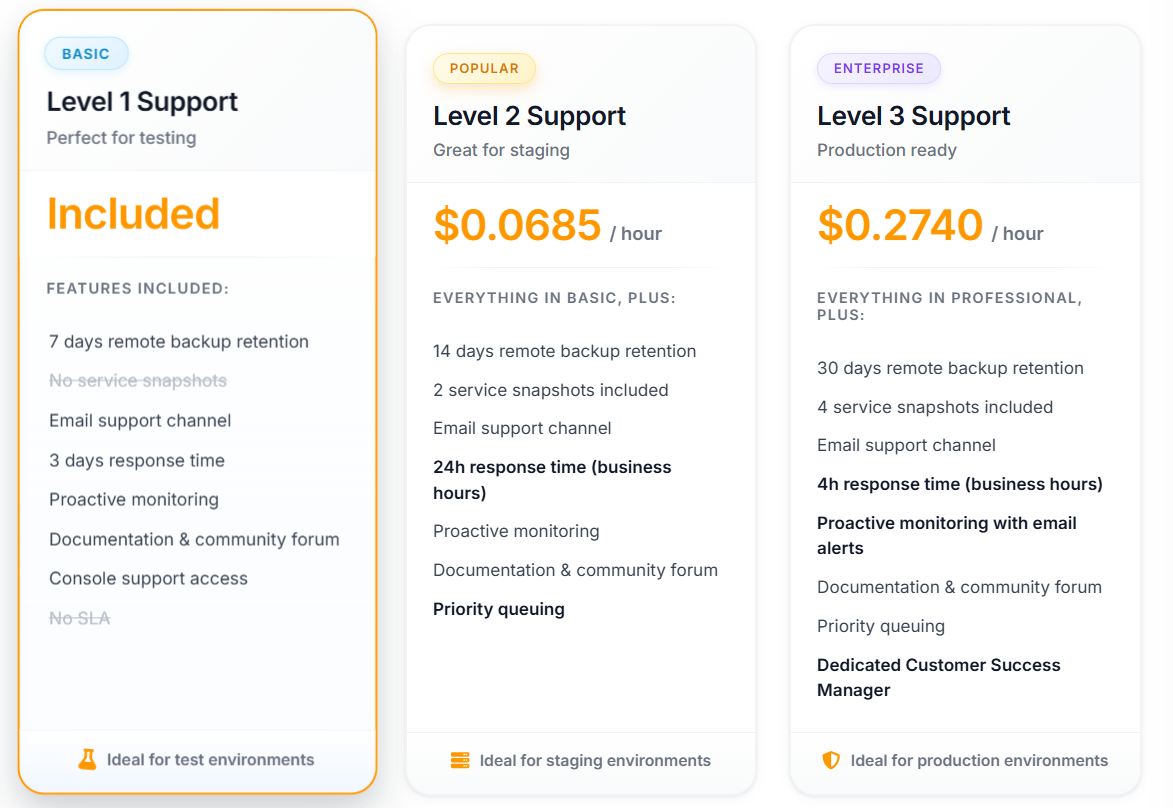
5. Set the support plans, and maintenance windows for OS & software updates and give a name to your new service
OS updates include updates to the Linux kernel, security patches, and other important maintenance to keep your instance running smoothly.
Software updates update the code of the open-source application itself. We respect semantic versioning, so we will only implement minor and patch updates, in order to avoid non-breaking changes.
Maintenance windows are specified in UTC
6. Click the "Create Service" button on the right when you are ready to deploy

7. After a few seconds your new service will appear in the list with a status: "Service is in deployment". It should only take 2-3 minutes before your service will be ready to use.
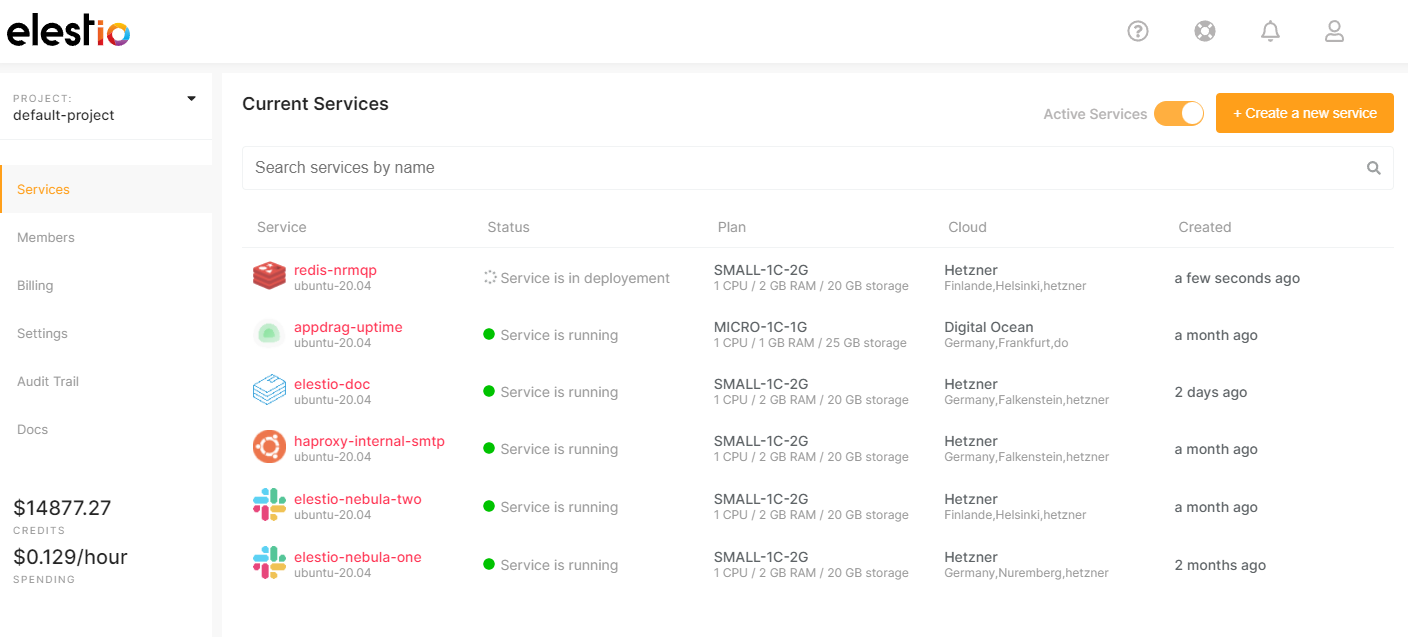
Once your service is ready you will get an email with details about the deployment of your software.
The URL and credentials to access the web UI or database application are also available in the Service Overview
Get started on the elestio dashboard, or read more about it in our documentation.
Newsletter
You can get the most recent information about Elestio features, supported software, and tips by subscribing to the elestio newsletter.

You can subscribe to the elestio newsletter during sign-up by checking the box (Sign up for our newsletter) and later manage subscribed unsubscribes from your elestio account settings.
How to Subscribe to the Newsletter:
To unsubscribe from the newsletter, follow these steps:
Create a new service with Bring your own AWS Account (BYOAWS)
To create a new service, first, open Elestio Dashboard, then go to services from the left sidebar and click the button to create a new service.
-
The first step is to choose a template or service to deploy, then click Deploy to proceed to the next step.
We offer more than 400 supported software templates, so you can pick the one you want to use. If you want to learn more about a specific template before using it, click the Details button. All of the templates and their details are also available on our managed services page.
Use the category tabs to filter the selection of software.
-
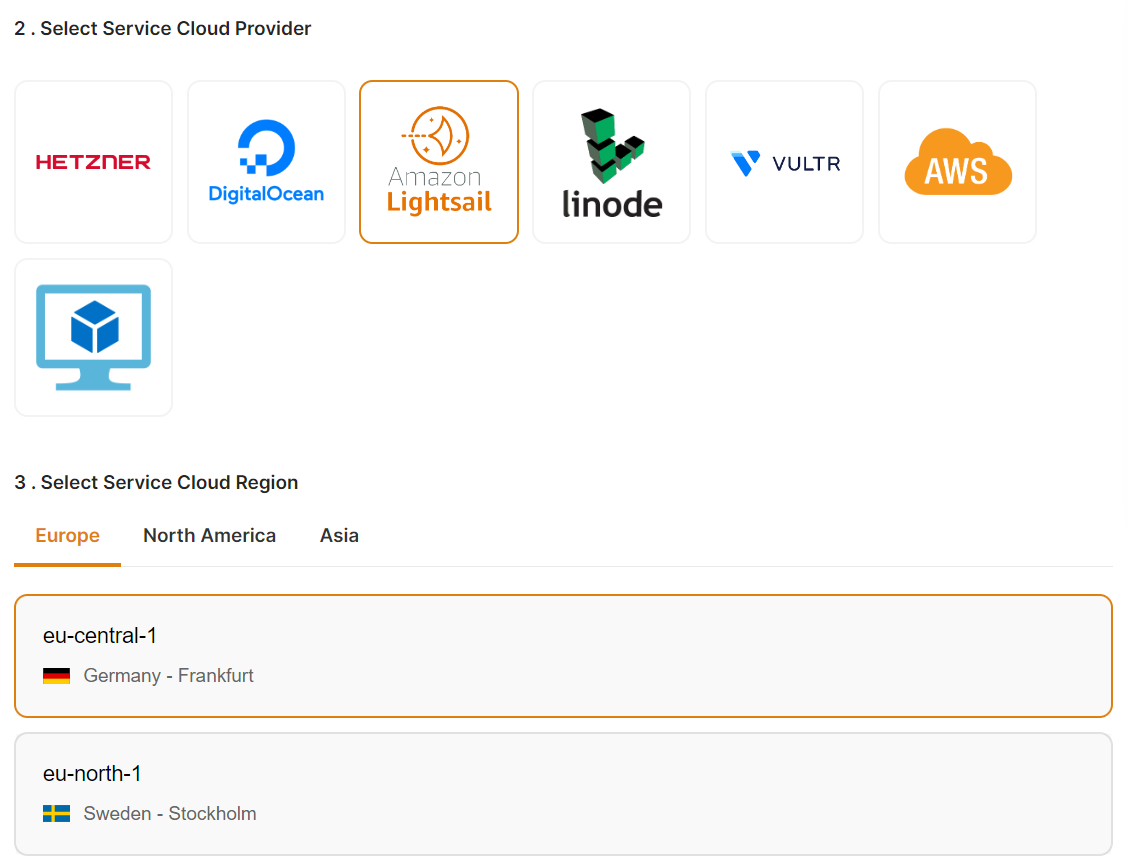
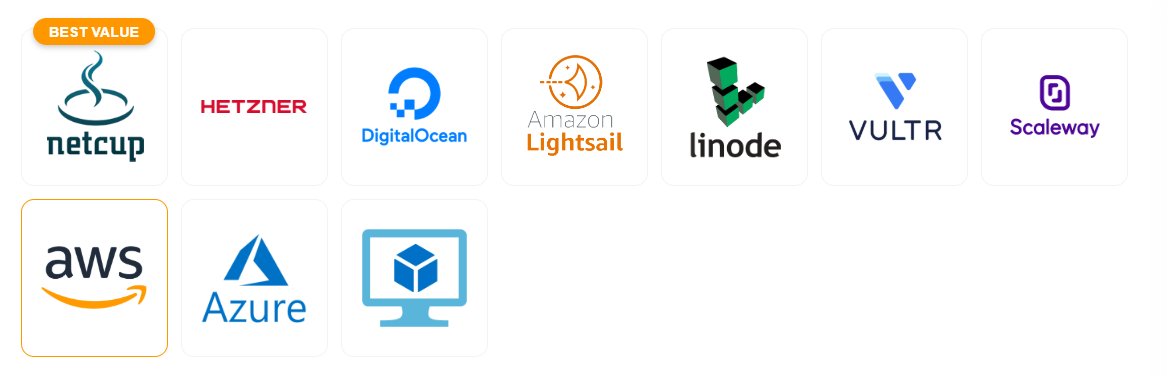
Select Service Cloud Provider
We provide 9 cloud service providers as well as Bring Your Own VM. You can choose AWS from this list.
Hetzner, Digital Ocean, LightSail, Linode, and Vultr providers' services are deployed on Elestio accounts, whereas AWS is Bring Your Own AWS account, so all of the services are deployed in your own AWS account.
-
Now configure your AWS account with Elestio. We offer two types of connections: simple and access/secret keys.
Choose the Access/Secret key way to connect your AWS account.
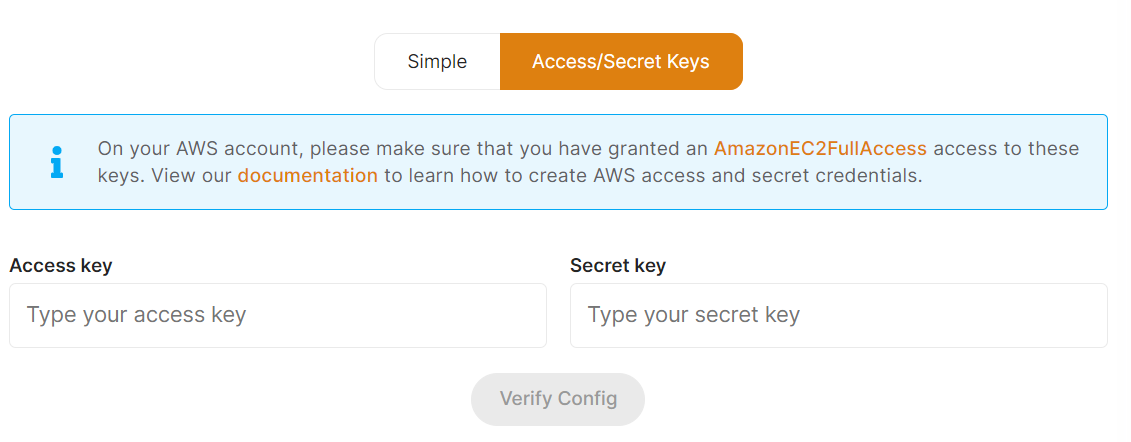
View our documentation to learn how to create AWS access and secret credentials.
Refer to the AWS documentation for guidance if you'd like to attach the IAM Instance Profile Role with SSM permissions to your EC2 instance.
Enter your AWS Account AmazonEC2FullAccess access key and secret key here, then click the Verify button to validate your AWS access credentials.
Anytime you've configured your AWS account in the project settings, you can update your AWS Account Access and Secret credentials by choosing the Project Settings option from the left sidebar. Visit our documentation for more information.
-
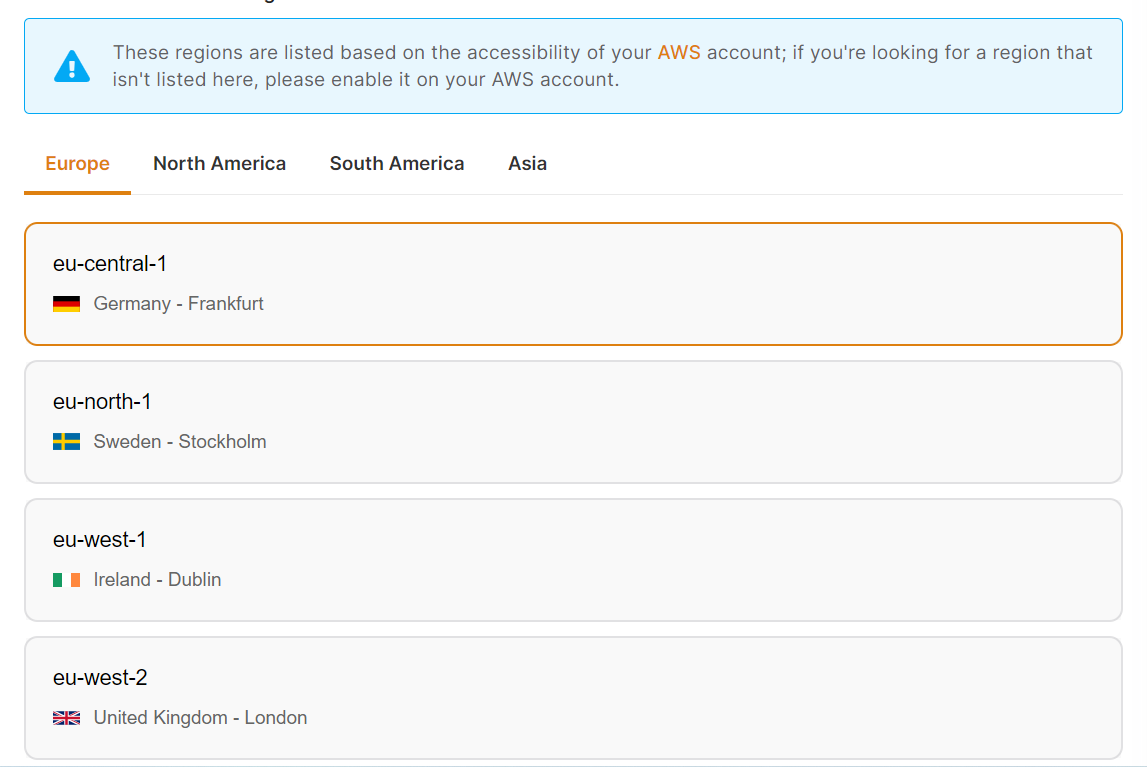
Select Service Cloud Region
-
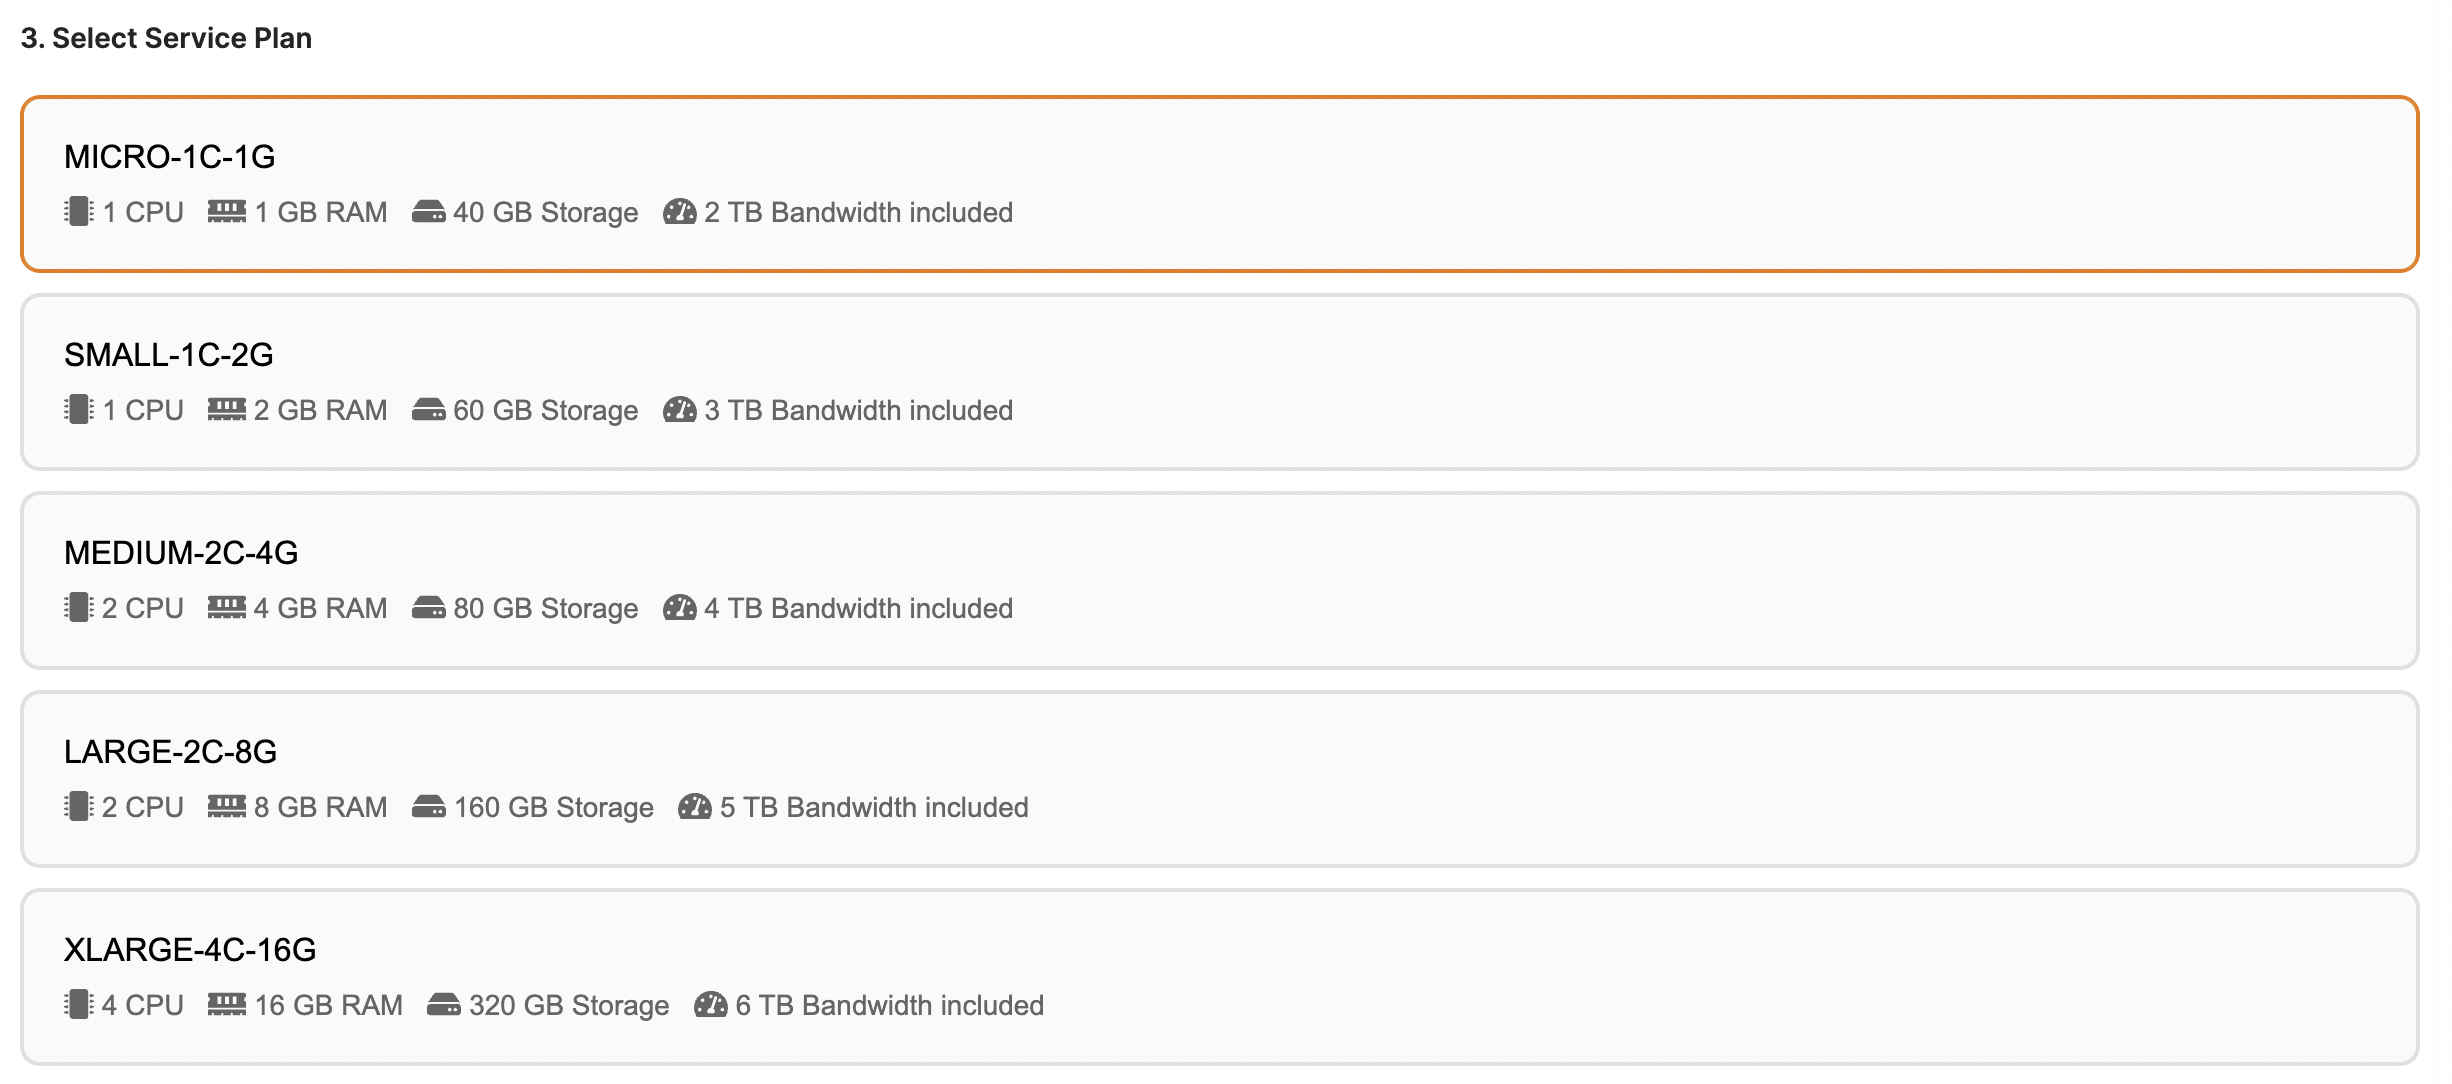
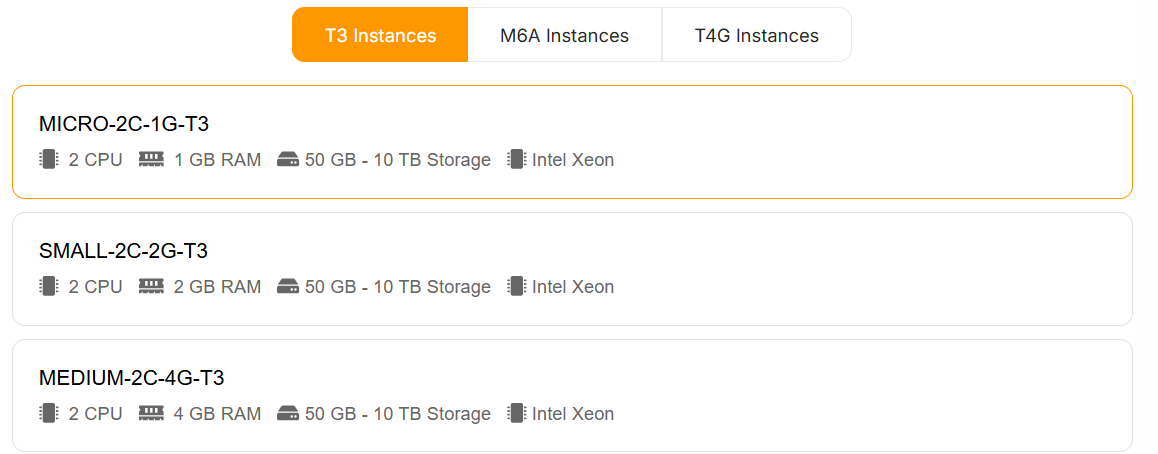
Select Service Plan
You can view a detailed list of all the AWS EC2 plans we offer.
-
Choose the Disk Storage Size
By default, we configure it with 50 GB, but you can change it as needed between 50 GB and 10 TB.

You can resize your disc size after deployment at any time by clicking the Update Volume button in the Main volume section of the services overview. Visit our documentation for more information.
-
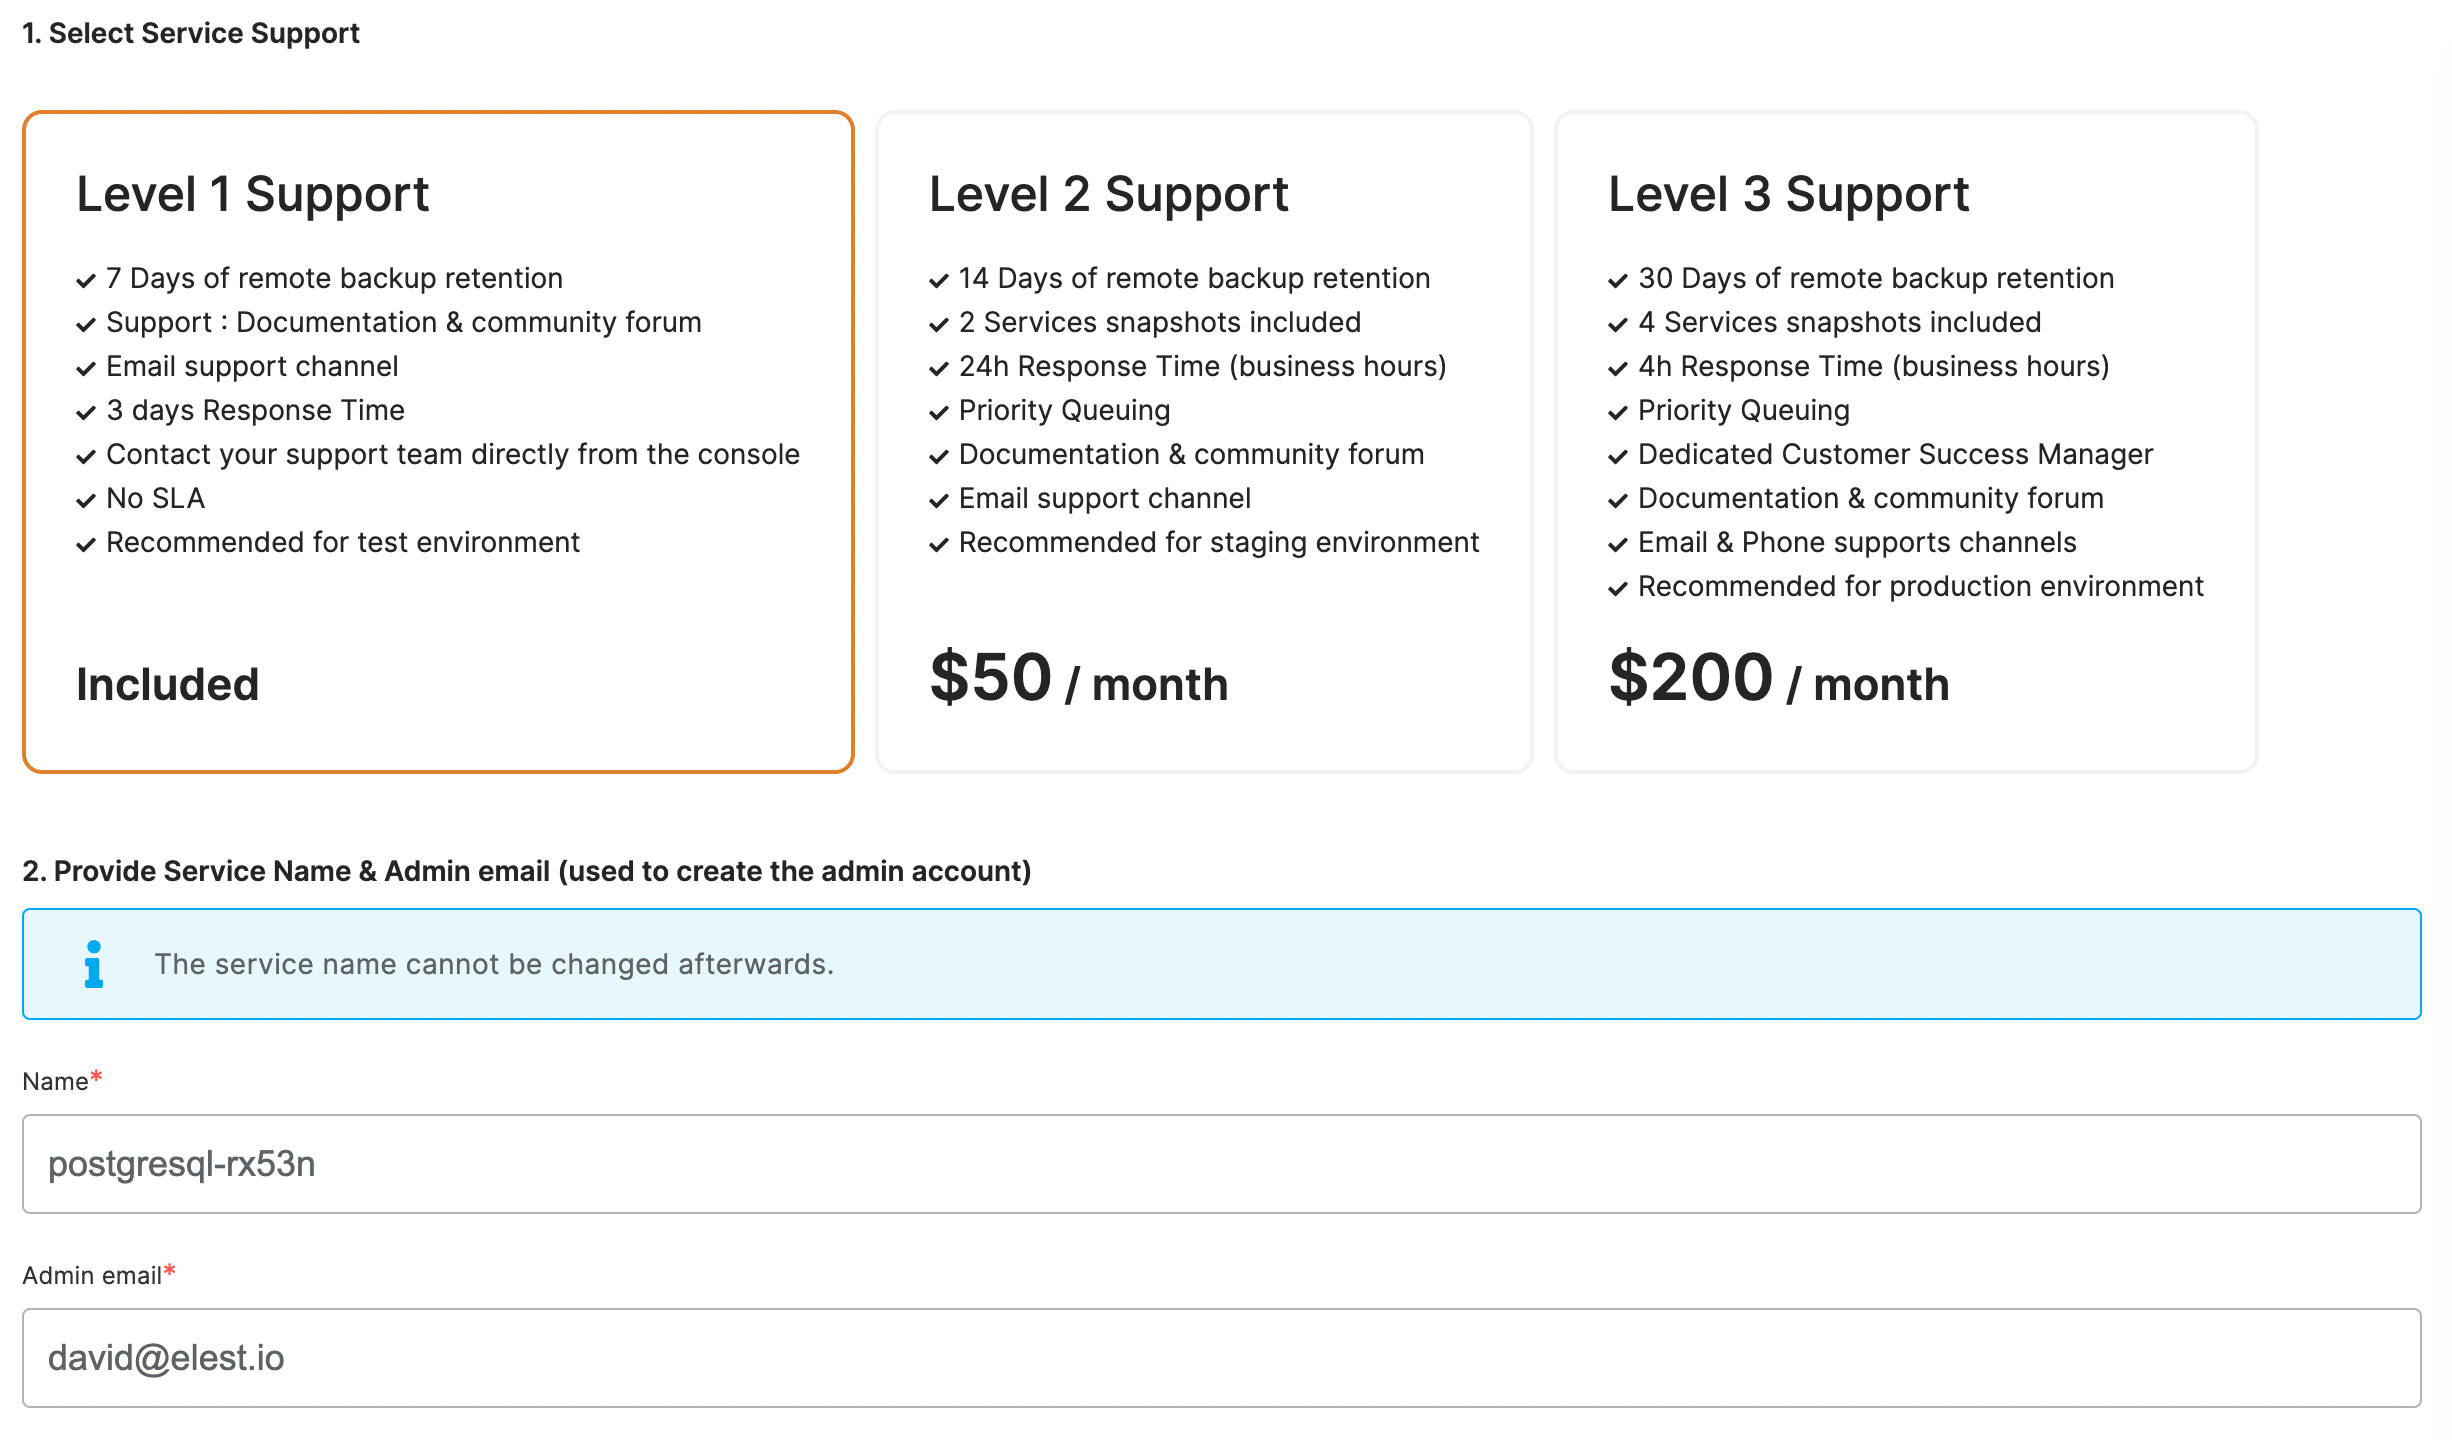
Select Service Support
-
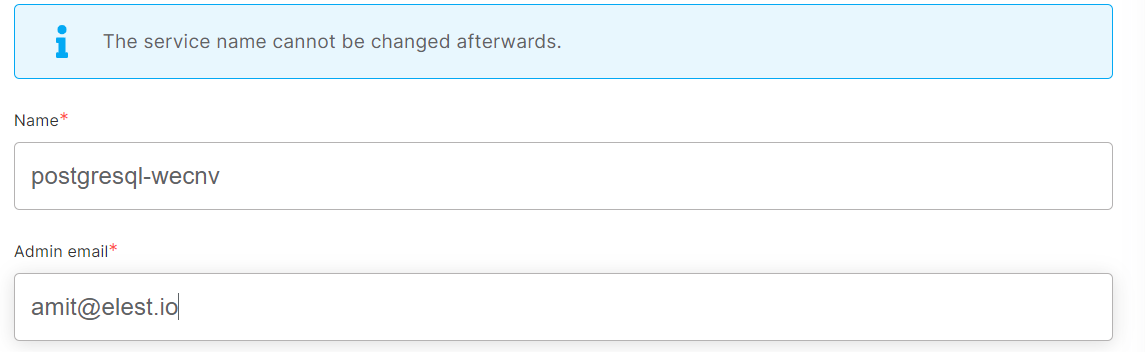
Provide the service name & Admin email (used to create the admin account)
By default, the name was prefilled with the template name, and the email was prefilled with the project owner's email, but you can change this.
-
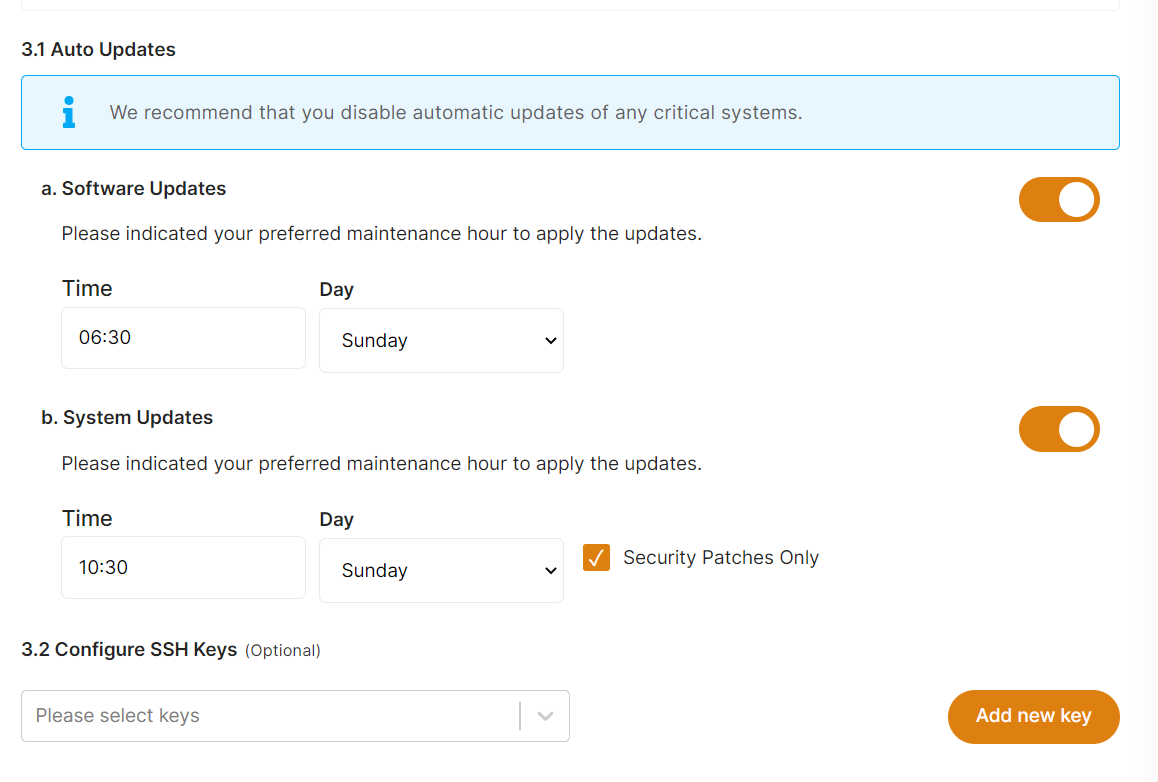
Advanced Configuration
By default, all settings are already filled out, but you can alter them to suit your preferences.
OS updates include updates to the Linux kernel, security patches, and other important maintenance to keep your instance running smoothly.
Software updates update the code of the open-source application itself. We respect semantic versioning, so we will only implement minor and patch updates in order to avoid non-breaking changes.
Maintenance windows are specified in UTC
-
Now, click the Create Service button to deploy your service.
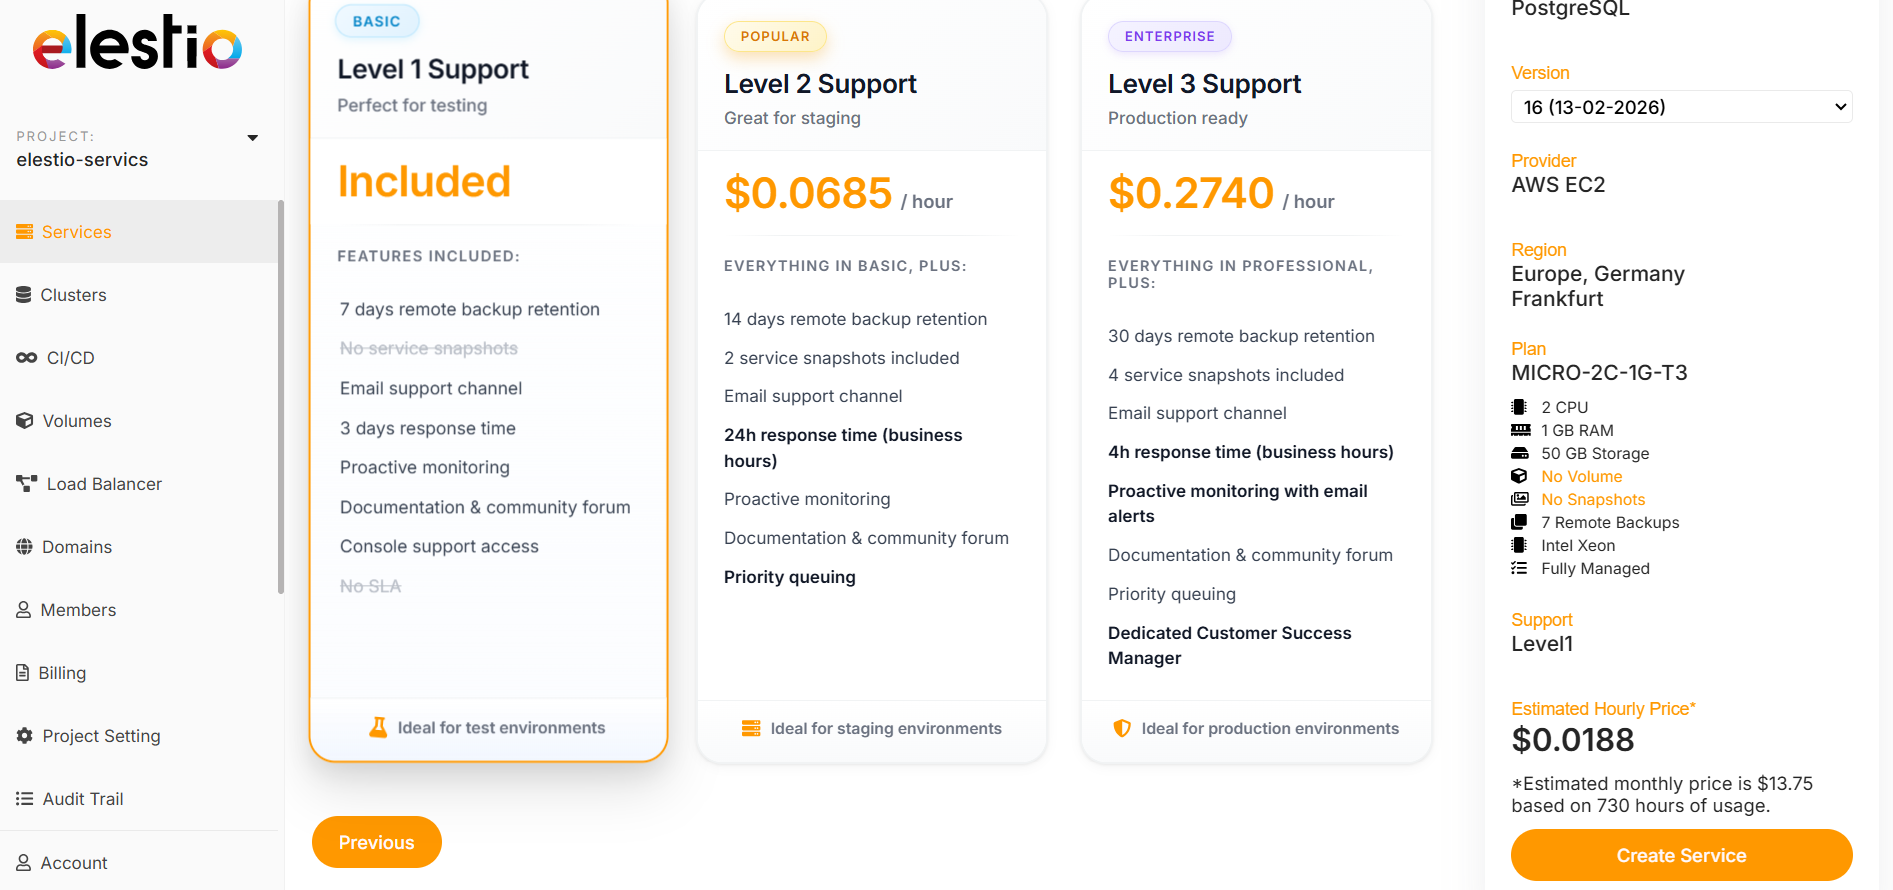
After a few seconds, your new service will appear in the list with the status "Service is in deployment." It should only take 2-3 minutes for your service to be ready to use.
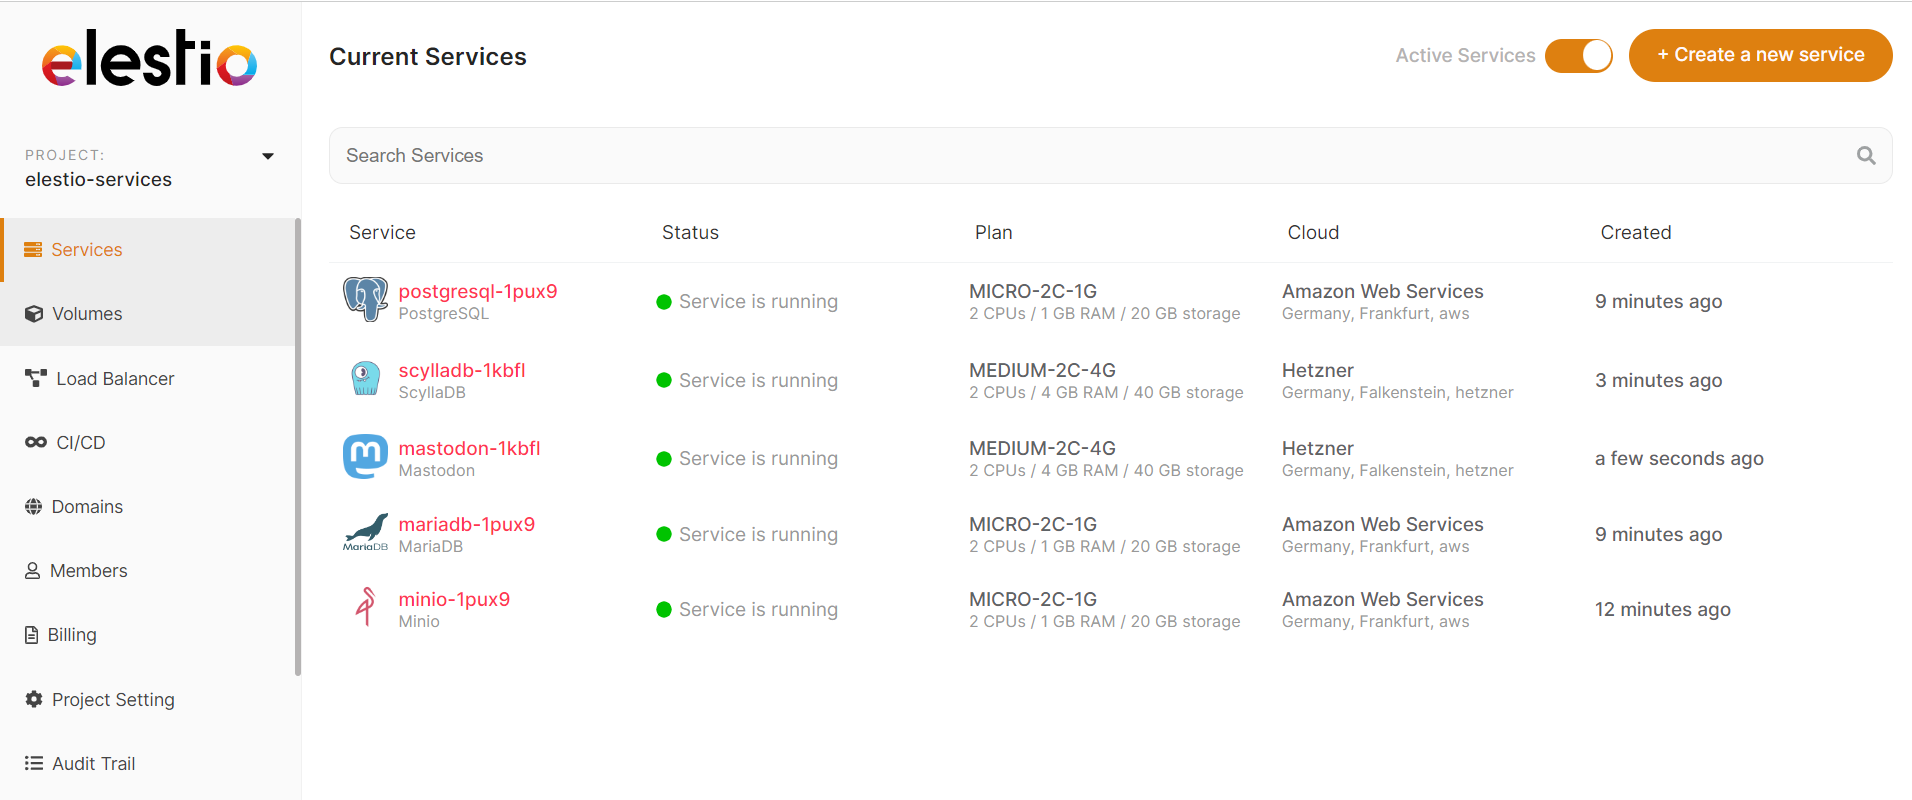
You will receive an email with information about the deployment of your software once your service is ready.
The URL and credentials for accessing the web UI or database application are sent via email and are also available in the Service Overview.
Visit our documentation to learn more about service management.
Get started on the elestio dashboard, or read more about it in our documentation
How to Create AWS Access and Secret Key for BYOAWS
To create your AWS Access and Secret Key, follow these steps.
- Step 1:- Use your AWS account ID or account alias, your IAM user name, and your password to sign in to the IAM console
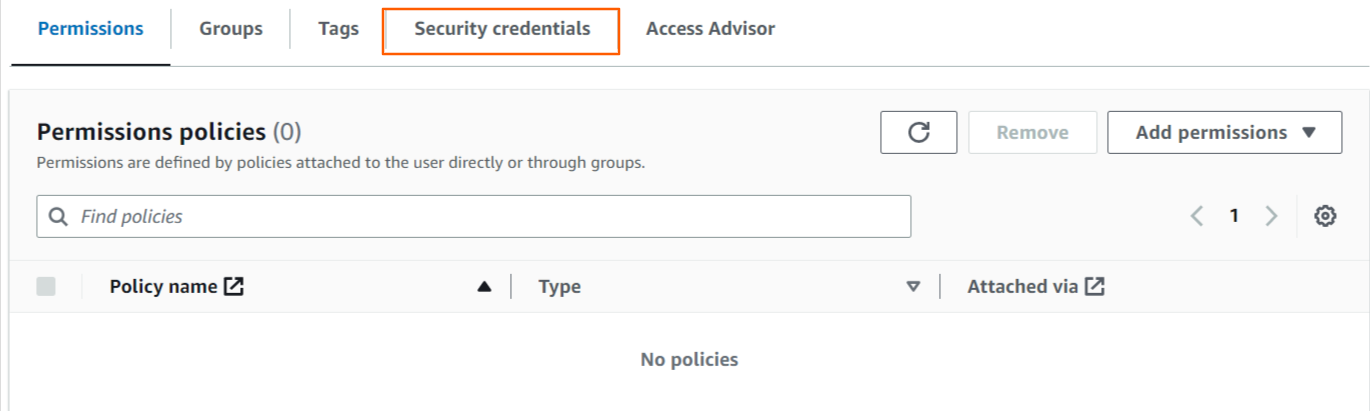
- Step 2:- In the navigation bar on the upper right, choose your user name, and then choose Security credentials.

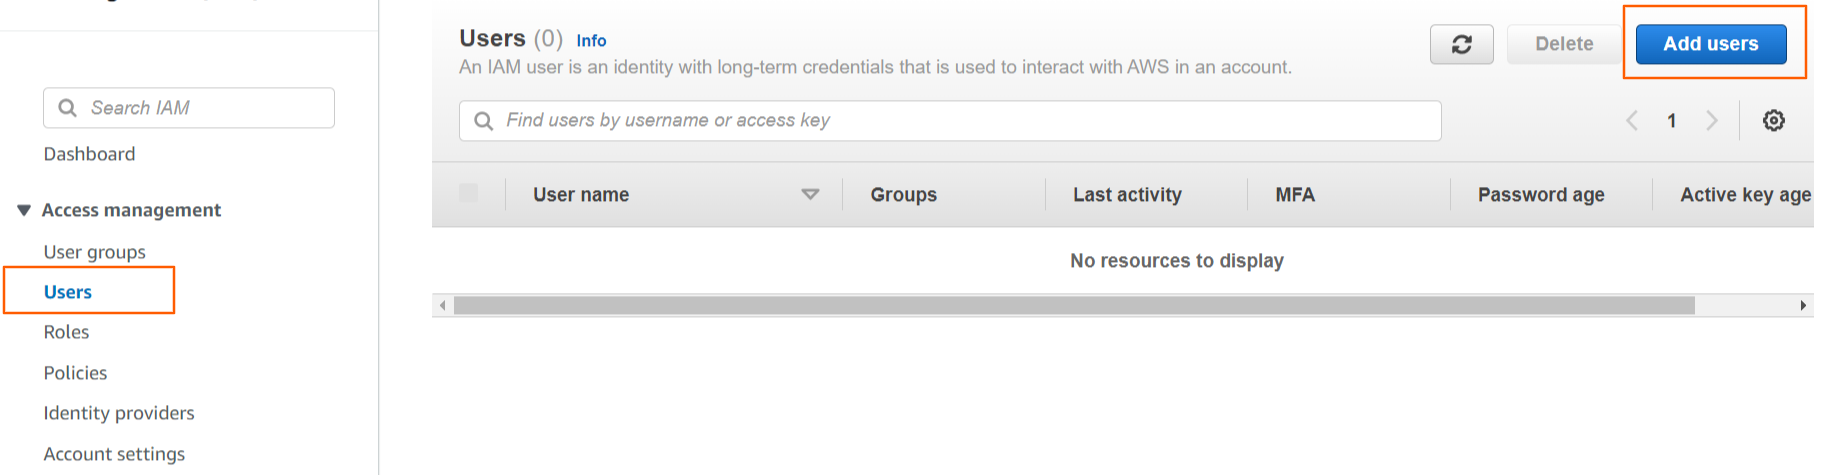
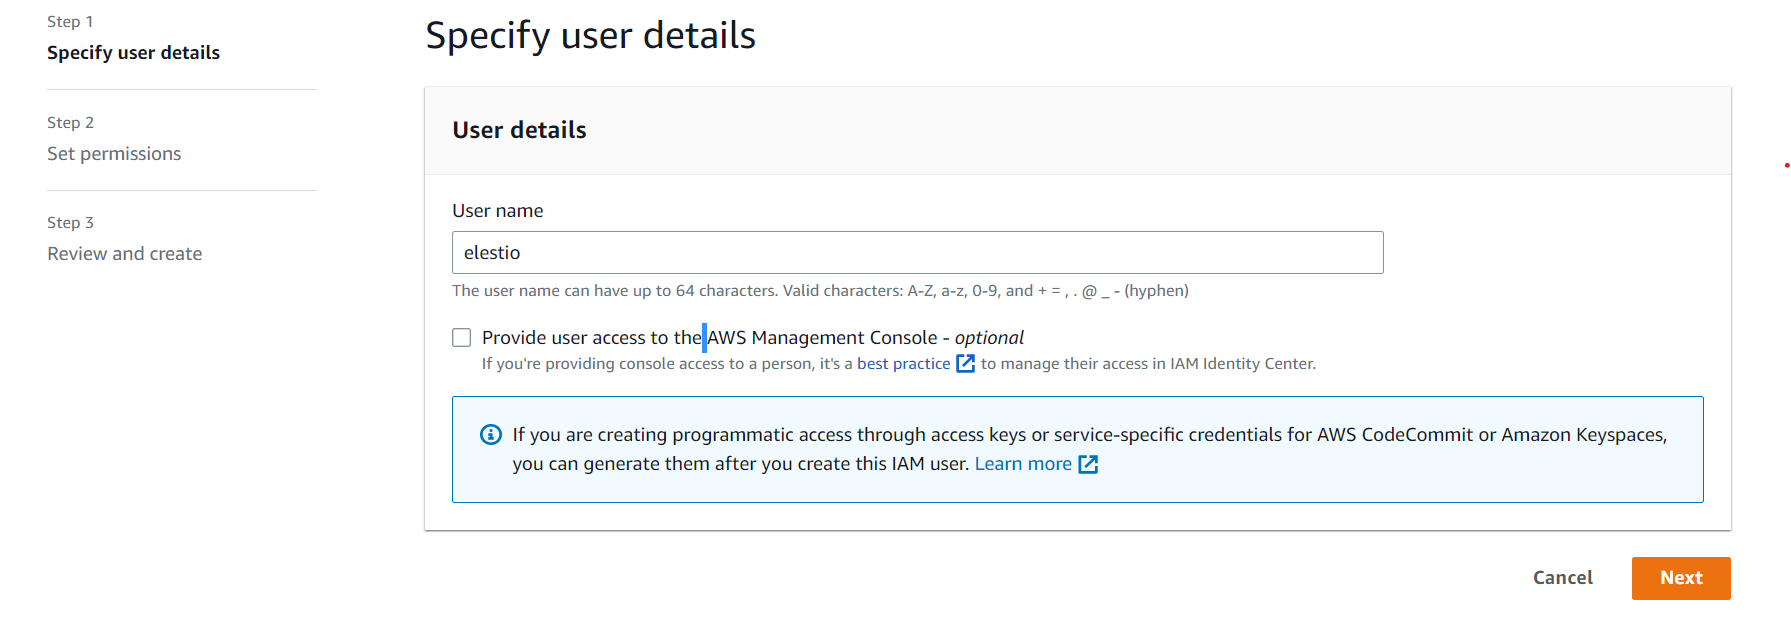
- Step 3:- If you want to create the AWS Access and Secret credentials with the root user, skip to step 4; otherwise, click Users on the left side of access management and then Add users.
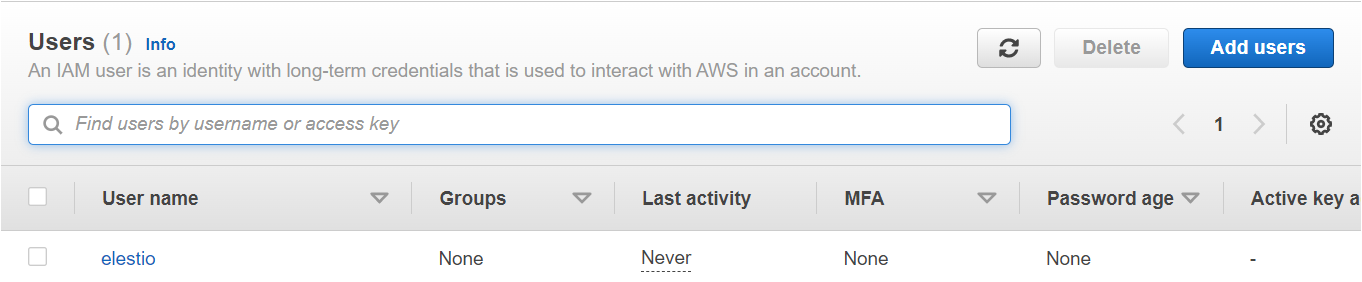
Enter your AWS Account access user name and click Next, Next, Next and Create User to proceed.
After clicking the Create User button, you will be taken to the user list. Choose your created user name from the user list and click on it.
-
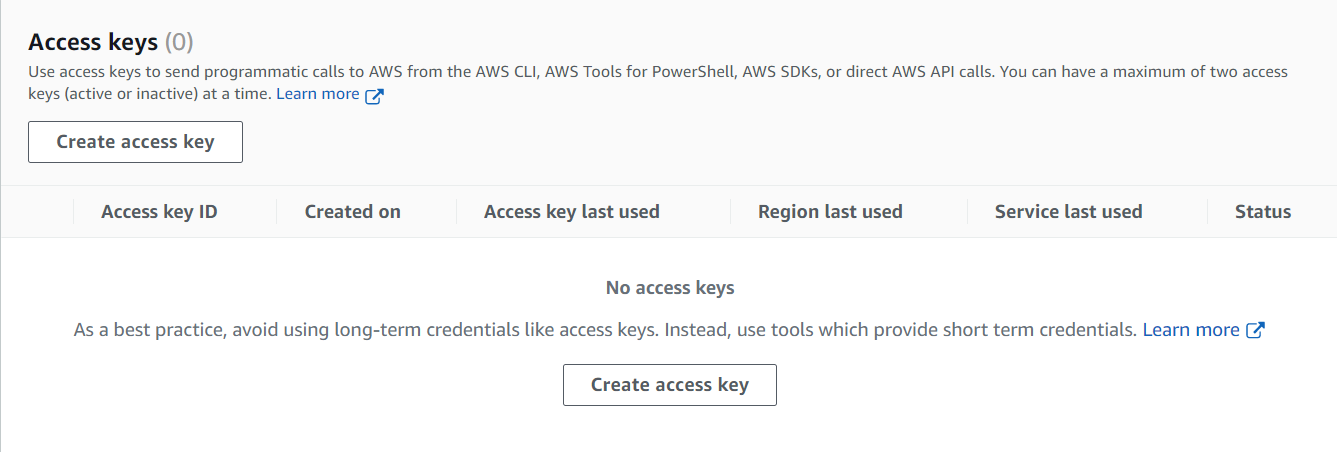
Step 4:- Select Create access key from the Access keys section. If you already have two access keys, this button is disabled, and you must delete one before creating a new one.
-
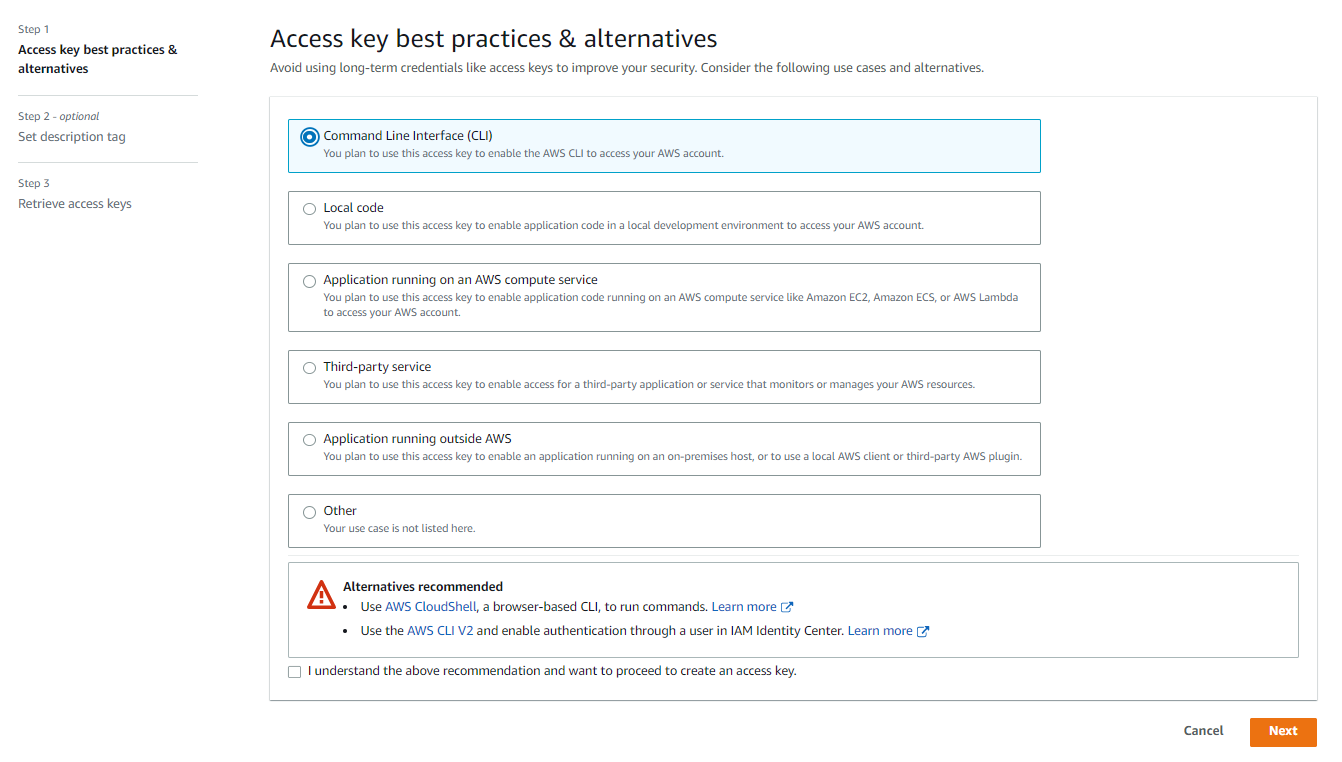
- On the Access key best practices & alternatives page, choose your use case to learn about additional options which can help you avoid creating a long-term access key. If you determine that your use case still requires an access key, choose Other and then choose Next.
-
(Optional) Set a description tag value for the access key. This adds a tag key-value pair to your IAM user. This can help you identify and rotate access keys later. The tag key is set to the access key id. The tag value is set to the access key description that you specify. When you are finished, choose to Create access key.
For Non-Root Users:- Choose Command Line Interface as an alternative and check the box, then click Next and Create Access Key.
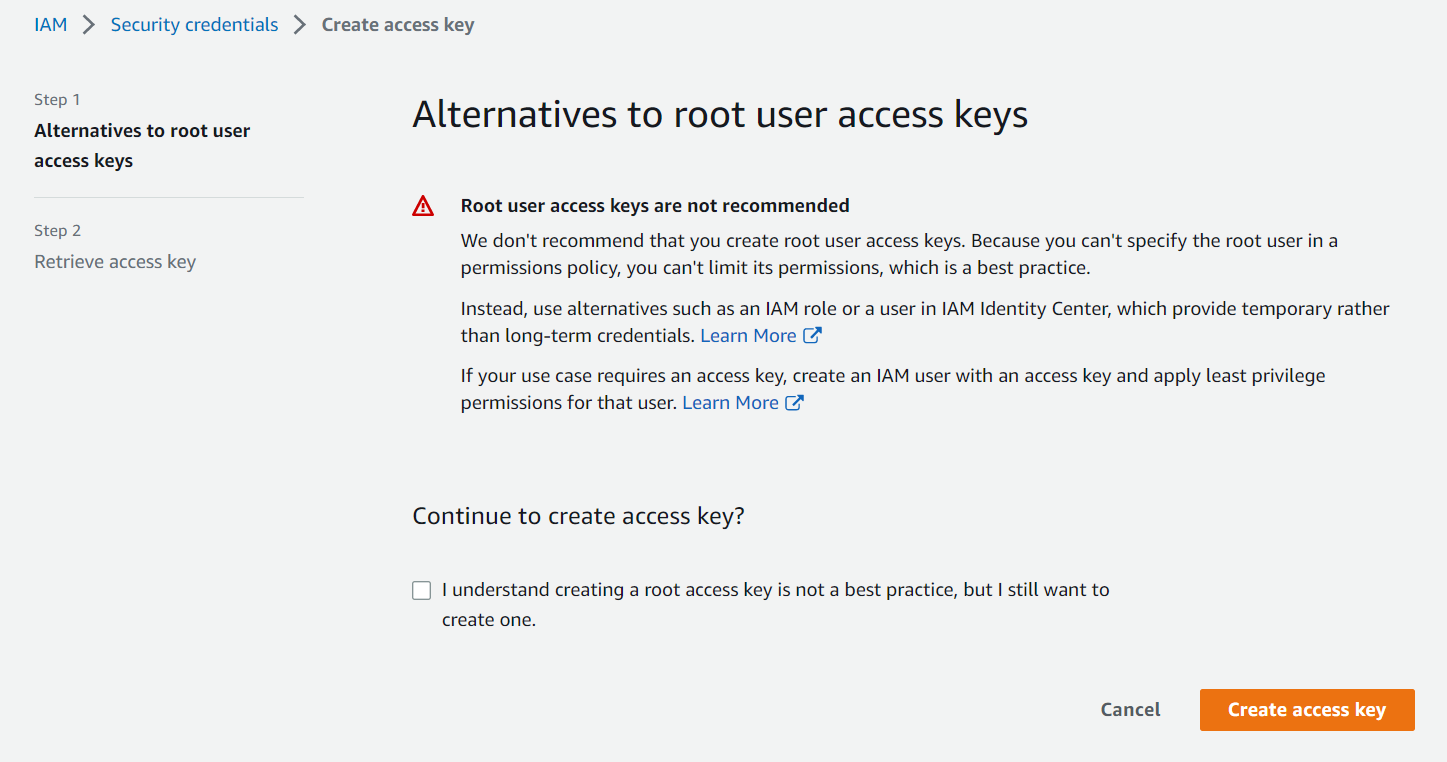
For Root User:- Check the box and click Create Access Key.
-
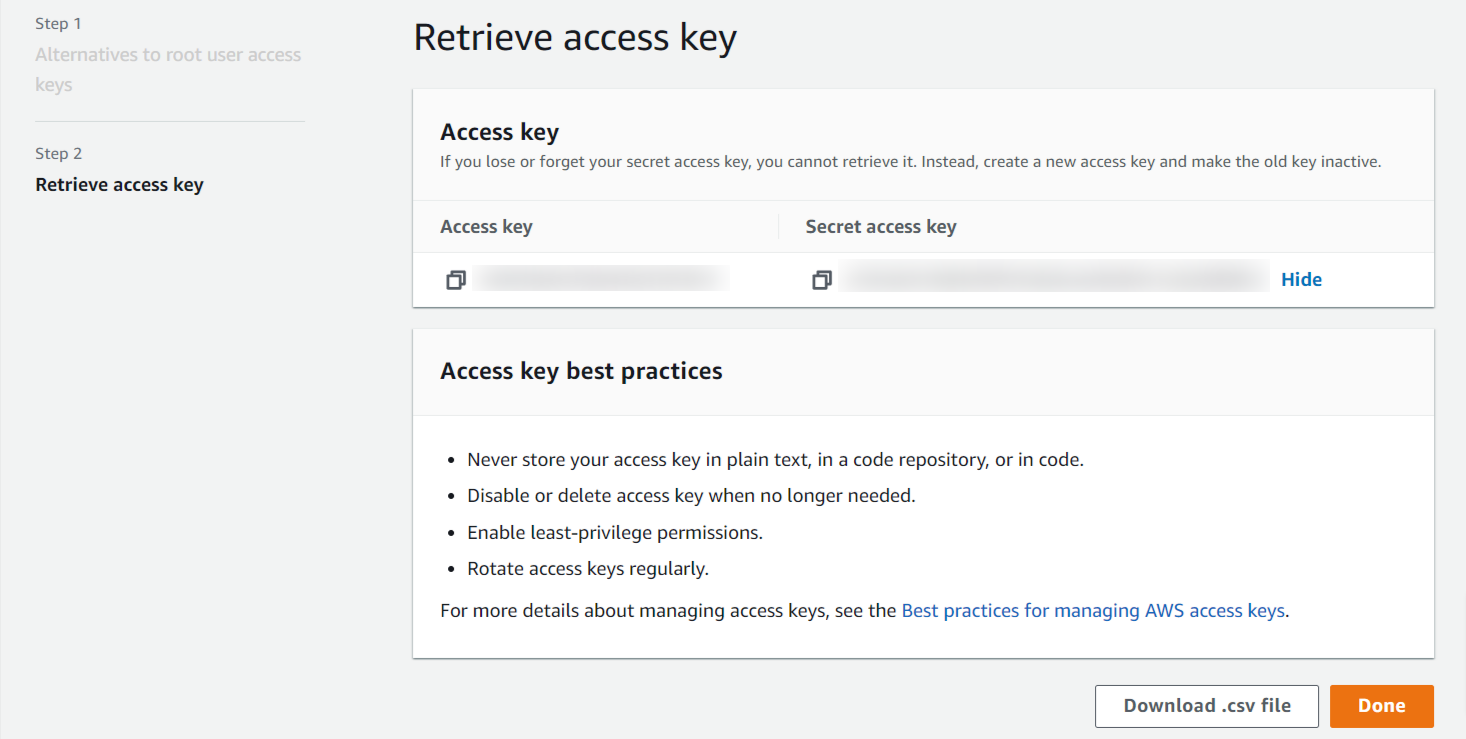
Step 5:- On the Retrieve access keys page, choose either Show to reveal the value of your user's secret access key, or Download .csv file. This is your only opportunity to save your secret access key. After you've saved your secret access key in a secure location, choose Done.
- Step 6:- Now grant Administration access to the newly created keys.
Elestio requires a AmazonEC2FullAccess permission to manage your Ec2 services
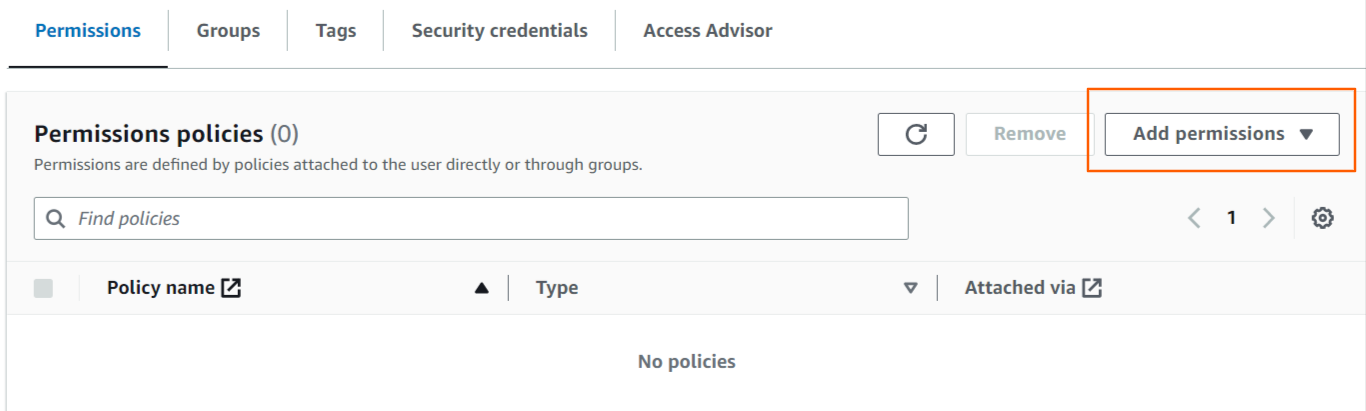
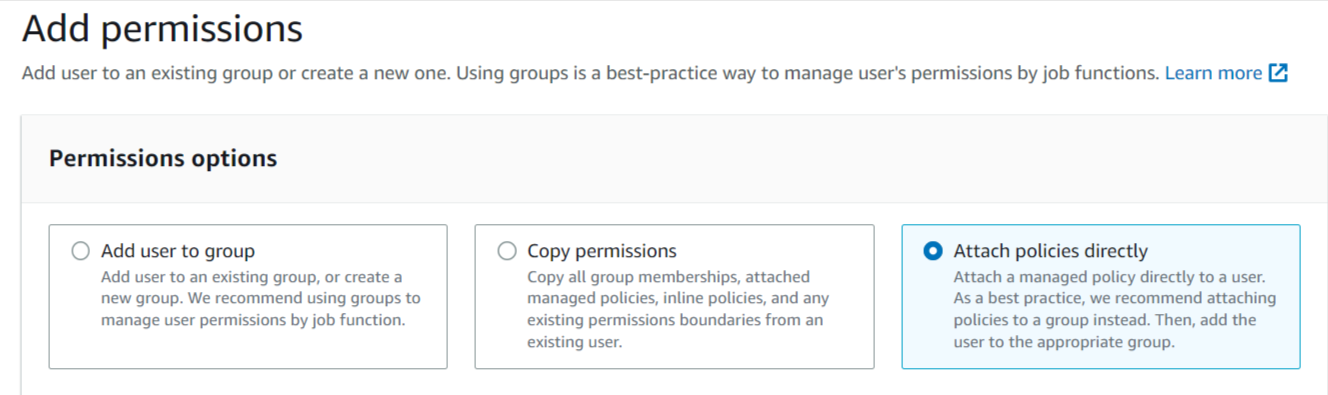
Select the Attach policies directly Tab to attach permission.
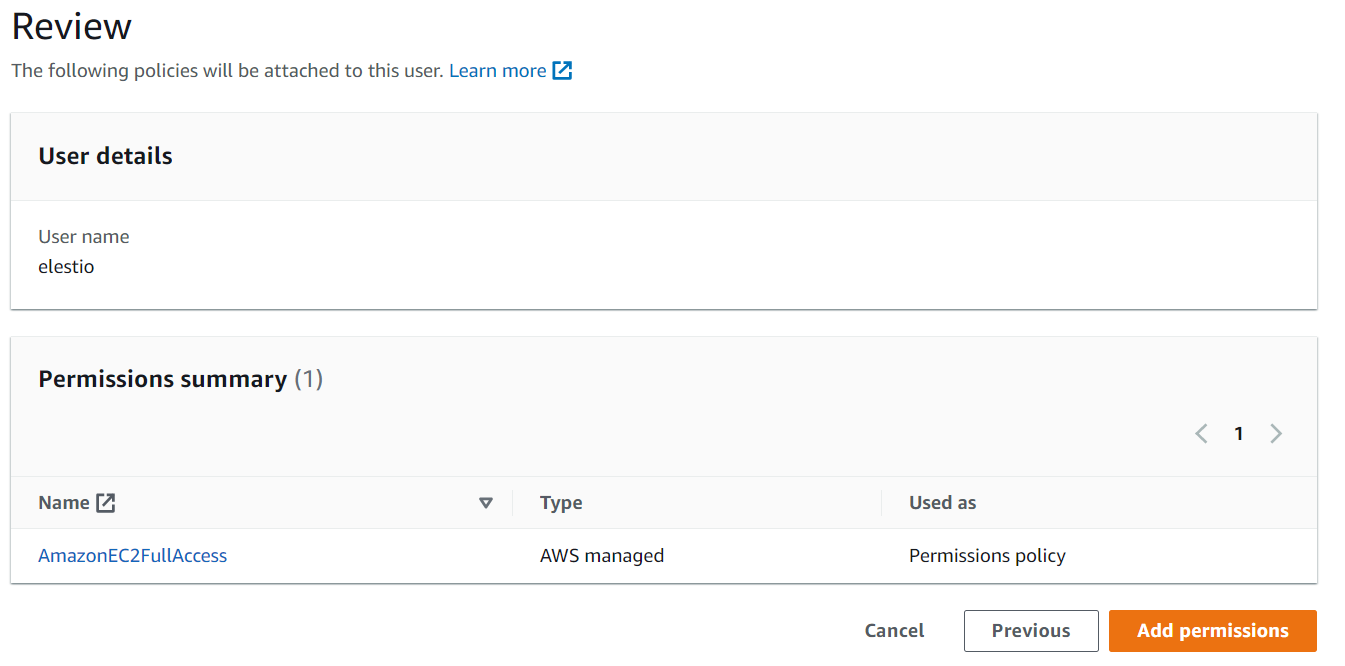
Now Enter AmazonEC2FullAccess into the search box and then select the AmazonEC2FullAccess permission from the results.

After Selecting both Click Next and then click Add permission to proceed.
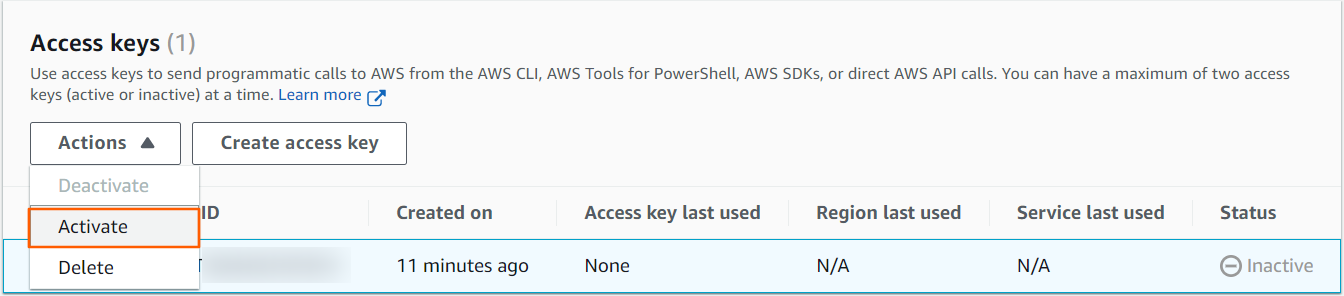
Follow these steps if you already have an access key and want to activate it instead of creating a new one.
-
In the Access keys section, find the key to activate.
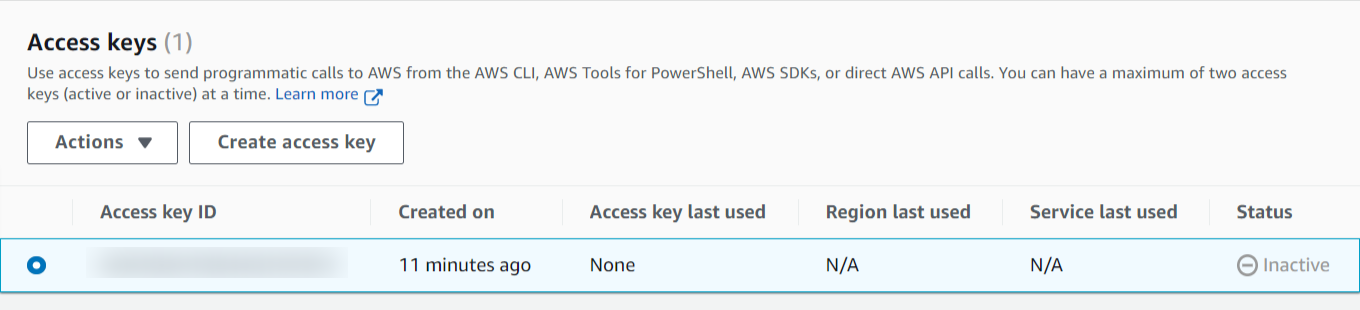
- To activate the key, go to Actions and select Activate.
Before adding keys to elestio, you must grant Administration access to them.
How to Deploy or Integrate a Service with Tor Onion on Elestio
To make your services accessible over Tor, you can configure a Tor service within your service Docker Compose setup. This will allow your service to function as an onion site, providing enhanced privacy and limiting access to Tor-compatible browsers. Here’s a guide to setting up your service with Tor on Elestio.
Step 1: Set Up Your Service
First, deploy a new service on Elestio or select an existing one you’ve already deployed.
Step 2: Open the Editor
Step 3: Stop the Current Container
To stop the current container, run the following command:
docker-compose down -v;Step 4: Configure Docker Compose with Tor
You’ll need to add a Tor service to your Docker Compose file. Below is an example Docker Compose configuration to run a nextcloud server accessible through a Tor onion address.
version: "3.9"
services:
app:
image: elestio/nextcloud:${SOFTWARE_VERSION_TAG}
restart: always
# ports:
# - 172.17.0.1:22000:80
volumes:
- ./nextcloud:/var/www/html
- ./apps:/var/www/html/custom_apps
- ./config:/var/www/html/config
- ./data:/var/www/html/data
tor:
image: jakejarvis/tor:latest
restart: unless-stopped
volumes:
- ./tor-data:/var/lib/tor/
- ./torrc:/etc/tor/torrc:ro
depends_on:
- app
volumes:
tor-data:
In the Docker Compose example, we used the `jakejarvis/tor` image to demonstrate the setup, but you can substitute it with any other official or custom Tor image that suits your needs. This allows for flexibility in using a Tor configuration that aligns with specific requirements or preferences.
Step 5: Create the torrc File
In the root directory of your project, create a file named torrc. This file configures Tor to run as a hidden service and specifies the settings for connecting to the web service.
Add the following content to torrc:
# This folder contains the public and private keys of the hidden
# service, probably provided by the host but can also be generated
# by Tor if it's missing.
HiddenServiceDir /var/lib/tor/hidden_service
# Point the hidden service to a web server (in this case, the web
# server container listening on port 80).
HiddenServicePort 80 app:80
# SOCKS proxy is only used for the container's internal healthcheck.
SocksPort 127.0.0.1:9050
Step 6: Start the service.
To start your services, use the following commands:
docker-compose up -d;This will bring up both the app and Tor services, allowing Tor to generate the necessary onion address.
Step 7: Obtain Your Onion URL
Once your services are running, Tor will create an onion address for your service. You can find this address by accessing the hostname file in the tor-data/hidden_service directory. Use the following command to view your onion URL:
This will output an onion address (like abcdefghijklmno.onion) that you can use to access your web service in a Tor-compatible browser like Tor Browser or Brave.
Step 8: Update Service URL with Onion URL
If your application has domain or URL settings in its environment variables or configurations, replace the current URL with your Tor onion URL. This ensures that your application will direct users to the onion address.
Optional: Disable Access to the Public Internet
To restrict access exclusively to the Tor network and block regular web traffic, you can disable external access by blocking port 443 in your security firewall settings. This can be configured through the firewall settings within the Security tab of your service, or via your cloud provider's firewall if using a BYOVM (Bring Your Own Virtual Machine).
Summary
With these steps, you’ve configured your Elestio-deployed service to be accessible through a Tor onion address. This setup allows for private, anonymous access via Tor, enhancing your service's privacy and security.