Keycloak
- Overview
- How to Connect
- Connecting with Node.js
- Connecting with Python
- Connecting with PHP
- Connecting with Go
- Connecting with Java
- Connecting with Frontend Applications
- Connecting with Keycloak Admin Rest API
- Connecting External Identity Providers
- How-To Guides
- Creating a Realm in Keycloak
- Adding and Managing Users in Keycloak
- Creating and Configuring Clients in Keycloak
- Setting Up Roles and Permissions in Keycloak
- Enabling Identity Federation in Keycloak
- Enabling Two-Factor Authentication (2FA) in Keycloak
- Resetting User Passwords in KeycloakNew Page
- Realm & Configuration Migration
- Exporting and Importing Realms
- Migrating from Another IAM Provider to Keycloak
- Cloning a Realm to a New Cluster or Region
- Cluster Management
Overview
Keycloak is an open-source identity and access management (IAM) solution aimed at modern applications and services. It provides features such as single sign-on (SSO), user federation, identity brokering, and social login. Designed for flexibility and scalability, Keycloak allows organizations to secure applications without writing custom authentication code. It integrates easily with frontend and backend services via standards like OAuth2, OpenID Connect, and SAML.
Key Features of Keycloak:
- Single Sign-On (SSO): Allows users to log in once and gain access to multiple applications without needing to re-authenticate, streamlining user experience and reducing password fatigue.
- Identity Brokering and Social Login: Supports integration with third-party identity providers such as Google, GitHub, Facebook, and others. Users can log in using existing social or enterprise identities.
- User Federation: Enables connection to existing LDAP or Active Directory servers, allowing organizations to leverage existing user stores for authentication and user management.
- Standard Protocol Support: Fully supports industry-standard authentication protocols like OAuth2, OpenID Connect, and SAML 2.0, ensuring interoperability with a wide range of applications and services.
- Admin Console and REST APIs: Provides a comprehensive admin console for managing realms, users, roles, groups, and clients. Also exposes a powerful REST API for automating and integrating IAM functions.
- Customizable Login Pages and Workflows: Allows customization of login, registration, and account management pages using themes and templates. Built-in support for user consent, password policies, and custom authentication flows.
- Multifactor Authentication (MFA): Supports additional authentication layers such as OTP (one-time passwords), enhancing security for sensitive applications and user accounts.
- High Availability and Clustering: Designed for scalability and reliability in distributed environments. Supports clustering, replication, and session failover for high availability deployments.
- Role-Based Access Control (RBAC): Provides fine-grained authorization capabilities with roles and groups, enabling control over what users can access within applications.
- Cross-Platform and Container Support: Runs on all major operating systems and is Docker/Kubernetes-friendly, making it easy to deploy in cloud-native and containerized environments.
These features make Keycloak a powerful choice for developers and organizations looking for a comprehensive, open-source solution to manage authentication, authorization, and identity federation securely and efficiently.
How to Connect
Connecting with Node.js
This guide explains how to establish a secure connection between a Node.js application and a Keycloak identity provider using the keycloak-connect middleware. It walks through the necessary setup, configuration, and usage of a protected route that requires authentication.
Variables
Certain parameters must be provided to integrate a Node.js application with Keycloak. Below is a breakdown of each required variable, its purpose, and where to find it. Here’s what each variable represents:
|
Variable |
Description |
Purpose |
|---|---|---|
|
|
The realm name from the Keycloak Admin Console |
Defines the namespace for authentication and authorization |
|
|
The full realm URL from Keycloak (e.g., https://your-domain/realms/xyz) |
Used as the OIDC issuer base URL |
|
|
Client ID from the Keycloak Clients page |
Identifies the application in Keycloak |
|
|
Secret for the OIDC client, found in the Credentials tab of the client |
Authenticates the Node.js application to Keycloak |
|
|
URI where users are redirected after authentication |
Ensures Keycloak returns control to your app after login |
These values can usually be found in the Keycloak Admin Console under Clients and Realm Settings. Make sure to copy these details and add them to the code moving ahead.
Prerequisites
Install Node.js and NPM
Check if Node.js is installed by running:
node -vIf not installed, download it from https://nodejs.org and install.
Verify NPM installation:
npm -vInstall Required Packages
The keycloak-connect package enables Node.js applications to authenticate using Keycloak. Install the required packages using:
npm install express express-session keycloak-connectCode
Once all prerequisites are set up, create a new file named keycloak.js and add the following code:
const express = require("express");
const session = require("express-session");
const Keycloak = require("keycloak-connect");

const app = express();
const port = process.env.PORT || 3000;

const memoryStore = new session.MemoryStore();

app.use(
  session({
    secret: "supersecret",
    resave: false,
    saveUninitialized: true,
    store: memoryStore,
  })
);

const keycloakConfig = {
  realm: "REALM",
  authServerUrl: "AUTH_SERVER_URL",
  clientId: "CLIENT_ID",
  credentials: {
    secret: "CLIENT_SECRET",
  },
  sslRequired: "external",
  confidentialPort: 0,
};

const keycloak = new Keycloak({ store: memoryStore }, keycloakConfig);
app.use(keycloak.middleware());

app.get("/", (req, res) => {
  res.send("Welcome to the public route.");
});

app.get("/protected", keycloak.protect(), (req, res) => {
  res.send("You have accessed a protected route.");
});

app.get("/logout", (req, res) => {
  req.logout();
  res.redirect("/");
});

app.listen(port, () => {
  console.log(`Server running at http://localhost:${port}`);
});
Replace the placeholder values (REALM, AUTH_SERVER_URL, CLIENT_ID, and CLIENT_SECRET) with actual values from your Keycloak server.
Execution
Open the terminal or command prompt and navigate to the directory where keycloak.js is saved. Once in the correct directory, run the script with the command:
node keycloak.jsIf the connection is successful:
-
Visit http://localhost:3000 in your browser to access the public route.
-
Visit http://localhost:3000/protected to trigger Keycloak authentication.
-
Upon successful login, you’ll be redirected back and see protected content.
-
Visit http://localhost:3000/logout to log out and end the session.
Connecting with Python
This guide explains how to establish a connection between a Python Flask application and a Keycloak identity provider using Flask-OIDC. It walks through the necessary setup, configuration, and usage of a protected route that requires authentication.
Variables
Certain parameters must be provided to integrate a Python Flask application with Keycloak. Below is a breakdown of each required variable, its purpose, and where to find it. Here’s what each variable represents:
|
Variable |
Description |
Purpose |
|---|---|---|
|
|
Client ID from the Keycloak Clients page |
Identifies the Flask app in the Keycloak realm |
|
|
Secret from the Credentials tab of the client |
Authenticates the Flask app with Keycloak |
|
|
Full Keycloak realm URL (e.g. https://your-domain/realms/your-realm) |
Defines the OpenID Connect issuer |
|
|
The callback URL Keycloak will redirect to after login |
Used by Flask-OIDC to complete login flow |
|
|
Token URL from Keycloak |
Used for exchanging authorization codes for access tokens |
|
|
User info endpoint from Keycloak |
Used to fetch user profile after login |
These values can be found in the Keycloak Admin Console under Clients → [Your Client] → Settings / Credentials / Endpoints. Make sure to copy and add them to the code as shown.
Prerequisites
Install Python and pip
Check if Python is installed by running:
python3 --versionIf not installed, download it from https://python.org and install.
Verify pip installation:
pip3 --versionInstall Required Packages
Install the required Python packages using:
pip3 install flask flask-oidcCode
Once all prerequisites are set up, create a new file named app.py and add the following code:
from flask import Flask, redirect, url_for, jsonify
from flask_oidc import OpenIDConnect

app = Flask(__name__)

# Keycloak OIDC configuration (no JSON file required)
app.config.update({
    'SECRET_KEY': 'your-random-secret',
    'OIDC_CLIENT_SECRETS': {
        "web": {
            "client_id": "CLIENT_ID",
            "client_secret": "CLIENT_SECRET",
            "auth_uri": "https://your-keycloak-domain/realms/your-realm/protocol/openid-connect/auth",
            "token_uri": "https://your-keycloak-domain/realms/your-realm/protocol/openid-connect/token",
            "userinfo_uri": "https://your-keycloak-domain/realms/your-realm/protocol/openid-connect/userinfo",
            "redirect_uris": ["http://localhost:5000/oidc/callback"]
        }
    },
    'OIDC_SCOPES': ['openid', 'email', 'profile'],
    'OIDC_CALLBACK_ROUTE': '/oidc/callback',
    'OIDC_COOKIE_SECURE': False
})

oidc = OpenIDConnect(app)

@app.route('/')
def index():
    return 'Welcome to the public route.'

@app.route('/protected')
@oidc.require_login
def protected():
    user_info = oidc.user_getinfo(['email', 'sub', 'name'])
    return jsonify({
        "message": "You are authenticated",
        "user": user_info
    })

@app.route('/logout')
def logout():
    oidc.logout()
    return redirect(url_for('index'))

if __name__ == '__main__':
    app.run(debug=True)
Replace the placeholders in the client_id, client_secret, and URL fields with actual values from your Keycloak instance.
Execution
Open the terminal and navigate to the directory where app.py is saved. Once in the correct directory, run the script with the command:
python3 app.pyIf the connection is successful:
-
Open http://localhost:5000 in your browser — Public route.
-
Open http://localhost:5000/protected — Redirects to Keycloak login.
-
After logging in, you’ll see user info returned from the protected route.
-
Visit http://localhost:5000/logout to end the session and return to the public page.
Connecting with PHP
This guide explains how to establish a connection between a PHP application and a Keycloak identity provider using the jumbojett/openid-connect-php library. It walks through the necessary setup, configuration, and execution of a protected login route using OpenID Connect (OIDC).
Variables
Certain parameters must be provided to integrate a PHP application with Keycloak. Below is a breakdown of each required variable, its purpose, and where to find it. Here’s what each variable represents:
|
Variable |
Description |
Purpose |
|---|---|---|
|
|
Client ID from the Keycloak Admin Console |
Identifies the PHP app in the Keycloak realm |
|
|
Secret from the Client > Credentials tab |
Authenticates the PHP app with Keycloak |
|
|
The Keycloak realm URL (e.g., https://your-domain/realms/your-realm) |
Acts as the OIDC issuer and discovery endpoint |
|
|
The URI that Keycloak will redirect to after login |
Where the user will be sent after successful authentication |
|
|
Token URL under the selected realm |
Used to retrieve access/ID tokens |
|
|
URL to fetch user profile information |
Used to retrieve authenticated user details |
These values can be copied from the Keycloak Admin Console under Clients > [Your Client] > Endpoints.
Prerequisites
Install PHP and Composer
Ensure PHP is installed:
php -vInstall Composer (PHP dependency manager) if not already installed:
composer --versionIf not installed, visit https://getcomposer.org and follow the install instructions
Install Required Package
Install the jumbojett/openid-connect-php package using Composer:
composer require jumbojett/openid-connect-phpCode
Once all prerequisites are set up, create a file named keycloak.php and add the following code:
<?php
require_once __DIR__ . '/vendor/autoload.php';

use Jumbojett\OpenIDConnectClient;

$oidc = new OpenIDConnectClient(
    'https://your-keycloak-domain/realms/your-realm',
    'CLIENT_ID',
    'CLIENT_SECRET'
);

// Optional config
$oidc->setRedirectURL('http://localhost:8000/keycloak.php');
$oidc->setProviderConfigParams([
    'token_endpoint' => 'https://your-keycloak-domain/realms/your-realm/protocol/openid-connect/token',
    'userinfo_endpoint' => 'https://your-keycloak-domain/realms/your-realm/protocol/openid-connect/userinfo'
]);

// Start login flow
$oidc->authenticate();

// Show user info
$userInfo = $oidc->requestUserInfo();

echo "<h1>Welcome, " . htmlspecialchars($userInfo->preferred_username) . "</h1>";
echo "<pre>";
print_r($userInfo);
echo "</pre>";
?>
Replace:
-
https://your-keycloak-domain/realms/your-realm with your actual realm URL
-
CLIENT_ID and CLIENT_SECRET with credentials from the Keycloak client settings
-
http://localhost:8000/keycloak.php with your desired callback/redirect URI
Ensure the Valid Redirect URIs field in Keycloak matches the above redirect URI.
Execution
Start a PHP development server in the directory containing keycloak.php:
php -S localhost:8000Open your browser and navigate to:
http://localhost:8000/keycloak.phpIf the connection is successful:
-
You’ll be redirected to the Keycloak login page.
-
After authentication, you’ll be redirected back to the PHP script.
-
The user profile will be displayed using data returned from Keycloak.
Connecting with Go
This guide explains how to establish a connection between a Go application and a Keycloak identity provider using the OIDC (OpenID Connect) protocol. It walks through the necessary setup, configuration, and execution of a basic login flow to authenticate users through Keycloak.
Variables
Certain parameters must be provided to integrate a Go application with Keycloak. Below is a breakdown of each required variable, its purpose, and where to find it. Here’s what each variable represents:
|
Variable |
Description |
Purpose |
|---|---|---|
|
|
Client ID from the Keycloak Admin Console |
Identifies the Go app in the Keycloak realm |
|
|
Secret from the Credentials tab of the client |
Authenticates the Go app with Keycloak |
|
|
Realm URL (e.g., https://your-domain/realms/your-realm) |
Base URL for OIDC discovery and validation |
|
|
The callback URL Keycloak redirects to after successful login |
Required to complete the OIDC flow |
These values are found under Clients > [Your Client] > Settings / Endpoints in the Keycloak Admin Console.
Prerequisites
Install Go
Check if Go is installed:
go versionIf not installed, download it from https://golang.org/dl and install.
Install Required Packages
Install the required Go packages:
go get github.com/coreos/go-oidc/v3
go get golang.org/x/oauth2
Code
Once all prerequisites are set up, create a new file named main.go and add the following code:
package main

import (
	"context"
	"fmt"
	"log"
	"net/http"

	"golang.org/x/oauth2"
	"golang.org/x/oauth2/clientcredentials"
	"golang.org/x/oauth2/endpoints"
	"github.com/coreos/go-oidc/v3/oidc"
)

var (
	clientID     = "CLIENT_ID"
	clientSecret = "CLIENT_SECRET"
	redirectURL  = "http://localhost:8080/callback"
	issuerURL    = "https://your-keycloak-domain/realms/your-realm"
)

func main() {
	ctx := context.Background()

	provider, err := oidc.NewProvider(ctx, issuerURL)
	if err != nil {
		log.Fatalf("Failed to get provider: %v", err)
	}

	verifier := provider.Verifier(&oidc.Config{ClientID: clientID})

	config := oauth2.Config{
		ClientID:     clientID,
		ClientSecret: clientSecret,
		Endpoint:     provider.Endpoint(),
		Scopes:       []string{oidc.ScopeOpenID, "profile", "email"},
		RedirectURL:  redirectURL,
	}

	http.HandleFunc("/", func(w http.ResponseWriter, r *http.Request) {
		url := config.AuthCodeURL("state", oauth2.AccessTypeOffline)
		http.Redirect(w, r, url, http.StatusFound)
	})

	http.HandleFunc("/callback", func(w http.ResponseWriter, r *http.Request) {
		ctx := r.Context()
		if r.URL.Query().Get("state") != "state" {
			http.Error(w, "state mismatch", http.StatusBadRequest)
			return
		}

		oauth2Token, err := config.Exchange(ctx, r.URL.Query().Get("code"))
		if err != nil {
			http.Error(w, "failed to exchange token: "+err.Error(), http.StatusInternalServerError)
			return
		}

		rawIDToken, ok := oauth2Token.Extra("id_token").(string)
		if !ok {
			http.Error(w, "no id_token field in oauth2 token", http.StatusInternalServerError)
			return
		}

		idToken, err := verifier.Verify(ctx, rawIDToken)
		if err != nil {
			http.Error(w, "failed to verify ID Token: "+err.Error(), http.StatusInternalServerError)
			return
		}

		var claims map[string]interface{}
		if err := idToken.Claims(&claims); err != nil {
			http.Error(w, "failed to parse claims: "+err.Error(), http.StatusInternalServerError)
			return
		}

		fmt.Fprintf(w, "Login successful! User info:\n\n%v", claims)
	})

	log.Println("Server started at http://localhost:8080")
	log.Fatal(http.ListenAndServe(":8080", nil))
}
Replace:
-
CLIENT_ID and CLIENT_SECRET with your Keycloak client credentials
-
https://your-keycloak-domain/realms/your-realm with your realm’s base URL
-
http://localhost:8080/callback should be registered in Keycloak’s Valid Redirect URIs
Execute
-
Run the application with:
go run main.gohttp://localhost:8080-
You will be redirected to the Keycloak login screen. After logging in:
-
The app will redirect to /callback
-
If successful, you’ll see your decoded user info printed on the screen
Connecting with Java
This guide explains how to establish a connection between a Java Spring Boot application and a Keycloak identity provider using the OAuth2 resource server configuration. It walks through the necessary setup, configuration, and creation of a protected endpoint that verifies Keycloak-issued access tokens.
Variables
Certain parameters must be provided to integrate a Spring Boot application with Keycloak. Below is a breakdown of each required variable, its purpose, and where to find it. Here’s what each variable represents:
|
Variable |
Description |
Purpose |
|---|---|---|
|
|
The name of the Keycloak realm |
Defines the authentication namespace |
|
|
Client ID from the Keycloak Admin Console |
Identifies the Spring Boot app in Keycloak |
|
|
Realm URL (e.g. https://your-domain/realms/your-realm) |
Used by Spring Security for token validation |
|
|
URL to the JWKS endpoint (auto-resolved by Spring from ISSUER_URI) |
Used to fetch public keys for token signature verification |
These values can be found in the Keycloak Admin Console → Clients and under the OpenID Connect Endpoints section for your realm.
Prerequisites
Install Java and Maven
Ensure Java is installed:
java -versionEnsure Maven is installed:
mvn -versionIf not, download and install from https://adoptium.net or https://maven.apache.org.
Code
Once all prerequisites are set up, create a new Spring Boot project with the following structure:
spring-keycloak-demo/
├── src/
│   └── main/
│       ├── java/com/example/demo/
│       │   ├── DemoApplication.java
│       │   └── HelloController.java
│       └── resources/
│           └── application.yml
├── pom.xml
pom.xml
<project xmlns="http://maven.apache.org/POM/4.0.0" ...>
  <modelVersion>4.0.0</modelVersion>
  <groupId>com.example</groupId>
  <artifactId>spring-keycloak-demo</artifactId>
  <version>0.0.1-SNAPSHOT</version>
  <properties>
    <java.version>17</java.version>
    <spring.boot.version>3.1.5</spring.boot.version>
  </properties>

  <dependencies>
    <dependency>
      <groupId>org.springframework.boot</groupId>
      <artifactId>spring-boot-starter-web</artifactId>
    </dependency>
    <dependency>
      <groupId>org.springframework.boot</groupId>
      <artifactId>spring-boot-starter-oauth2-resource-server</artifactId>
    </dependency>
  </dependencies>

  <build>
    <plugins>
      <plugin>
        <groupId>org.springframework.boot</groupId>
        <artifactId>spring-boot-maven-plugin</artifactId>
      </plugin>
    </plugins>
  </build>
</project>
application.yml
server:
  port: 8080

spring:
  security:
    oauth2:
      resourceserver:
        jwt:
          issuer-uri: https://your-keycloak-domain/realms/your-realm
Replace https://your-keycloak-domain/realms/your-realm with the full issuer URI from your Keycloak realm.
DemoApplication.java
package com.example.demo;

import org.springframework.boot.SpringApplication;
import org.springframework.boot.autoconfigure.SpringBootApplication;

@SpringBootApplication
public class DemoApplication {
  public static void main(String[] args) {
    SpringApplication.run(DemoApplication.class, args);
  }
}
HelloController.java
package com.example.demo;

import org.springframework.web.bind.annotation.GetMapping;
import org.springframework.web.bind.annotation.RestController;
import org.springframework.security.core.annotation.AuthenticationPrincipal;
import org.springframework.security.oauth2.jwt.Jwt;

@RestController
public class HelloController {

  @GetMapping("/")
  public String publicEndpoint() {
    return "Welcome to the public endpoint.";
  }

  @GetMapping("/protected")
  public String protectedEndpoint(@AuthenticationPrincipal Jwt jwt) {
    return "Hello " + jwt.getClaimAsString("preferred_username") + ", you have accessed a protected route.";
  }
}
Execution
-
Start the Spring Boot app with:
mvn spring-boot:run-
Generate a JWT access token by logging in through your frontend or REST client (e.g., using Postman with client credentials).
-
Make a request to:
GET http://localhost:8080/protected
Authorization: Bearer <access_token>
If the token is valid:
-
You will receive a welcome message with the Keycloak username
-
If no token is provided or it’s invalid, you’ll get a 401 Unauthorized error
Connecting with Frontend Applications
This guide explains how to establish a connection between a frontend single-page application (SPA) — such as those built with React, Vue, or Angular and a Keycloak identity provider using the official Keycloak JavaScript adapter. It walks through the necessary setup, configuration, and execution of a protected login flow.
Variables
Certain parameters must be provided to integrate a frontend application with Keycloak. Below is a breakdown of each required variable, its purpose, and where to find it. Here’s what each variable represents:
|
Variable |
Description |
Purpose |
|---|---|---|
|
|
Full Keycloak realm URL (e.g., https://your-domain/realms/your-realm) |
The base endpoint for authentication, token requests, and user info |
|
|
Client ID from the Keycloak Admin Console |
Identifies the SPA in Keycloak |
|
|
The realm name where the client is defined |
Defines the identity space |
|
|
The URL where the frontend app should return after login |
Must be registered in Keycloak as a Valid Redirect URI |
These values can be found under Clients > [Your Client] > Settings in the Keycloak Admin Console.
Prerequisites
Install Node.js and NPM
Check if Node.js is installed:
node -vIf not, download and install from https://nodejs.org.
Set Up Frontend Project
Create a frontend project using your framework of choice. For example:
-
React:
npx create-react-app keycloak-app
cd keycloak-app-
Vue:
npm init vue@latest
cd keycloak-app-
Angular:
ng new keycloak-app
cd keycloak-app
Then install the Keycloak JS adapter:
npm install keycloak-jsCode
Create a file named keycloak.js inside your src/ directory with the following content:
import Keycloak from "keycloak-js";

const keycloak = new Keycloak({
  url: "https://your-keycloak-domain",
  realm: "your-realm",
  clientId: "your-client-id",
});

export default keycloak;
Then update your app’s entry point (App.js, main.js, or main.ts) to initialize Keycloak:
Example (React - App.js):
import React, { useEffect, useState } from "react";
import keycloak from "./keycloak";

function App() {
  const [authenticated, setAuthenticated] = useState(false);

  useEffect(() => {
    keycloak.init({ onLoad: "login-required" }).then((auth) => {
      setAuthenticated(auth);
    });
  }, []);

  if (!authenticated) return <div>Loading...</div>;

  return (
    <div>
      <h1>Welcome, {keycloak.tokenParsed?.preferred_username}</h1>
      <p>You have accessed a protected frontend app using Keycloak.</p>
    </div>
  );
}

export default App;
Notes for Vue and Angular
-
In Vue, you can wrap keycloak.init() inside a plugin and gate your app rendering using the onReady() hook.
-
In Angular, use route guards (CanActivate) to protect routes based on Keycloak session state.
Execution
-
Replace all placeholders in the config with actual values from your Keycloak setup.
-
Start your frontend application:
npm start-
Open your browser and navigate to:
http://localhost:3000-
The Keycloak login page will appear. After authentication:
-
You’ll be redirected back to your SPA
-
The user info will be displayed, indicating successful integration
-
Connecting with Keycloak Admin Rest API
This guide explains how to authenticate with and use the Keycloak Admin REST API from a backend application. It walks through the necessary setup, authentication flow, and execution of a sample API request to list users in a realm.
Variables
Certain parameters must be provided to access the Keycloak Admin REST API successfully. Below is a breakdown of each required variable, its purpose, and where to find it. Here’s what each variable represents:
|
Variable |
Description |
Purpose |
|---|---|---|
|
|
The base URL of the Keycloak server (e.g., https://your-domain) |
All admin API requests are made under this URL |
|
|
The realm name used to obtain an admin access token |
Typically "master" if accessing all realms, or your target realm |
|
|
The client ID configured for admin access (must have sufficient privileges) |
Authenticates the backend to obtain an access token |
|
|
The client secret associated with the client |
Required to authenticate confidential clients |
|
|
A Keycloak admin user with the manage-users or admin role |
Used in password grant to fetch an access token |
|
|
The password for the above admin user |
Used with the username to authenticate |
These values can be found in the Keycloak Admin Console under Clients > [Your Admin Client] and Users > [Admin User].
Prerequisites
Install Node.js and NPM
Check if Node.js is installed:
node -vVerify npm installation:
npm -vInstall Required Package
We’ll use Axios to make HTTP requests. Install it with:
npm install axiosCode
Once all prerequisites are set up, create a new file named admin-api.js and add the following code:
const axios = require("axios");

const BASE_URL = "https://your-keycloak-domain";
const REALM = "master";
const CLIENT_ID = "admin-cli";
const ADMIN_USERNAME = "your-admin-username";
const ADMIN_PASSWORD = "your-admin-password";

async function getAccessToken() {
  const response = await axios.post(
    `${BASE_URL}/realms/${REALM}/protocol/openid-connect/token`,
    new URLSearchParams({
      client_id: CLIENT_ID,
      grant_type: "password",
      username: ADMIN_USERNAME,
      password: ADMIN_PASSWORD,
    }),
    {
      headers: {
        "Content-Type": "application/x-www-form-urlencoded",
      },
    }
  );
  return response.data.access_token;
}

async function listUsers() {
  try {
    const token = await getAccessToken();
    const response = await axios.get(
      `${BASE_URL}/admin/realms/${REALM}/users`,
      {
        headers: {
          Authorization: `Bearer ${token}`,
        },
      }
    );

    console.log("Users in realm:", response.data);
  } catch (err) {
    console.error("Failed to list users:", err.response?.data || err.message);
  }
}

listUsers();
Replace:
-
BASE_URL with your Keycloak server base URL
-
ADMIN_USERNAME and ADMIN_PASSWORD with your actual admin user credentials
-
REALM with master (or a custom realm if you configured admin access)
Execution
Open the terminal and navigate to the directory where admin-api.js is saved. Once in the correct directory, run the script with the command:
node admin-api.jsIf the connection is successful:
-
The script will authenticate using the password grant type
-
It will retrieve a valid admin access token
-
It will fetch and display the list of users in the specified realm
If an error occurs (such as a 401 unauthorized), double-check your admin credentials and client permissions.
Connecting External Identity Providers
This guide explains how to integrate external identity providers (IdPs) like Google, GitHub, Facebook, or LDAP/Active Directory into a Keycloak realm. It walks through the necessary setup, configuration, and execution of a login flow that delegates authentication to the external provider.
Variables
Certain parameters must be provided to integrate an external identity provider into Keycloak. Below is a breakdown of each required variable, its purpose, and where to find it. Here’s what each variable represents:
|
Variable |
Description |
Purpose |
|---|---|---|
|
|
Unique alias name for the identity provider in Keycloak |
Used to identify and manage the identity provider internally |
|
|
OAuth2/OpenID Connect Client ID provided by the external IdP |
Authenticates Keycloak with the external provider |
|
|
Client secret provided by the external IdP |
Used for secure communication with the IdP |
|
|
Authorization endpoint of the external provider |
Used to start the OAuth2 login flow |
|
|
Token endpoint of the external provider |
Used to exchange authorization code for access token |
|
|
User info endpoint of the external provider (for OIDC) |
Fetches profile info for the logged-in user |
These values are available from the external identity provider’s developer console (e.g., Google Cloud Console, GitHub Developer Settings, Facebook for Developers, or LDAP configuration).
Prerequisites
Keycloak Admin Access
Make sure you are logged into the Keycloak Admin Console with sufficient permissions to:
-
Modify identity providers
-
Configure clients and mappers
-
Assign default roles or groups (optional)
External Provider Setup
You must first register your Keycloak app with the external identity provider (e.g., Google, GitHub, etc.) and obtain the client ID and client secret, along with redirect URI.
Example (Google):
-
Register a new OAuth2 Client under APIs & Services > Credentials
-
Set redirect URI to:
https://<keycloak-domain>/realms/<your-realm>/broker/google/endpointCode-Free Setup (via Keycloak Admin UI)
-
Go to your realm > Identity Providers
-
Click “Add provider” → Choose from list (e.g., Google, GitHub, Facebook, etc.)

-
Enter the required fields:
-
Alias: google, github, etc.
-
Client ID: From the external IdP
-
Client Secret: From the external IdP
-
-
Configure Default Scopes and any user attribute mappers (e.g., email, name)
-
Enable the provider by checking “Enabled”
-
Save
You’ll now see the provider appear on your login page as a social button or link.
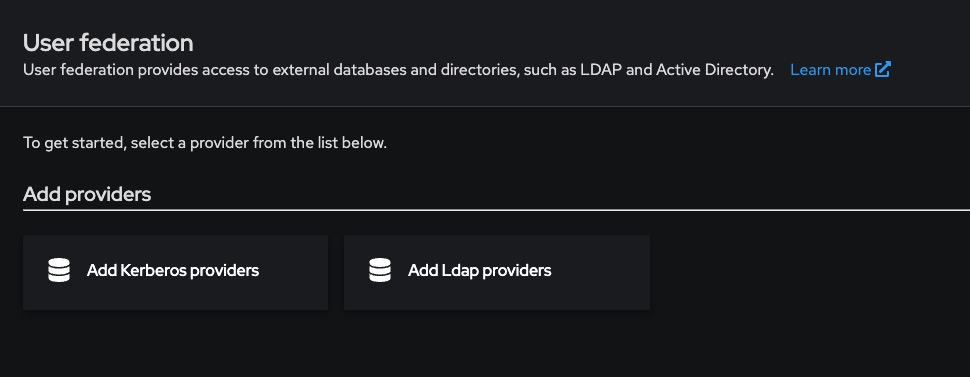
LDAP / Active Directory Integration
For enterprise identity backends like LDAP or Active Directory, follow these steps:
- Go to User Federation > Add Provider → LDAP
- Fill in the following fields:
|
Field |
Example |
|---|---|
|
Connection URL |
ldap://ldap.mycompany.com |
|
Users DN |
ou=users,dc=mycompany,dc=com |
|
Bind DN |
cn=admin,dc=mycompany,dc=com |
|
Bind Credential |
Your LDAP admin password |
|
Vendor |
Choose from Active Directory, Novell, Red Hat, etc. |
- Set Edit Mode to READ_ONLY or WRITABLE based on your use case
- Enable periodic sync if needed under Sync Settings
- Save and test the connection
Execution
Once saved, test the login by:
You can manage the linked identity in the Keycloak Admin Console under:
Users > [user] > Identity Provider LinksHow-To Guides
Creating a Realm in Keycloak
A realm in Keycloak is the top-level container for managing users, roles, groups, identity providers, and applications. It provides complete logical isolation, making it ideal for multi-tenant systems or staging/production splits. This guide explains different ways to create a realm via the Admin Console, REST API, and Docker CLI while covering permissions, best practices, and troubleshooting.
Creating a Realm via Keycloak Admin Console
The Admin Console is the most straightforward way to create and manage realms using a web-based UI.
Access the Admin Console
Log in to your Keycloak Admin Console:
http://<your-keycloak-domain>/admin/Use the admin account created during setup or one with realm management privileges.
Create a New Realm
-
Click the realm dropdown in the top-left corner (default is master).
-
Click Create Realm.
-
Enter the following details:
-
Realm Name: A unique name like customer-portal or internal-tools.
-
Display Name: Optional friendly name shown on login screens.
-
-
Click Create.
Configure Realm Settings
Once created, you can adjust behavior by navigating to
-
Realm Settings > Login: Enable email verification, OTP, remember-me, etc.
-
Realm Settings > Themes: Set custom themes for login and account pages
Creating a Realm via Keycloak REST API
For automation and CI/CD pipelines, use the Admin REST API.
Get Access Token
Use the master realm or a privileged realm with an admin user.
curl -X POST "https://<keycloak-domain>/realms/master/protocol/openid-connect/token" \
  -H "Content-Type: application/x-www-form-urlencoded" \
  -d "username=admin" \
  -d "password=admin-password" \
  -d "grant_type=password" \
  -d "client_id=admin-cli"
Save the access_token from the response.
Create the Realm
curl -X POST "https://<keycloak-domain>/admin/realms" \
  -H "Content-Type: application/json" \
  -H "Authorization: Bearer <access_token>" \
  -d '{
    "realm": "newrealm",
    "enabled": true,
    "displayName": "New Realm"
  }'
This creates a new realm called newrealm with default settings.
Creating a Realm via Docker CLI
If Keycloak is running inside a Docker container:
Access the Container
docker exec -it keycloak bashCreate Realm Using Import File
-
Create a JSON realm file (e.g., myrealm.json):
{
  "realm": "myrealm",
  "enabled": true
}-
Run Keycloak with the import flag:
kc.sh import --file /opt/keycloak/data/import/myrealm.jsonOr via Docker:
docker run -v $PWD:/opt/keycloak/data/import \
  quay.io/keycloak/keycloak:latest \
  import --file /opt/keycloak/data/import/myrealm.json
Required Permissions for Realm Creation
-
Users must have manage-realm or admin roles in the master realm.
-
If using the REST API, token must be obtained using admin-cli.
To grant permissions:
# From master realm
Users > admin > Role Mappings > Realm Roles > Assign 'admin'
Best Practices for Creating Realms
- Use Descriptive Realm Names: Avoid generic names like test or default. Use environment- or tenant-specific names like dev-project-x, production-client123.
- Enable Login Hardening Features: Under Realm Settings > Login:
-
Enable email verification
-
Disable user registration (unless required)
-
Enable OTP for 2FA
-
- Use Theme Branding: Upload and assign a custom login theme under Themes to reflect client or environment branding.
- Automate via REST or Terraform: For CI/CD deployments, automate realm provisioning using REST API or tools like Terraform (mrparkers/keycloak provider).
Common Issues and Troubleshooting
|
Issue |
Possible Cause |
Solution |
|---|---|---|
|
403 Forbidden when creating via API |
Access token lacks permission |
Ensure token is generated from a user with admin role in master realm |
|
Realm already exists |
Attempting to recreate an existing realm |
Use a different realm name or delete existing one before re-creating |
|
Realm not listed in dropdown |
Misconfiguration or missing role |
Refresh UI or check admin user’s permissions |
|
Docker import doesn’t create realm |
File format error or wrong path |
Ensure JSON is valid and mounted correctly in /opt/keycloak/data/import |
|
Login page shows default theme |
Custom theme not set |
Go to Realm Settings > Themes and set your theme manually |
Adding and Managing Users in Keycloak
Users in Keycloak represent the individuals or system accounts that authenticate and interact with your applications. This guide explains multiple methods to create and manage users via the Admin Console, REST API, and Docker CLI while covering required roles, best practices, and common issues.
Creating Users via Keycloak Admin Console
The Admin Console is the most user-friendly method to manage users and assign roles.
Access the Admin Console
Log in to your Keycloak Admin Console:
http://<your-keycloak-domain>/admin/Choose the realm where you want to manage users.
Add a New User
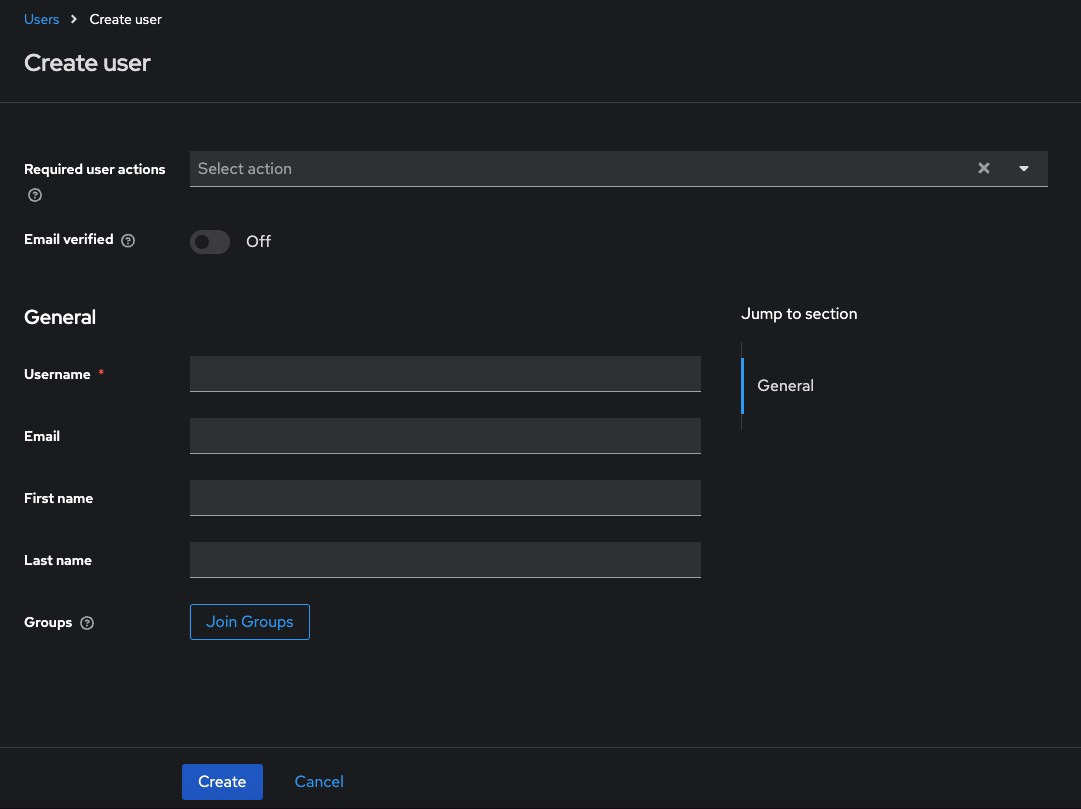
-
Go to Users > Add User
-
Fill in the following:
-
Username (required)
-
Email, First Name, Last Name (optional but recommended)
-
Set Email Verified if applicable
-
-
Click Create
Set Credentials
After creating the user:
-
Go to the Credentials tab
-
Set a password
-
Toggle Temporary to OFF if you don’t want the user to reset on first login
-
Click Set Password
Creating Users via Keycloak REST API
This method is suitable for CI/CD pipelines or automated scripts.
Get Access Token
curl -X POST "https://<keycloak-domain>/realms/master/protocol/openid-connect/token" \
  -H "Content-Type: application/x-www-form-urlencoded" \
  -d "username=admin" \
  -d "password=admin-password" \
  -d "grant_type=password" \
  -d "client_id=admin-cli"
Copy the access_token from the response.
Create User
curl -X POST "https://<keycloak-domain>/admin/realms/<realm>/users" \
  -H "Content-Type: application/json" \
  -H "Authorization: Bearer <access_token>" \
  -d '{
    "username": "johndoe",
    "email": "johndoe@example.com",
    "enabled": true,
    "emailVerified": true,
    "firstName": "John",
    "lastName": "Doe"
  }'
Set Password
curl -X PUT "https://<keycloak-domain>/admin/realms/<realm>/users/<user-id>/reset-password" \
  -H "Authorization: Bearer <access_token>" \
  -H "Content-Type: application/json" \
  -d '{
    "type": "password",
    "value": "StrongPassword123!",
    "temporary": false
  }'
To get <user-id>, call:
curl -H "Authorization: Bearer <access_token>" \
  https://<keycloak-domain>/admin/realms/<realm>/users?username=johndoe
Creating Users via Docker CLI
Step into the Container
docker exec -it keycloak bashUse Admin CLI Script
/opt/keycloak/bin/kcadm.sh config credentials --server http://localhost:8080 \
  --realm master --user admin --password admin

/opt/keycloak/bin/kcadm.sh create users -r <realm> -s username=jane -s enabled=true
Set Password
/opt/keycloak/bin/kcadm.sh set-password -r <realm> --username jane --new-password "SecurePass!123"Required Permissions for User Management
-
Requires manage-users role in the realm.
-
Admin token used via CLI or REST must be scoped with user management privileges.
To assign permission via Admin Console:
Users > admin > Role Mappings > Realm Roles > Assign 'manage-users'Best Practices for Managing Users
Use Verified Emails
Ensure emailVerified is set to true for pre-created users to skip email confirmation.
Avoid Temporary Passwords for API Imports
If scripting user creation, set temporary: false to avoid forcing password reset on first login.
Group Users by Role or Department
Organize users into groups (e.g., devs, sales, ops) for easier role management and policy application.
Monitor Login History
Enable event logging to track user login activity under Events > Settings.
Enforce Strong Passwords
Go to Authentication > Password Policy and configure rules like minimum length, digits, special chars, etc.
Common Issues and Troubleshooting
|
Issue |
Possible Cause |
Solution |
|---|---|---|
|
409 Conflict: User exists |
Username already taken |
Use a unique username or search existing users |
|
403 Forbidden on API |
Missing permission or token scope |
Ensure admin has manage-users in the correct realm |
|
User not able to log in |
Password not set or user is disabled |
Check status under the user’s profile and verify credentials |
|
Password reset fails |
Temporary password not set correctly |
Use "temporary": false if you want permanent password via API |
|
Email not received for verification |
SMTP not configured |
Go to Realm Settings > Email and add SMTP server details |
Creating and Configuring Clients in Keycloak
A client in Keycloak represents an application or service that uses Keycloak to authenticate users. Clients can be web apps, REST APIs, mobile apps, or even CLI tools. This guide explains how to create and configure clients through the Admin Console, REST API, and CLI (Docker), and also includes roles, best practices, and common troubleshooting steps.
Creating Clients via Keycloak Admin Console
This is the simplest way to register and configure a client visually.
Access the Admin Console
Log in to:
http://<your-keycloak-domain>/admin/Choose the realm where the client should be added.
Add a New Client
-
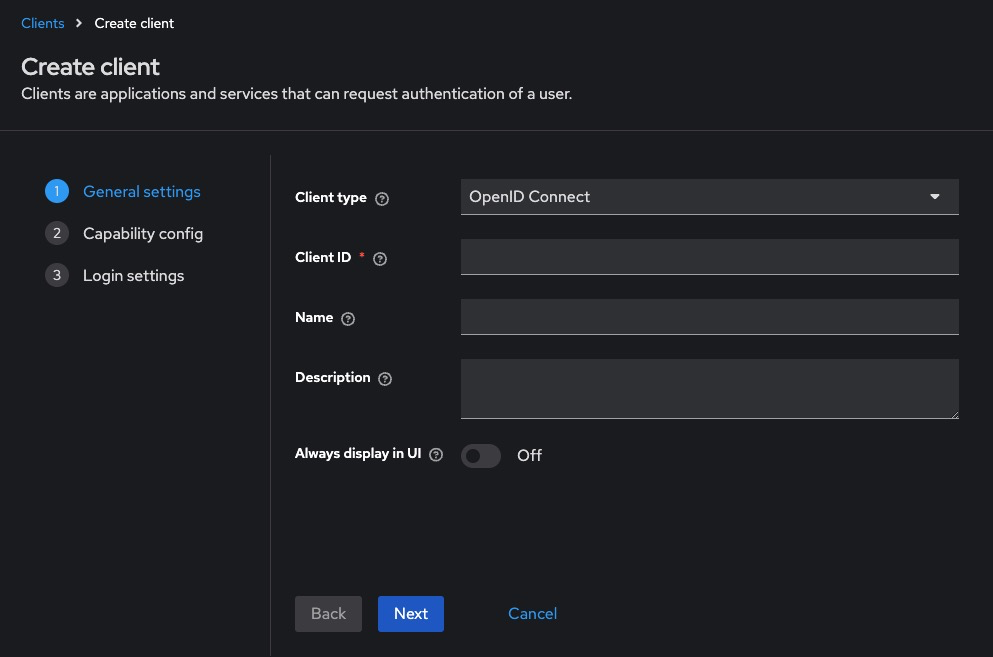
Go to Clients > Create
-
Fill in the fields:
-
Client ID: A unique name, e.g., frontend-app or api-service
-
Client Type: Choose between OpenID Connect (default) or SAML
-
Root URL: The application base URL (e.g., http://localhost:3000)
-
-
Click Next, then Save

Configure Client Settings
-
Go to the Settings tab for the client:
-
Access Type: Choose public, confidential, or bearer-only
-
Valid Redirect URIs: Add allowed redirect URLs (e.g., http://localhost:3000/*)
-
Web Origins: Add * or specific origins allowed to call this client
-
Standard Flow Enabled: Enable for browser-based login
-
Direct Access Grants: Enable if using password grant from API
-
-
Save the changes
Creating Clients via Keycloak REST API
Get Access Token
curl -X POST "https://<keycloak-domain>/realms/master/protocol/openid-connect/token" \
  -H "Content-Type: application/x-www-form-urlencoded" \
  -d "username=admin" \
  -d "password=admin-password" \
  -d "grant_type=password" \
  -d "client_id=admin-cli"
Save the access_token.
Create a Client
curl -X POST "https://<keycloak-domain>/admin/realms/<realm>/clients" \
  -H "Authorization: Bearer <access_token>" \
  -H "Content-Type: application/json" \
  -d '{
    "clientId": "my-app",
    "enabled": true,
    "publicClient": false,
    "redirectUris": ["http://localhost:3000/*"],
    "webOrigins": ["http://localhost:3000"],
    "protocol": "openid-connect"
  }'
This creates a confidential client named my-app.
Creating Clients via Docker CLI
Step into the Container
docker exec -it keycloak bashAuthenticate and Create Client
/opt/keycloak/bin/kcadm.sh config credentials \
  --server http://localhost:8080 \
  --realm master --user admin --password admin

/opt/keycloak/bin/kcadm.sh create clients -r <realm> \
  -s clientId=my-cli-client \
  -s enabled=true \
  -s publicClient=false \
  -s redirectUris='["http://localhost:3000/*"]' \
  -s webOrigins='["http://localhost:3000"]'
Required Permissions for Client Management
-
Requires manage-clients or admin role in the realm
-
Token used via REST or CLI must be scoped to allow client creation
To grant roles via Admin Console:
Users > admin > Role Mappings > Realm Roles > Assign 'manage-clients'Best Practices for Client Configuration
- Use Confidential Clients for Backends: Set publicClient = false and use client_secret for server-to-server communication.
- Use Public Clients for SPAs: Frontend apps using redirect flows should be marked as publicClient = true.
- Set Narrow Redirect URIs: Avoid using wildcards like * unless absolutely necessary. Use precise URIs for better security.
- Limit Token Lifespans: Go to Realm Settings > Tokens and configure access and refresh token lifetimes.
- Rotate Client Secrets Regularly: Manually rotate secrets or use automation for higher security compliance.
- Use Roles and Mappers for RBAC: Assign client roles and use protocol mappers to inject them into access tokens for authorization checks.
Common Issues and Troubleshooting
|
Issue |
Possible Cause |
Solution |
|---|---|---|
|
Invalid redirect URI |
Redirect URI doesn’t match registered value |
Ensure exact match in Valid Redirect URIs |
|
Client not visible after creation |
UI or API delay |
Refresh or re-login to see updated clients |
|
Access token doesn’t include roles |
Missing mappers |
Add protocol mapper for client roles under Client > Mappers |
|
403 Forbidden when using client credentials |
Client type is public or secret is wrong |
Verify publicClient=false and check the client secret |
|
Invalid client credentials error |
Wrong client ID or secret |
Verify spelling and match values from Admin Console |
Setting Up Roles and Permissions in Keycloak
Roles and permissions in Keycloak define what users and applications are allowed to do. Roles can be assigned to users, groups, or clients, and are embedded into access tokens to enforce authorization. This guide explains how to define and manage roles via the Admin Console, REST API, and CLI, with best practices and common issues.
Creating Roles via Keycloak Admin Console
This is the easiest way to create and manage roles visually.
Access the Admin Console
Log in to:
http://<your-keycloak-domain>/admin/Choose the appropriate realm.
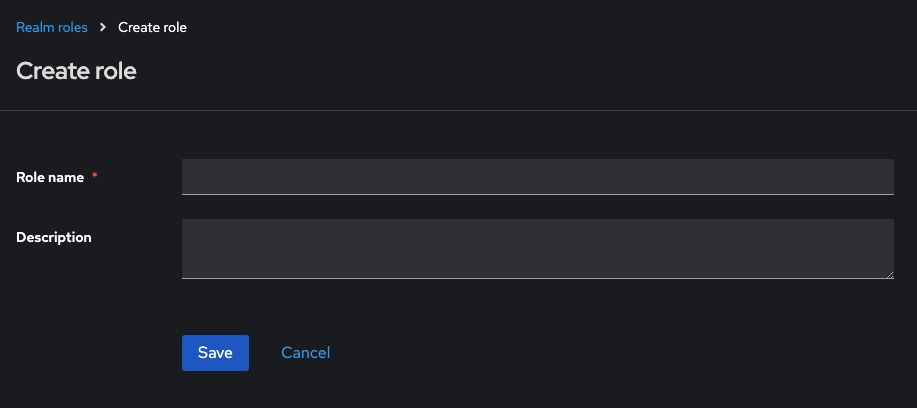
Create Realm Roles
-
Go to Roles > Add Role
-
Enter:
-
Role Name: e.g., admin, viewer, editor
-
Description: Optional but recommended
-
-
Click Save
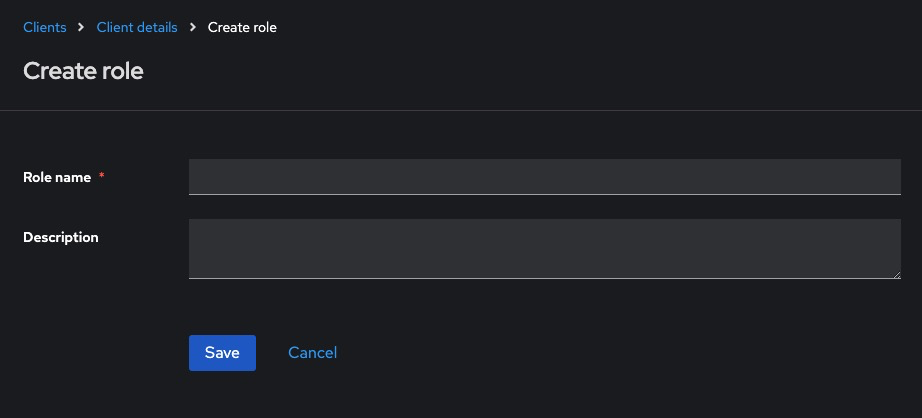
Create Client Roles
-
Go to Clients > [client-name] > Roles > Create Role
-
Fill in the Role Name and optional Description
-
Save the role
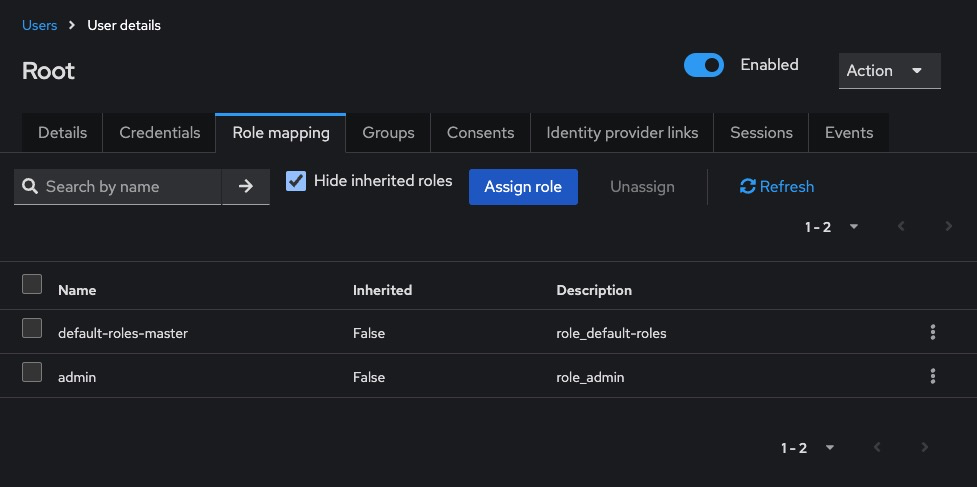
Assign Roles to Users
-
Go to Users > [username] > Role Mappings
-
In Available Roles, choose from:
-
Realm roles (top-left dropdown)
-
Client roles (select client under “Client Roles”)
-
-
Click Add selected
Creating Roles via Keycloak REST API
Get Access Token
curl -X POST "https://<keycloak-domain>/realms/master/protocol/openid-connect/token" \
  -H "Content-Type: application/x-www-form-urlencoded" \
  -d "username=admin" \
  -d "password=admin-password" \
  -d "grant_type=password" \
  -d "client_id=admin-cli"
Save the access_token.
Create Realm Role
curl -X POST "https://<keycloak-domain>/admin/realms/<realm>/roles" \
  -H "Authorization: Bearer <access_token>" \
  -H "Content-Type: application/json" \
  -d '{
    "name": "viewer",
    "description": "Read-only access"
  }'
Create Client Role
curl -X POST "https://<keycloak-domain>/admin/realms/<realm>/clients/<client-id>/roles" \
  -H "Authorization: Bearer <access_token>" \
  -H "Content-Type: application/json" \
  -d '{
    "name": "api-user",
    "description": "API access for clients"
  }'
To get the client ID:
curl -H "Authorization: Bearer <access_token>" \
  "https://<keycloak-domain>/admin/realms/<realm>/clients"
Creating Roles via Docker CLI
Access the Container
docker exec -it keycloak bashCreate Roles via CLI
/opt/keycloak/bin/kcadm.sh config credentials \
  --server http://localhost:8080 --realm master \
  --user admin --password admin

/opt/keycloak/bin/kcadm.sh create roles -r <realm> \
  -s name=auditor -s description="Can view reports"
To create client roles:
/opt/keycloak/bin/kcadm.sh create clients/<client-id>/roles -r <realm> \
  -s name=external-api -s description="Role for external apps"
Required Permissions for Managing Roles
To manage roles, users need:
-
manage-realm role for realm roles
-
manage-clients role for client-specific roles
To assign via Admin Console:
Users > [admin-user] > Role Mappings > Realm Roles > Add 'manage-realm' or 'manage-clients'Best Practices for Roles and Permissions
- Use Fine-Grained Role Names: Use names like invoice_viewer, invoice_editor, or admin_dashboard for clarity.
- Use Groups to Assign Roles in Bulk: Create groups such as managers, sales, or auditors, then assign roles to groups.
- Map Roles to Access Tokens: Use Client > Mappers to include role names in the access_token or id_token.
- Prefer Client Roles for Application Permissions: Client roles are scoped to individual apps and help separate responsibilities.
- Use Composite Roles Sparingly: Composite roles combine multiple roles into one but may add complexity if overused.
Common Issues and Troubleshooting
|
Issue |
Possible Cause |
Solution |
|---|---|---|
|
Role doesn’t appear in token |
Missing protocol mapper |
Add a role mapper in Client > Mappers |
|
User not authorized despite role assignment |
Role not assigned to the correct client/realm |
Verify if the role is client-scoped or realm-wide |
|
403 Forbidden despite valid login |
Role not embedded in access token |
Ensure token includes required roles via protocol mappers |
|
REST API: 409 Conflict when creating role |
Role with same name already exists |
Use a unique name or update existing role |
|
Cannot assign role to user |
User lacks manage-users privilege |
Ensure admin has role assignment rights |
Enabling Identity Federation in Keycloak
Identity federation allows you to delegate authentication to external identity providers (IdPs) like Google, GitHub, Facebook, or enterprise systems such as LDAP and Active Directory. This guide explains how to integrate identity providers using the Keycloak Admin Console, REST API, and Docker CLI (kcadm.sh). It includes configuration examples, permission requirements, best practices, and common issues.
Adding Identity Providers via Keycloak Admin Console
This method supports most popular providers like Google, GitHub, Facebook, and SAML/LDAP.
Access the Admin Console
Log in to your Keycloak Admin Console:
http://<your-keycloak-domain>/admin/Select the realm where you want to add the identity provider.
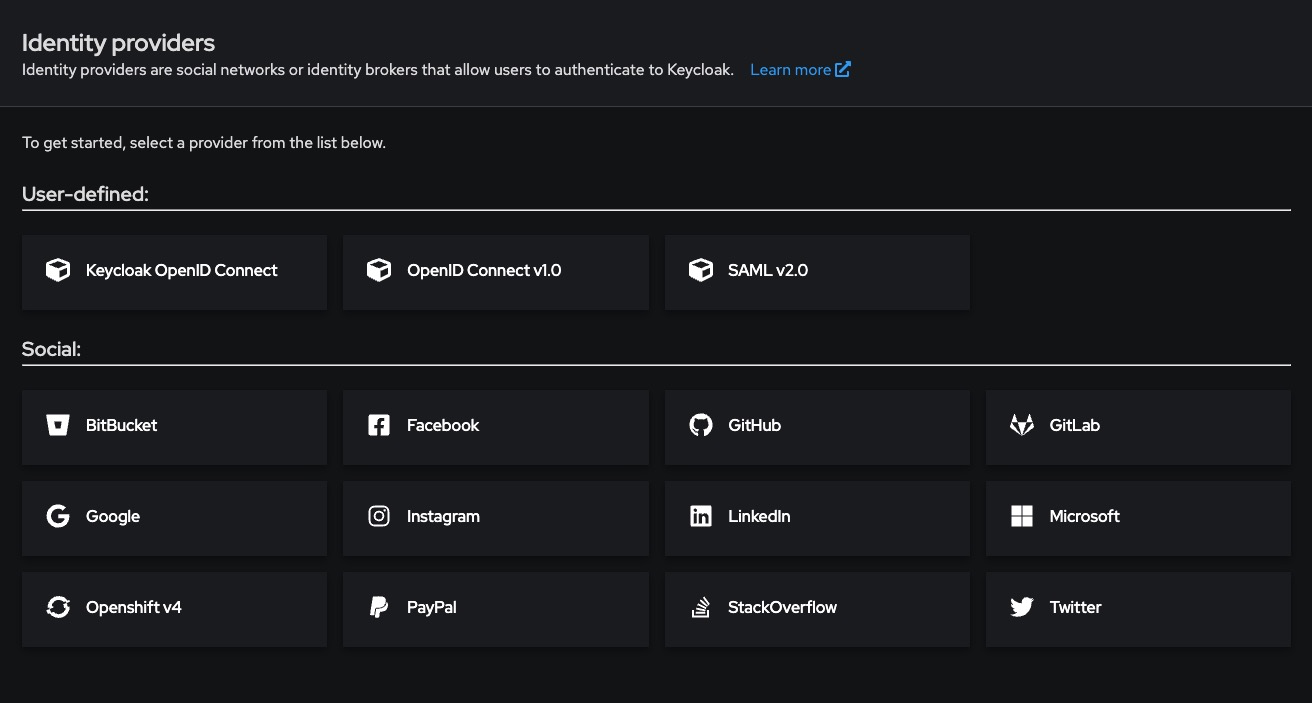
Add an Identity Provider (OIDC-based)
-
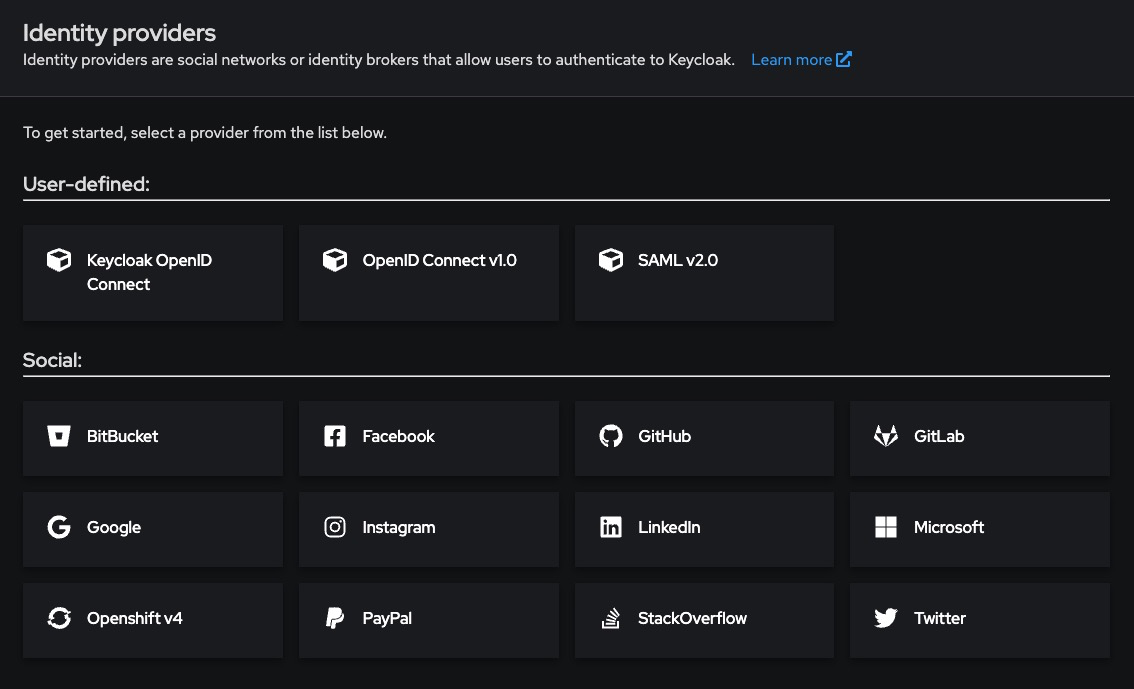
Go to Identity Providers > Add Provider
-
Choose an option like Google, GitHub, or OpenID Connect v1.0
-
Fill in the following:
-
Alias: A unique name like google or github
-
Client ID: From the external IdP
-
Client Secret: From the external IdP
-
Authorization URL, Token URL, User Info URL: Auto-filled for well-known providers
-
-
Set Sync Mode (e.g., IMPORT, FORCE, or LEGACY)
-
Enable Store Tokens if you want offline access
-
Click Save
Test the Identity Provider
-
Go to the realm login page
-
You’ll now see a “Login with Google” or equivalent option
Adding LDAP or Active Directory
-
Go to User Federation > Add Provider → LDAP
-
Fill in connection details:
|
Field |
Example |
|---|---|
|
Connection URL |
ldap://ldap.mycompany.com |
|
Users DN |
ou=users,dc=mycompany,dc=com |
|
Bind DN |
cn=admin,dc=mycompany,dc=com |
|
Bind Credential |
Your LDAP password |
|
Vendor |
Active Directory, Other, etc. |
-
Choose Edit Mode: READ_ONLY, WRITABLE, or UNSYNCED
-
Enable Periodic Sync if needed
-
Save and test the connection
Adding Identity Providers via REST API
Get Access Token
curl -X POST "https://<keycloak-domain>/realms/master/protocol/openid-connect/token" \
  -H "Content-Type: application/x-www-form-urlencoded" \
  -d "username=admin" \
  -d "password=admin-password" \
  -d "grant_type=password" \
  -d "client_id=admin-cli"
Save the access_token.
Add OIDC Identity Provider
curl -X POST "https://<keycloak-domain>/admin/realms/<realm>/identity-provider/instances" \
  -H "Authorization: Bearer <access_token>" \
  -H "Content-Type: application/json" \
  -d '{
    "alias": "google",
    "providerId": "google",
    "enabled": true,
    "trustEmail": true,
    "storeToken": false,
    "addReadTokenRoleOnCreate": false,
    "firstBrokerLoginFlowAlias": "first broker login",
    "config": {
      "clientId": "GOOGLE_CLIENT_ID",
      "clientSecret": "GOOGLE_CLIENT_SECRET"
    }
  }'
Adding Identity Providers via Docker CLI
Access the Container
docker exec -it keycloak bashAdd Provider
/opt/keycloak/bin/kcadm.sh config credentials \
  --server http://localhost:8080 \
  --realm master --user admin --password admin

/opt/keycloak/bin/kcadm.sh create identity-provider/instances -r <realm> \
  -s alias=github -s providerId=github \
  -s enabled=true \
  -s config.clientId=GITHUB_CLIENT_ID \
  -s config.clientSecret=GITHUB_CLIENT_SECRET
Required Permissions for Identity Federation
-
Requires manage-identity-providers or admin role in the target realm
-
REST tokens must come from a user with these privileges
To assign via Admin Console:
Users > [admin-user] > Role Mappings > Realm Roles > Add 'manage-identity-providers'Best Practices for Identity Federation
- Use Standard Broker Flows: Leverage First Broker Login flow to prompt for email verification or account linking.
- Map External Claims to Roles: Use Identity Provider Mappers to assign roles or sync attributes (like email, groups, org) automatically.
- Avoid Using Public Client IDs in Backend: Always use confidential clients when configuring from the backend or REST API.
- Enable Logging During Setup: Use Keycloak’s Events > Settings to track login attempts and errors for debugging.
- Test With Separate Test Realm First: Validate your configuration in a dev/test realm before enabling in production.
Common Issues and Troubleshooting
|
Issue |
Possible Cause |
Solution |
|---|---|---|
|
Login button not showing on login page |
Provider not enabled |
Ensure enabled=true and alias is correct |
|
Invalid client_id error |
Client ID mismatch |
Verify credentials from the IdP provider dashboard |
|
User not found after login |
No email or username claim returned |
Check mappers and ensure email or preferred_username is mapped |
|
LDAP users not visible in UI |
Wrong base DN or invalid bind credentials |
Test connection under User Federation settings |
|
403 Forbidden on REST call |
Missing role or token scope |
Ensure token has manage-identity-providers |
Enabling Two-Factor Authentication (2FA) in Keycloak
Two-Factor Authentication (2FA) adds an extra layer of security to user logins by requiring something the user knows (password) and something they have (typically an OTP via a mobile app). This guide explains how to enable and enforce OTP-based 2FA for all or specific users in Keycloak, using the Admin Console, authentication flows, and best practices.
Enabling 2FA via the Admin Console
Log in to the Admin Console
http://<your-keycloak-domain>/admin/Choose the realm where you want to enable 2FA.
Enable OTP in Authentication Flow
-
Go to Authentication > Flows
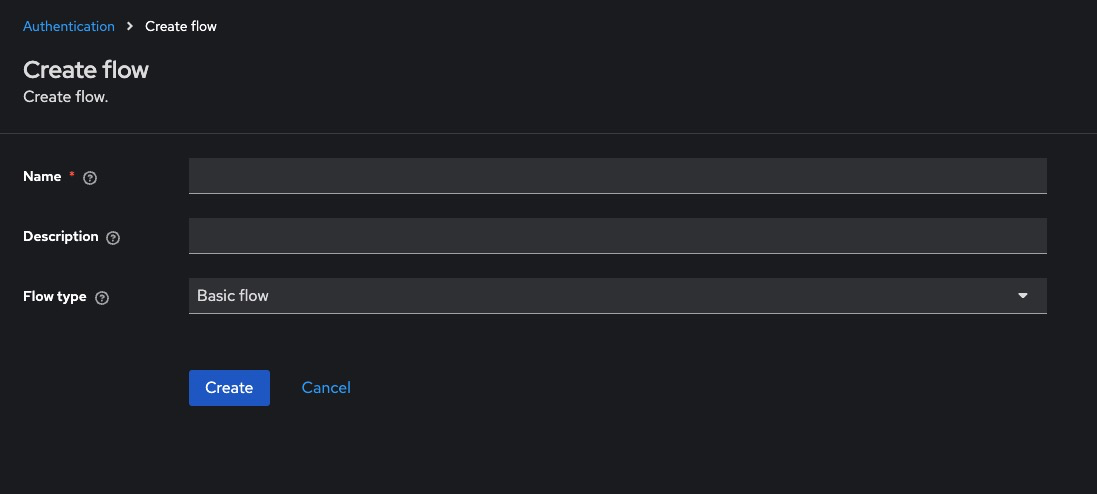
-
Select the Browser flow (or copy it if you want a custom flow)
-
Locate the Browser execution list:
-
Ensure that OTP Form is listed and set to REQUIRED
-
If it’s not listed:
-
Click Add Execution
-
Choose OTP Form, then set its requirement to REQUIRED
-
-
-
Click Save
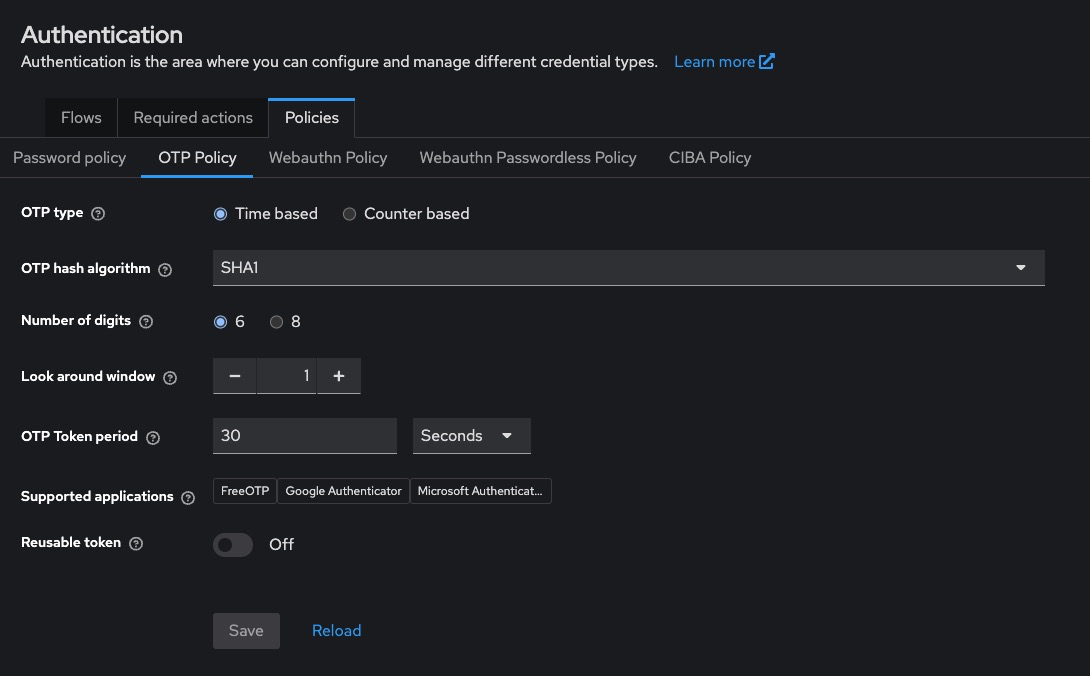
Configure OTP Policy
Go to Realm Settings > OTP and configure:
-
OTP Type: TOTP (time-based, most common)
-
Period: 30 seconds (default)
-
Digits: 6
-
Algorithm: SHA1
-
Look Ahead Window: 1 or 2
Click Save
Enforcing 2FA for Specific Users
2FA is optional by default. To make it required for a specific user:
-
Go to Users > [username]
-
Open the Credentials tab
-
Click Set Up Required Action
-
Choose Configure OTP from the dropdown
-
Click Save
The user will be prompted to set up 2FA on their next login.

Enforcing 2FA for All Users
To enforce 2FA globally:
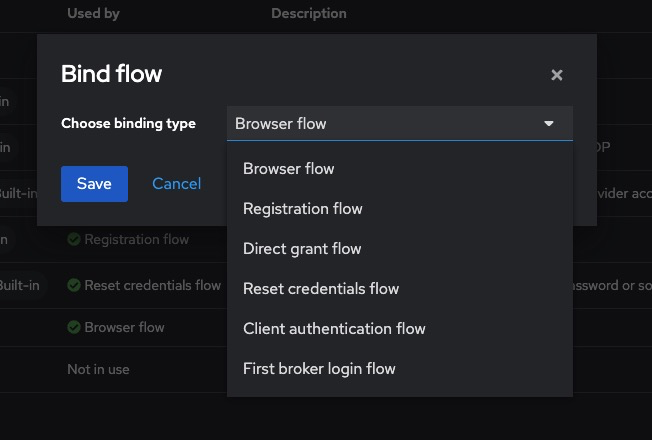
-
Go to Authentication > Bindings
-
Set Browser Flow to a flow where OTP Form is REQUIRED
-
All users will be required to configure 2FA on their next login if not already done
Enabling 2FA via REST API
Get Admin Access Token
curl -X POST "https://<keycloak-domain>/realms/master/protocol/openid-connect/token" \
  -H "Content-Type: application/x-www-form-urlencoded" \
  -d "username=admin" \
  -d "password=admin-password" \
  -d "grant_type=password" \
  -d "client_id=admin-cli"
Assign “Configure OTP” Required Action to a User
curl -X PUT "https://<keycloak-domain>/admin/realms/<realm>/users/<user-id>" \
  -H "Authorization: Bearer <access_token>" \
  -H "Content-Type: application/json" \
  -d '{"requiredActions": ["CONFIGURE_TOTP"]}'
To get the user ID:
curl -H "Authorization: Bearer <access_token>" \
  https://<keycloak-domain>/admin/realms/<realm>/users?username=<username>
Enabling 2FA via Docker CLI
Authenticate and Set OTP Action
docker exec -it keycloak bash

/opt/keycloak/bin/kcadm.sh config credentials \
  --server http://localhost:8080 \
  --realm master --user admin --password admin

/opt/keycloak/bin/kcadm.sh update users/<user-id> -r <realm> \
  -s 'requiredActions=["CONFIGURE_TOTP"]'
Required Permissions for 2FA Management
-
Requires manage-users role
-
REST API calls must use a token with manage-users permission in the realm
To assign via Admin Console:
Users > [admin-user] > Role Mappings > Realm Roles > Add 'manage-users'Best Practices for 2FA
- Use Time-Based OTP (TOTP): TOTP is compatible with standard apps like Google Authenticator, Authy, or FreeOTP.
- Customize OTP Setup Page: Modify the otp.ftl page inside your theme to reflect your brand and offer setup instructions.
- Inform Users Before Enforcing: Enable OTP as a required action with communication ahead of rollout to avoid login issues.
- Use Conditional 2FA Flows: Use conditional executions (e.g., only require OTP from outside a trusted network/IP range).
- Back Up OTP Configuration: Encourage users to back up their OTP seed or enable recovery codes for critical accounts.
Common Issues and Troubleshooting
|
Issue |
Possible Cause |
Solution |
|---|---|---|
|
Users not prompted for 2FA |
OTP Form not set to REQUIRED in flow |
Set requirement to REQUIRED in the Browser flow |
|
OTP setup skips |
Configure OTP not added as required action |
Manually assign it to users or enforce via default flow |
|
“Invalid TOTP” error on login |
Wrong time sync or wrong app |
Ensure mobile device clock is correct and app supports TOTP |
|
OTP works once then fails |
Look-ahead window too small |
Increase look-ahead window under Realm Settings > OTP |
|
No OTP page shown after password |
Flow misconfigured |
Review order and requirement levels of all executions in the flow |
Resetting User Passwords in KeycloakNew Page
Password resets are a critical part of account lifecycle management. Keycloak provides multiple secure methods for resetting a user’s password manually through the Admin Console, programmatically via REST API, or via user self-service workflows using email links. This guide walks through all these approaches, including configuration steps, best practices, and common issues.
Resetting Password via Admin Console
This is the most direct method for administrators to reset passwords.
Access the Admin Console
Log in to:
http://<your-keycloak-domain>/admin/Select the desired realm.
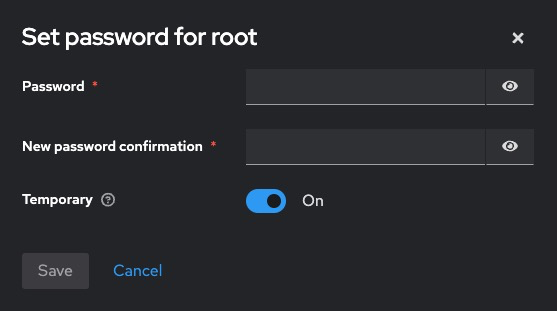
Reset a User’s Password
-
Go to Users > [username] > Credentials
-
Under Set Password:
-
Enter a new password
-
Confirm it
-
Toggle Temporary:
-
ON = user will be forced to change it on next login
-
OFF = permanent change
-
-
-
Click Set Password
The new password takes effect immediately.
Resetting Password via REST API
Get Admin Access Token
curl -X POST "https://<keycloak-domain>/realms/master/protocol/openid-connect/token" \
  -H "Content-Type: application/x-www-form-urlencoded" \
  -d "username=admin" \
  -d "password=admin-password" \
  -d "grant_type=password" \
  -d "client_id=admin-cli"
Set New Password for a User
curl -X PUT "https://<keycloak-domain>/admin/realms/<realm>/users/<user-id>/reset-password" \
  -H "Authorization: Bearer <access_token>" \
  -H "Content-Type: application/json" \
  -d '{
    "type": "password",
    "value": "SecurePassword123!",
    "temporary": false
  }'
To get <user-id>:
curl -H "Authorization: Bearer <access_token>" \
  https://<keycloak-domain>/admin/realms/<realm>/users?username=<username>
Resetting Password via Docker CLI
Inside the Container
docker exec -it keycloak bashReset User Password
/opt/keycloak/bin/kcadm.sh config credentials \
  --server http://localhost:8080 \
  --realm master --user admin --password admin

/opt/keycloak/bin/kcadm.sh set-password -r <realm> \
  --username <username> --new-password "SecurePassword123!" --temporary=false
Resetting Password via Email (Self-Service)
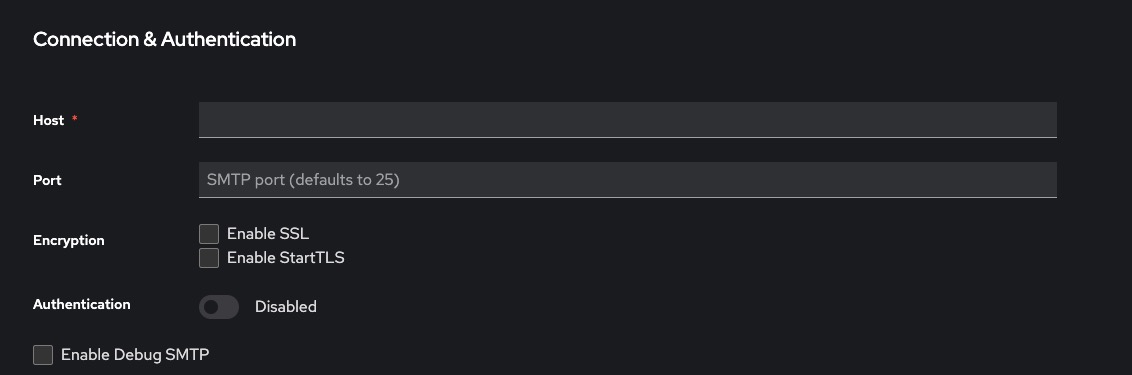
Configure SMTP
-
Go to Realm Settings > Email
-
Enter your SMTP configuration:
-
Host
-
Port
-
From address
-
Username/password
-
-
Click Test Connection
-
Click Save
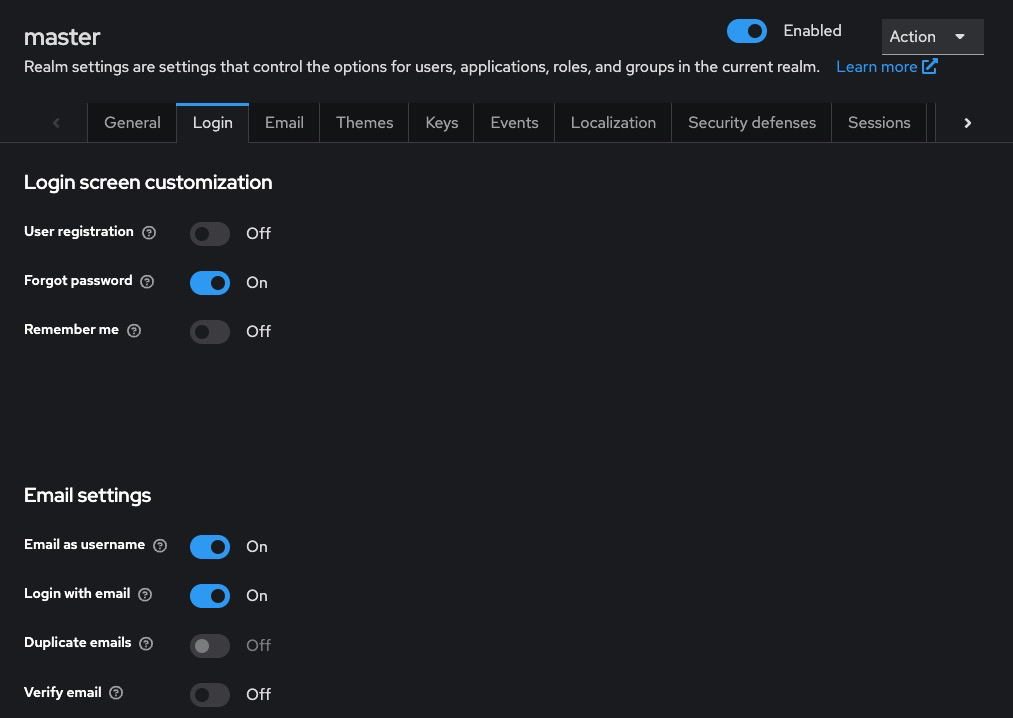
Enable “Forgot Password” Option
-
Go to Authentication > Flows > Browser
-
Ensure Reset Credentials subflow is present
- Under Realm Settings > Login, enable:
-
-
Forgot Password
-
Email as Username (optional)
-
Trigger Reset Link (User Side)
Users can go to the login page, click Forgot Password, and receive a reset link via email.
Required Permissions
-
Admin Console: Must have manage-users role
-
REST API: Token must have manage-users in the target realm
To assign via Admin Console:
Users > [admin-user] > Role Mappings > Realm Roles > Add 'manage-users'Best Practices for Password Resets
- Always Use Temporary Passwords for Manual Resets: For admin-initiated resets, mark passwords as temporary to enforce user re-entry.
- Secure SMTP Configuration: Always use TLS/SSL for SMTP and avoid using free/public SMTP providers in production.
- Limit Password Reset Frequency: Use brute-force protection under Realm Settings > Security Defenses > Brute Force Detection.
- Log and Audit Password Resets: Enable Events > Settings to log password reset events and maintain an audit trail.
- Inform Users of Security Practices: Add disclaimers to reset emails and verify request intent using short-lived links.
Common Issues and Troubleshooting
|
Issue |
Possible Cause |
Solution |
|---|---|---|
|
Password reset link not received |
SMTP not configured or invalid |
Set up SMTP under Realm Settings > Email |
|
Reset link expired |
Time limit exceeded |
Increase Reset Link Lifespan under Realm Settings > Tokens |
|
User not prompted to change password |
Password not marked as temporary |
Enable temporary: true or configure as required action |
|
REST API returns 403 Forbidden |
Missing permissions |
Ensure admin token has manage-users role |
|
User not found error |
Wrong realm or username |
Confirm realm and check Users > View all users |
Realm & Configuration Migration
Exporting and Importing Realms
Elestio enables seamless migration of Keycloak realms by supporting realm exports and imports. This capability is vital for backing up configurations, replicating environments, or transitioning between staging and production systems. The process ensures consistency across deployments while preserving all realm-level resources such as users, roles, groups, clients, and identity providers.
Key Steps for Exporting and Importing
Pre-Migration Preparation
Before initiating realm export or import, it’s essential to prepare both the source and target environments to ensure compatibility and prevent data loss:
-
Create an Elestio Account and Deploy Keycloak
Sign up at elest.io and deploy a Keycloak instance. Ensure the Keycloak version in the target environment matches the source to avoid compatibility issues during import.
-
Backup Existing Configuration
Always create a snapshot or export of the existing realm configuration before starting. This ensures a rollback path in case of issues during import.
-
Verify Resource Limits
Confirm the Elestio service has adequate CPU, RAM, and storage to accommodate the imported realm data, especially when dealing with large user bases or multiple clients.
Exporting a Realm
Keycloak provides CLI-based tools and startup parameters to export realm configurations. Elestio supports these via custom startup commands.
- Export Using kcadm.sh (CLI)
/opt/keycloak/bin/kcadm.sh config credentials --server http://localhost:8080 --realm master --user admin --password <your-password>
/opt/keycloak/bin/kcadm.sh get realms/<realm-name> > myrealm-export.json
This method exports the realm configuration to a JSON file.
- Export Using Environment Variable Method (Preferred on Elestio): You can configure the container to perform a full export on startup:
KEYCLOAK_IMPORT=/opt/keycloak/data/import/myrealm-export.jsonAnd use the following command:
/opt/keycloak/bin/kc.sh export --dir /opt/keycloak/data/import --realm <realm-name> --users realm_fileThis will export the full realm configuration including users, clients, and roles into the myrealm-export.json file.
- Download the Export File
After the export completes, use the Elestio dashboard or scp/rsync to download the exported JSON file from the container.
Importing a Realm into Elestio-Hosted Keycloak
Once the realm has been exported and downloaded, follow these steps to import it into your Elestio-hosted Keycloak instance:
- Upload Exported JSON File: Place the exported file in a volume accessible to the Elestio container (e.g., under
/opt/keycloak/data/import/). - Configure Import Environment Variable: In the Elestio dashboard, go to your Keycloak service → Settings → Environment Variables, and add:
KEYCLOAK_IMPORT=/opt/keycloak/data/import/myrealm-export.json- Trigger Import at Startup: Elestio will automatically import the realm during the next container restart. To do this:
-
-
Click Restart Service from the Elestio dashboard.
-
Monitor logs in real-time to ensure the import process completes successfully.
-
Post-Import Validation and Optimization
After importing the realm into your Elestio-hosted Keycloak instance, perform the following steps
- Validate Realm Components: Confirm all users, roles, groups, clients, and identity providers have been imported. Use the Keycloak Admin UI or kcadm.sh CLI to inspect the imported realm.
- Test Application Authentication Flows: Update client application configurations if needed. Confirm login, token exchange, and logout flows work as expected using the new realm setup.
- Review Access Tokens and Certificates: Ensure keys and token lifespans are properly configured. Replace any expired or incompatible certificates.
- Enable Monitoring and Backup: Use Elestio’s built-in monitoring tools to observe performance and usage. Schedule regular backups from the dashboard to ensure data protection.
- Apply Security Best Practices: Rotate admin credentials. Set up IP whitelisting and firewalls via Elestio. Review and assign minimal privileges to users and service accounts.
Benefits of Using Elestio for Realm Management
- Simplified Automation: Elestio automates backup, monitoring, and scaling, removing manual overhead from managing Keycloak instances.
- Secure by Default: Instances are provisioned with firewalls, encryption, and unique passwords. Elestio keeps Keycloak up to date with critical security patches.
- Scalable and Portable: Realms can be exported and imported across environments with ease, enabling multi-region replication, staging-to-prod transitions, and more.
- Performance Optimized: Instances are pre-tuned for performance. Elestio supports scaling CPU, RAM, and volume size based on identity workload.
Migrating from Another IAM Provider to Keycloak
Migrating to Keycloak from other IAM platforms such as Auth0, Okta, Firebase Auth, or custom-built identity solutions requires careful preparation, structured data transformation, and secure reconfiguration of users, applications, and federation protocols. This guide provides a comprehensive, command-supported migration pathway tailored for real-world deployments—especially useful in DevOps pipelines and managed hosting environments such as Elestio.
Pre-Migration Preparation
Begin by auditing your existing IAM system to determine the number of users, the complexity of roles and permissions, the use of federated identity providers (like Google or LDAP), and any custom claims or attributes associated with each user. Export the data structure if the platform supports it. For example, Auth0 offers a Management API to export users in JSON format, while Okta allows CSV exports directly from the dashboard. Firebase Auth provides CLI-based user export via the auth:export command.
Simultaneously, deploy a new Keycloak instance on your preferred infrastructure—using Docker, Kubernetes, or a managed solution. For local Docker-based testing, the following command spins up a Keycloak container:
docker run -d --name keycloak \
  -p 8080:8080 \
  -e KEYCLOAK_ADMIN=admin \
  -e KEYCLOAK_ADMIN_PASSWORD=admin \
  quay.io/keycloak/keycloak:24.0.3 \
  start-dev
After starting the Keycloak server, access the admin console at http://localhost:8080/admin/. Create a new realm to isolate your identity configuration. In this realm, define the clients (applications), roles, and groups you plan to import or recreate based on your previous IAM structure.
User and Credential Migration
Export users from your existing IAM provider and structure the data for compatibility with Keycloak. If using Auth0, the export may look like this:
{
  "email": "jane.doe@example.com",
  "user_id": "auth0|abc123",
  "email_verified": true,
  "given_name": "Jane",
  "family_name": "Doe",
  "custom_roles": ["admin", "viewer"]
}
Transform this data into a Keycloak-compatible JSON using a script. You can use the Keycloak Admin REST API or the kcadm.sh CLI to programmatically create users. Here’s an example using kcadm.sh:
./kcadm.sh config credentials --server http://localhost:8080 \
  --realm master \
  --user admin \
  --password admin

./kcadm.sh create users -r myrealm -s username=jane.doe \
  -s enabled=true \
  -s email=jane.doe@example.com \
  -s emailVerified=true

./kcadm.sh set-password -r myrealm --username jane.doe --new-password newPassword123!
To bulk import users, generate a JSON file with user definitions and mount it into the Keycloak container using the keycloak-config-cli. For example:
docker run --rm \
  -e KEYCLOAK_URL=http://localhost:8080 \
  -e KEYCLOAK_USER=admin \
  -e KEYCLOAK_PASSWORD=admin \
  -v "$(pwd)/realm-config:/config" \
  adorsys/keycloak-config-cli:latest
If your previous IAM provider did not expose hashed passwords or used incompatible hashing algorithms, plan to send password reset links after user import. Alternatively, you can enforce first-login password resets using the following command:
./kcadm.sh update users/<user_id> -r myrealm -s "requiredActions=['UPDATE_PASSWORD']"Application and Federation Migration
Next, migrate application integrations. In Keycloak, applications are known as clients. For each application that used your old IAM system, recreate a corresponding client in Keycloak. Choose the correct protocol (OpenID Connect or SAML) and configure the redirect URIs, web origins, client secrets, and access token lifetimes.
For example, to create a public OpenID Connect client:
./kcadm.sh create clients -r myrealm \
  -s clientId=my-app \
  -s enabled=true \
  -s publicClient=true \
  -s 'redirectUris=["https://myapp.com/*"]'
For third-party identity federation, use the Keycloak admin console or CLI to add identity providers. To connect Google OAuth:
./kcadm.sh create identity-provider/instances -r myrealm \
  -s alias=google \
  -s providerId=google \
  -s enabled=true \
  -s storeToken=true \
  -s "config.clientId=<GOOGLE_CLIENT_ID>" \
  -s "config.clientSecret=<GOOGLE_CLIENT_SECRET>" \
  -s "config.defaultScope=email profile"
For LDAP integration:
./kcadm.sh create user-storage -r myrealm \
  -s name=ldap \
  -s providerId=ldap \
  -s "config.connectionUrl=ldap://ldap.example.com" \
  -s "config.bindDn=cn=admin,dc=example,dc=com" \
  -s "config.bindCredential=adminpass" \
  -s "config.usersDn=ou=users,dc=example,dc=com"
For SAML-based federation, download the SAML metadata from your IdP and import it using the admin console under Identity Providers > Add provider > SAML v2.0.
Post-Migration Validation and Optimization
After users, clients, and federation setups are migrated, conduct the following checklist for validation:
-
User Login Testing: Log in with a subset of migrated user accounts to verify that usernames, emails, roles, and group mappings are correctly preserved.
-
Token Verification: Use JWT decoder tools to inspect access and ID tokens issued by Keycloak. Ensure claims match what applications expect.
-
Application Login Flow: Test login, logout, and token refresh operations in all integrated applications.
-
Admin Console Review: Confirm that users, groups, roles, and clients appear as expected in the Keycloak admin console.
-
MFA Setup: Enable and test two-factor authentication (TOTP or WebAuthn) for relevant user roles.
-
Email Configuration: Configure SMTP settings under Realm Settings > Email and verify email-based actions such as password resets or verification emails.
-
Backup Enablement: Configure regular database backups using cron jobs, Kubernetes volumes, or your platform’s snapshot features.
-
HTTPS Enforcement: Ensure your instance is served over TLS with valid certificates. Update keycloak.conf or reverse proxy settings accordingly.
-
Audit Logs: Enable event logging under Events > Settings to monitor authentication events and system-level changes.
-
Token Lifespan Configuration: Adjust accessTokenLifespan, refreshTokenMaxReuse, and session timeouts to fit your application needs.
-
Security Review: Rotate all client secrets, disable default admin accounts in production, and set up firewalls to restrict admin endpoint access.
Cloning a Realm to a New Cluster or Region
In scenarios where high availability, regional redundancy, or environment separation (e.g., staging to production) is required, cloning an entire Keycloak realm to a new cluster or region becomes essential. This process involves exporting the realm’s configuration and optionally user data, transferring it securely, and importing it into a fresh Keycloak instance. This guide covers all the required steps, including command-line tooling, configuration handling, and validation checks to ensure a seamless realm replication.
Pre-Cloning Preparation
Before initiating the cloning process, ensure that both the source and target Keycloak clusters are accessible and running compatible versions of Keycloak. This avoids schema mismatches and import errors. Install the Keycloak Admin CLI (kcadm.sh) and Keycloak Configuration CLI (keycloak-config-cli) on your local system or CI/CD pipeline.
Deploy a new Keycloak instance in the target cluster or region. This can be done using Docker, Kubernetes, or a managed hosting provider. Example Docker command to spin up a development instance:
docker run -d --name keycloak \
  -p 8080:8080 \
  -e KEYCLOAK_ADMIN=admin \
  -e KEYCLOAK_ADMIN_PASSWORD=admin \
  quay.io/keycloak/keycloak:24.0.3 \
  start-dev
Ensure that network connectivity exists between your machine and the target Keycloak instance. Also, create an admin user for the new instance.
Exporting Realm Configuration from the Source Cluster
To begin the cloning process, export the realm’s full configuration (including clients, roles, groups, and optionally users) using the Keycloak Admin CLI or built-in export tools. If using the Keycloak start command with --export flag, execute:
/opt/keycloak/bin/kc.sh export --dir /opt/keycloak/data/export \
  --realm myrealm \
  --users skip
To include users in the export:
/opt/keycloak/bin/kc.sh export --dir /opt/keycloak/data/export \
  --realm myrealm \
  --users all
If the Keycloak instance is running in Docker:
docker exec -it keycloak /opt/keycloak/bin/kc.sh export \
  --dir /opt/keycloak/data/export \
  --realm myrealm \
  --users all
The exported realm will be saved as a JSON file, e.g., myrealm-realm.json.
Transferring Exported Data
Once exported, securely transfer the generated realm export directory or file (myrealm-realm.json) to the target cluster or region. Depending on your infrastructure, use one of the following methods:
-
SCP or SFTP for VM-to-VM transfer:
scp myrealm-realm.json user@target-host:/tmp/-
AWS S3, Azure Blob Storage, or GCS for multi-cloud environments.
-
Git repositories or artifact registries for CI/CD pipelines.
Ensure that the target Keycloak container or pod has access to the file location.
Importing Realm into the Target Cluster
To import the realm into the new Keycloak instance, use the same kc.sh tool on the target side. The import must be triggered before the Keycloak server starts. If using a container:
docker run -d --name keycloak-new \
  -p 8080:8080 \
  -e KEYCLOAK_ADMIN=admin \
  -e KEYCLOAK_ADMIN_PASSWORD=admin \
  -v $(pwd)/export:/opt/keycloak/data/import \
  quay.io/keycloak/keycloak:24.0.3 \
  start-dev --import-realm
This command will initialize the new Keycloak instance with the cloned realm, including users if they were part of the original export.
Alternatively, if the server is already running, use kcadm.sh or the keycloak-config-cli for post-start import. The keycloak-config-cli is suitable for GitOps-style deployments:
docker run --rm \
  -e KEYCLOAK_URL=http://localhost:8080 \
  -e KEYCLOAK_USER=admin \
  -e KEYCLOAK_PASSWORD=admin \
  -v "$(pwd)/myrealm:/config" \
  adorsys/keycloak-config-cli:latest
Post-Cloning Validation
After the import is complete, validate the integrity of the cloned realm with the following checks:
-
Confirm that the new realm appears in the admin console and is accessible at /realms/myrealm.
-
Inspect clients to verify that client IDs, redirect URIs, and secrets have been preserved.
-
Validate that roles, groups, and permissions are correctly replicated.
-
Test login using a few sample user accounts if users were exported.
-
Decode access tokens to confirm the correctness of claims, issuer, and audience.
-
Check identity provider connections (e.g., Google, LDAP) and test federated logins.
-
Enable auditing under Events > Settings to monitor realm activity in the new instance.
-
Update baseUrl settings for clients if moving across DNS regions.
-
Ensure SMTP settings, themes, and custom scripts are present and functioning.
-
Enable TLS and update public frontend URLs if applicable.
-
Verify realm-specific settings like session timeout, brute force detection, and required actions.
Cluster Management
Overview
Elestio provides a complete solution for setting up and managing software clusters. This helps users deploy, scale, and maintain applications more reliably. Clustering improves performance and ensures that services remain available, even if one part of the system fails. Elestio supports different cluster setups to handle various technical needs like load balancing, failover, and data replication.
Supported Software for Clustering:
Elestio supports clustering for a wide range of open-source software. Each is designed to support different use cases like databases, caching, and analytics:
-
MySQL:
Supports Single Node, Primary/Replica, and Multi-Master cluster types. These allow users to create simple setups or more advanced ones where reads and writes are distributed across nodes. In a Primary/Replica setup, replicas are updated continuously through replication. These configurations are useful for high-traffic applications that need fast and reliable access to data. -
PostgreSQL:
PostgreSQL clusters can be configured for read scalability and failover protection. Replication ensures that data written to the primary node is copied to replicas. Clustering PostgreSQL also improves query throughput by offloading read queries to replicas. Elestio handles replication setup and node failover automatically. -
Redis/KeyDB/Valkey:
These in-memory data stores support clustering to improve speed and fault tolerance. Clustering divides data across multiple nodes (sharding), allowing horizontal scaling. These tools are commonly used for caching and real-time applications, so fast failover and data availability are critical. -
Hydra and TimescaleDB:
These support distributed and time-series workloads, respectively. Clustering helps manage large datasets spread across many nodes. TimescaleDB, built on PostgreSQL, benefits from clustering by distributing time-based data for fast querying. Hydra uses clustering to process identity and access management workloads more efficiently in high-load environments. -
Keycloak:
Keycloak clustering allows you to scale identity and access management services horizontally. In a clustered setup, Keycloak nodes share session and login state using a distributed cache (e.g., Infinispan), ensuring high availability and session failover. This is especially important for applications that depend on SSO, OAuth2, and federated login across microservices. Elestio’s managed Keycloak clusters handle the complexity of configuration, secure communication between nodes, and high availability out of the box.
- Clickhouse
- Opensearch
- Vaultwarden
- RKE2
- N8N
- RabbitMQ
- VAULT

Note: Elestio is frequently adding support for more clustered software like OpenSearch, Kafka, and ClickHouse. Always check the Elestio catalogue for the latest supported services.
Cluster Configurations:
Elestio offers several clustering modes, each designed for a different balance between simplicity, speed, and reliability:
- Single Node:
This setup has only one node and is easy to manage. It acts as a standalone Primary node. It’s good for testing, development, or low-traffic applications. Later, you can scale to more nodes without rebuilding the entire setup. Elestio lets you expand this node into a full cluster with just a few clicks. - Primary/Replica:
One node (Primary) handles all write operations, and one or more Replicas handle read queries. Replication is usually asynchronous and ensures data is copied to all replicas. This improves read performance and provides redundancy if the primary node fails. Elestio manages automatic data syncing and failover setup.
Cluster Management Features:
Elestio’s cluster dashboard includes tools for managing, monitoring, and securing your clusters. These help ensure stability and ease of use:
-
Node Management:
You can scale your cluster by adding or removing nodes as your app grows. Adding a node increases capacity; removing one helps reduce costs. Elestio handles provisioning and configuring nodes automatically, including replication setup. This makes it easier to scale horizontally without downtime. -
Backups and Restores:
Elestio provides scheduled and on-demand backups for all nodes. Backups are stored securely and can be restored if something goes wrong. You can also create a snapshot before major changes to your system. This helps protect against data loss due to failures, bugs, or human error. -
Access Control:
You can limit access to your cluster using IP allowlists, ensuring only trusted sources can connect. Role-based access control (RBAC) can be applied for managing different user permissions. SSH and database passwords are generated securely and can be rotated easily from the dashboard. These access tools help reduce the risk of unauthorized access. -
Monitoring and Alerts:
Real-time metrics like CPU, memory, disk usage, and network traffic are available through the dashboard. You can also check logs for troubleshooting and set alerts for high resource usage or failure events. Elestio uses built-in observability tools to monitor the health of your cluster and notify you if something needs attention. This allows you to catch problems early and take action.
Deploying a New Cluster
Creating a cluster is a foundational step when deploying services in Elestio. Clusters provide isolated environments where you can run containerized workloads, databases, and applications. Elestio’s web dashboard helps the process, allowing you to configure compute resources, choose cloud providers, and define deployment regions without writing infrastructure code. This guide walks through the steps required to create a new cluster using the Elestio dashboard.
Prerequisites
To get started, you’ll need an active Elestio account. If you’re planning to use your own infrastructure, make sure you have valid credentials for your preferred cloud provider (like AWS, GCP, Azure, etc.). Alternatively, you can choose to deploy clusters using Elestio-managed infrastructure, which requires no external configuration.
Creating a Cluster
Once you’re logged into the Elestio dashboard, navigate to the Clusters section from the sidebar. You’ll see an option to Create a new cluster clicking this will start the configuration process. The cluster creation flow is flexible but simple for defining essential details like provider, region, and resources in one place.
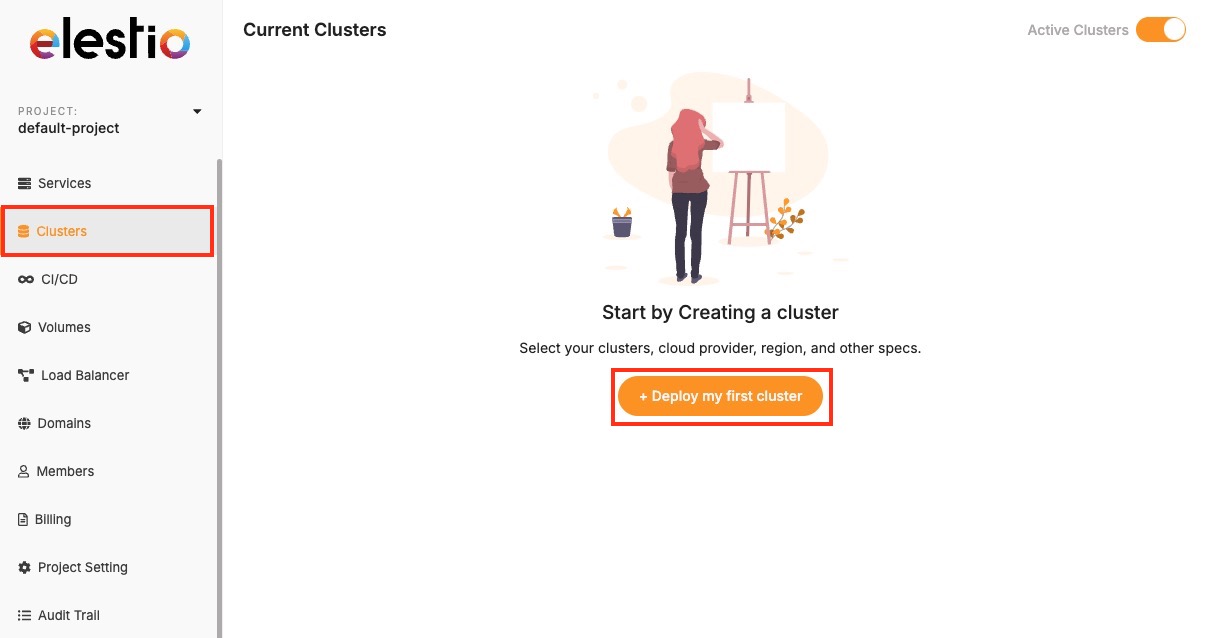
Now, select the database service of your choice that you need to create in a cluster environment. Click on Select button as you choose one.
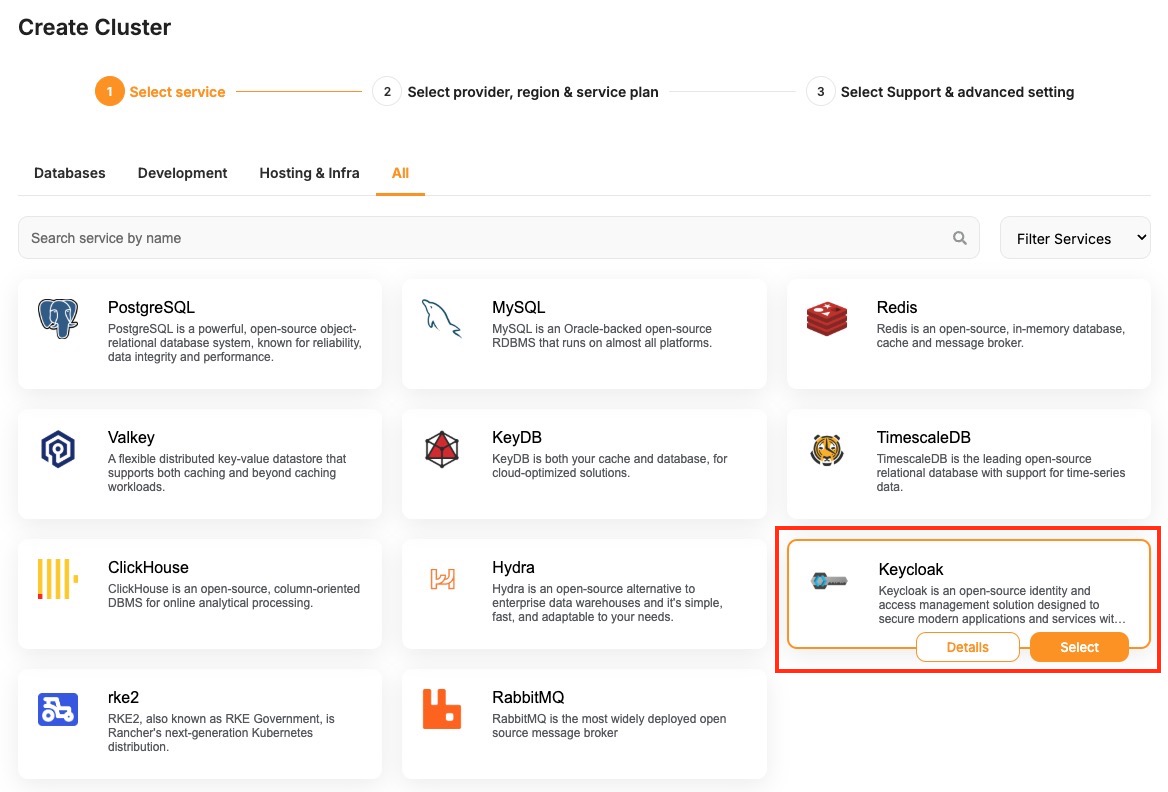
During setup, you’ll be asked to choose a hosting provider. Elestio supports both managed and BYOC (Bring Your Own Cloud) deployments, including AWS, DigitalOcean, Hetzner, and custom configurations. You can then select a region based on latency or compliance needs, and specify the number of nodes along with CPU, RAM, and disk sizes per node.
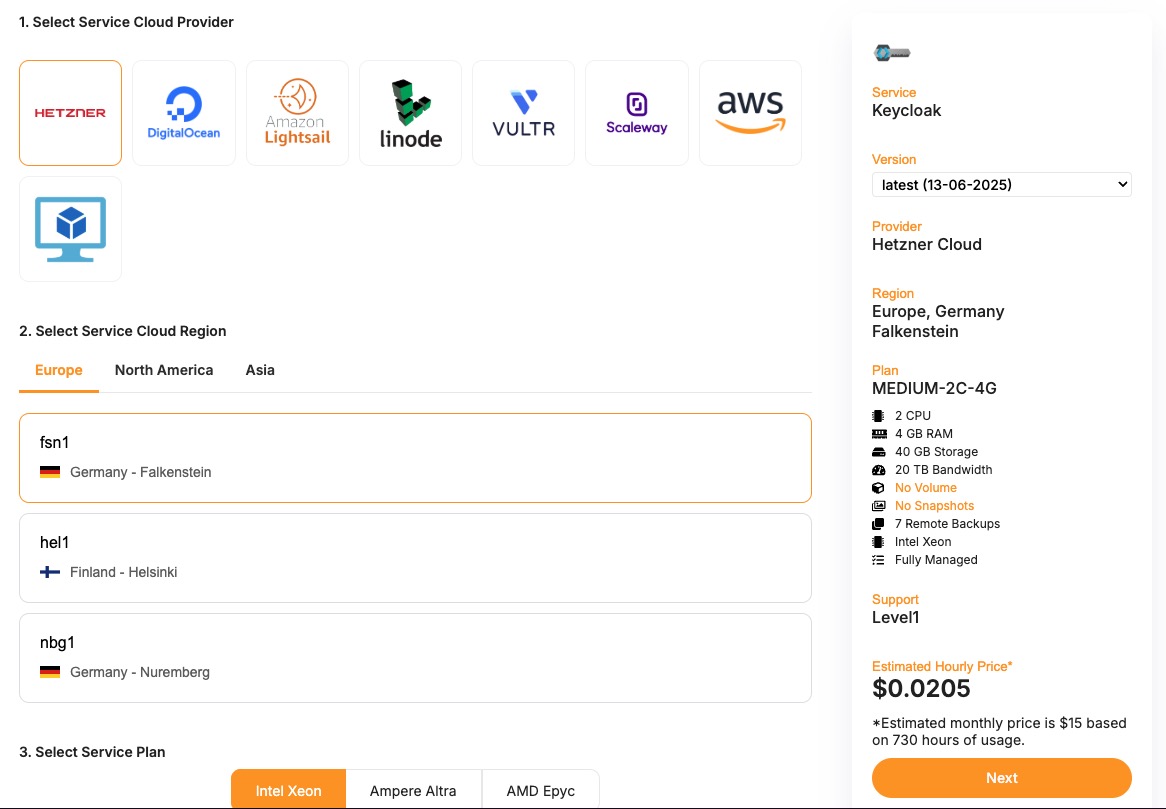
If you’re setting up a high-availability cluster, the dashboard also allows you to configure cluster-related details under Cluster configuration, where you get to select things like replication modes, number of replicas, etc. After you’ve configured the cluster, review the summary to ensure all settings are correct. Click the Create Cluster button to begin provisioning.
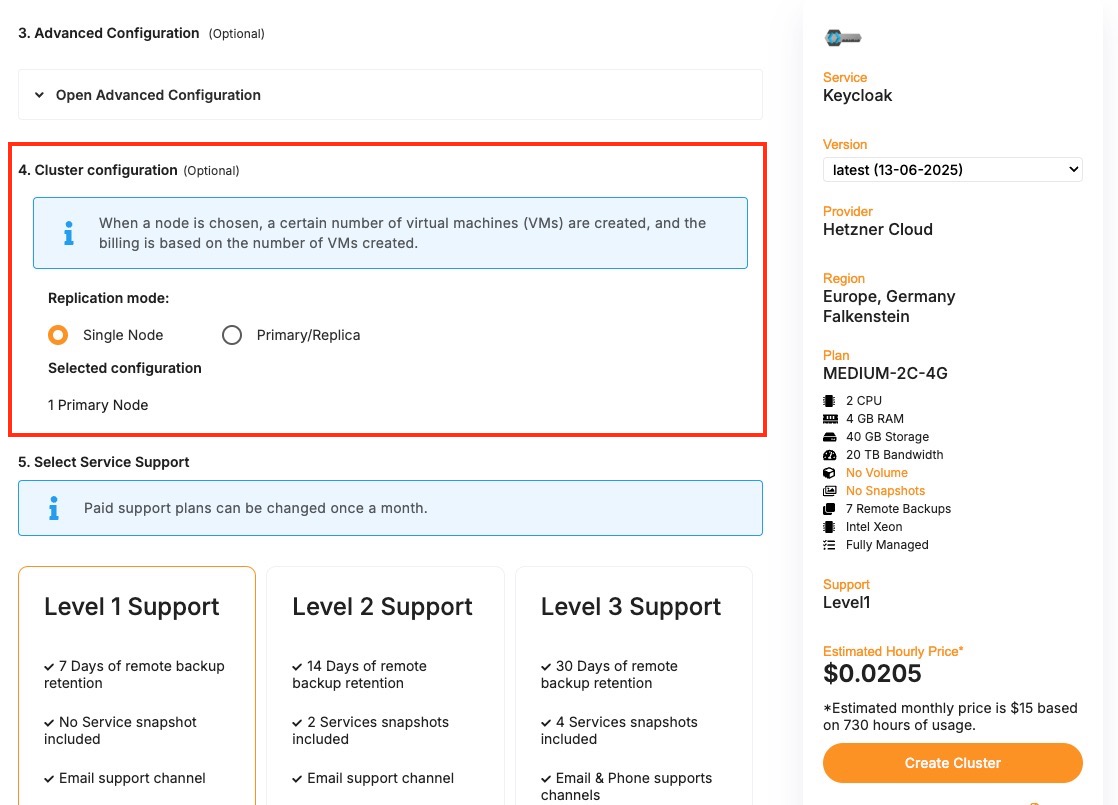
Elestio will start the deployment process, and within a few minutes, the cluster will appear in your dashboard. Once your cluster is live, it can be used to deploy new nodes and additional configurations. Each cluster supports real-time monitoring, log access, and scaling operations through the dashboard. You can also set up automated backups and access control through built-in features available in the cluster settings.
Node Management
Node management plays a critical role in operating reliable and scalable infrastructure on Elestio. Whether you’re deploying stateless applications or stateful services like databases, managing the underlying compute units nodes is essential for maintaining stability and performance.
Understanding Nodes
In Elestio, a node is a virtual machine that contributes compute, memory, and storage resources to a cluster. Clusters can be composed of a single node or span multiple nodes, depending on workload demands and availability requirements. Each node runs essential services and containers as defined by your deployed applications or databases.
Nodes in Elestio are provider-agnostic, meaning the same concepts apply whether you’re using Elestio-managed infrastructure or connecting your own cloud provider (AWS, Azure, GCP, etc.). Each node is isolated at the VM level but participates fully in the cluster’s orchestration and networking. This abstraction allows you to manage infrastructure without diving into the complexity of underlying platforms.
Node Operations
The Elestio dashboard allows you to manage the lifecycle of nodes through clearly defined operations. These include:
-
Creating a node, which adds capacity to your cluster and helps with horizontal scaling of services. This is commonly used when load increases or when preparing a high-availability deployment.
-
Deleting a node, which removes underutilized or problematic nodes. Safe deletion includes draining workloads to ensure service continuity.
-
Promoting a node, which changes the role of a node within the cluster—typically used in clusters with redundancy, where certain nodes may need to take on primary or leader responsibilities.
Each of these operations is designed to be safely executed through the dashboard and is validated against the current cluster state to avoid unintended service disruption. These actions are supported by Elestio’s backend orchestration, which handles tasks like container rescheduling and load balancing when topology changes.
Monitoring and Maintenance
Monitoring is a key part of effective node management. Elestio provides per-node visibility through the dashboard, allowing you to inspect CPU, memory, and disk utilization in real time. Each node also exposes logs, status indicators, and health checks to help detect anomalies or degradation early.
In addition to passive monitoring, the dashboard supports active maintenance tasks. You can reboot a node when applying system-level changes or troubleshooting, or drain a node to safely migrate workloads away from it before performing disruptive actions. Draining ensures that running containers are rescheduled on other nodes in the cluster, minimizing service impact.
For production setups, combining resource monitoring with automation like scheduled reboots, log collection, and alerting can help catch issues before they affect users. While Elestio handles many aspects of orchestration automatically, having visibility at the node level helps teams make informed decisions about scaling, updates, and incident response.
Cluster-wide resource graphs and node-level metrics are also useful for capacity planning. Identifying trends such as memory saturation or disk pressure allows you to preemptively scale or rebalance workloads, reducing the risk of downtime.
Adding a Node
As your application usage grows or your infrastructure requirements change, scaling your cluster becomes essential. In Elestio, you can scale horizontally by adding new nodes to an existing cluster. This operation allows you to expand your compute capacity, improve availability, and distribute workloads more effectively.
Need to Add a Node
There are several scenarios where adding a node becomes necessary. One of the most common cases is resource saturation when existing nodes are fully utilized in terms of CPU, memory, or disk. Adding another node helps distribute the workload and maintain performance under load.
In clusters that run stateful services or require high availability, having additional nodes ensures that workloads can fail over without downtime. Even in development environments, nodes can be added to isolate environments or test services under production-like load conditions. Scaling out also gives you flexibility when deploying services with different resource profiles or placement requirements.
Add a Node to Cluster
To begin, log in to the Elestio dashboard and navigate to the Clusters section from the sidebar. Select the cluster you want to scale. Once inside the cluster view, switch to the Nodes tab. This section provides an overview of all current nodes along with their health status and real-time resource usage.
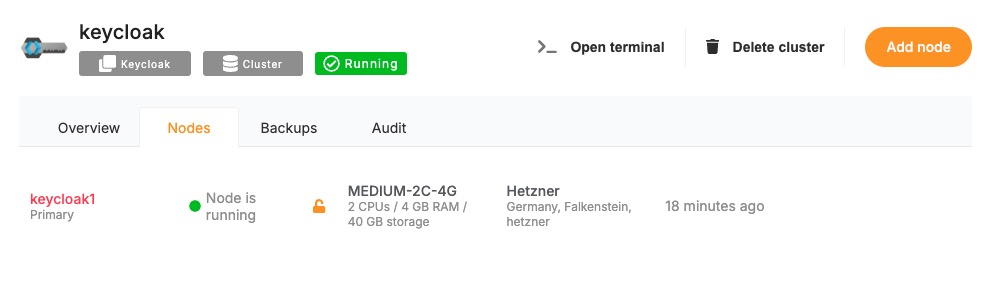
To add a new node, click the “Add Node” button. This opens a configuration panel where you can define the specifications for the new node. You’ll be asked to specify the amount of CPU, memory, and disk you want to allocate. If you’re using a bring-your-own-cloud setup, you may also need to confirm or choose the cloud provider and deployment region.
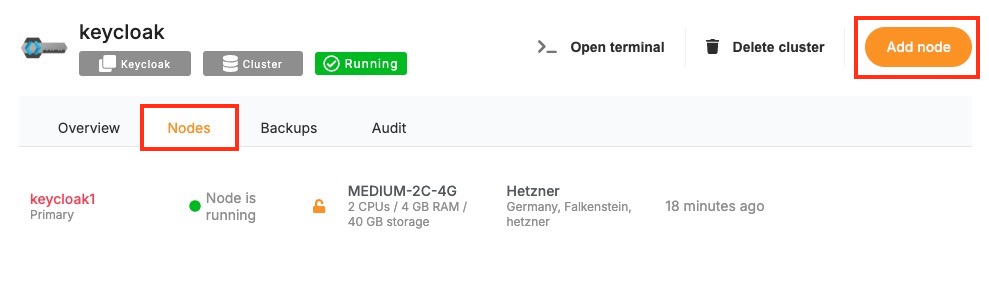
After configuring the node, review the settings to ensure they meet your performance and cost requirements. Click “Create” to initiate provisioning. Elestio will begin setting up the new node, and once it’s ready, it will automatically join your cluster.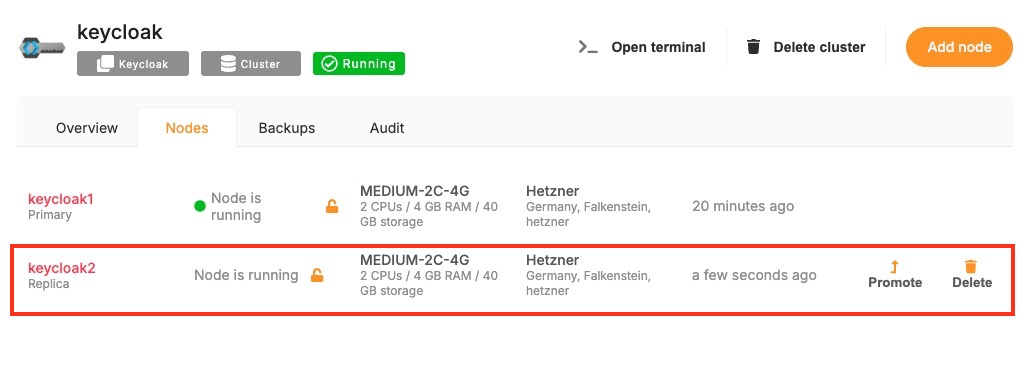
Once provisioned, the new node will appear in the node list with its own metrics and status indicators. You can monitor its activity, verify that workloads are being scheduled to it, and access its logs directly from the dashboard. From this point onward, the node behaves like any other in the cluster and can be managed using the same lifecycle actions such as rebooting or draining.
Post-Provisioning Considerations
After the node has been added, it becomes part of the active cluster and is available for scheduling workloads. Elestio’s orchestration layer will begin using it automatically, but you can further customize service placement through resource constraints or affinity rules if needed.
For performance monitoring, the dashboard provides per-node metrics, including CPU load, memory usage, and disk I/O. This visibility helps you confirm that the new node is functioning correctly and contributing to workload distribution as expected.
Maintenance actions such as draining or rebooting the node are also available from the same interface, making it easy to manage the node lifecycle after provisioning.
Promoting a Node
Clusters can be designed for high availability or role-based workloads, where certain nodes may take on leadership or coordination responsibilities. In these scenarios, promoting a node is a key administrative task. It allows you to change the role of a node. While not always needed in basic setups, node promotion becomes essential in distributed systems, replicated databases, or services requiring failover control.
When to Promote a Node?
Promoting a node is typically performed in clusters where role-based architecture is used. In high-availability setups, some nodes may act as leaders while others serve as followers or replicas. If a leader node becomes unavailable or needs to be replaced, you can promote another node to take over its responsibilities and maintain continuity of service.
Node promotion is also useful when scaling out and rebalancing responsibilities across a larger cluster. For example, promoting a node to handle scheduling, state tracking, or replication leadership can reduce bottlenecks and improve responsiveness. In cases involving database clusters or consensus-driven systems, promotion ensures a clear and controlled transition of leadership without relying solely on automatic failover mechanisms.
Promote a Node in Elestio
To promote a node, start by accessing the Clusters section in the Elestio dashboard. Choose the cluster containing the node you want to promote. Inside the cluster view, navigate to the Nodes tab to see the full list of nodes, including their current roles, health status, and resource usage. Locate the node that you want to promote and open its action menu. From here, select the “Promote Node” option.
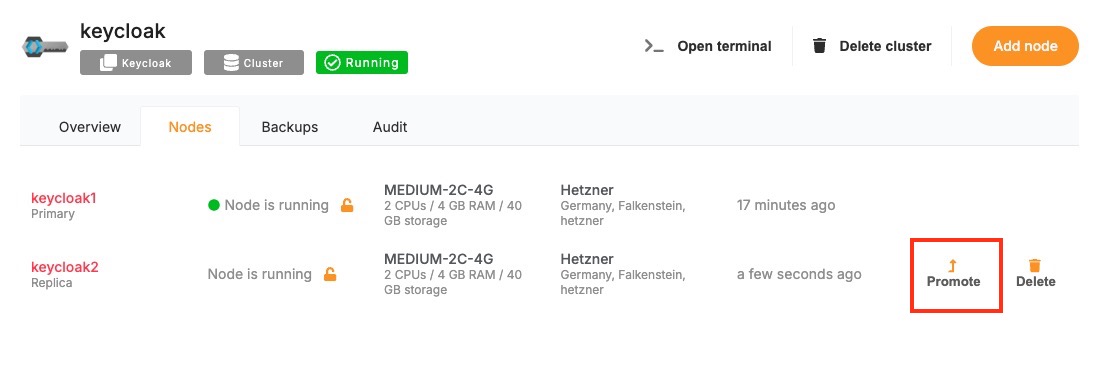
You may be prompted to confirm the action, depending on the configuration and current role of the node. This confirmation helps prevent unintended role changes that could affect cluster behavior.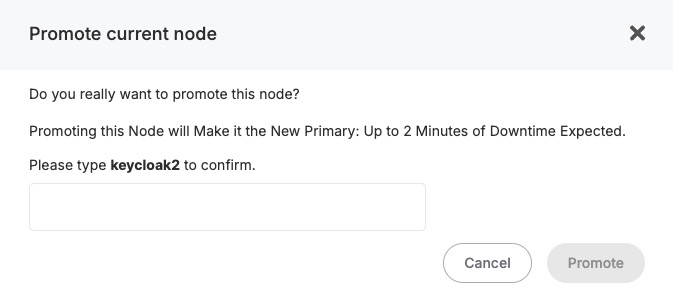
Once confirmed, Elestio will initiate the promotion process. This involves reconfiguring the cluster’s internal coordination state to acknowledge the new role of the promoted node. Depending on the service architecture and the software running on the cluster, this may involve reassigning leadership, updating replication targets, or shifting service orchestration responsibilities.
After promotion is complete, the node’s updated role will be reflected in the dashboard. At this point, it will begin operating with the responsibilities assigned to its new status. You can monitor its activity, inspect logs, and validate that workloads are being handled as expected.
Considerations for Promotion
Before promoting a node, ensure that it meets the necessary resource requirements and is in a stable, healthy state. Promoting a node that is under high load or experiencing performance issues can lead to service degradation. It’s also important to consider replication and data synchronization, especially in clusters where stateful components like databases are in use.
Promotion is a safe and reversible operation, but it should be done with awareness of your workload architecture. If your system relies on specific leader election mechanisms, promoting a node should follow the design patterns supported by those systems.
Removing a Node
Over time, infrastructure needs change. You may scale down a cluster after peak load, decommission outdated resources, or remove a node that is no longer needed for cost, isolation, or maintenance reasons. Removing a node from a cluster is a safe and structured process designed to avoid disruption. The dashboard provides an accessible interface for performing this task while preserving workload stability.
Why Remove a Node?
Node removal is typically part of resource optimization or cluster reconfiguration. You might remove a node when reducing costs in a staging environment, when redistributing workloads across fewer or more efficient machines, or when phasing out a node for maintenance or retirement.
Another common scenario is infrastructure rebalancing, where workloads are shifted to newer nodes with better specs or different regions. Removing an idle or underutilized node can simplify management and reduce noise in your monitoring stack. It also improves scheduling efficiency by removing unneeded targets from the orchestration engine.
In high-availability clusters, node removal may be preceded by data migration or role reassignment (such as promoting a replica). Proper planning helps maintain system health while reducing reliance on unnecessary compute resources.
Remove a Node
To begin the removal process, open the Elestio dashboard and navigate to the Clusters section. Select the cluster that contains the node you want to remove. From within the cluster view, open the Nodes tab to access the list of active nodes and their statuses.
Find the node you want to delete from the list. If the node is currently running services, ensure that those workloads can be safely rescheduled to other nodes or are no longer needed. Since Elestio does not have a built-in drain option, any workload redistribution needs to be handled manually, either by adjusting deployments or verifying that redundant nodes are available. Once the node is drained and idle, open the action menu for that node and select “Delete Node”.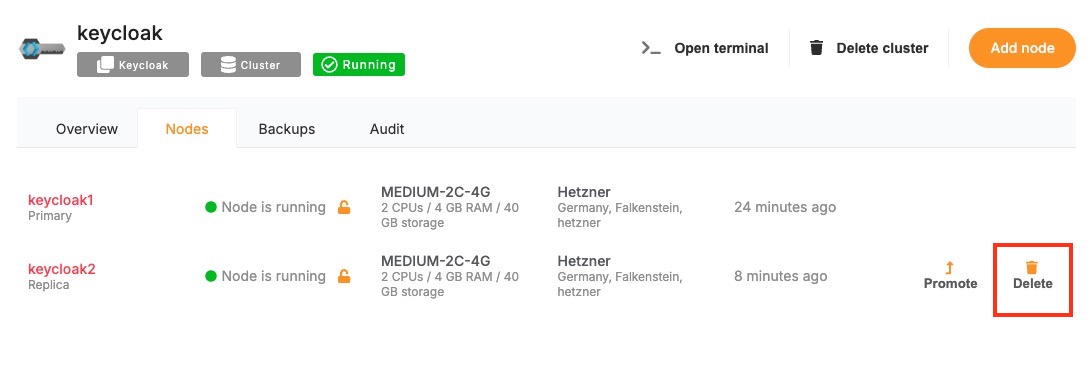
The dashboard may prompt you to confirm the operation. After confirmation, Elestio will begin the decommissioning process. This includes detaching the node from the cluster, cleaning up any residual state, and terminating the associated virtual machine.

Once the operation completes, the node will no longer appear in the cluster’s node list, and its resources will be released.
Considerations for Safe Node Removal
Before removing a node in Elestio, it’s important to review the services and workloads currently running on that node. Since Elestio does not automatically redistribute or migrate workloads during node removal, you should ensure that critical services are either no longer in use or can be manually rescheduled to other nodes in the cluster. This is particularly important in multi-node environments running stateful applications, databases, or services with specific affinity rules.
You should also verify that your cluster will have sufficient capacity after the node is removed. If the deleted node was handling a significant portion of traffic or compute load, removing it without replacement may lead to performance degradation or service interruption. In high-availability clusters, ensure that quorum-based components or replicas are not depending on the node targeted for deletion. Additionally, confirm that the node is not playing a special role such as holding primary data or acting as a manually promoted leader before removal. If necessary, reconfigure or promote another node prior to deletion to maintain cluster integrity.
Backups and Restores
Reliable backups are essential for data resilience, recovery, and business continuity. Elestio provides built-in support for managing backups across all supported services, ensuring that your data is protected against accidental loss, corruption, or infrastructure failure. The platform includes an automated backup system with configurable retention policies and a straightforward restore process, all accessible from the dashboard. Whether you’re operating a production database or a test environment, understanding how backups and restores work in Elestio is critical for maintaining service reliability.
Cluster Backups
Elestio provides multiple backup mechanisms designed to support various recovery and compliance needs. Backups are created automatically for most supported services, with consistent intervals and secure storage in managed infrastructure. These backups are performed in the background to ensure minimal performance impact and no downtime during the snapshot process. Each backup is timestamped, versioned, and stored securely with encryption. You can access your full backup history for any given service through the dashboard and select any version for restoration.
You can utilize different backup options depending on your preferences and operational requirements. Elestio supports manual local backups for on-demand recovery points, automated snapshots that capture the state of the service at fixed intervals, and automated remote backups using Borg, which securely stores backups on external storage volumes managed by Elestio. In addition, you can configure automated external backups to S3-compatible storage, allowing you to maintain full control over long-term retention and geographic storage preferences.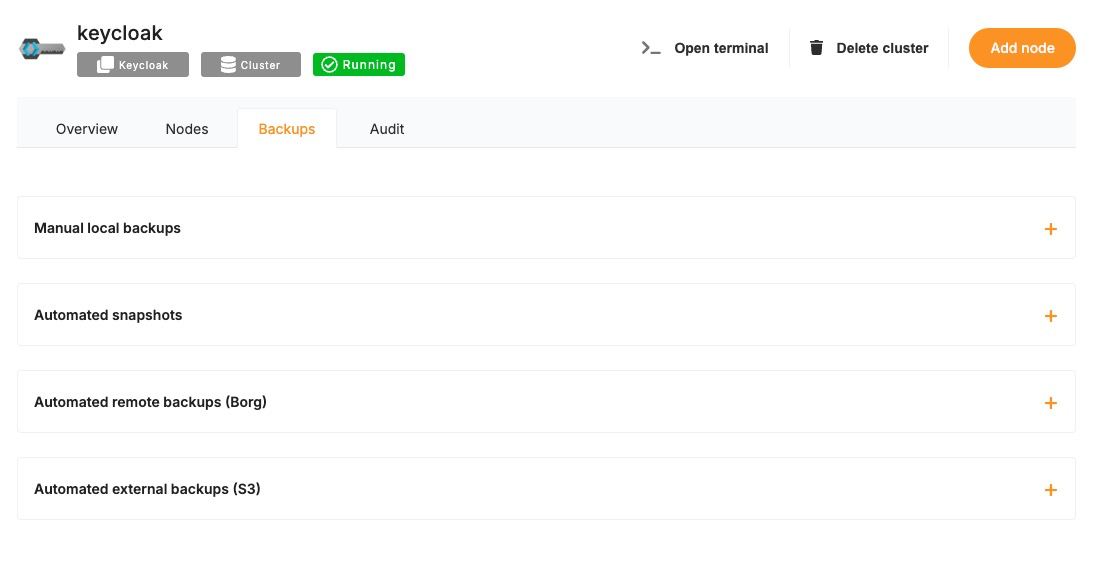
Restoring from a Backup
Restoring a backup in Elestio is a user-initiated operation, available directly from the service dashboard. Once you’re in the dashboard, select the service you’d like to restore. Navigate to the Backups section, where you’ll find a list of all available backups along with their creation timestamps.
To initiate a restore, choose the desired backup version and click on the “Restore” option. You will be prompted to confirm the operation. Depending on the type of service, the restore can either overwrite the current state or recreate the service as a new instance from the selected backup.

The restore process takes a few minutes, depending on the size of the backup and the service type. Once completed, the restored service is immediately accessible. In the case of databases, you can validate the restore by connecting to the database and inspecting the restored data.
Considerations for Backup & Restore
- Before restoring a backup, it’s important to understand the impact on your current data. Restores may overwrite existing service state, so if you need to preserve the current environment, consider creating a manual backup before initiating the restore. In critical environments, restoring to a new instance and validating the data before replacing the original is a safer approach.
- Keep in mind that restore operations are not instantaneous and may temporarily affect service availability. It’s best to plan restores during maintenance windows or periods of low traffic, especially in production environments.
- For services with high-frequency data changes, be aware of the backup schedule and retention policy. Elestio’s default intervals may not capture every change, so for high-volume databases, consider exporting incremental backups manually or using continuous replication where supported.
Monitoring Backup Health
Elestio provides visibility into your backup history directly through the dashboard. You can monitor the status, timestamps, and success/failure of backup jobs. In case of errors or failed backups, the dashboard will display alerts, allowing you to take corrective actions or contact support if necessary.
It’s good practice to periodically verify that backups are being generated and that restore points are recent and complete. This ensures you’re prepared for unexpected failures and that recovery options remain reliable.
Restricting Access by IP
Securing access to services is a fundamental part of managing cloud infrastructure. One of the most effective ways to reduce unauthorized access is by restricting connectivity to a defined set of IP addresses. Elestio supports IP-based access control through its dashboard, allowing you to explicitly define which IPs or IP ranges are allowed to interact with your services. This is particularly useful when exposing databases, APIs, or web services over public endpoints.
Need to Restrict Access by IP
Restricting access by IP provides a first layer of network-level protection. Instead of relying solely on application-layer authentication, you can control who is allowed to even initiate a connection to your service. This approach reduces the surface area for attacks such as brute-force login attempts, automated scanning, or unauthorized probing.
Common use cases include:
-
Limiting access to production databases from known office networks or VPNs.
-
Allowing only CI/CD pipelines or monitoring tools with static IPs to connect.
-
Restricting admin dashboards or internal tools to internal teams.
By defining access rules at the infrastructure level, you gain more control over who can reach your services, regardless of their authentication or API access status.
Restrict Access by IP
To restrict access by IP in Elestio, start by logging into the Elestio dashboard and navigating to the Clusters section. Select the cluster that hosts the service you want to protect. Once inside the Cluster Overview page, locate the Security section.
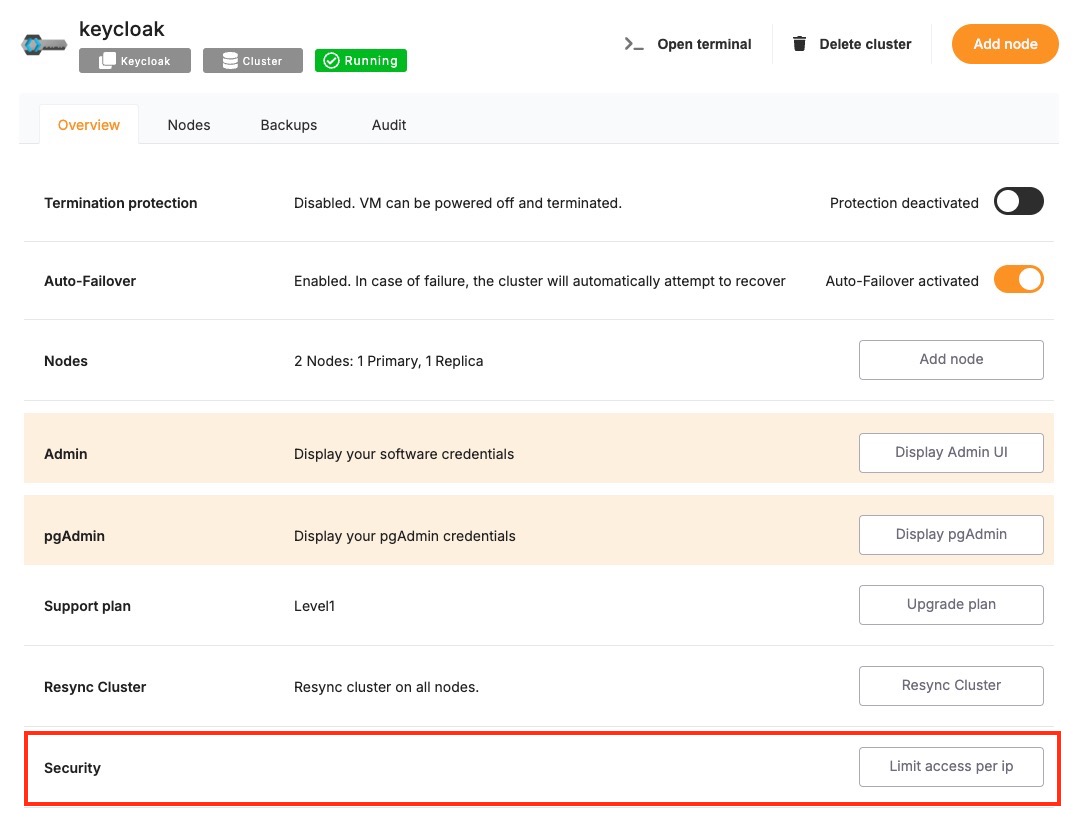
Within this section, you’ll find a setting labeled “Limit access per IP”. This is where you can define which IP addresses or CIDR ranges are permitted to access the services running in the cluster. You can add a specific IPv4 or IPv6 address (e.g., 203.0.113.5) or a subnet in CIDR notation (e.g., 203.0.113.0/24) to allow access from a range of IPs.
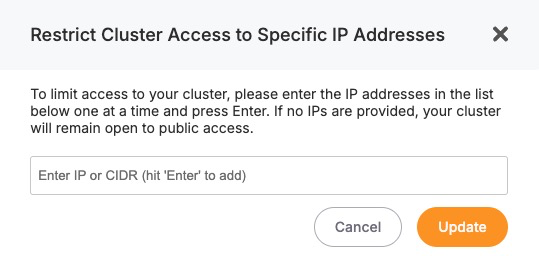
After entering the necessary IP addresses, save the configuration. The changes will apply to all services running inside the cluster, and only the defined IPs will be allowed to establish network connections. All other incoming requests from unlisted IPs will be blocked at the infrastructure level.
Considerations When Using IP Restrictions
- When applying IP restrictions, it’s important to avoid locking yourself out. Always double-check that your own IP address is included in the allowlist before applying rules, especially when working on remote infrastructure.
- For users on dynamic IPs (e.g., home broadband connections), consider using a VPN or a static jump host that you can reliably allowlist. Similarly, if your services are accessed through cloud-based tools, make sure to verify their IP ranges and update your rules accordingly when those IPs change.
- In multi-team environments, document and review IP access policies regularly to avoid stale rules or overly permissive configurations. Combine IP restrictions with secure authentication and encrypted connections (such as HTTPS or SSL for databases) for layered security.
Cluster Resynchronization
In distributed systems, consistency and synchronization between nodes are critical to ensure that services behave reliably and that data remains accurate across the cluster. Elestio provides built-in mechanisms to detect and resolve inconsistencies across nodes using a feature called Cluster Resynchronization. This functionality ensures that node-level configurations, data replication, and service states are properly aligned, especially after issues like node recovery, temporary network splits, or service restarts.
Need for Cluster Resynchronization
Resynchronization is typically required when secondary nodes in a cluster are no longer consistent with the primary node. This can happen due to temporary network failures, node restarts, replication lag, or partial service interruptions. In such cases, secondary nodes may fall behind or store incomplete datasets, which could lead to incorrect behavior if a failover occurs or if read operations are directed to those nodes. Unresolved inconsistencies can result in data divergence, serving outdated content, or failing health checks in load-balanced environments. Performing a resynchronization ensures that all secondary nodes are forcibly aligned with the current state of the primary node, restoring a clean and unified cluster state.
It may also be necessary to perform a resync after restoring a service from backup, during infrastructure migrations, or after recovering a previously offline node. In each of these cases, resynchronization acts as a corrective mechanism to ensure that every node is operating with the same configuration and dataset, reducing the risk of drift and maintaining data integrity across the cluster.
Cluster Resynchronization
To perform a resynchronization, start by accessing the Elestio dashboard and navigating to the Clusters section. Select the cluster where synchronization is needed. On the Cluster Overview page, scroll down slightly until you find the “Resync Cluster” option. This option is visible as part of the cluster controls and is available only in clusters with multiple nodes and a defined primary node.
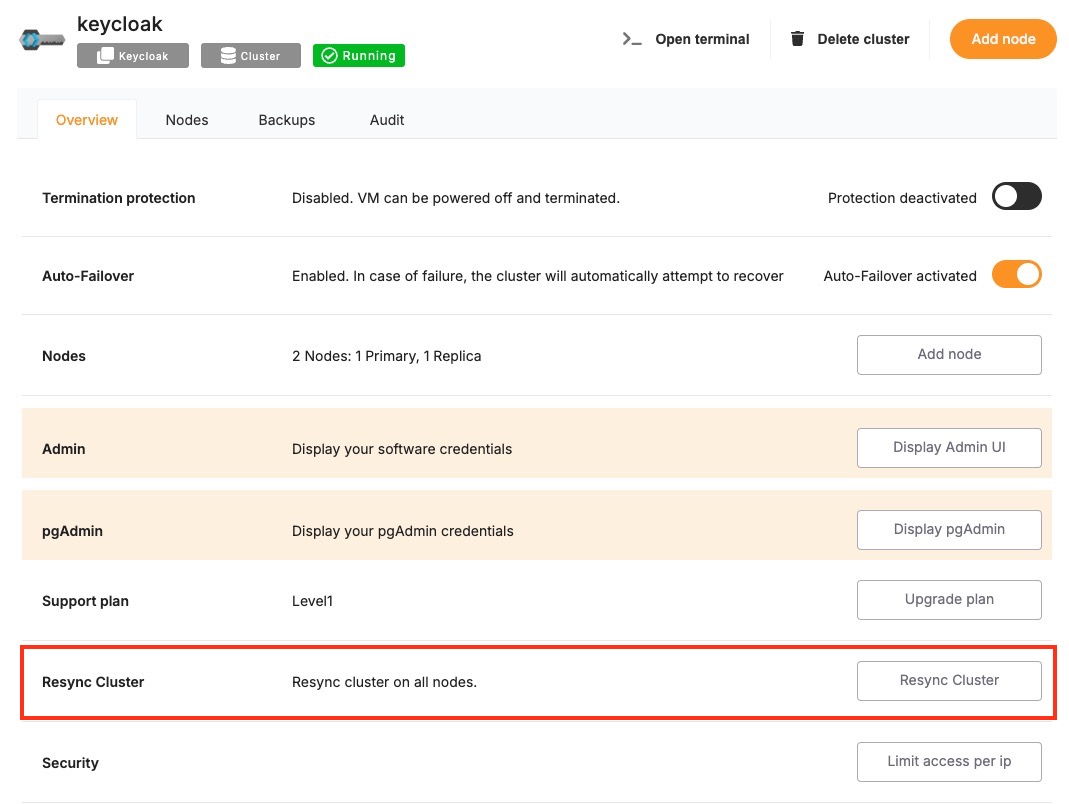
Clicking the Resync button opens a confirmation dialog. The message clearly explains that this action will initiate a request to resynchronize all secondary nodes. During the resync process, existing data on all secondary nodes will be erased and replaced with a copy of the data from the primary node. This operation ensures full consistency across the cluster but should be executed with caution, especially if recent changes exist on any of the secondaries that haven’t yet been replicated.
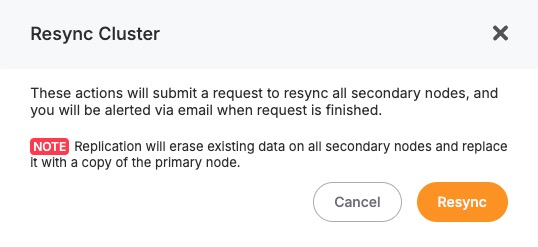
You will receive an email notification once the resynchronization is complete. During this process, Elestio manages the replication safely, but depending on the size of the data, the operation may take a few minutes. It’s advised to avoid making further changes to the cluster while the resync is in progress.
Considerations Before Resynchronizing
- Before triggering a resync, it’s important to verify that the primary node holds the desired state and that the secondary nodes do not contain any critical unsynced data. Since the resync overwrites the secondary nodes completely, any local changes on those nodes will be lost.
- This action is best used when you’re confident that the primary node is healthy, current, and stable. Avoid initiating a resync if the primary has recently experienced errors or data issues. Additionally, consider performing this operation during a low-traffic period, as synchronization may temporarily impact performance depending on the data volume.
- If your application requires high consistency guarantees, it’s recommended to monitor your cluster closely during and after the resync to confirm that services are functioning correctly and that the replication process completed successfully.
Deleting a Cluster
When a cluster is no longer needed—whether it was created for testing, staging, or an obsolete workload—deleting it helps free up resources and maintain a clean infrastructure footprint. Elestio provides a straightforward and secure way to delete entire clusters directly from the dashboard. This action permanently removes the associated services, data, and compute resources tied to the cluster.
When to Delete a Cluster
Deleting a cluster is a final step often performed when decommissioning an environment. This could include shutting down a test setup, replacing infrastructure during migration, or retiring an unused production instance. In some cases, users also delete and recreate clusters as part of major version upgrades or architectural changes. It is essential to confirm that all data and services tied to the cluster are no longer required or have been backed up or migrated before proceeding. Since cluster deletion is irreversible, any services, volumes, and backups associated with the cluster will be permanently removed.
Delete a Cluster
To delete a cluster, log in to the Elestio dashboard and navigate to the Clusters section. From the list of clusters, select the one you want to remove. Inside the selected cluster, you’ll find a navigation bar at the top of the page. One of the available options in this navigation bar is “Delete Cluster.”
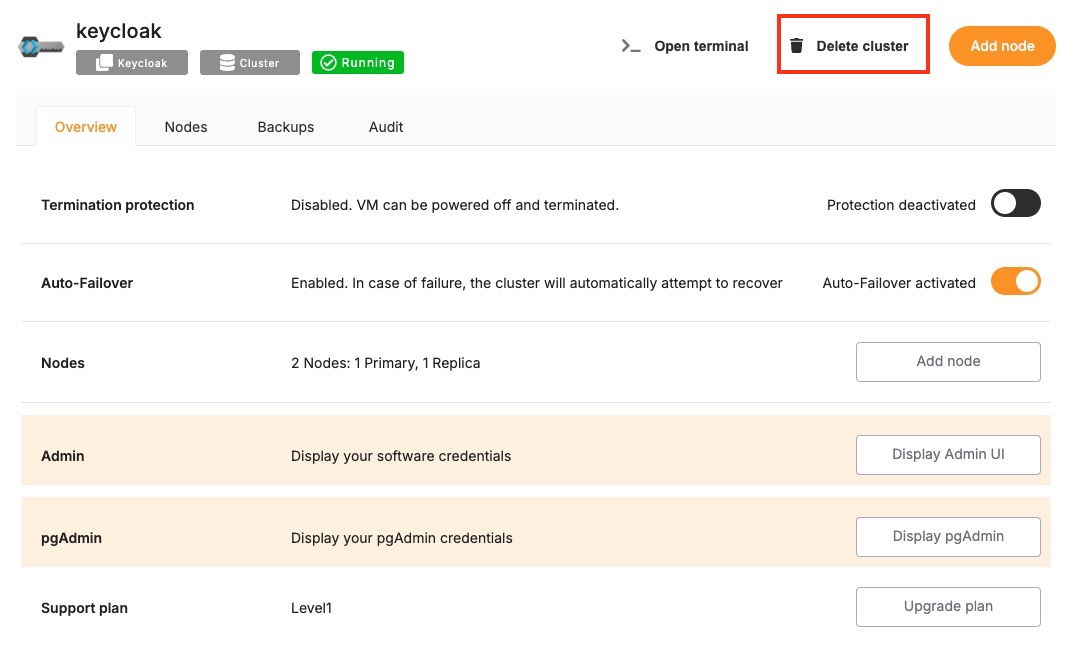
Clicking this opens a confirmation dialog that outlines the impact of deletion. It will clearly state that deleting the cluster will permanently remove all associated services, storage, and configurations. By acknowledging a warning or typing in the cluster name, depending on the service type. Once confirmed, Elestio will initiate the deletion process, which includes tearing down all resources associated with the cluster. This typically completes within a few minutes, after which the cluster will no longer appear in your dashboard.
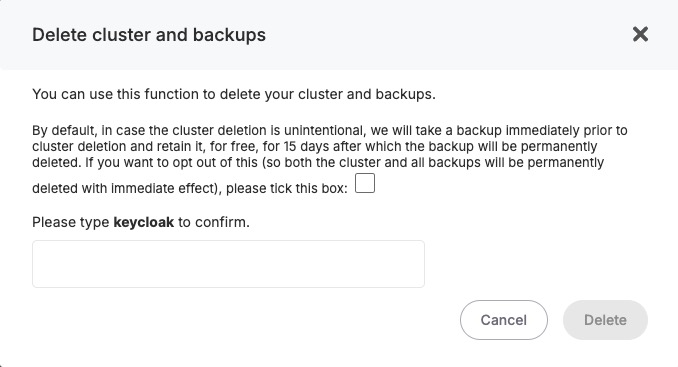
Considerations Before Deleting
Deleting a cluster also terminates any linked domains, volumes, monitoring configurations, and scheduled backups. These cannot be recovered once deletion is complete, so plan accordingly before confirming the action. If the cluster was used for production workloads, consider archiving data to external storage (e.g., S3) or exporting final snapshots for compliance and recovery purposes.
Before deleting a cluster, verify that:
-
All required data has been backed up externally (e.g., downloaded dumps or exports).
-
Any active services or dependencies tied to the cluster have been reconfigured or shut down.
-
Access credentials, logs, or stored configuration settings have been retrieved if needed for auditing or migration.