Database Migration
- Cloning a Service to Another Provider or Region
- Database Migration Services for Redis
- Manual Redis Migration Using redis-cli and RDB Files
Cloning a Service to Another Provider or Region
Migrating or cloning services across cloud providers or geographic regions is a critical part of modern infrastructure management. Whether you’re optimizing for latency, preparing for disaster recovery, meeting regulatory requirements, or simply switching providers, a well-planned migration ensures continuity, performance, and data integrity. This guide outlines a structured methodology for service migration, applicable to most cloud-native environments.
Pre-Migration Preparation
Before initiating a migration, thorough planning and preparation are essential. This helps avoid unplanned downtime, data loss, or misconfiguration during the move:
- Evaluate the Current Setup: Begin by documenting the existing service’s configuration. This includes runtime environments (container images, platform versions), persistent data (databases, object storage), network rules (ports, firewalls), and application dependencies (APIs, credentials, linked services).
- Define the Migration Target: Choose the new cloud provider or region you plan to migrate to. Confirm service compatibility, resource limits, and geographic latency requirements. If you’re replicating an existing environment, make sure the target region supports the same compute/storage features and versions.
- Provision the Target Environment: Set up the target infrastructure where the service will be cloned. This could involve creating new Kubernetes clusters, VM groups, container registries, databases, or file storage volumes depending on your stack.
- Backup the Current Service: Always create a full backup or snapshot of the current service and its associated data before proceeding. This acts as a rollback point in case of migration issues and ensures recovery in the event of failure.
Cloning Execution
The first step in executing a clone is to replicate the configuration of the original service in the target environment. This involves deploying the same container image or service binary using the same runtime settings. If you’re using Kubernetes or container orchestrators, this can be done via Helm charts or declarative manifests. Pay close attention to environment variables, secrets, mounted paths, storage class definitions, and health check configurations to ensure a consistent runtime environment.
Next, you’ll need to migrate any persistent data tied to the service. For file-based storage, tools like rsync or rclone are effective for copying volume contents over SSH or cloud storage backends. It’s crucial to verify compatibility across disk formats, database versions, and encoding standards to avoid corruption or mismatched behavior.
After replicating the environment and data, it’s important to validate the new service in isolation. This means confirming that all application endpoints respond as expected, background tasks or cron jobs are functioning, and third-party integrations (e.g., payment gateways, S3 buckets) are accessible. You should test authentication flows, data read/write operations, and retry logic to ensure the new service is functionally identical. Use observability tools to monitor resource consumption and application logs during this stage.
Once validation is complete, configure DNS and route traffic to the new environment. This might involve updating DNS A or CNAME records, changing cloud load balancer configurations, or applying new firewall rules. For high-availability setups, consider using health-based routing or weighted DNS to gradually transition traffic from the old instance to the new one.
Post-Migration Validation and Optimization
Once the new environment is live and receiving traffic, focus on optimizing and securing the setup:
- Validate Application Functionality: Test all integrations, user workflows, and background jobs to confirm proper behavior. Review logs for silent errors or timeouts. Ensure all applications pointing to the service are updated with the new URL or connection string.
- Monitor Performance: Analyze load, CPU, memory, and storage utilization. Scale resources as needed, or optimize runtime settings for the new provider/region. Enable autoscaling where applicable.
- Secure the Environment: Implement firewall rules, IP restrictions, and access controls. Rotate secrets and validate that no hardcoded credentials or endpoints point to the old service.
- Cleanup and Documentation: Once validated, decommission the old setup safely. Update internal documentation with new deployment details, endpoint addresses, and any configuration changes.
Benefits of Cloning
Cloning a database service, particularly for engines like Redis offers several operational and strategic advantages. It allows teams to test schema migrations, version upgrades, or major application features in an isolated environment without affecting production. By maintaining a cloned copy, developers and QA teams can work against realistic data without introducing risk.
Cloning also simplifies cross-region redundancy setups. A replica in another region can be promoted quickly if the primary region experiences an outage. For compliance or analytics purposes, cloned databases allow for read-only access to production datasets, enabling safe reporting or data processing without interrupting live traffic.
Additionally, rather than building a new environment from scratch, you can clone the database into another provider, validate it, and cut over with minimal disruption. This helps maintain operational continuity and reduces the effort needed for complex migrations.
Database Migration Services for Redis
Elestio provides a streamlined and reliable approach for migrating Redis instances from various environments such as on-premises servers, self-managed cloud deployments, or other managed services into its fully managed Redis platform. This migration process is designed to ensure data consistency, minimize downtime, and simplify the operational complexity of managing Redis infrastructure.
Key Steps in Migrating to Elestio
Pre-Migration Preparation
Before initiating your Redis migration, proper preparation is essential to ensure a seamless and error-free transition:
- Create an Elestio Account: Sign up on the Elestio platform to access its suite of managed services. This account will serve as the central hub for provisioning and managing your Redis instance.
- Deploy the Target Redis Service: Create a new Redis service on Elestio to act as the migration destination. Make sure the version matches your current Redis setup to avoid compatibility issues. Review Elestio’s Redis documentation for details on supported features, such as persistence modes (AOF, RDB), module support, and cluster configurations.
Initiating the Migration Process
With the target environment ready, proceed with the Redis migration using the Elestio migration interface:
- Access the Migration Tool: Navigate to your Redis service overview on the Elestio dashboard. Select the “Migrate Database” option to initiate the guided migration workflow.
- Configure Migration Settings: A prompt will appear to confirm that the target Redis instance has sufficient memory and disk capacity to receive the source data. Once verified, click “Get started” to begin.
- Validate Source Redis Connection: Enter the connection details for your existing Redis instance, including:
-
Hostname – IP address or domain of the source Redis server
-
Port – Default Redis port is 6379, but on Elestio it is configured as 26379
-
Password – If your Redis instance is secured with authentication
-
Database Number – (Optional) If using a specific logical database within Redis
-
Click “Run Check” to validate the source connection. This ensures Elestio can securely access and read from your Redis instance. These details are typically available in your current Redis deployment configuration or environment variables.
4. Execute the Migration: If all checks pass successfully, start the migration by selecting “Start migration.” Elestio will begin transferring the in-memory dataset and persistent data (if applicable) into the new environment. Real-time logs and progress indicators will help you monitor the operation, making it easy to identify and resolve any issues promptly.
Post-Migration Validation and Optimization
Once the Redis migration is complete, it’s critical to validate the deployment and ensure the new instance performs optimally:
- Verify Data Consistency: Use redis-cli or Elestio’s integrated tools to confirm that all keys, data types, and values were correctly transferred. Compare key counts and sample data between source and target. If using persistence (RDB or AOF), check the loading behavior on restart to ensure durability.
- Test Application Connectivity: Update application configurations or connection strings to point to the new Redis instance. Verify that all interactions such as caching, pub/sub, or session storage are functioning as expected.
- Optimize Performance: Take advantage of Elestio’s performance features. Monitor memory usage, eviction policies, and throughput in real-time using the platform’s dashboard. Adjust Redis configurations for your workload type and enable auto-scaling if supported.
- Implement Security Best Practices: Secure your new Redis instance by configuring firewall rules, enabling TLS (if applicable), and rotating authentication credentials. Elestio supports access management features that help restrict unauthorized connections and secure data in transit.
- Clean Up and Document: After successful validation, decommission the old Redis environment if no longer needed. Update your internal documentation to reflect the new Redis endpoint, authentication details, and any configuration changes made during migration.
Benefits of Using Elestio for Redis
Migrating Redis to Elestio delivers several operational and strategic benefits:
- Simplified Management: Elestio automates the operational overhead of managing Redis, including monitoring, backups, and software updates. The centralized dashboard provides real-time visibility into performance, key metrics, and system health. Users can modify environment variables, upgrade service tiers, and manage Redis modules without deep DevOps intervention.
- Security: Elestio keeps Redis instances up to date with the latest security patches. It offers built-in mechanisms for securely managing credentials and limits unauthorized access through firewall rules and network isolation. Backup automation ensures data is safe and recoverable.
- Performance: Redis instances on Elestio are tuned for low-latency performance and can handle real-time, high-throughput workloads. The infrastructure supports both standalone and clustered Redis deployments, allowing for optimal performance under load.
- Scalability: Elestio’s Redis services are built to scale with your application. Users can increase memory capacity, CPU allocation, or attach additional storage as demand grows. The platform supports seamless plan upgrades without significant downtime, enabling consistent growth and workload flexibility.
Manual Redis Migration Using redis-cli and RDB Files
Manual migrations using Redis’s built-in tools, such as redis-cli and RDB (Redis Database) files, are ideal for users who require full control over data export and import particularly during transitions between providers, Redis version upgrades, or importing existing self-managed Redis datasets into Elestio’s managed environment. This guide walks through the process of performing a manual migration to and from Elestio Redis services using command-line tools, ensuring data portability, consistency, and transparency at every step.
When to Use Manual Migration
Manual migration using native Redis tools is well-suited for scenarios that demand complete control over the migration process. It is especially useful when transferring data from a self-hosted Redis instance, an on-premises server, or another cloud provider into Elestio’s managed Redis service. This method supports one-time imports without requiring persistent connections between source and destination systems.
It also provides a reliable approach for performing version upgrades. Because RDB files contain a snapshot of the dataset in a portable format, they can be restored into newer Redis versions with minimal compatibility issues. When Elestio’s built-in tools are not applicable such as in migrations from isolated environments or selective key transfers manual migration becomes the preferred option. It also enables offline backup archiving, providing users with transportable and restorable datasets independent of platform-specific formats.
Performing the Migration
Prepare the Environments
Before starting the migration, ensure that Redis is properly installed on both the source system and your Elestio service. The source Redis server must allow access (if remote) and have a user with sufficient privileges to export the dataset, including read access to all relevant keys and data types.
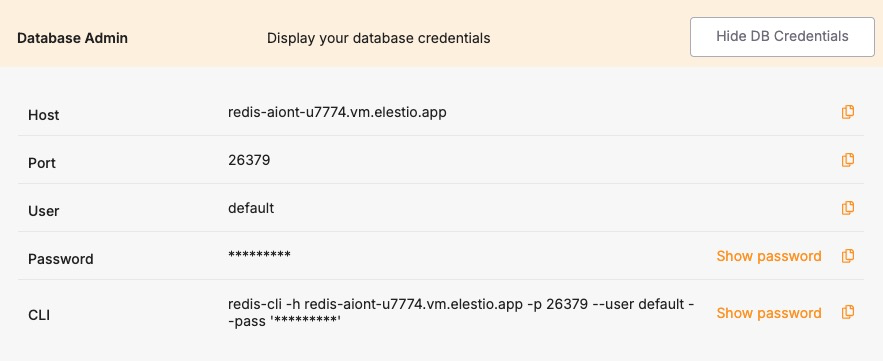
On the Elestio side, provision a Redis service through the dashboard. Once it’s active, retrieve the connection credentials from the Database Info section. This includes host, port, and password. Verify that your public IP is allowed under Cluster Overview > Security > Limit access per IP, or the Redis port will not be reachable.
Create a Backup Using RDB
Use Redis’s RDB snapshotting method to create a backup of the dataset. This process serializes the current state of your Redis database into a binary .rdb file.
To trigger a manual snapshot, run:
redis-cli -h <source_host> -p <source_port> SAVEOnce the command completes, locate the resulting dump.rdb file on the source system. This is typically stored in /var/lib/redis/ or a path defined in your Redis configuration.
Alternatively, you can generate an RDB file using:
redis-cli --rdb backup.rdbThis creates a portable snapshot of the entire dataset without modifying the source instance’s configuration.
Transfer the Dump File to the Target
If your local system differs from the one with access to Elestio’s Redis service, transfer the dump file using a secure file transfer tool such as SCP:
scp backup.rdb user@host:/path/to/restore-system/Ensure the file is available on the system you will use to perform the restore. You do not need to upload the RDB file directly to the Elestio service restores are performed remotely using Redis commands.
Restore the Dataset to Elestio
To restore data into Elestio, start a temporary local Redis instance using the dump file:
redis-server --dbfilename dump.rdb --dir /path/to/rdb/This allows you to access the original dataset locally. Then, connect to both the local and Elestio Redis instances and copy keys using redis-cli. For example:
redis-cli -h <source_host> --scan | while read key; do
  redis-cli -h <source_host> DUMP "$key" | \
  redis-cli -h <elestio_host> -p <elestio_port> -a <elestio_password> RESTORE "$key" 0 -
done
This approach reads each key from the source instance and restores it to the Elestio-managed Redis instance. Ensure that both instances are reachable and that no firewall or access rules block communication.
For large datasets or environments with complex key structures, consider using community tools like redis-copy or redis-migrate-tool to streamline key transfers.
Validate the Migration
After completing the import, verify that the migration was successful by connecting to the Elestio Redis instance and inspecting the dataset.
Start by checking the total key count:
redis-cli -h <elestio_host> -p <elestio_port> -a <elestio_password> DBSIZEReview specific keys to confirm data consistency:
redis-cli -h <elestio_host> -p <elestio_port> -a <elestio_password> KEYS *Also verify the integrity of sets, hashes, lists, and sorted sets if used in your application. Ensure that your application connects to the new Redis instance without issues and performs expected operations.
If you’ve updated environment variables or configuration files, confirm that your changes are reflected in the application deployment.
Benefits of Manual Migration
Manual Redis migration using redis-cli and RDB files offers several important advantages:
- Portability and Compatibility: RDB files are standard Redis snapshot formats that can be restored into any Redis-compatible instance, whether hosted locally, in containers, or in the cloud.
- Version Flexibility: Migrate across Redis versions using forward-compatible RDB snapshots, without relying on binary compatibility or replication.
- Offline Storage: Backup files can be stored offline, versioned, and archived as part of disaster recovery or compliance processes.
- Platform Independence: Elestio does not enforce proprietary formats. Native Redis tools give you complete control over export, transfer, and restoration operations.