Deploy your first CI/CD pipeline on Elestio
You are about to learn how to deploy an application from a Git repository to production on any cloud.
First, open Elestio dashboard and click on CI/CD
1) Select your source
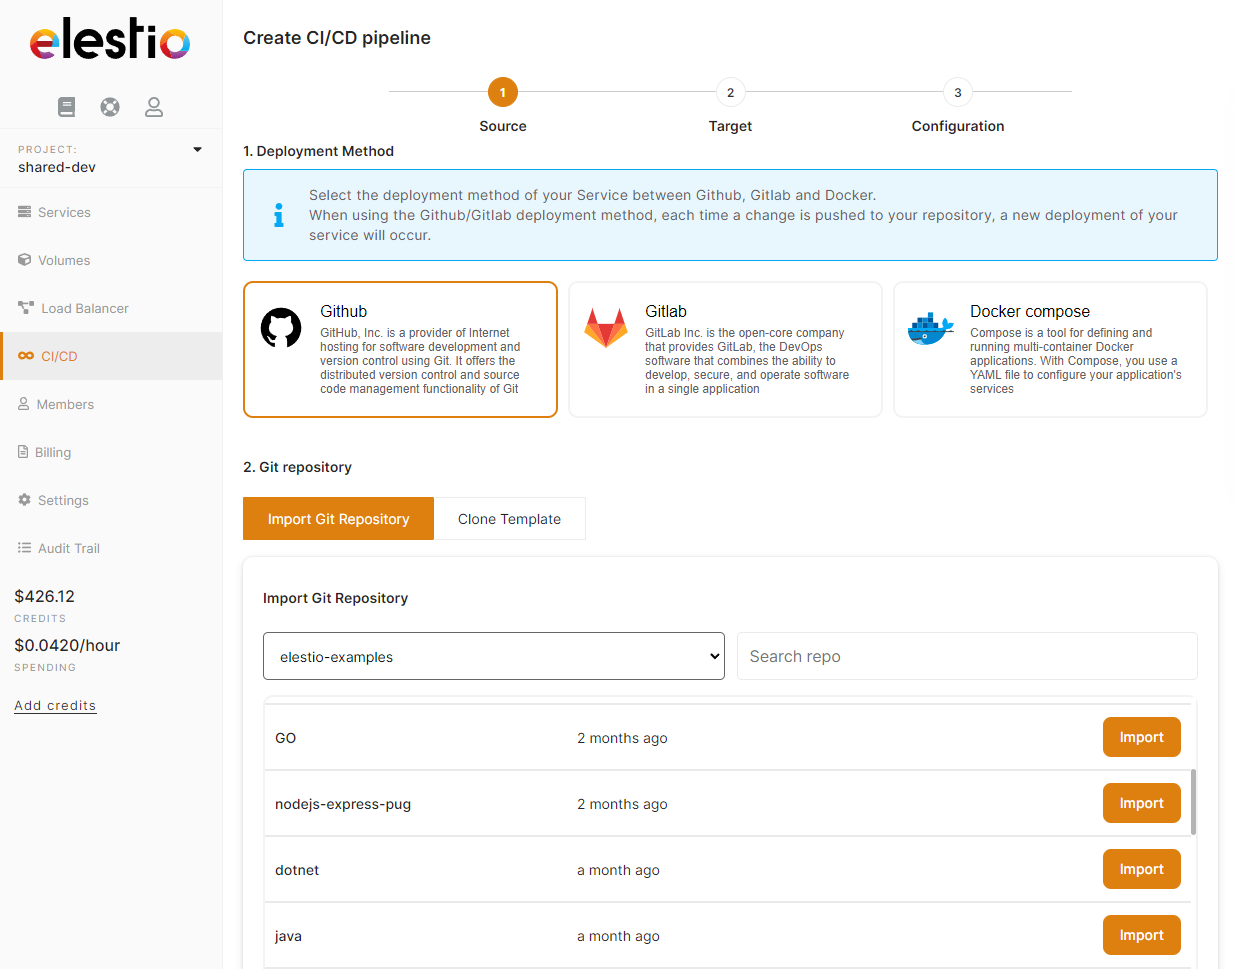
From there click on Github or Gitlab, you will be asked to provide authorization to list your projects in Elestio.
Then you will be able to browse Organizations & Repositories detected on your account. You can also use the search to find directly your project to deploy. Once you found it, click on Import, then click on next.
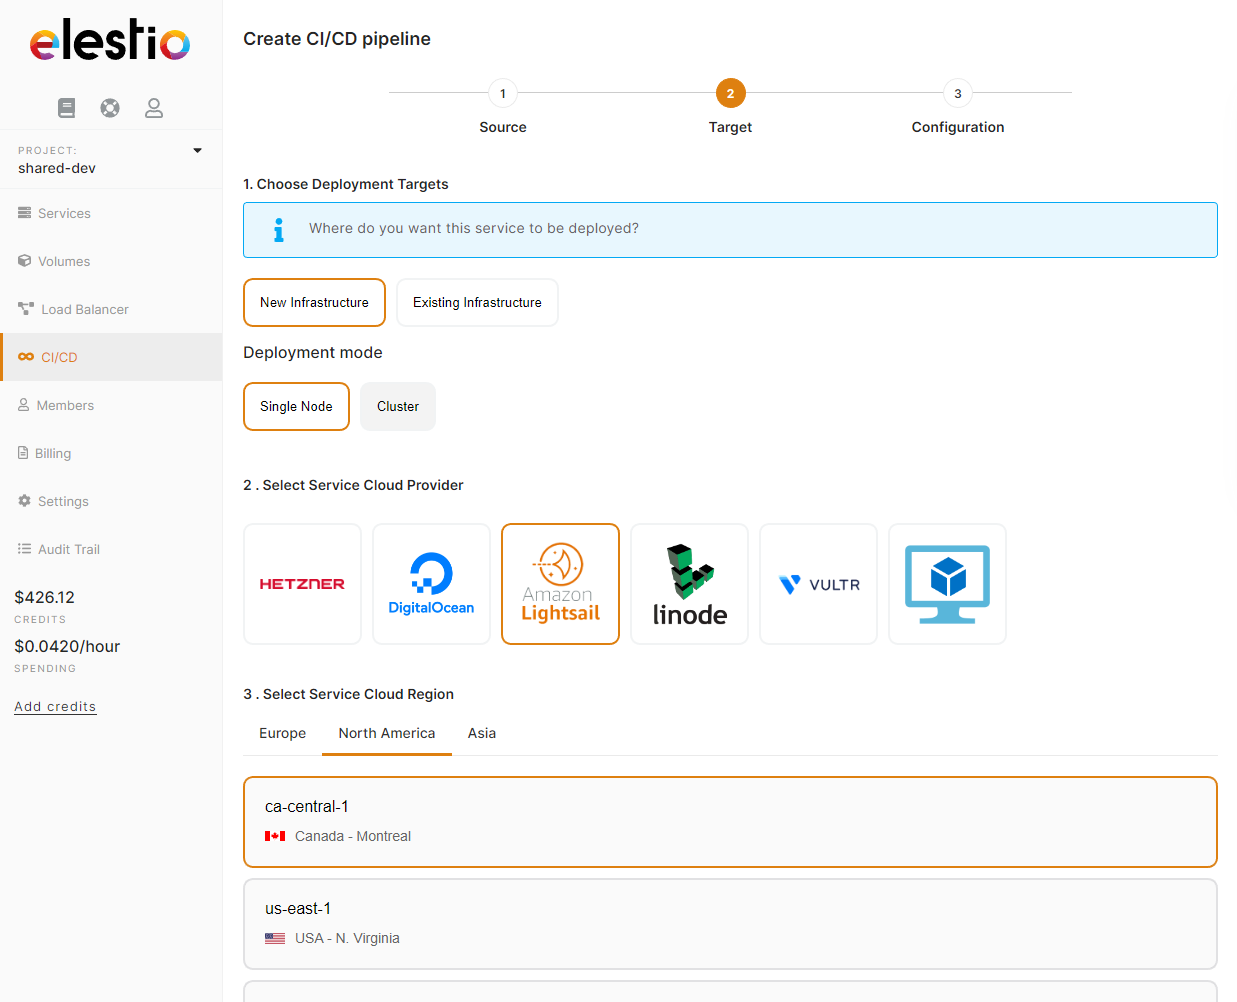
2) Select your target
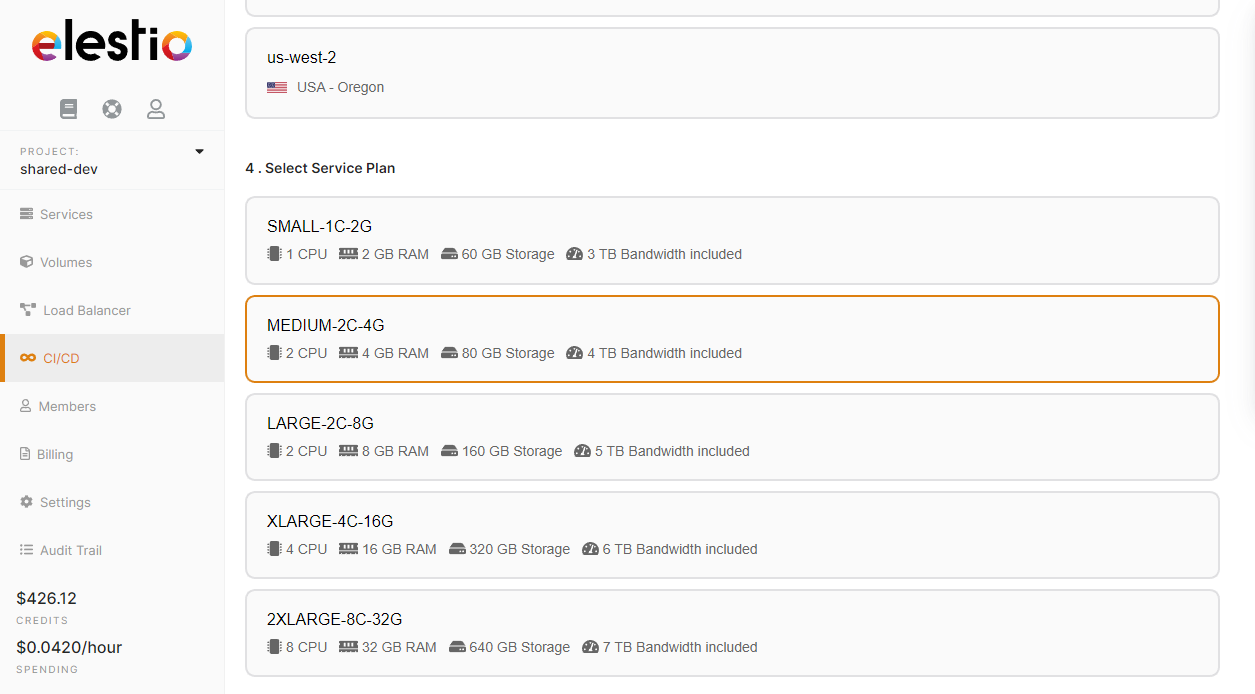
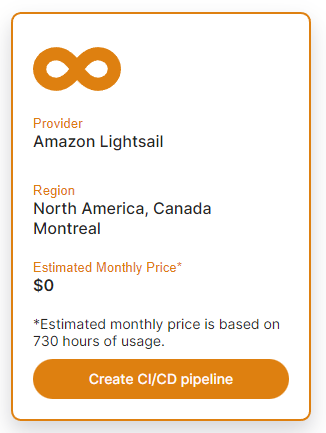
Here you have to indicate where the app should be deployed, it can be a "New infrastructure", in that case you can select your preferred provider / region / instance size. Or an existing infrastructure, then you just have to pick it in the list.
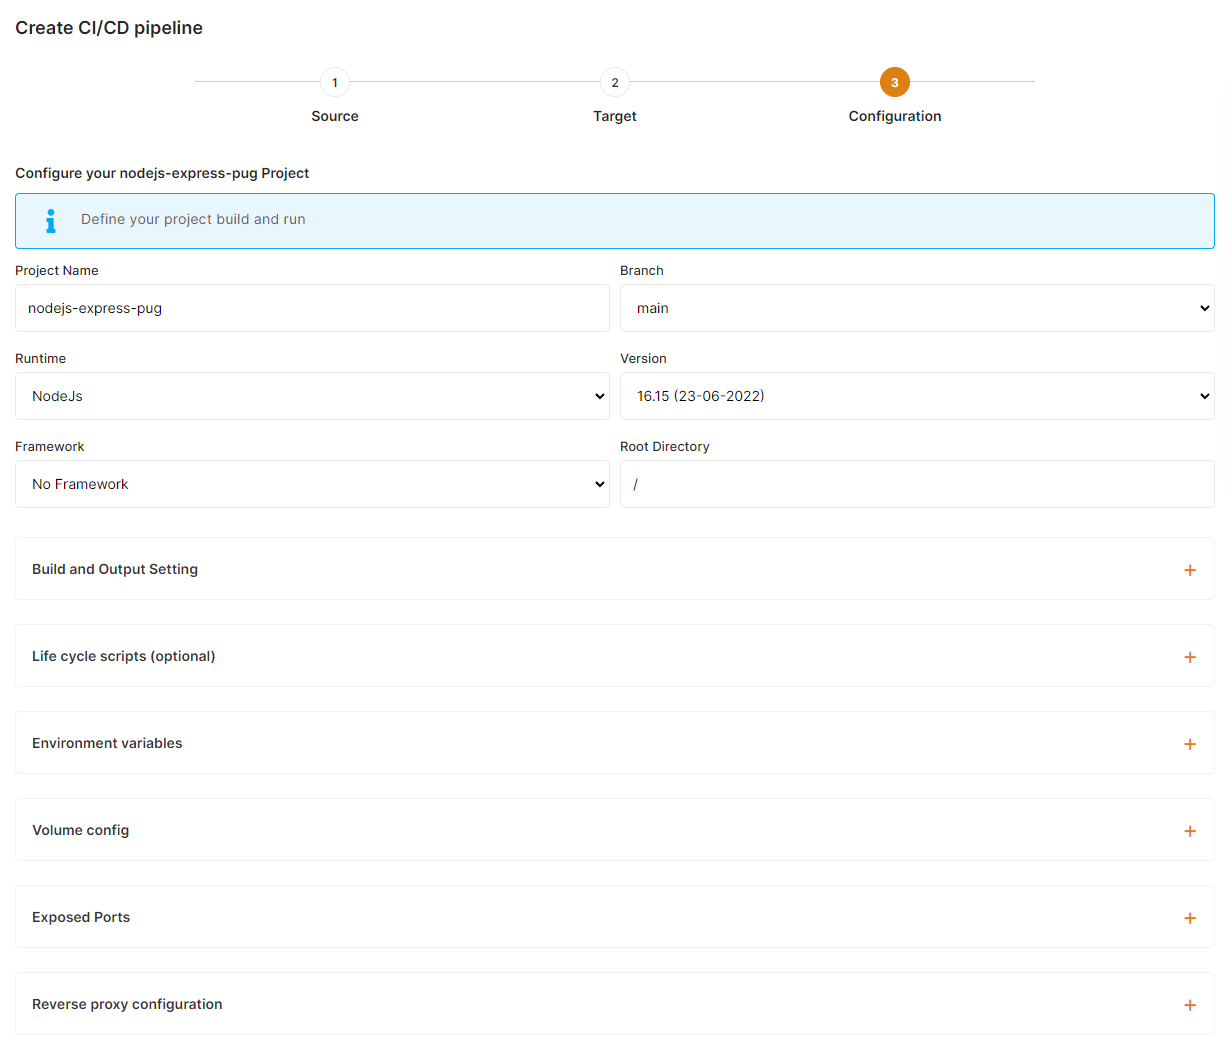
3) Configure your project
This is the last step of the process where you can configure your project name, branch, runtime, and all other settings about your build and environnement configuration.
a) global settings
Select the Runtime & version matching your project needs. If you are using a framework select it in the framework dropdown, this will auto popularepopulate the build/run commands.
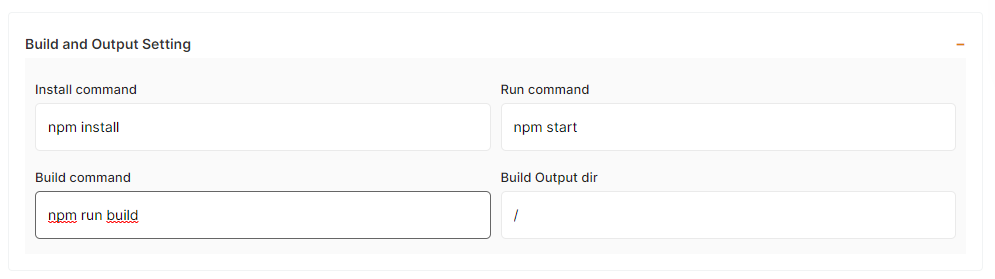
b) Build settings
You can customize install/build/run command to suits your requirements.
c) Life cycle scripts
In some situations you will need to execute scripts before or after installation of a new pipeline to setup your env, install some dependencies, copy dataset, ... In those cases you can define pre/post scripts to execute before/after an installation and other actions like backup/restore. To activate it just indicate your script path relative to the root folder of your git repository.

d) Environment variables
In most case you will have to indicate configuration for your app through env vars. This is useful to pass various configuration to your app like database connection string, S3 bucket details, email address to use and other global configuration.

e) Volumes (data storage)
A lot of apps are totally stateless and don't require any volumes, but some of them need persistant storage to store file uploads, config, logs and other files. You can define one or multiple volumes as folders from the host (CI/CD target instance) mounted into the container. That way the files are persisted and available to the container.
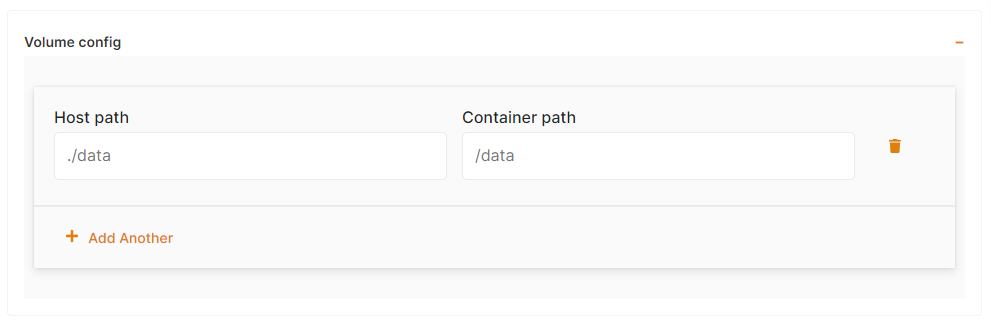
Host path must be relative and must start with ./
f) Exposed ports
If you app is listening on port 3000, you should indicate Container port to 3000, then Host port can be the same or anything else. If your app is listening on multiple ports you can add them as addition rows by clicking on "Add another".
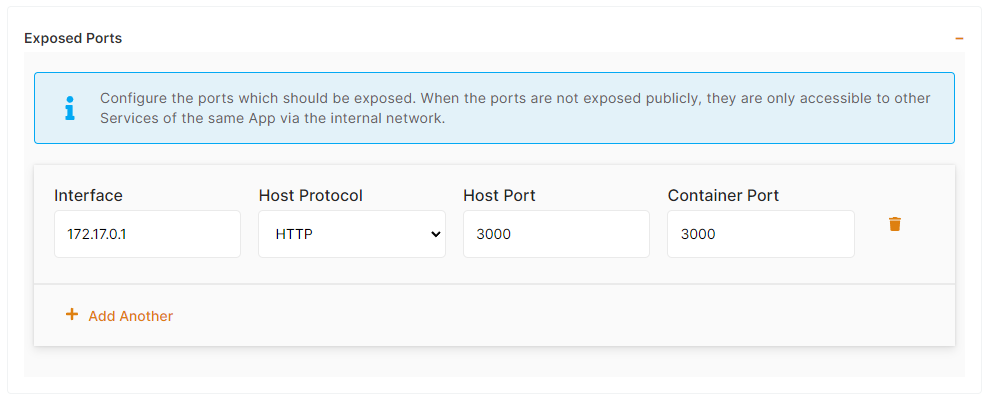
If you need to deploy several instance of the same app on a single node you will have to change the host port in the exposed ports > host port and also in reverse proxy > target port accordingly.
g) Reverse proxy
Finally to make your app accessible on internet, indicate in the target port the same thing you have configured on host port in previous step, so here port 3000.
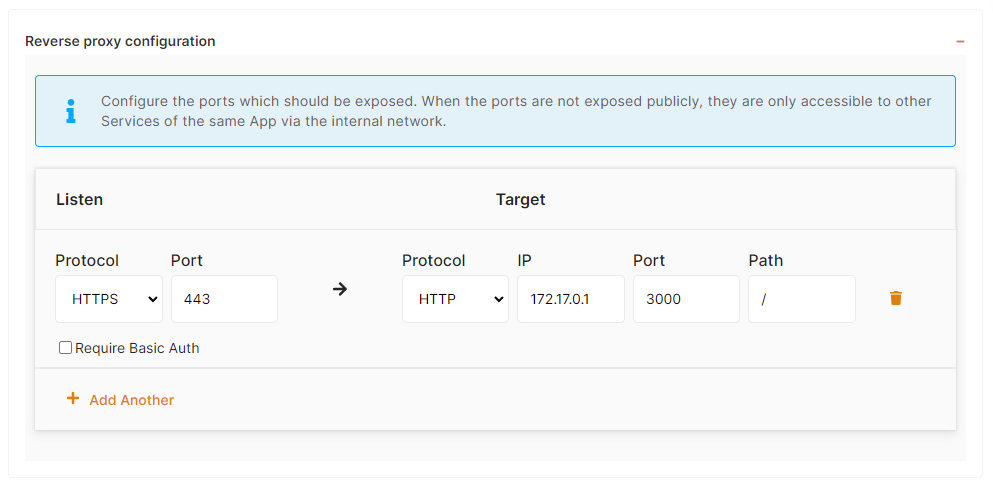
It's possible to activate Basic Authentication if you check the corresponding checkbox and define a login and password

Finally click on "Create CI/CD pipeline" to complete your deployment.
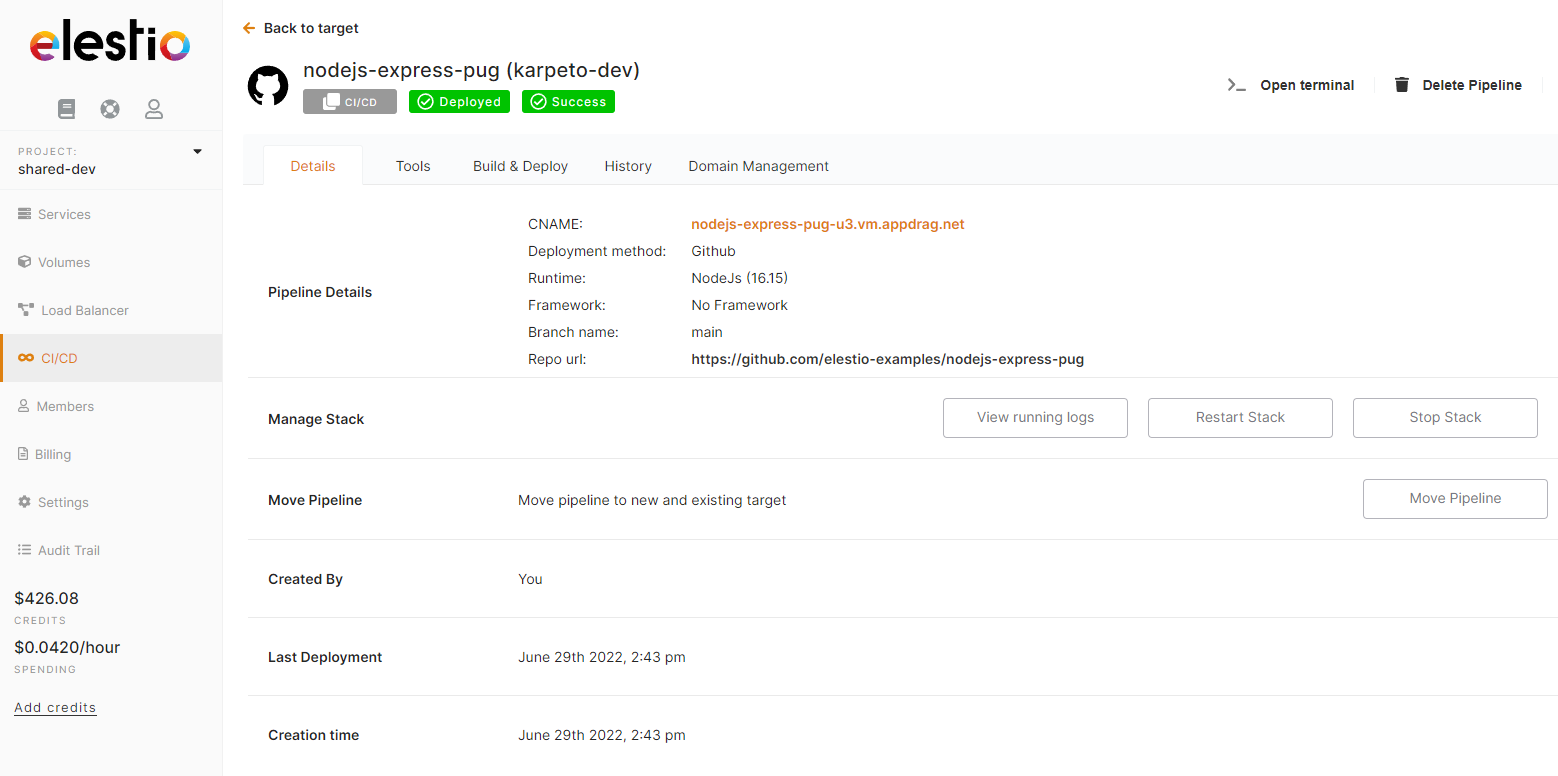
After few minutes your app should be accessible on the CI/CD pipeline url, you can find it in the dashboard overview of your pipeline. Also each time you commit to your repo code will be rebuild & re-deployed.