
How to Transfer your Domains from GoDaddy /others to elestio
If you desire to transfer your domain to Elestio, here is a comprehensive, step-by-step guide that will enable you to successfully migrate your domains to Elestio while effortlessly continuing to develop your online presence.
Before initiating the domain transfer process, ensure you have completed the following steps:
- Verify domain eligibility: Confirm that your domain is eligible for transfer. The domain must be at least 60 days old
as per ICANN policy, should not be in the process of expiration or redemption, and must not have a transfer lock enabled.
- Obtain the EPP/Auth Code: Request the EPP (Extensible Provisioning Protocol) or Auth Code from GoDaddy/others for the domain you wish to transfer. This code serves as an extra layer of security during the transfer process.
- Backup your domain settings: Take note or screenshot your current DNS settings, email forwarding configurations, and any custom settings associated with the domain to replicate them on Elestio after the transfer.
Step 1. Unlock the domain in your GoDaddy account
- Log in to GoDaddy, navigate to the domains menu, and then click “launch” for the domain you intend to transfer. If you’ve enabled privacy protection for the domain, you’ll need to turn it off before proceeding.
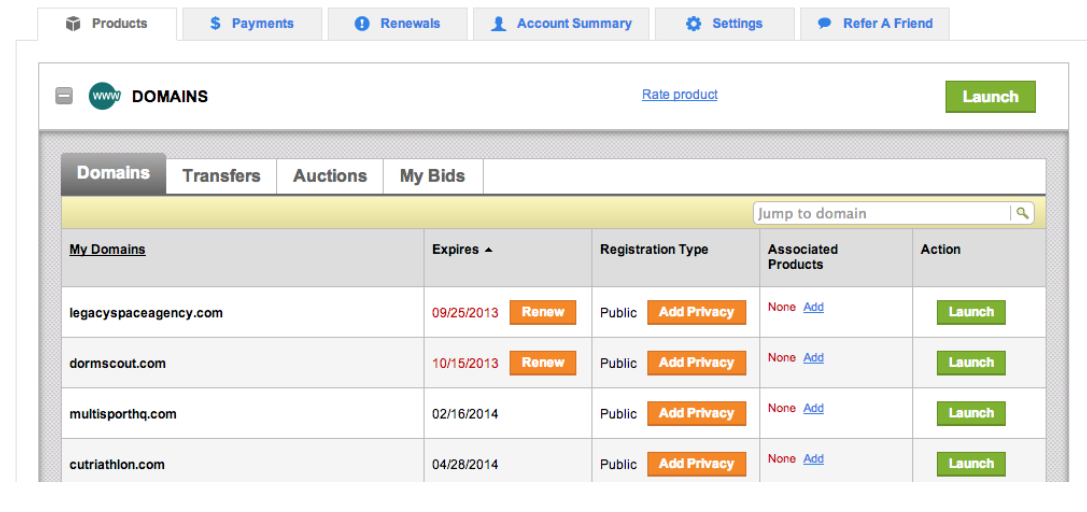
- After clicking “Launch,” you’ll be taken to a menu where you can manage settings for that specific domain. Click the “Manage” link in the “Lock” section, and a dialogue box will open.
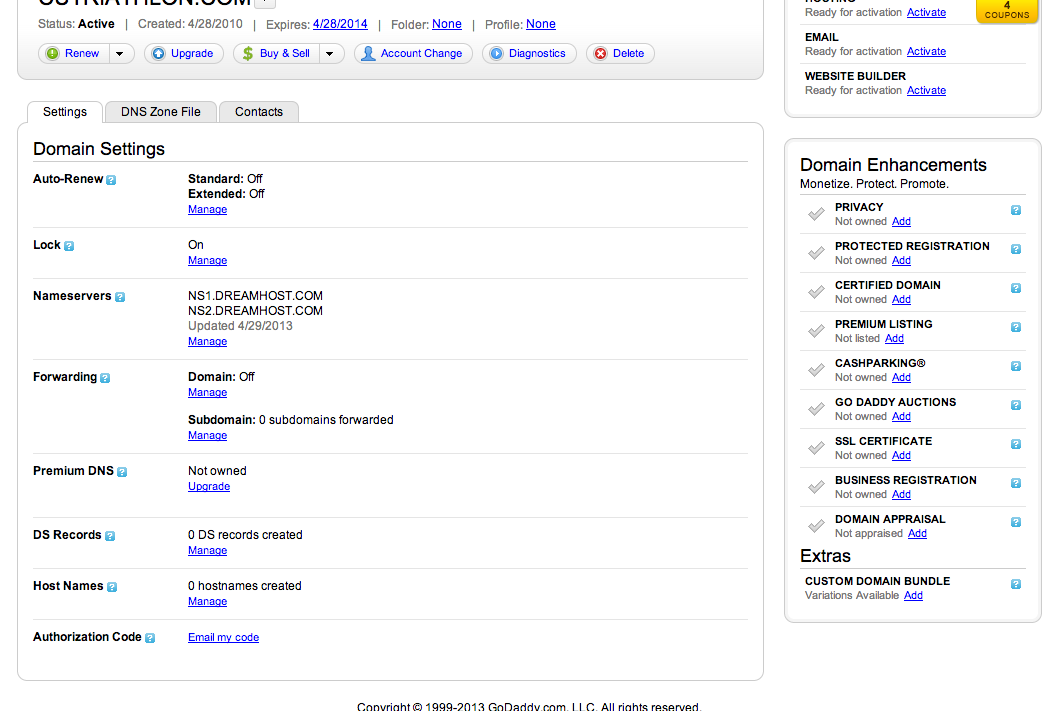
- Switch the lock setting to “Off,” and then click “Save.”

Step 2. Get an authorization code
- After unlocking the domain you’ll return to the domain settings page. Scroll to the bottom, click the “Authorization code” link, and then click “Send” to have an authorization code sent to the email address associated with the domain.


- You should receive an email containing the authorization code within a few minutes.

Step 3. Use the elestio domain transfer page to initiate your transfer.
- Go to the elestio dashboard and click on domains in the left sidebar.
- Click on the text "Want to transfer your existing one ?" in the top right side.
- Fill in the appropriate fields for the domain name and the authorization code (which you just received via email), and then click the “Create Transfer” button.
Step 4. Confirm the domain transfer at GoDaddy.com
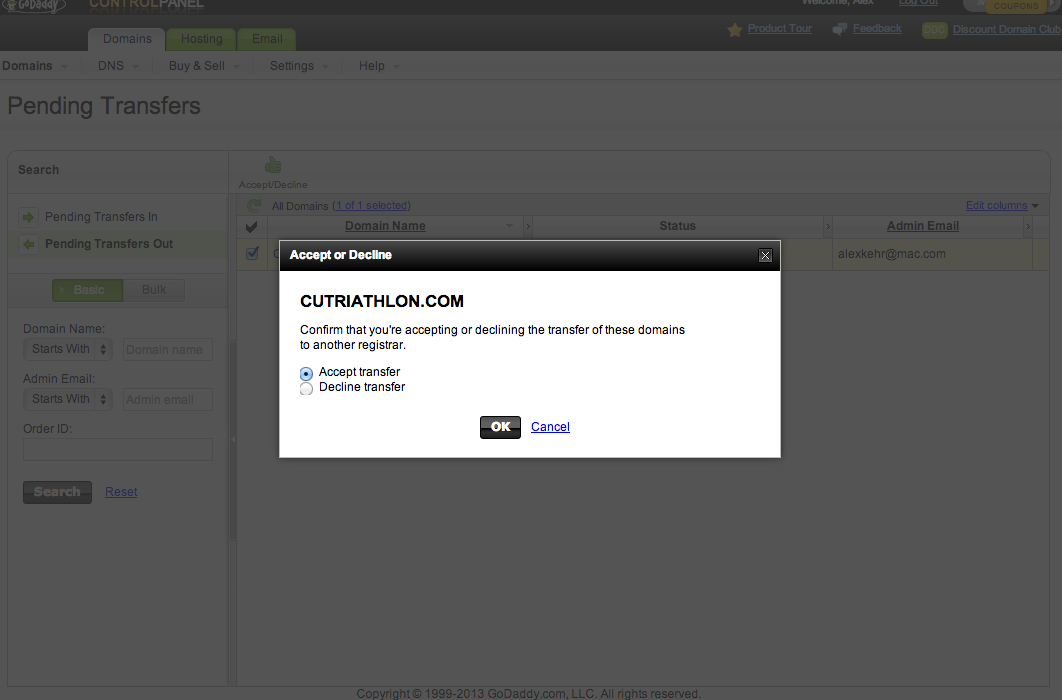
- Once you’ve approved the transfer, you’ll receive an email from GoDaddy (it may take a few hours). It’ll include a link to your GoDaddy account, where you can confirm the transfer.

- Clicking that link will take you to the transfers page in your GoDaddy account. Click on your pending transfers, follow the “Accept of decline transfer now” link, and accept the transfer.

Celebrate! Your domain is now safe and sound in your elestio account 🚀
Transferring your domains from GoDaddy to elestio can be a straightforward process when following the steps mentioned above. Remember to prepare in advance, backup essential domain settings, and ensure your domain is eligible for transfer.
This guide is intended for GoDaddy users; however, it can also be applied to other service providers. You may begin the transfer process on your provider's account and subsequently proceed with step 3 to execute it on elestio.