Create a new service with Bring your own AWS Account
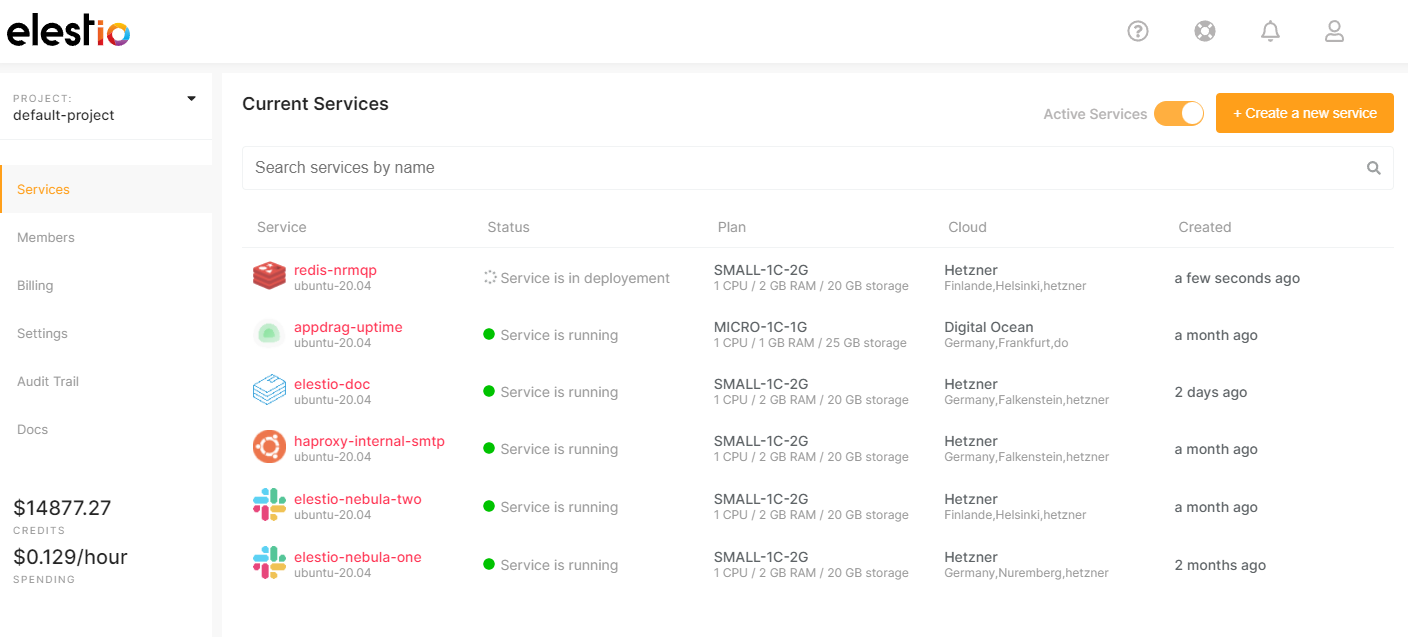
To create a new service, first, open Elestio Dashboard, then go to services from the left sidebar and click the button to create a new service.
-
The first step is to select a template or service to be deployed.
We offer more than 200 software templates that are supported, so you can pick the one you want to use. If you want to learn more about a specific template before using it, click the Details button. All of the templates and their details are also available on our managed services page.
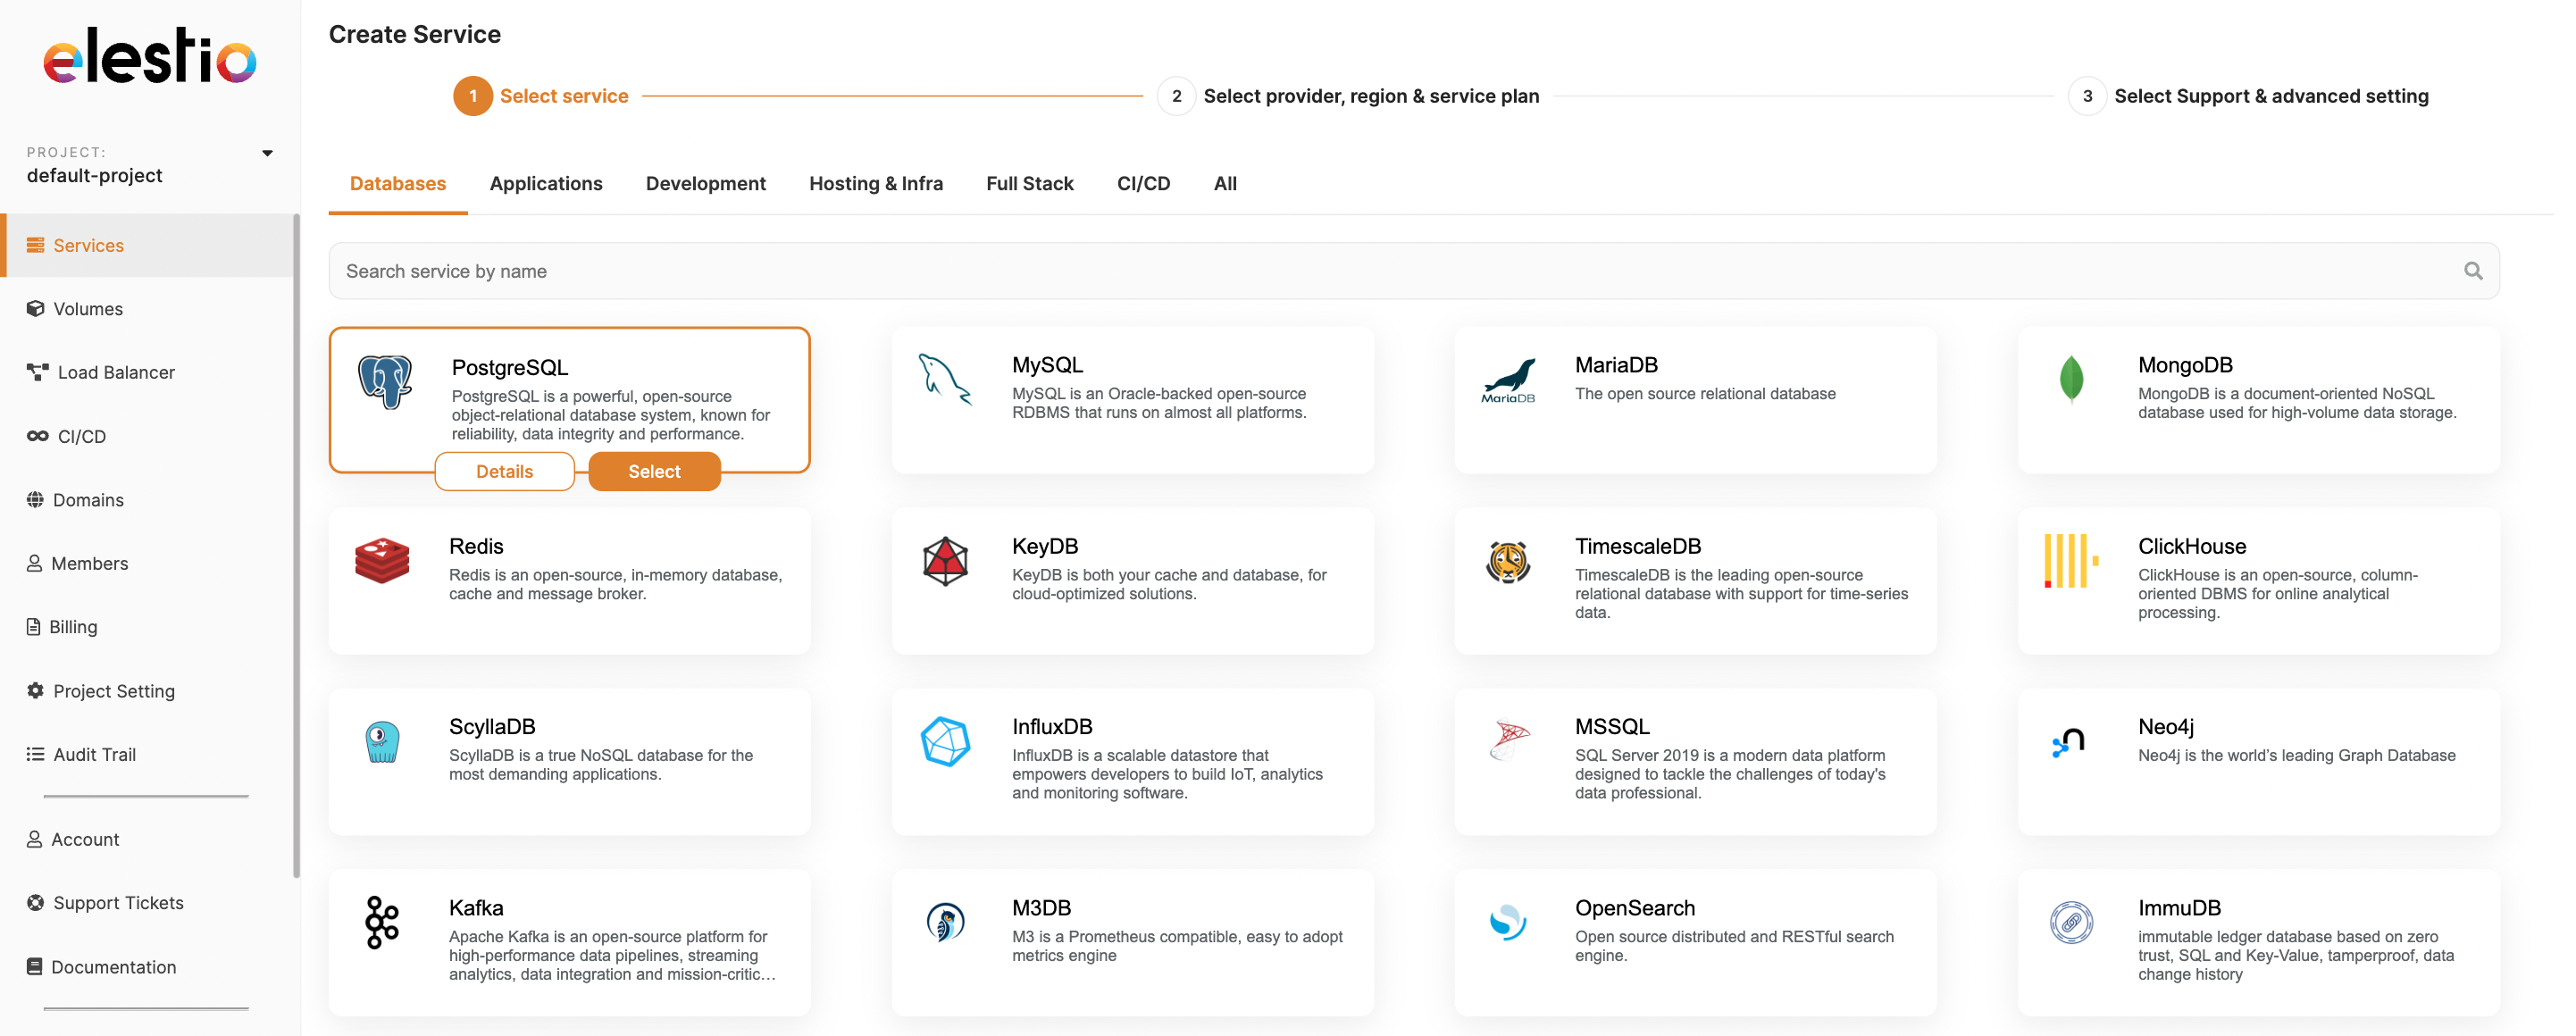
Use the category tabs to filter the selection of software.
-
We provide 6 cloud service providers as well as Bring Your Own VM. You can choose AWS from this list.
Hetzner, Digital Ocean, LightSail, Linode, and Vultr providers' services are deployed on Elestio accounts, whereas AWS is Bring your own AWS account, so all of the services are deployed in your own AWS account.

-
Now Configure your AWS Account with Elestio. We offer two types of connections: simple and access/secret keys.
Choose the Access/Secret key way to connect your AWS account.
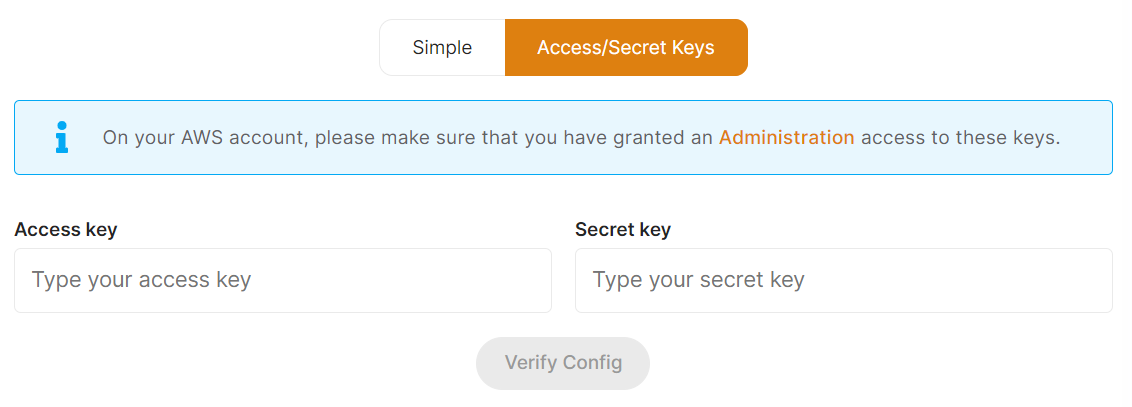
Enter your AWS Account Administration access Access Key and Secret Key here, then click the Verify button to validate your AWS access credentials.
-
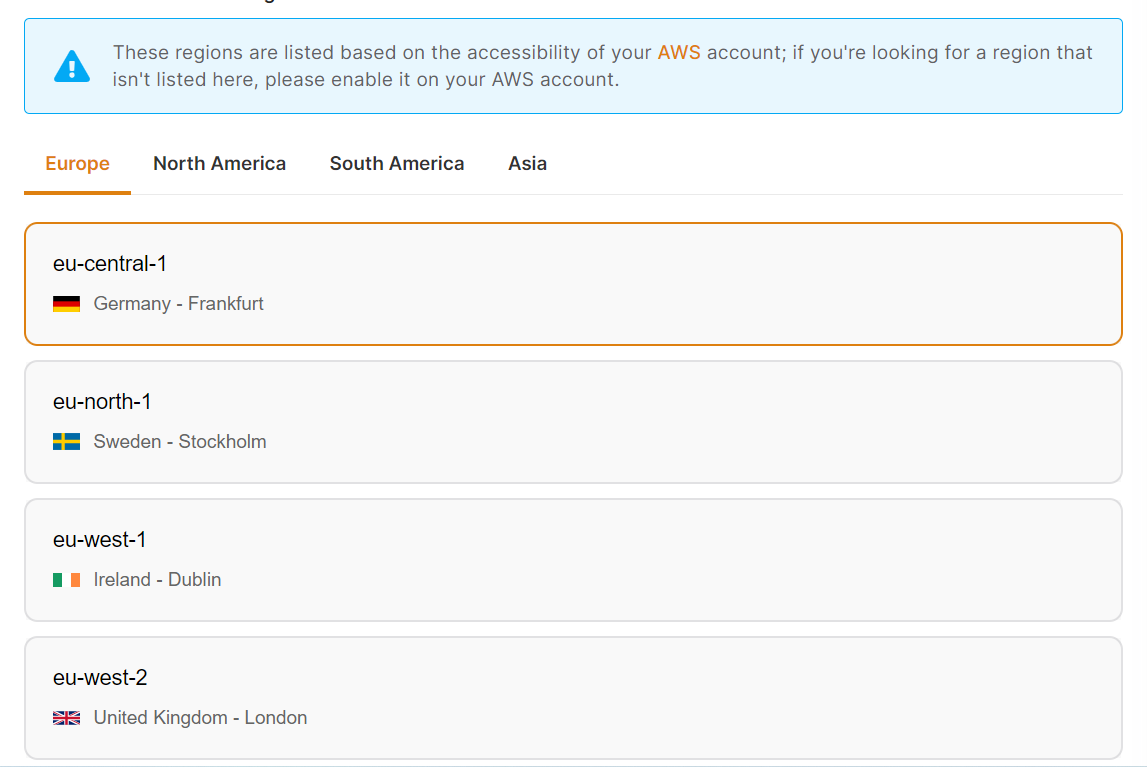
Select Service Cloud Region
-
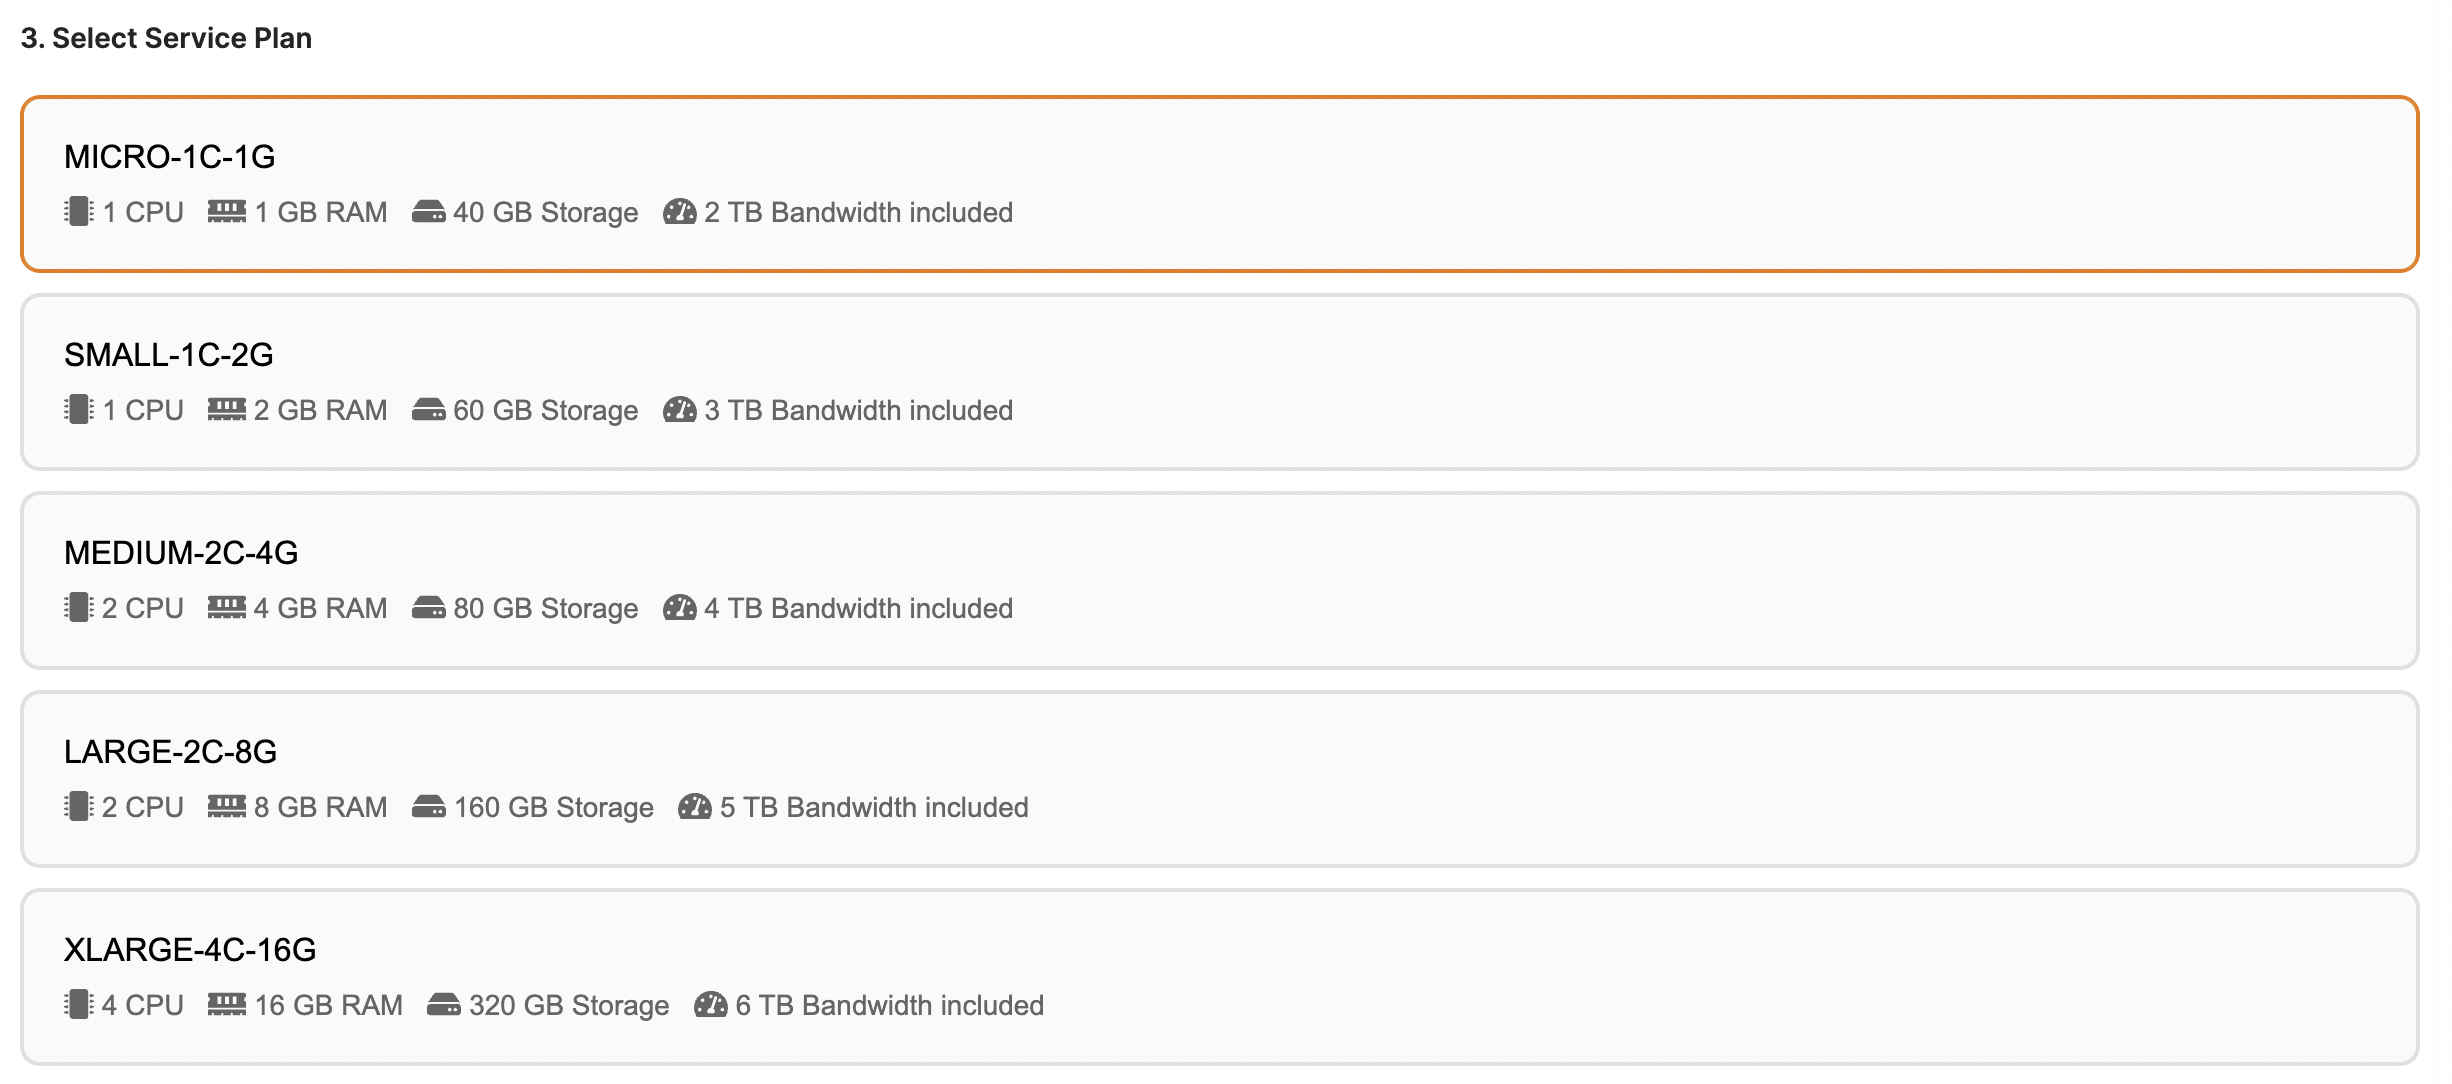
Select Service Plan
You can view a list of all the AWS Ec2 plans we offer by clicking here.
-
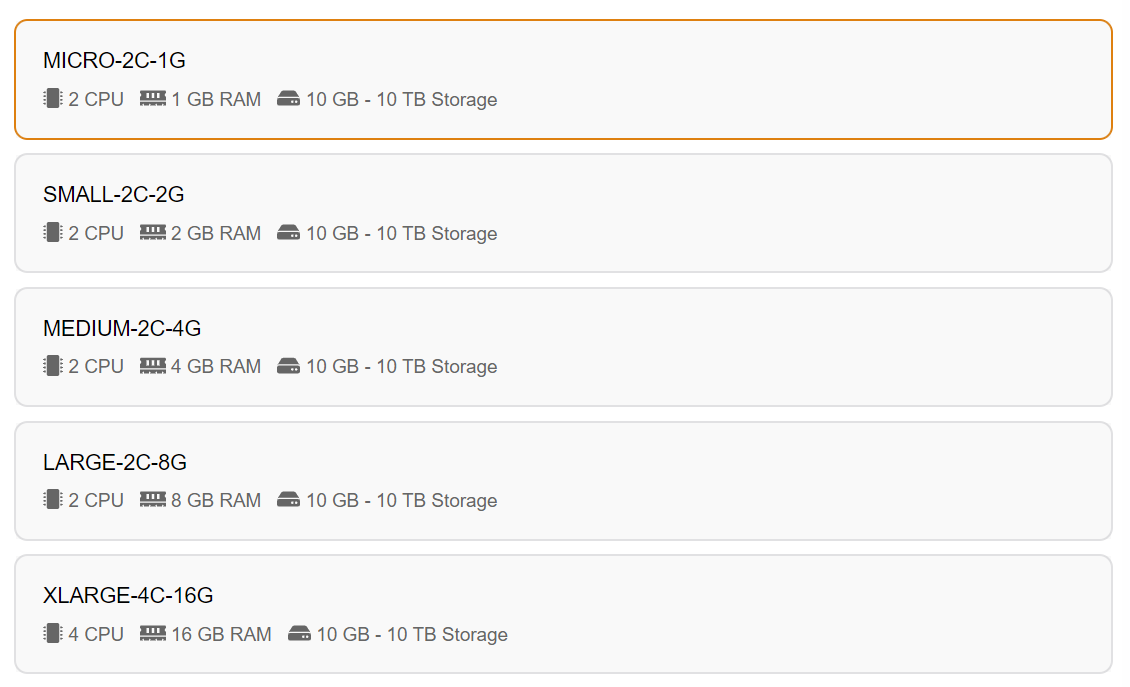
Choose the Disk Storage Size
By default, we configure it with 20GB, but you can change it as needed between 10 GB and 10 GB.

3. Select the instance size that works for you
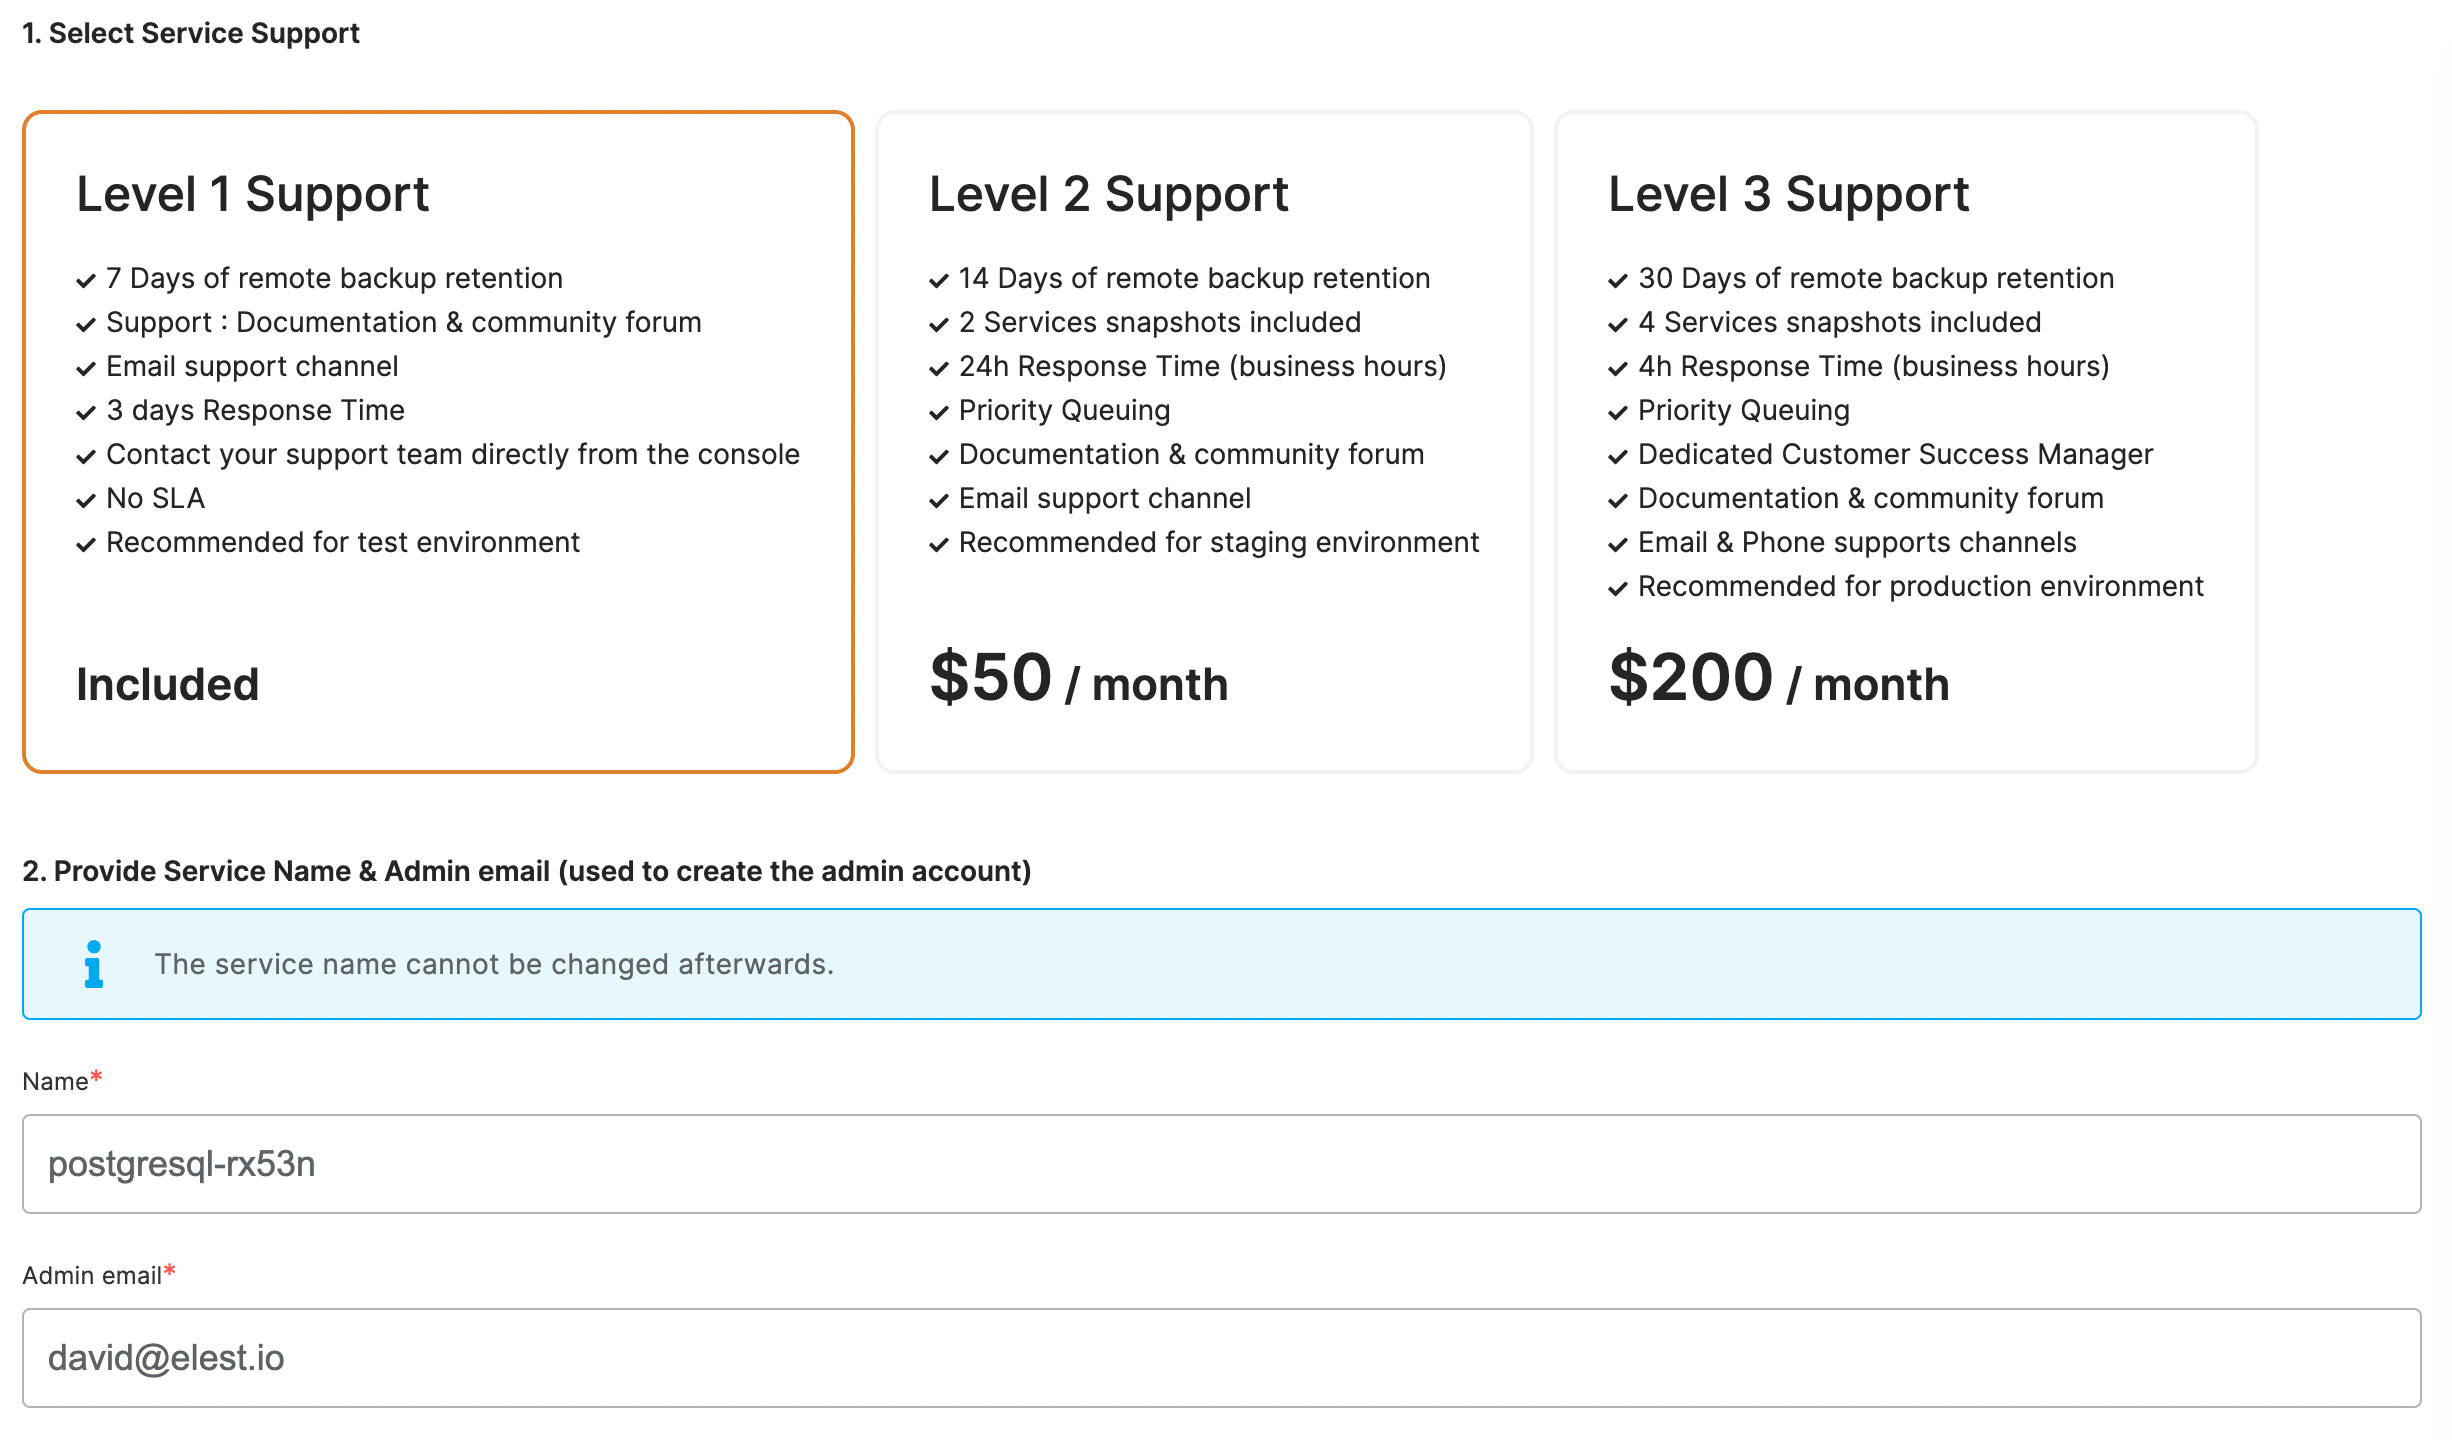
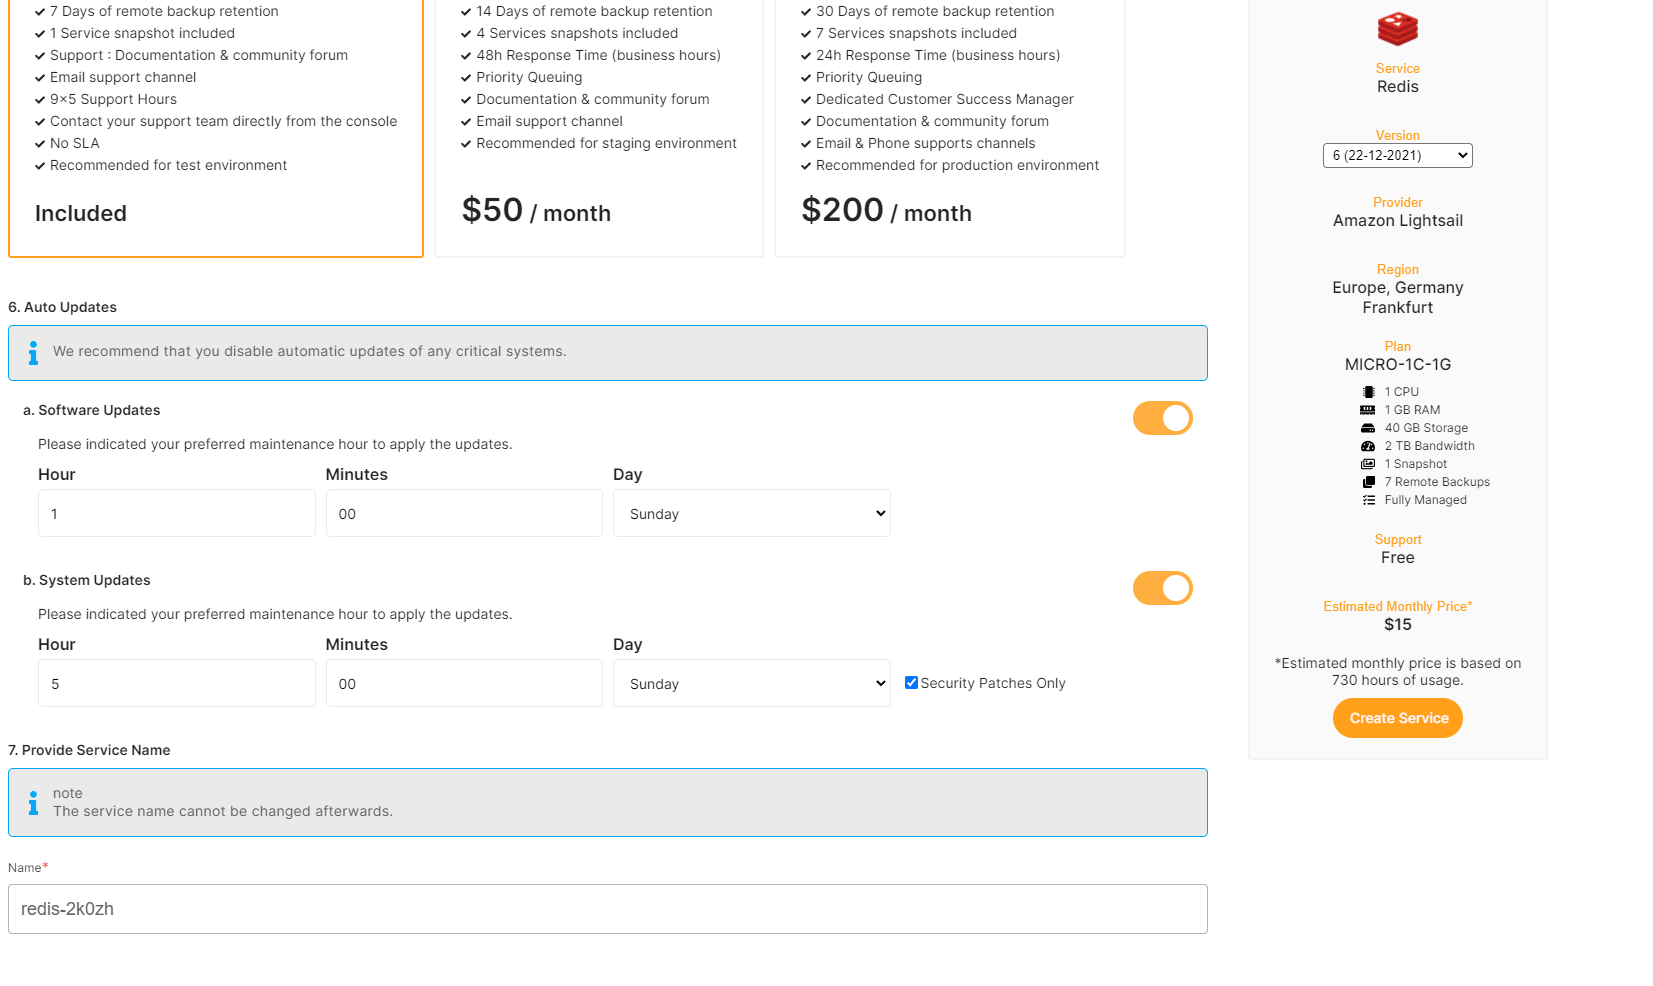
5. Set the support plans, and maintenance windows for OS & software updates and give a name to your new service
OS updates include updates to the Linux kernel, security patches, and other important maintenance to keep your instance running smoothly.
Software updates update the code of the open-source application itself. We respect semantic versioning, so we will only implement minor and patch updates, in order to avoid non-breaking changes.
Maintenance windows are specified in UTC
6. Click "Create Service" button on the right when you are ready to deploy

7. After a few seconds your new service will appear in the list with a status: "Service is in deployment". It should only take 2-3 minutes before your service will be ready to use.