
New Page
Prerequisites
If the firewall is enabled on your service, ensure that port 80 is open. This is required for SSL certificate creation and renewal.
Accessing the Configuration
-
Go to the Overview tab of your service dashboard.
-
Locate the Custom Domain Names section.
-
Click Manage SSL Domains.

In this section, you will have two ways to configure custom domains.
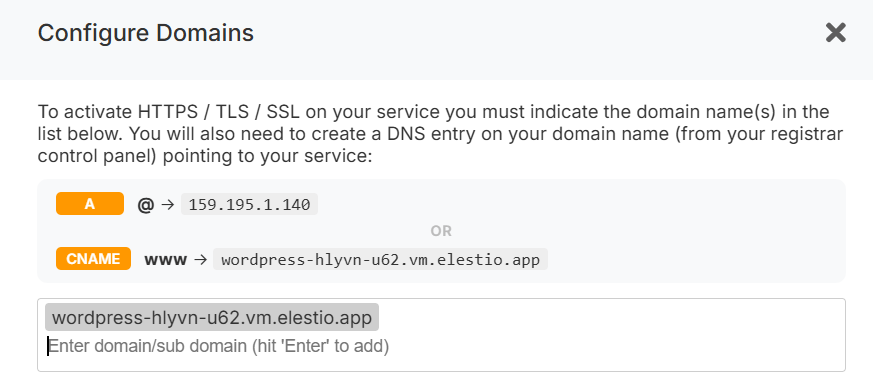
Method 1: Manual DNS Setup
-
In this step, enter your domain and press Enter to add it to the list of authorized domains.
-
Configure DNS records in your domain registrar panel.
Required DNS Records
-
A record:
@→<service IPv4>
(Points the root domain to your service IP) -
CNAME record:
www→<service CNAME>
(Recommended remains stable even if your IP changes, e.g., after migration.)
-
Verify DNS propagation using a tool like: https://dnschecker.org/
Once propagation is complete, the SSL certificate will be automatically generated and renewed, and HTTPS will start working.
Method 2: One-Click DNS Setup via Cloudflare (Domain Connect)
A One-click DNS Setup section is available if the domain name server or registrar is Cloudflare, allowing automatic DNS configuration via the Domain Connect protocol.
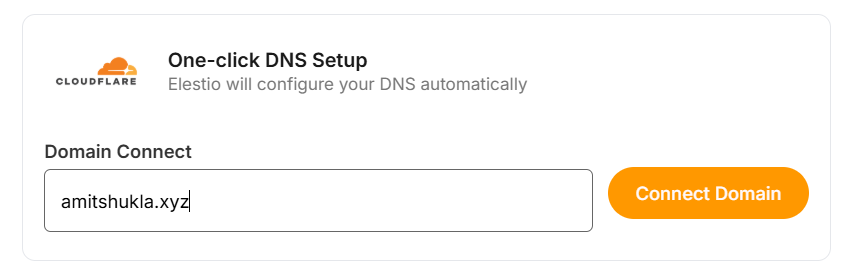
Steps
-
Enter your domain (e.g.
example.com). -
Click Connect Domain.
-
This action will redirect you to the Cloudflare dashboard for accepting the DNS record configuration.
Cloudflare Reverse Proxy Users
If you are using method 1 and want Cloudflare with the proxy enabled (orange cloud icon), refer to the detailed guide:
https://docs.elest.io/books/security/page/using-cloudflare
Environment Variable Update
Some applications require updating an environment variable to reflect the configured domain.

To update:
-
Go to the Overview page of your service.
-
Click the Update Config tab in the software row.
-
Open the Env tab.
-
Update the domain-related environment variable.
Troubleshooting: SSL Not Generated
View Nginx Logs
You can inspect logs using a terminal command:
cd /opt/elestio/nginx;
docker-compose logs -f;
Press Ctrl + C to stop live log output.
Reset SSL Data Folder
In some cases, the SSL data directory /opt/elestio/nginx/ssl_data may become corrupted:
To fix:
-
Connect to your service via terminal.
-
Run the below command.
cd /opt/elestio/nginx/;
docker-compose down;
mv ./ssl_data/ ./ssl_data_old/;
mkdir ./ssl_data/;
chmod 777 ./ssl_data/;
docker-compose up -d
Once executed, just open your custom website URL again, and your certificate should be generated and your site served over SSL/TLS.