
How to configure NGINX to Listen on IPv6

Some cloud images ship with IPv6 already enabled at the OS level, but NGINX still has to be told to listen on an IPv6 socket.
This guide shows how to add that single listen [::]:443 ssl http2; directive in the Elest.io dashboard so your site becomes reachable via AAAA records.

(If IPv6 is thedisabled latest version ofon the InternetVM Protocol,itself, designed to address the limitations of IPv4. In some scenarios, such as managing Docker Hub rate limits, disabling IPv6 may be necessary to ensure smooth operation. This guide provides step-by-step instructions for enabling or disabling IPv6 on a Linux VM.

If you are encountering issuesstart with the Docker Hub rate limit, it is recommended to disable“Enable IPv6 on your VMVM” byarticle followingand come back here.)

1. Open the stepsdashboard

outlined
in

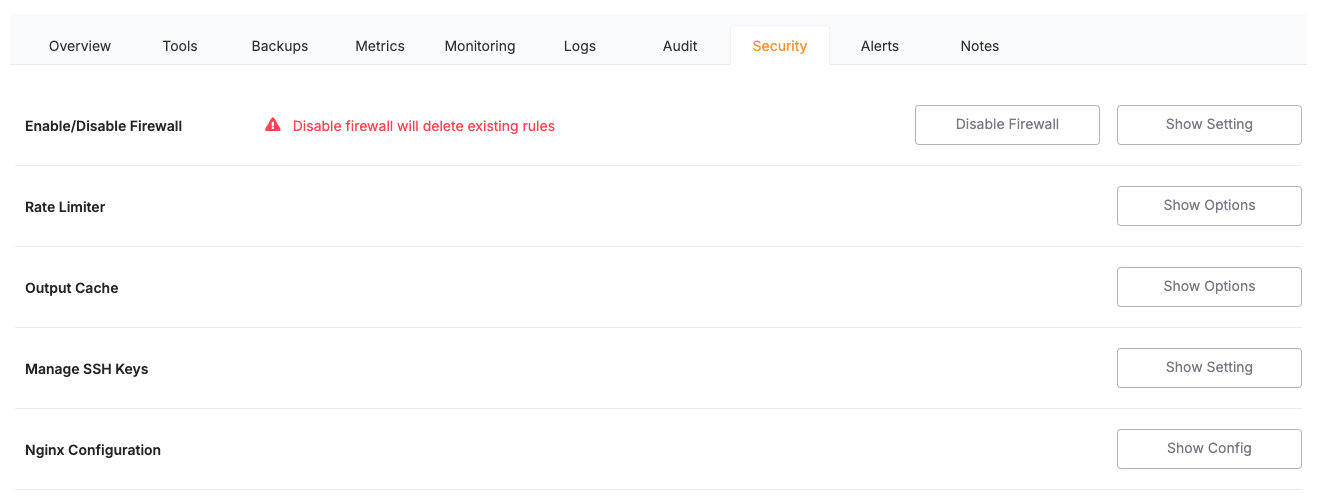
    Go to your project → Services → Security tab.

    Click NGINX Configuration › Show config.

    Screenshot 2025-05-14 at 15.16.43.png

    2 . Edit the "Disablingserver IPv6"block sectionfor below.your domain

    Choose your domain and find edit the NGINX config then find 

    listen 443 ssl http2;

    Add the IPv6 line directly beneath:

    listen 443 ssl http2; listen [::]:443 ssl http2; 

    (Keep the original IPv4 line—now NGINX will listen on both stacks.)

    Screenshot 2025-05-14 at 15.35.26.png

    Click Apply & Restart. NGINX reloads and your server is now ready to serve HTTPS traffic over IPv6.


    First, open the terminal by selecting the "Open Terminal" option located at the top-right corner of the service details overview. Then, proceed with the steps for either enabling or disabling IPv6, depending on your requirements.
    Enabling
    IPv6
    If IPv6 is currently disabled on your VM and you want to enable it, follow these steps:

    1.

    Temporarily

    Enable
    IPv6:
    To
    enable
    IPv6
    without rebooting:
    sudo sysctl -w net.ipv6.conf.all.disable_ipv6=0
    sudo sysctl -w net.ipv6.conf.default.disable_ipv6=0

    This change will revert after a system reboot.

    2. Permanently Enable IPv6:  To enable IPv6 persistently:

      Edit the `sysctl.conf` file:
      sudo nano /etc/sysctl.conf
        Locate and comment out the following lines (if present):
        # net.ipv6.conf.all.disable_ipv6 = 1
        # net.ipv6.conf.default.disable_ipv6 = 1
          Apply the changes:
          sudo sysctl -p

          IPv6 will now remain enabled even after a reboot.


          Disabling IPv6

          If IPv6 is causing issues, such as with Docker Hub rate limits, follow these steps to disable it.

          1. Temporarily Disable IPv6:  To disable IPv6 without rebooting:

          sudo sysctl -w net.ipv6.conf.all.disable_ipv6=1
          sudo sysctl -w net.ipv6.conf.default.disable_ipv6=1

          This change is not permanent and will be reset after a reboot.

          2. Permanently Disable IPv6:  To disable IPv6 persistently:

            Edit the `sysctl.conf` file:
            sudo nano /etc/sysctl.conf
              Add the following lines to the file:
              net.ipv6.conf.all.disable_ipv6 = 1
              net.ipv6.conf.default.disable_ipv6 = 1
                Apply the changes:
                sudo sysctl -p

                IPv6 will now remain disabled even after a reboot.