
Connecting with redis-cli
This guide explains how to establish a connection between redis-cli and a Redis database instance. It walks through the necessary setup, configuration, and execution of a simple Redis command from the terminal.
Variables
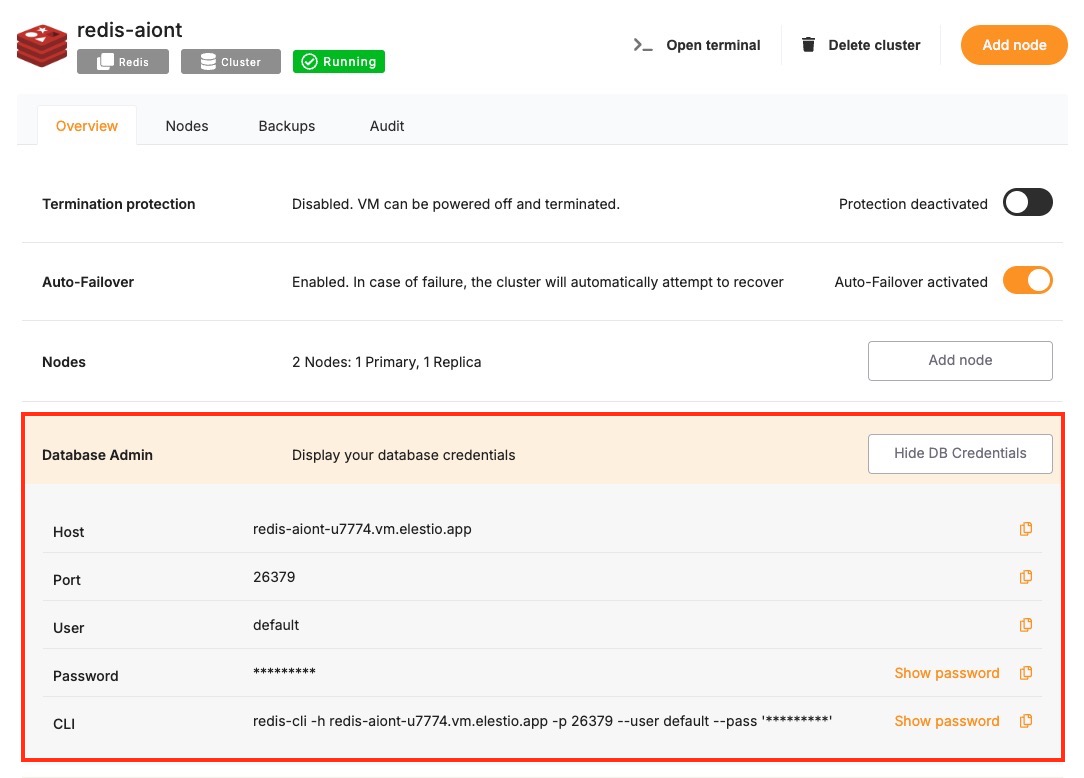
Certain parameters must be provided to establish a successful connection to a Redis database. Below is a breakdown of each required variable, its purpose, and where to find it. Here’s what each variable represents:
|
Variable |
Description |
Purpose |
|---|---|---|
|
|
Redis hostname, from the Elestio service overview page |
The address of the server hosting your Redis instance. |
|
|
Port for Redis connection, from the Elestio service overview page |
The network port used to connect to Redis. The default port is 6379. |
|
|
Redis password, from the Elestio service overview page |
The authentication key required to connect securely to Redis. |
These values can usually be found in the Elestio service overview details as shown in the image below, make sure to take a copy of these details and use them in the command moving ahead.
Prerequisites
Install redis-cli
Check if redis-cli is installed by running:
redis-cli --versionIf not installed, you can install it via:
-
macOS:
brew install redis-
Ubuntu/Debian:
sudo apt install redis-tools-
Windows:
Use Windows Subsystem for Linux (WSL) or download a Redis CLI binary.
Command
Once all prerequisites are set up, open the terminal or command prompt and run the following command:
redis-cli -h HOST -p PORT -a PASSWORDReplace HOST, PORT, and PASSWORD with the actual values from your Elestio Redis service. If the connection is successful, the terminal will display a Redis prompt like this:
HOST:PORT>You can then run a simple command to test the connection:
set testKey "Hello Redis"
get testKey
Expected output:
"Hello Redis"If the connection is successful, the terminal will display output similar to:
"Hello Redis"