
Cloudflare Tunnel with Elestio
IPv6
What is quicklyCloudflare becomingTunnel?
Cloudflare IfTunnel is a secure solution that connects your VMweb already supports it, you just needapplications to tellCloudflare's NGINXglobal network without exposing your server's IP address or opening inbound ports. It creates an encrypted tunnel between your origin server and Cloudflare's edge, providing enhanced security and performance for your applications.
Why Use Cloudflare Tunnel?
Key Benefits:
Getting Started with Cloudflare Tunnel
Prerequisites
Step-by-Step Installation Guide
Step 1: Access Zero Trust Dashboard
Navigate to your Cloudflare dashboard and click on anZero IPv6Trust socket.in the sidebar. This is where all tunnel management happens.
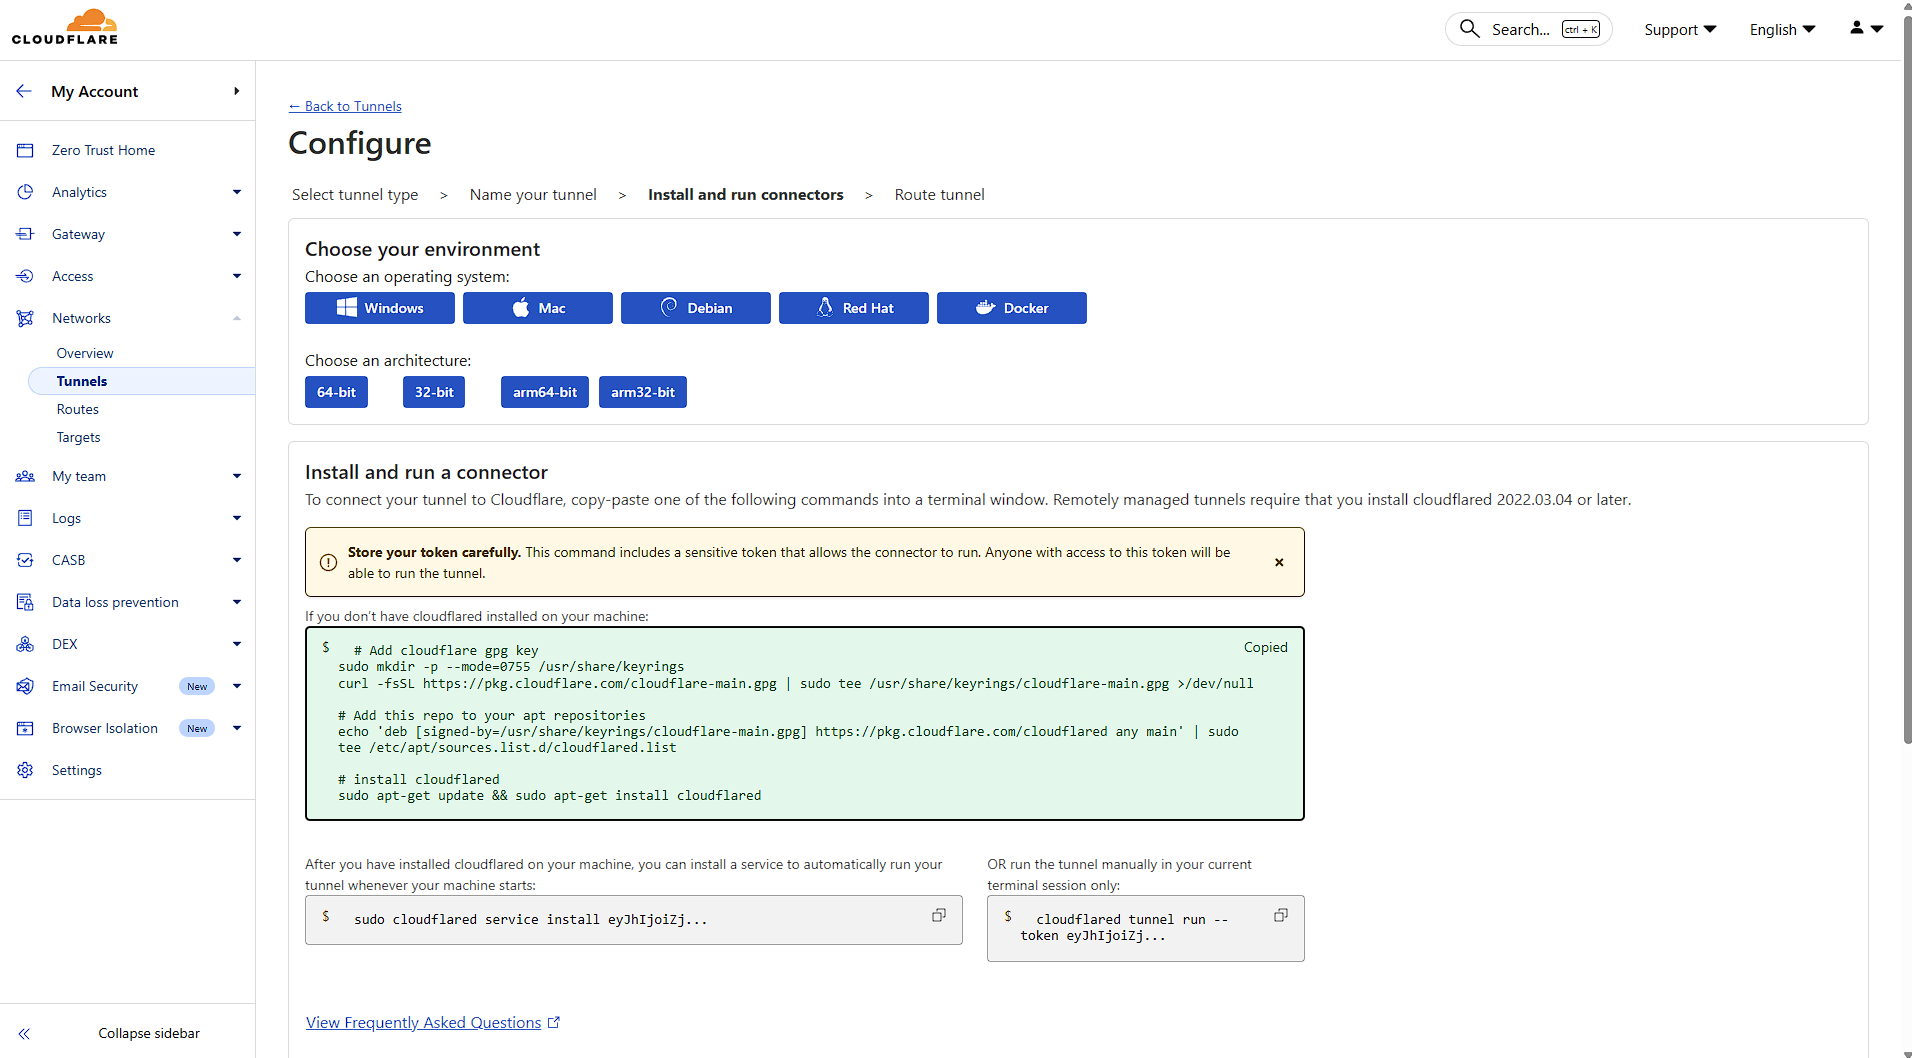
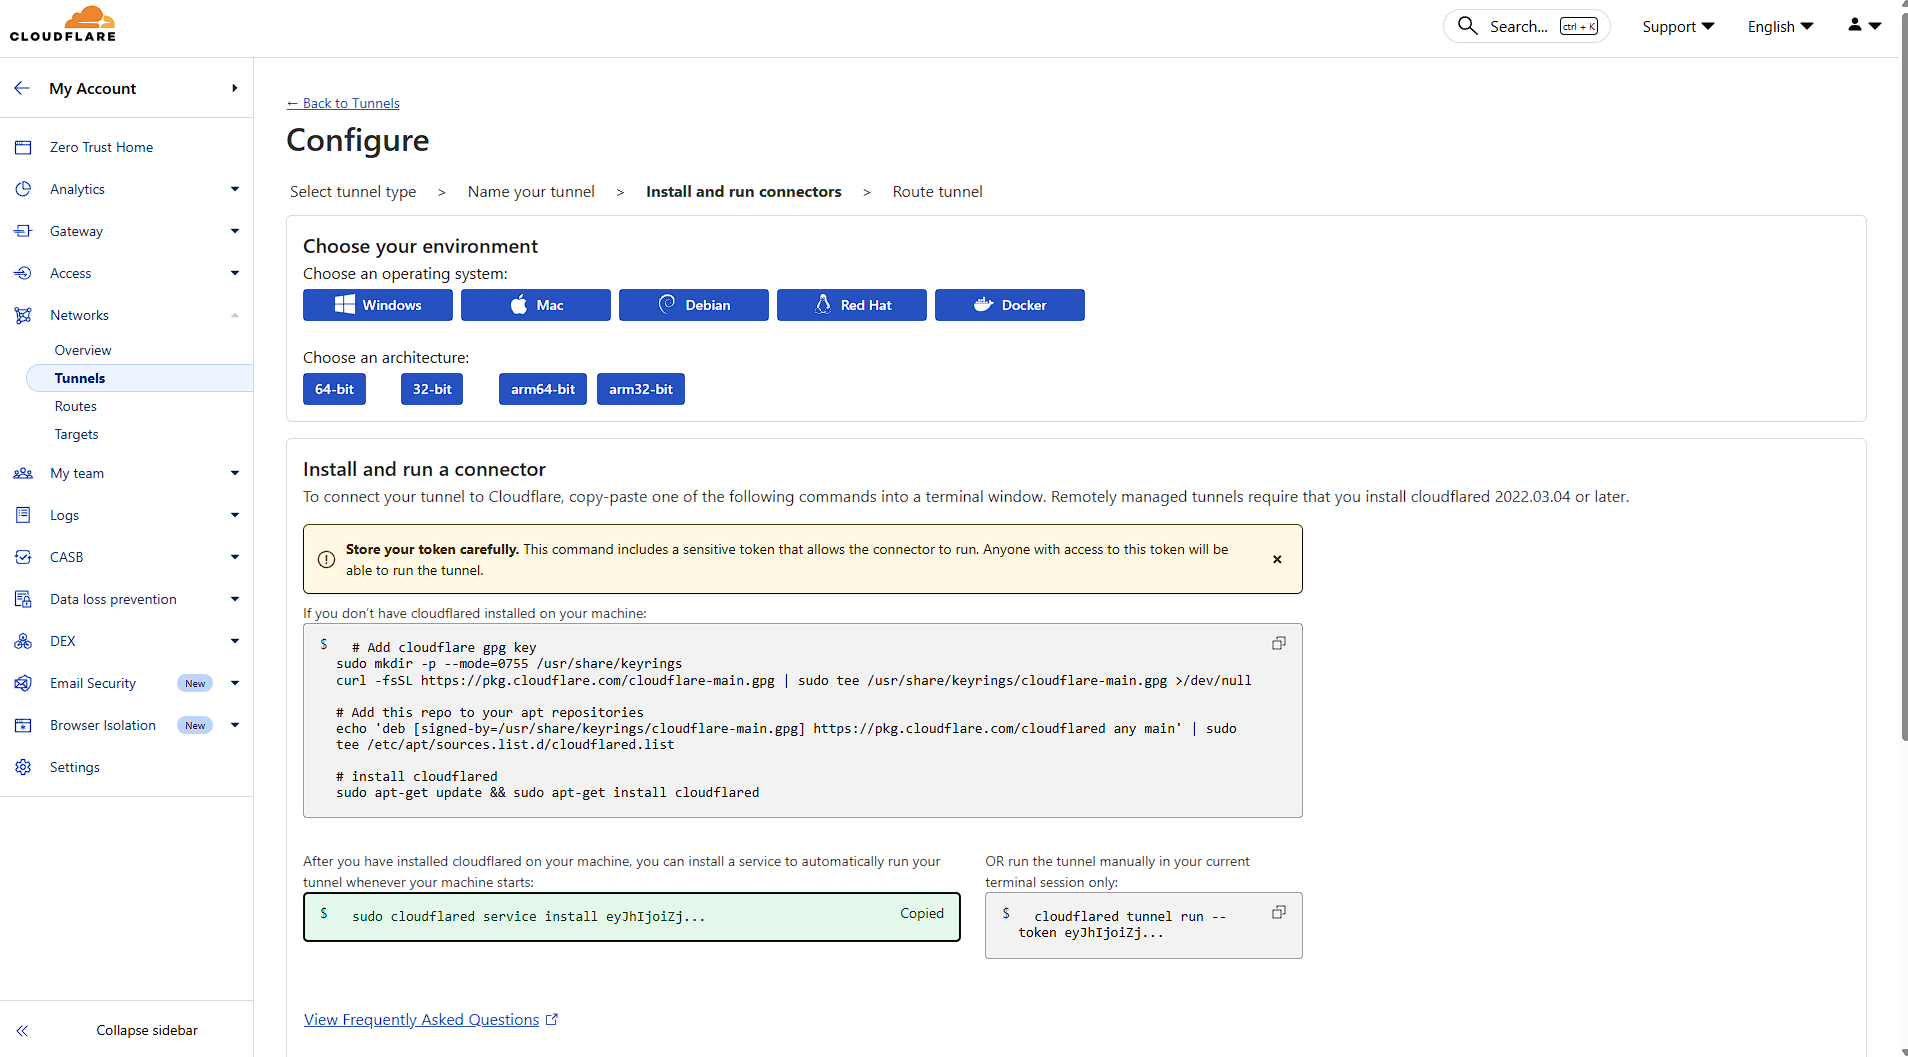
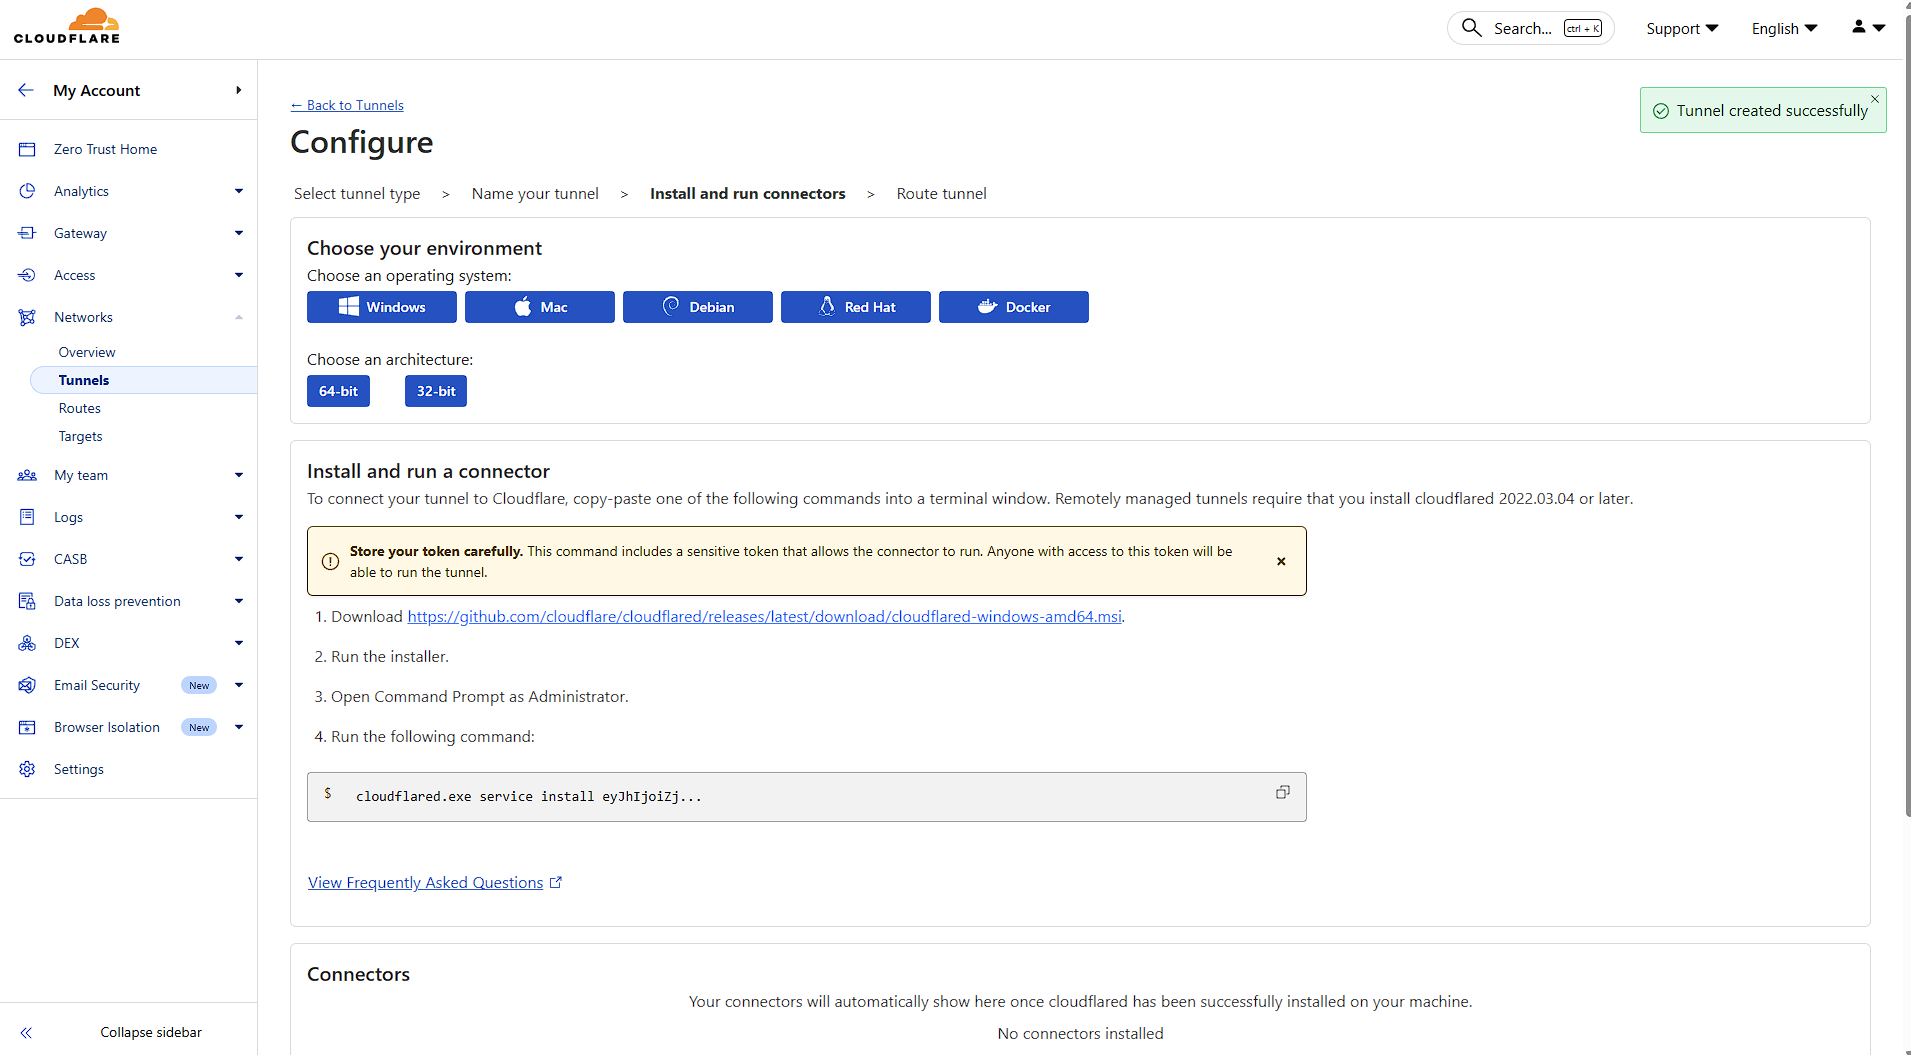
(IfWhen IPv6installing is disabled on the VM itself, start with the “Enable IPv6Cloudflare on your VM”Elestio articleservice, make sure to select Debian as the operating system.
Next, open your Elestio Terminal. Once inside, install Cloudflare and comeset back here.)
1. Openup the dashboard
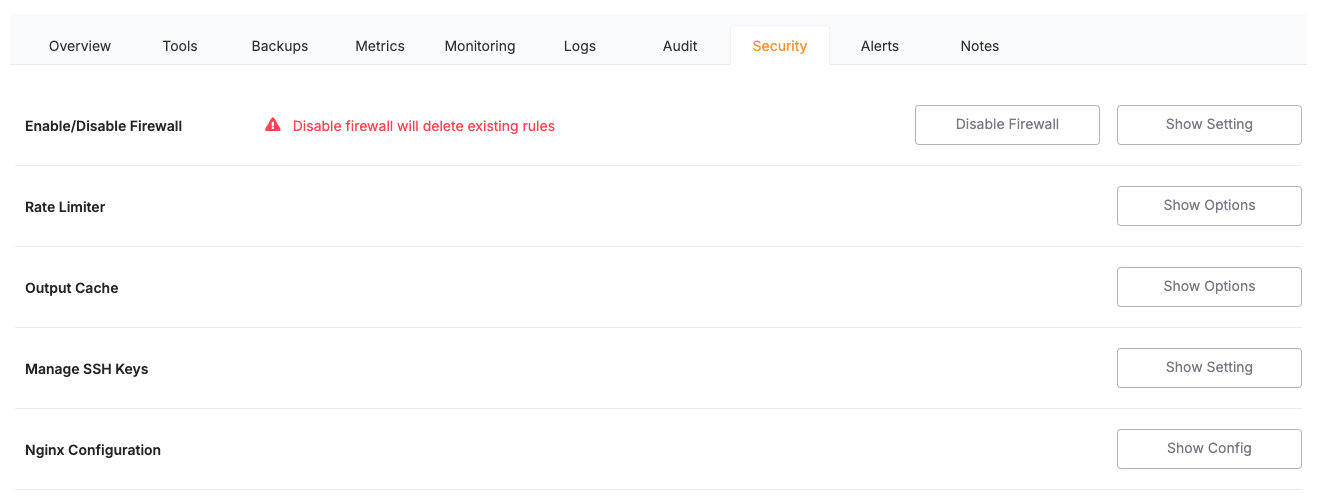
Goservice to run your projecttunnel →by Servicescopying →and Security tab.
Click NGINX Configuration › Show config.
2 . Editpasting the servercommands blockprovided forby your domain
Choose your domain and find edit the NGINX config then find
listen 443 ssl http2;
Step 2: Navigate to Tunnels
Under the Networks section, click on Tunnels. This is your central hub for creating and managing all your tunnels.
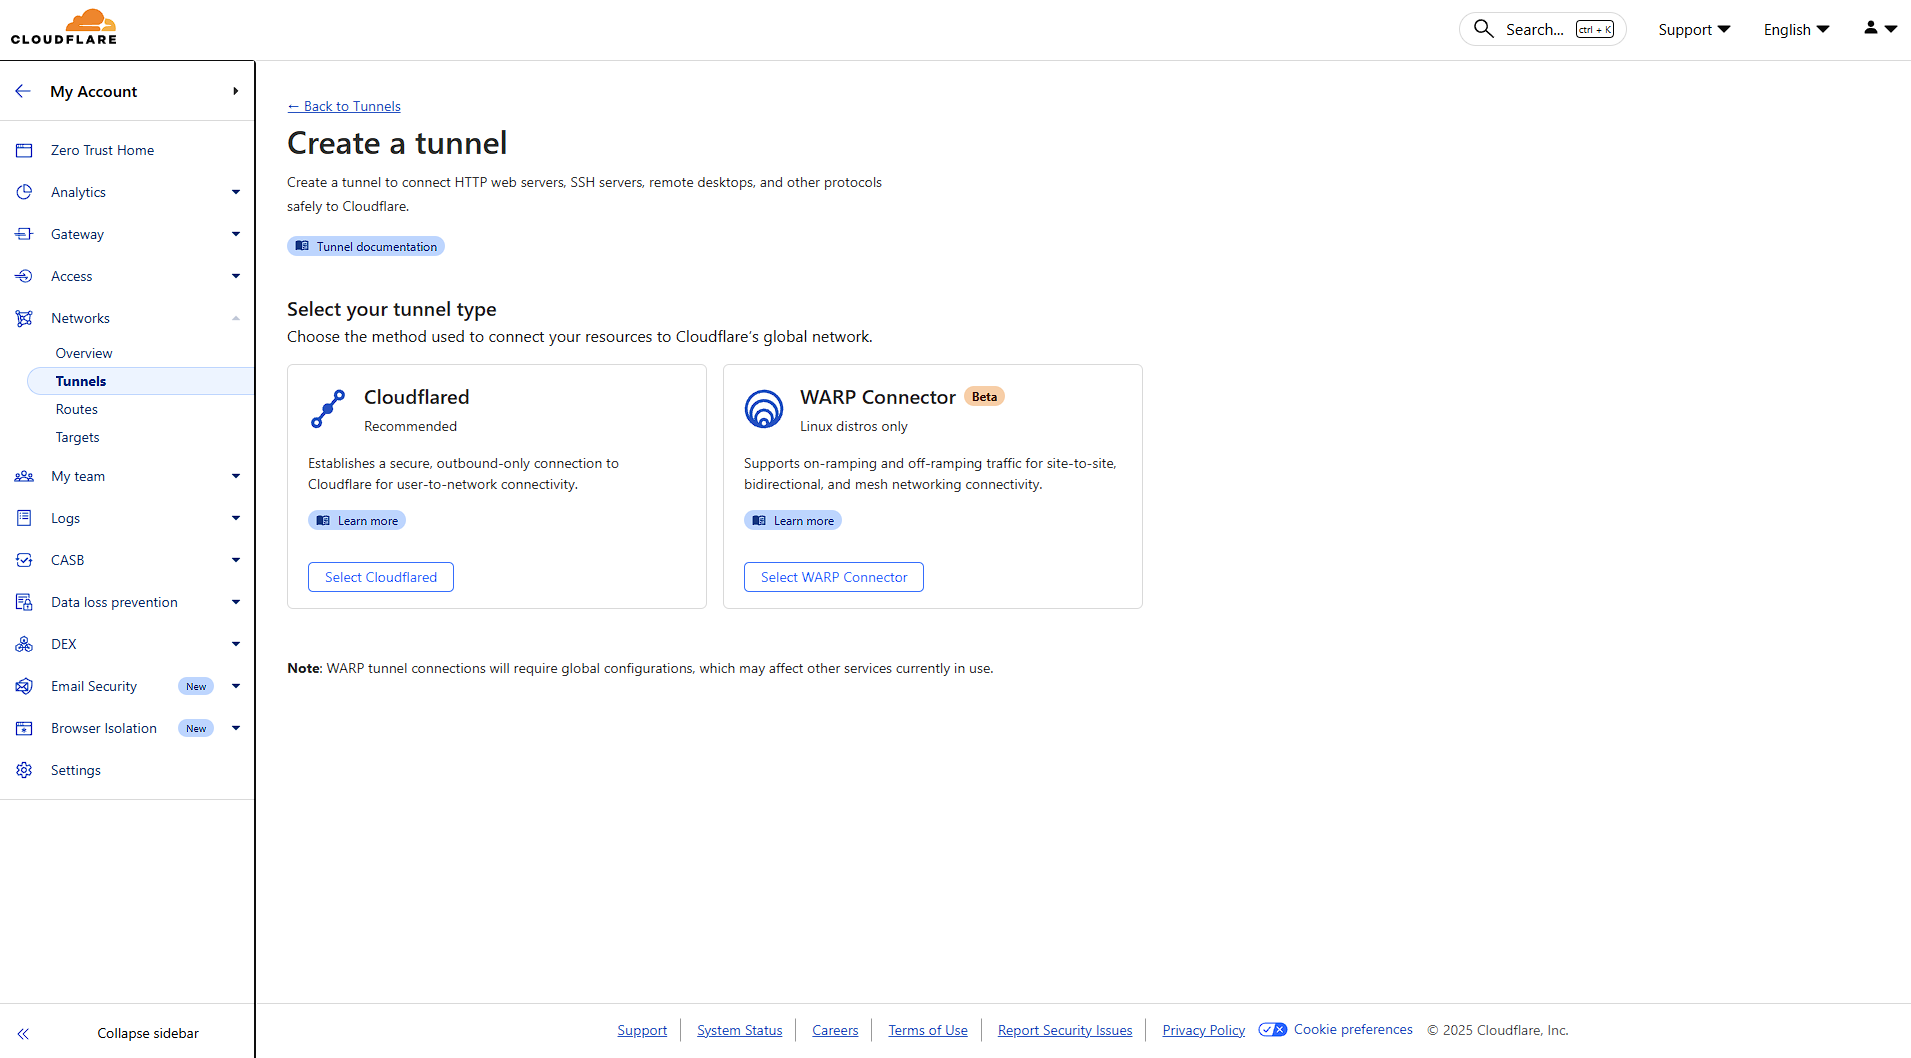
Click "Create a tunnel" to begin the setup process. You'll be presented with two options:
AddSelect Cloudflared for this guide.
Choose a descriptive name for your tunnel. This helps you identify it later, especially if you manage multiple tunnels.
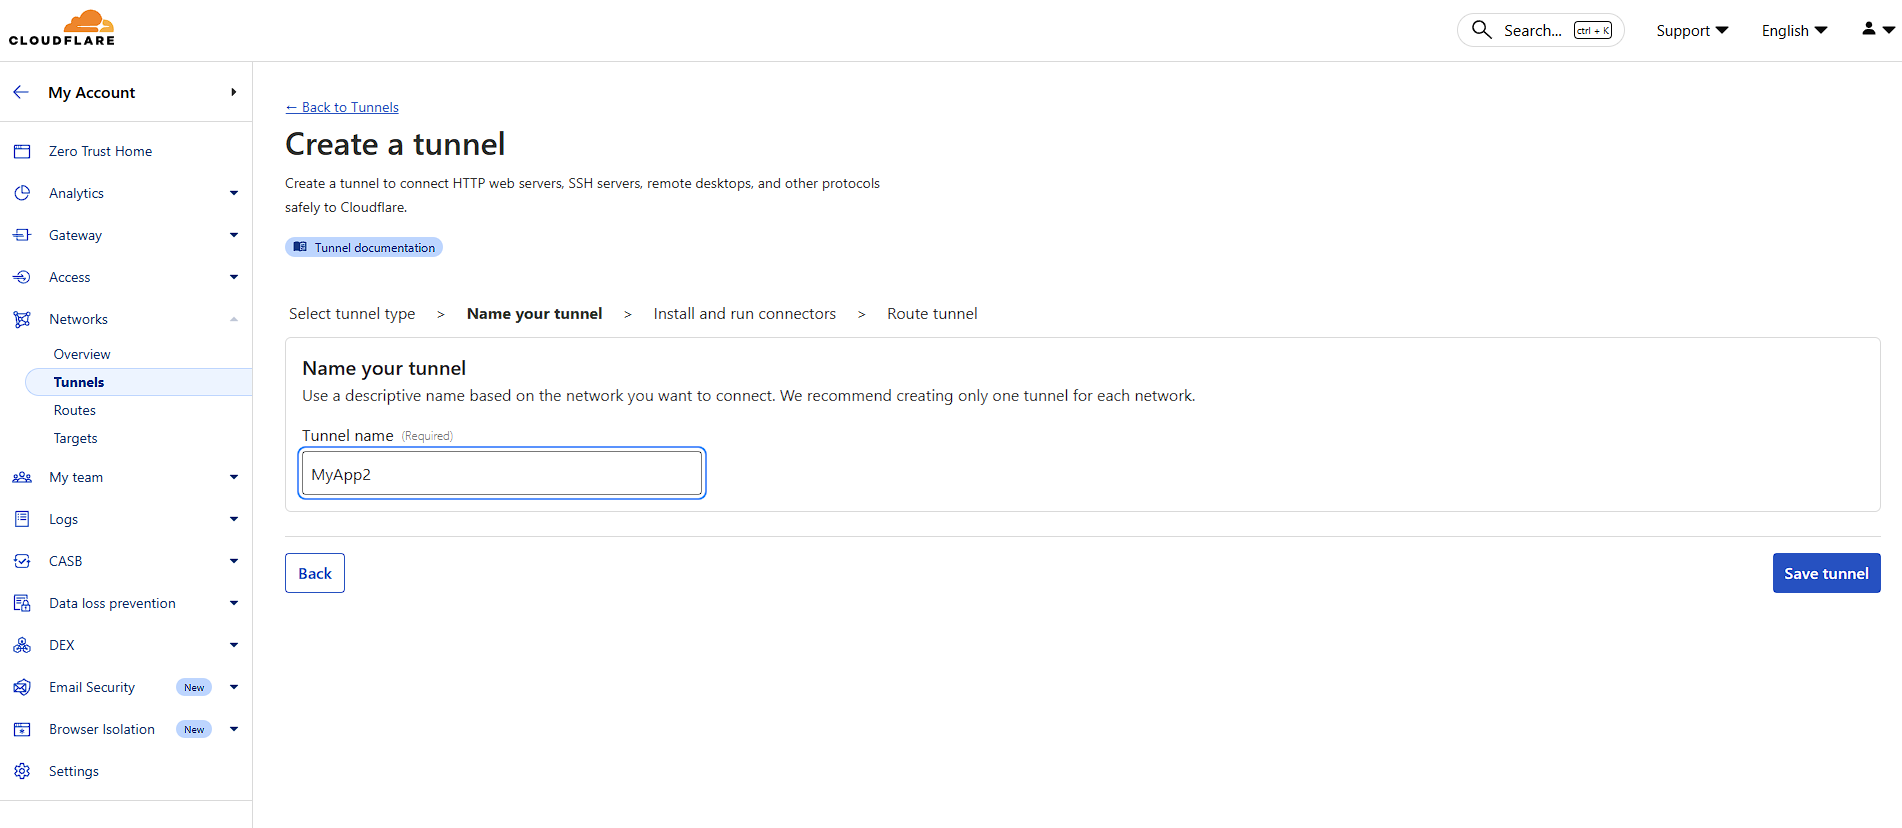
Click "Save tunnel" to proceed.
Step 3: Configure Your Application Route
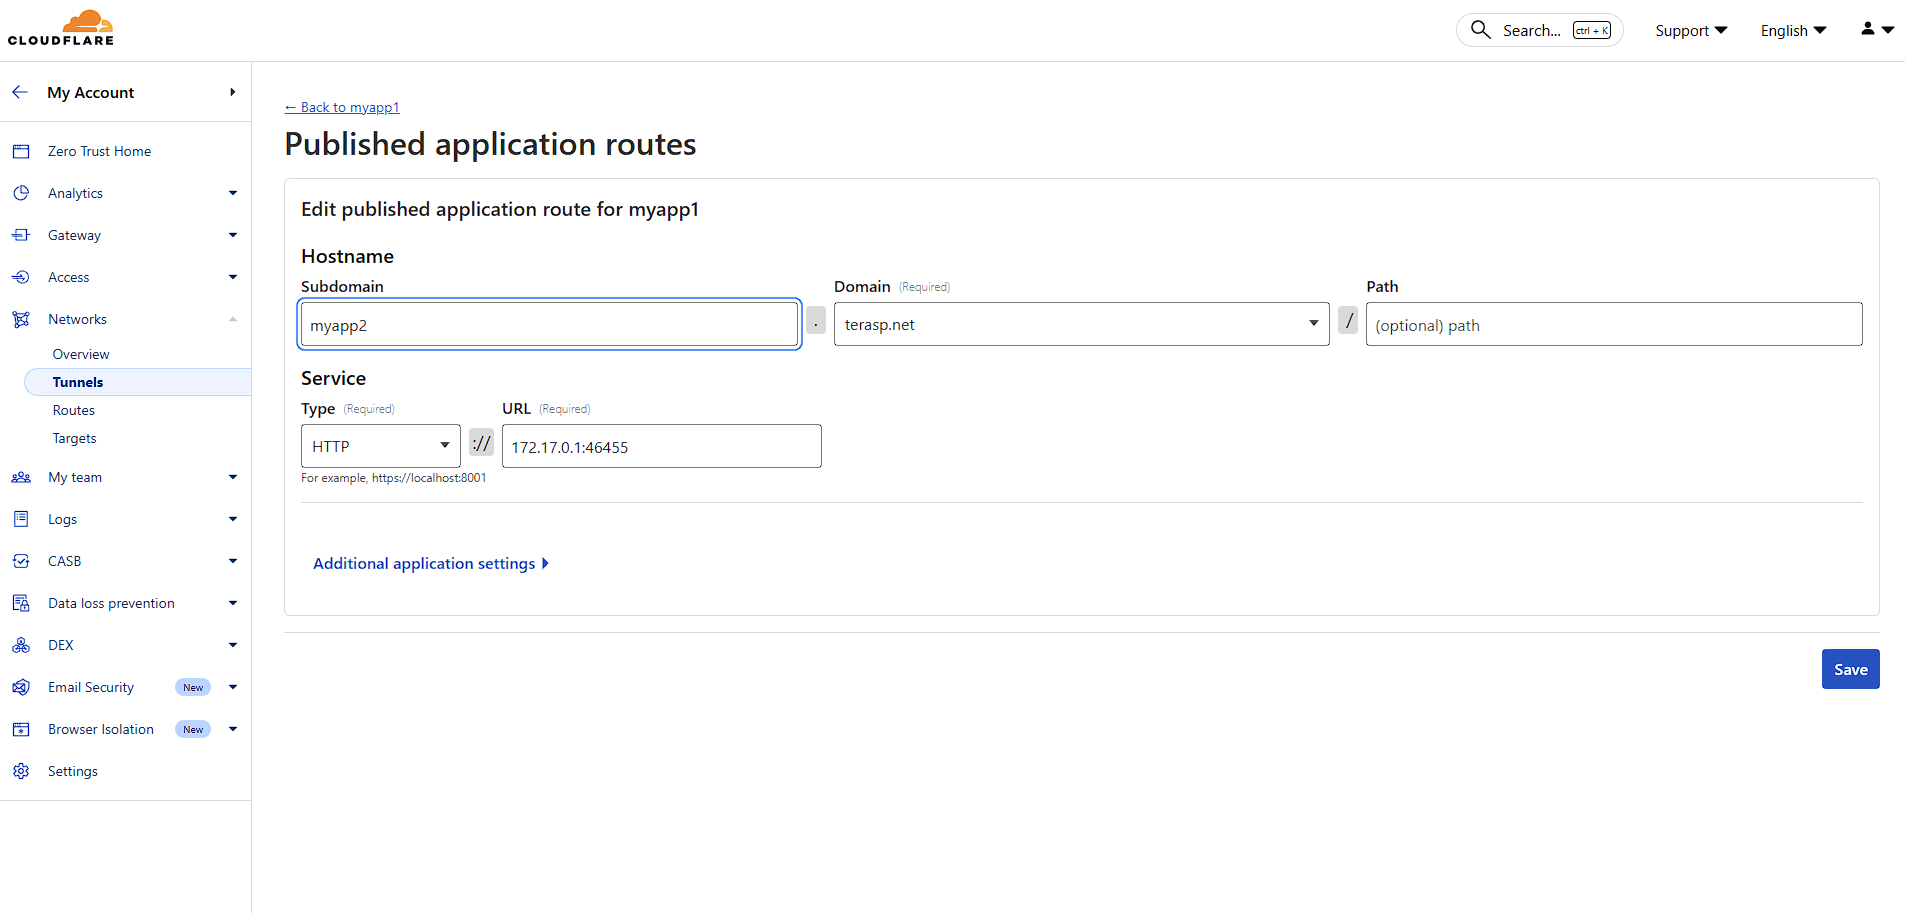
Hostname Configuration:
Service Configuration:
You can easily find the IPv6correct lineport directlyby beneath:
listenUpdate 443Config ssl http2;
listen [::]:443 ssl http2;
(Keepin the originalOverview IPv4tab line—nowof NGINXyour willservice, listenthen onchecking boththe stacks.)

Click Apply"Save" &to Restart. NGINX reloads andfinalize your serverconfiguration. Your tunnel is now readyactive and routing traffic!
Cloudflare Tunnel revolutionizes how we expose applications to servethe HTTPSinternet. trafficBy overeliminating IPv6.the need for public IP addresses and open ports, it significantly reduces attack surface while providing enterprise-grade performance and security.
Combining