DB Clusters
Introduction
Clustered databases are essential for ensuring high availability, scalability, and fault tolerance in modern systems.
By distributing data across multiple nodes, they can handle larger workloads, prevent single points of failure, and ensure that services remain accessible even during hardware or network issues. Clusters are critical for businesses that need reliable, fast, and scalable database solutions to support growing demands.
Supported Software
Elestio supports clustering for a wide range of software, making it adaptable to various use cases:
- MySQL
- PostgreSQL
- Hydra
- TimescaleDB
- Redis
- KeyDB
- Valkey
More DB clusters will be added soon, we are currently working on Clickhouse, Opensearch, Kafka and others.
Deploy a new cluster
How to deploy a new cluster
- Go to the Elestio Clusters tab.
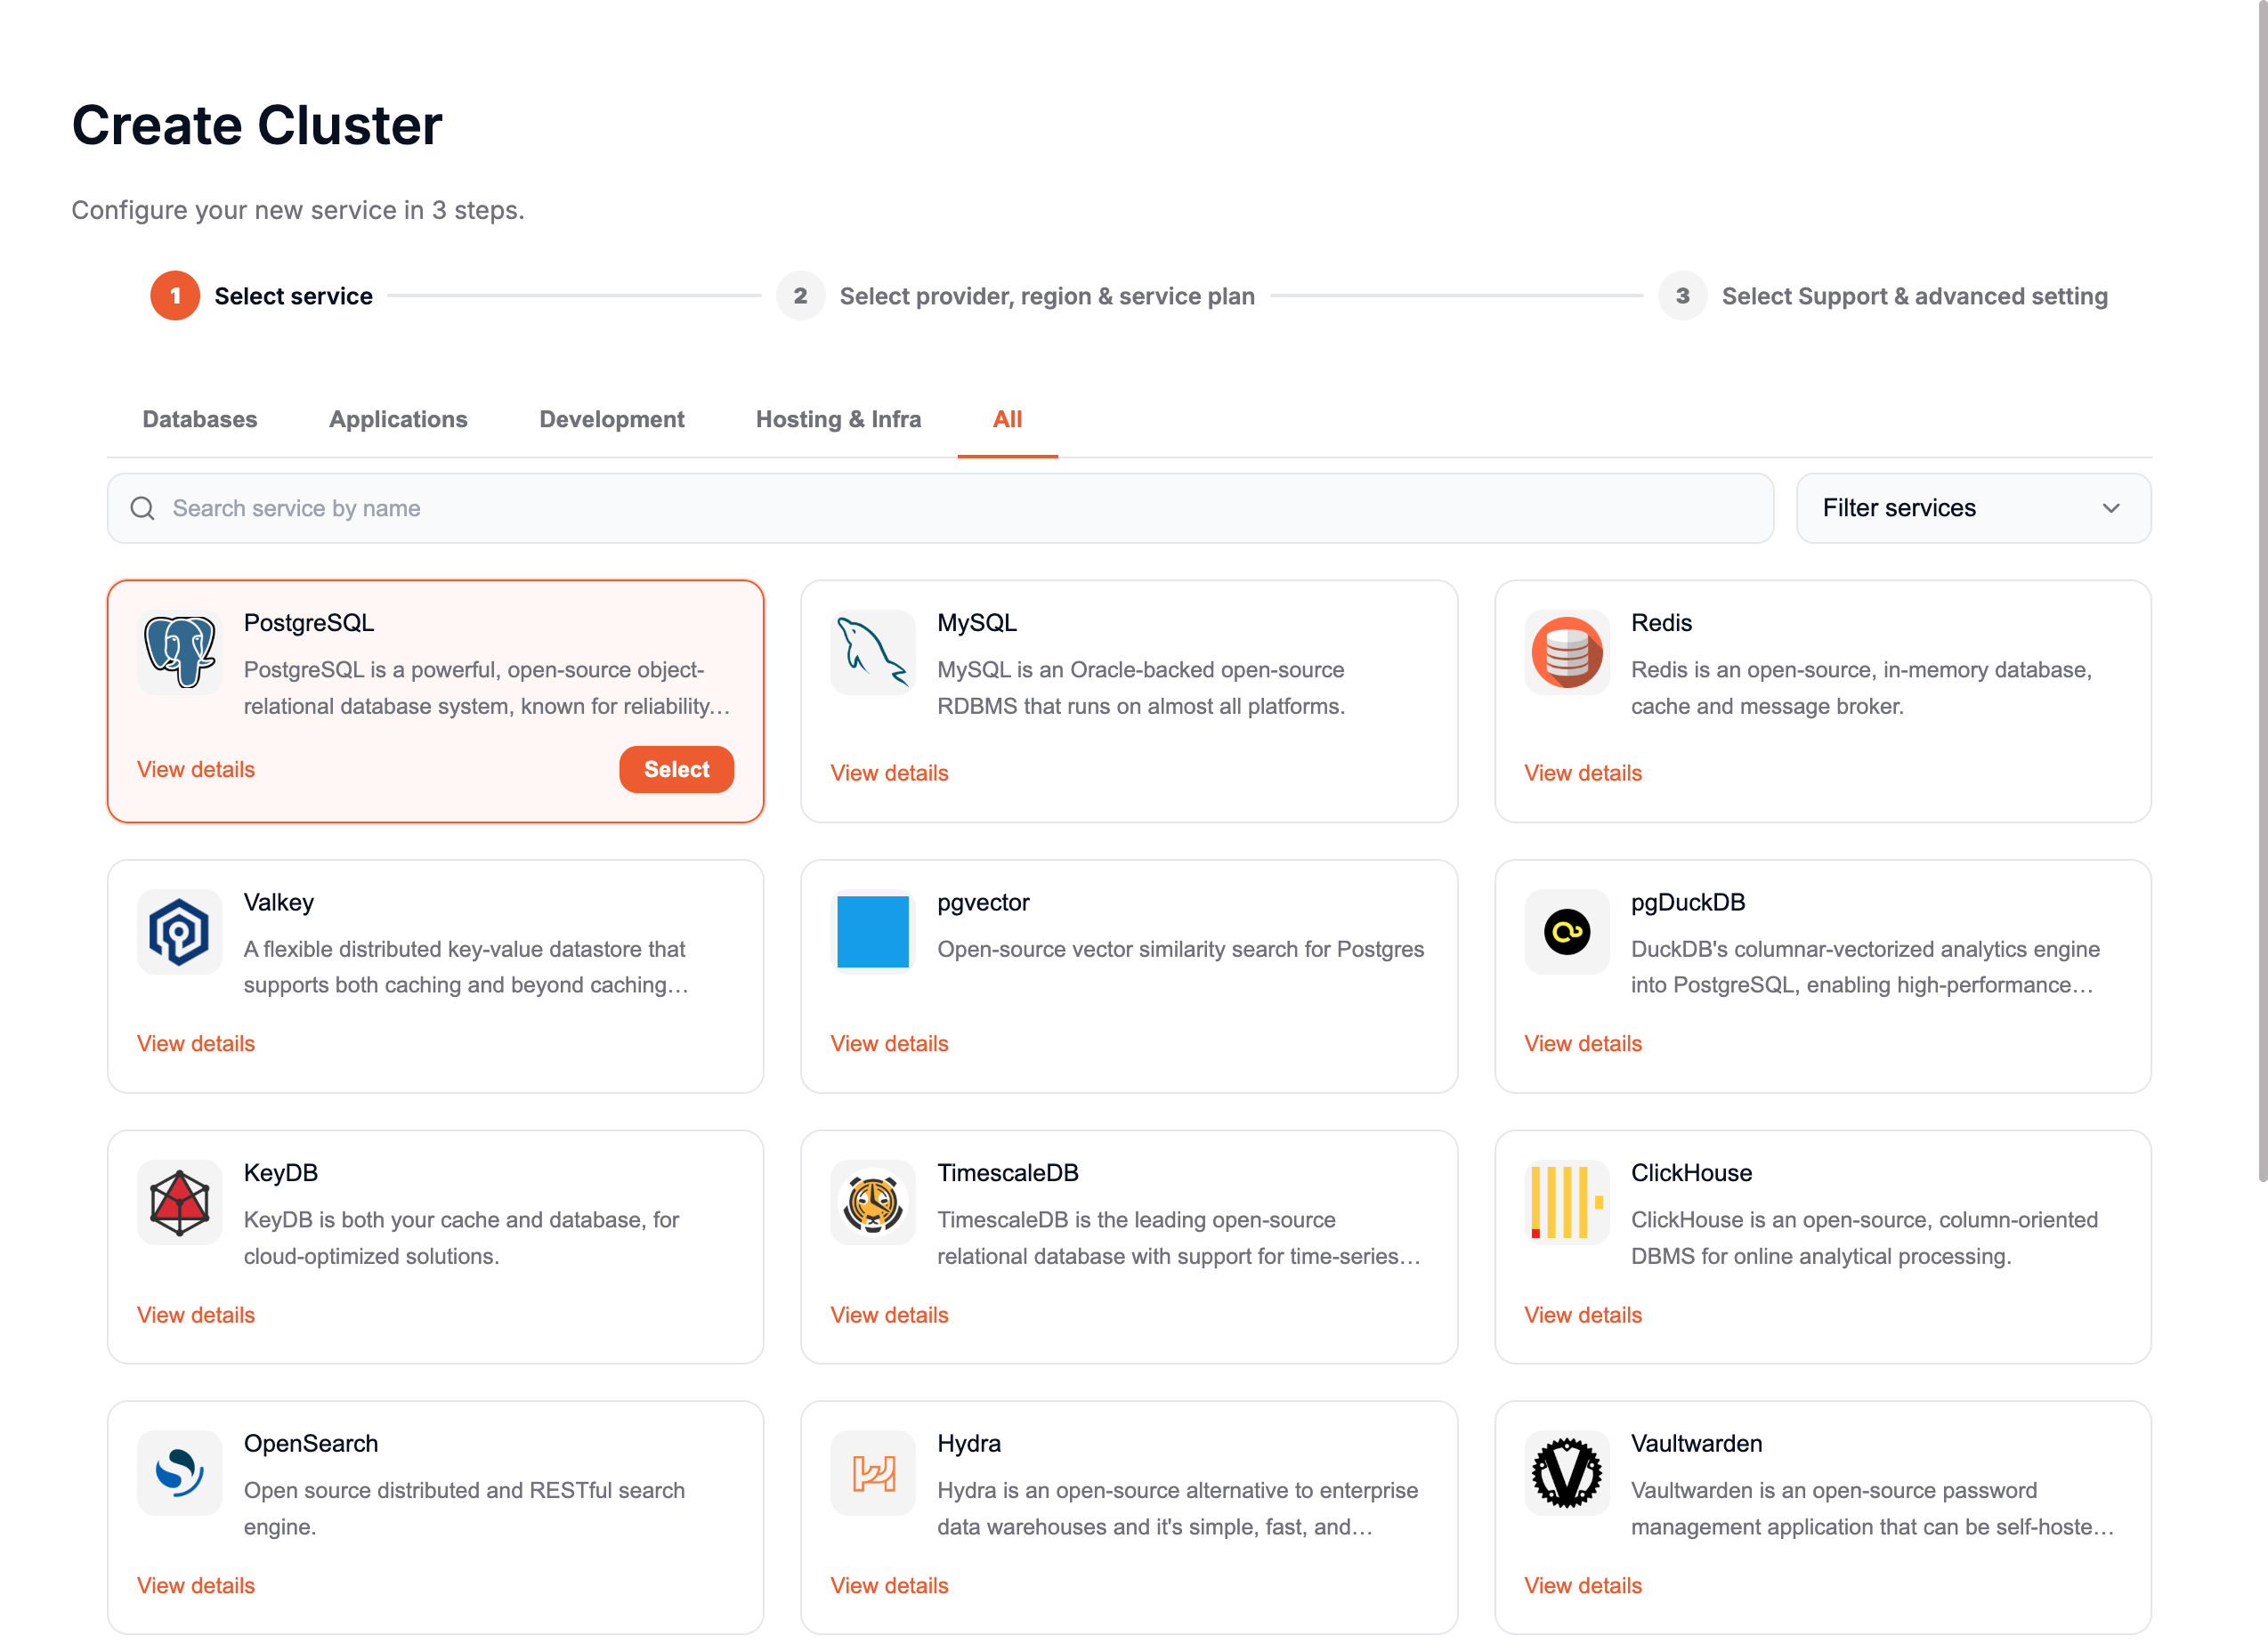
- Click on Deploy My First Cluster.
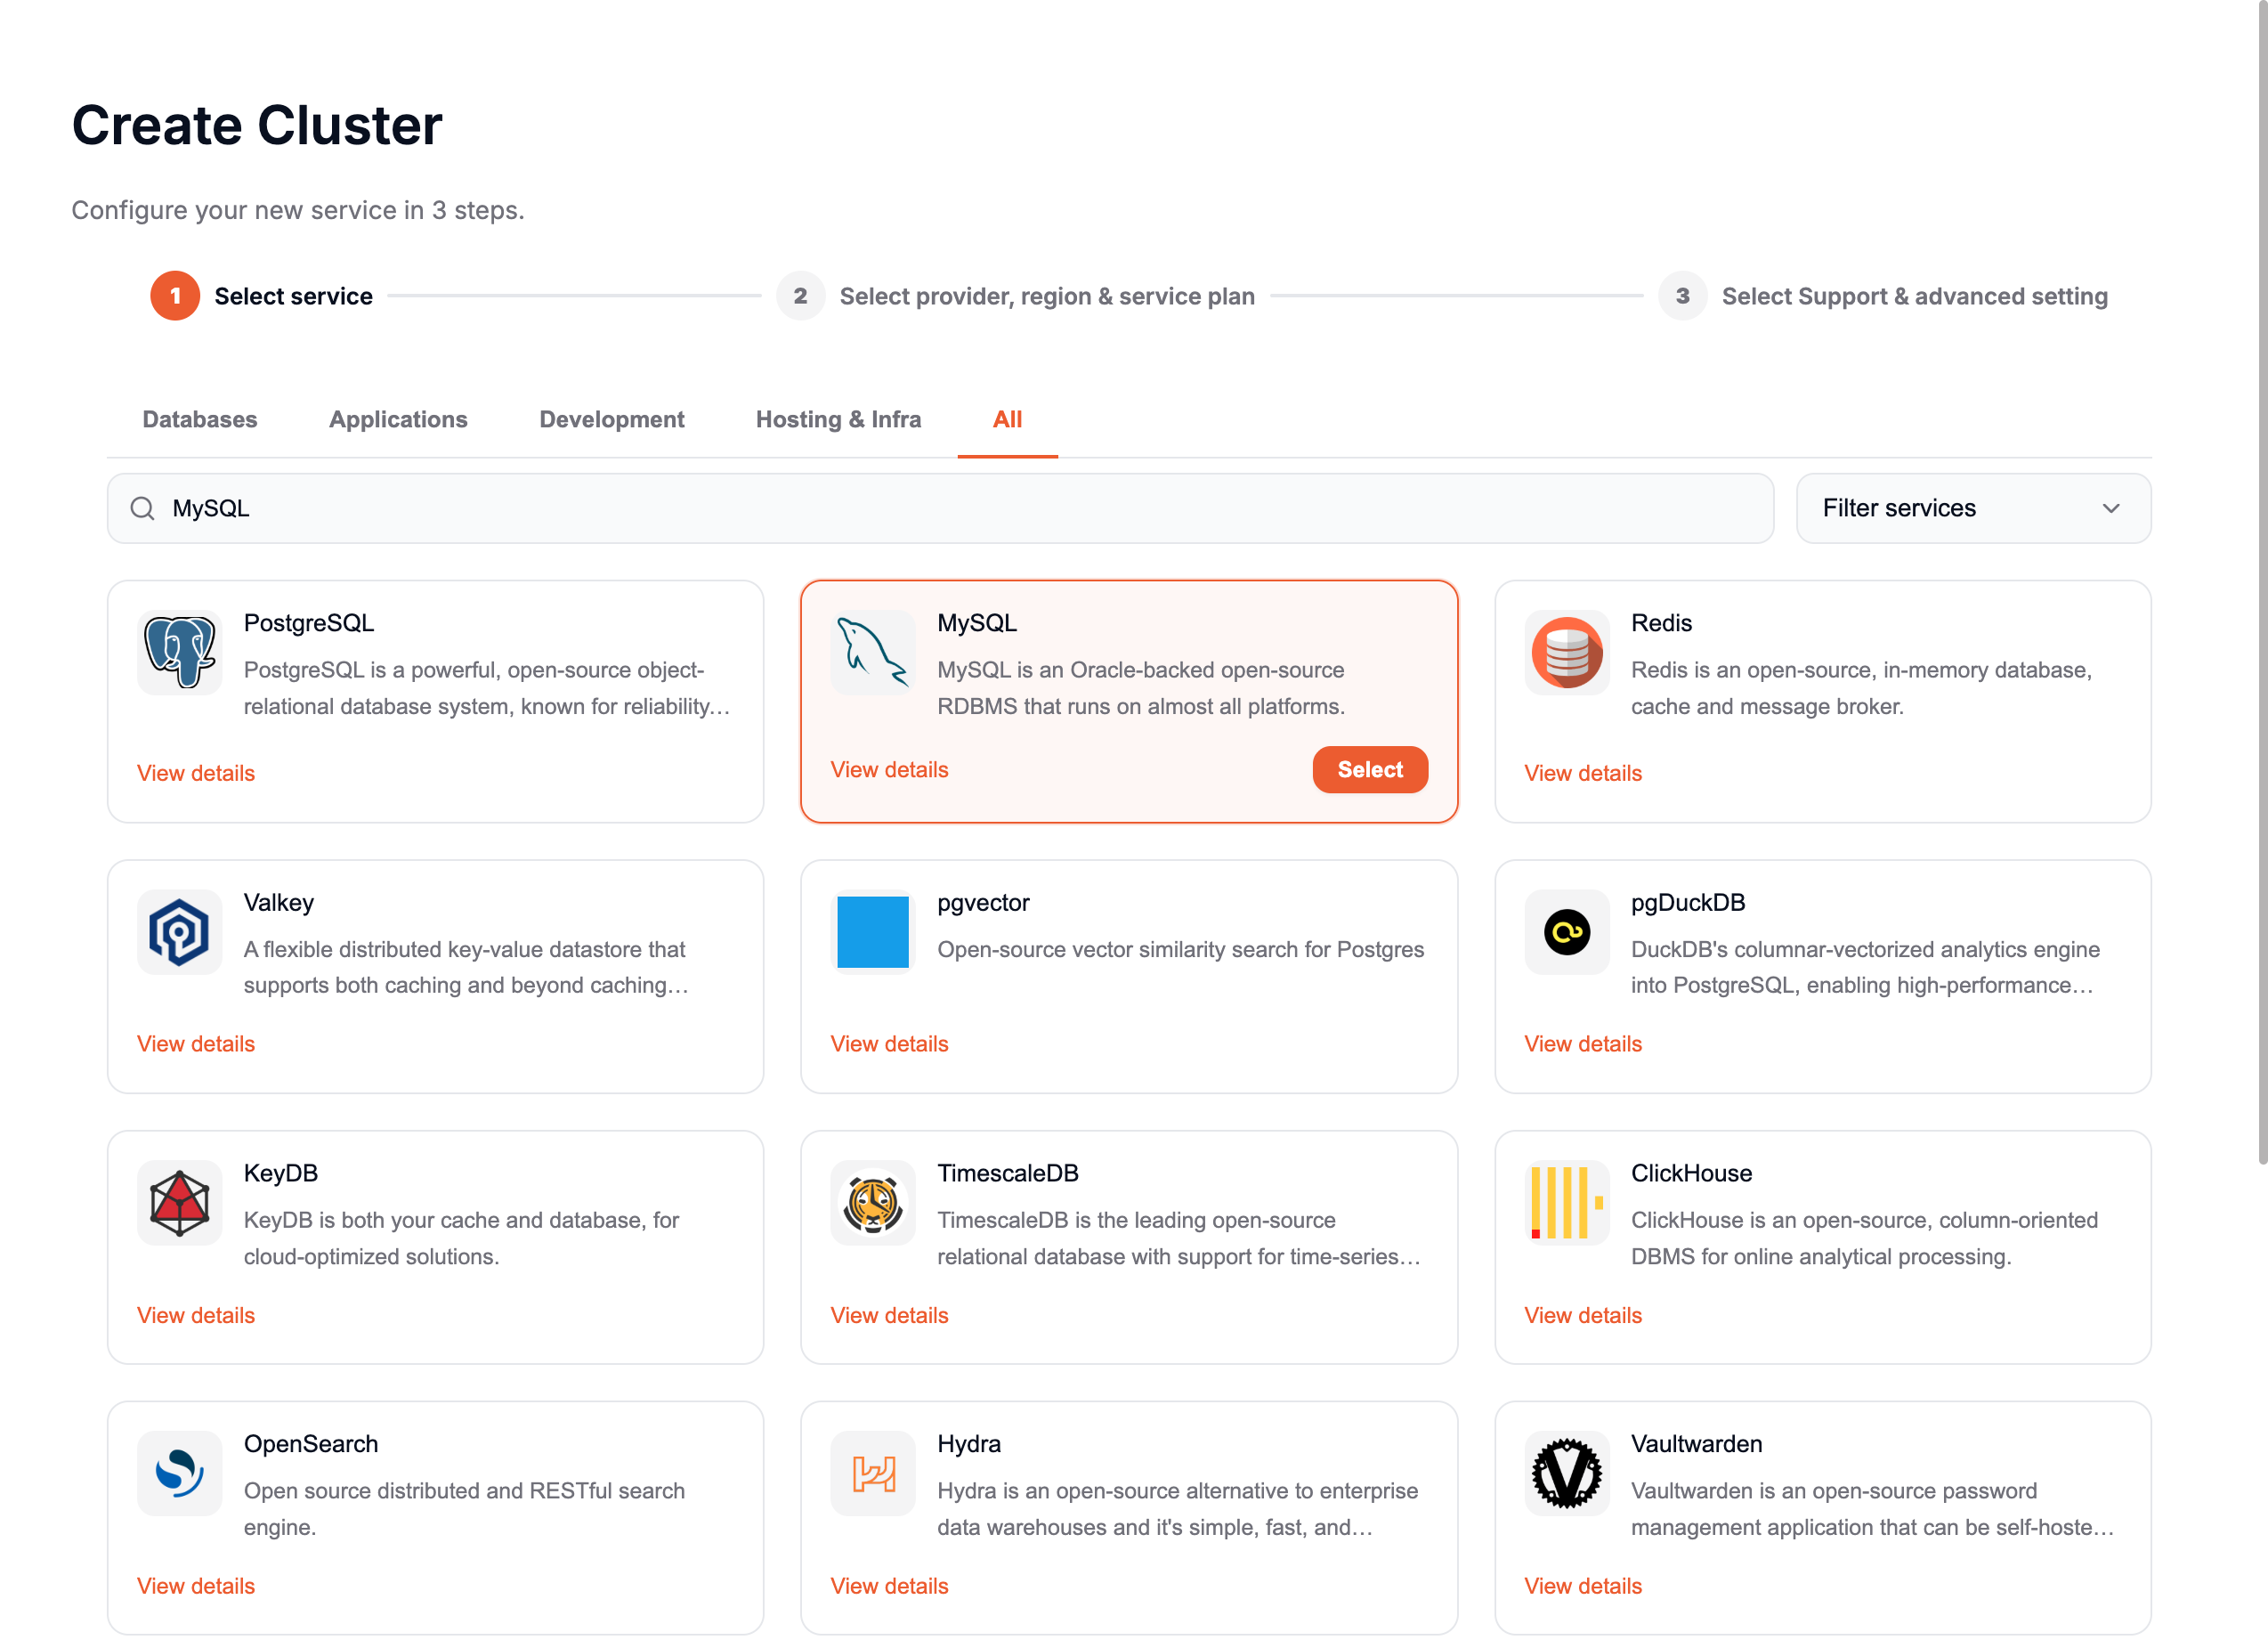
- Select your Software, for example, MySQL.
-
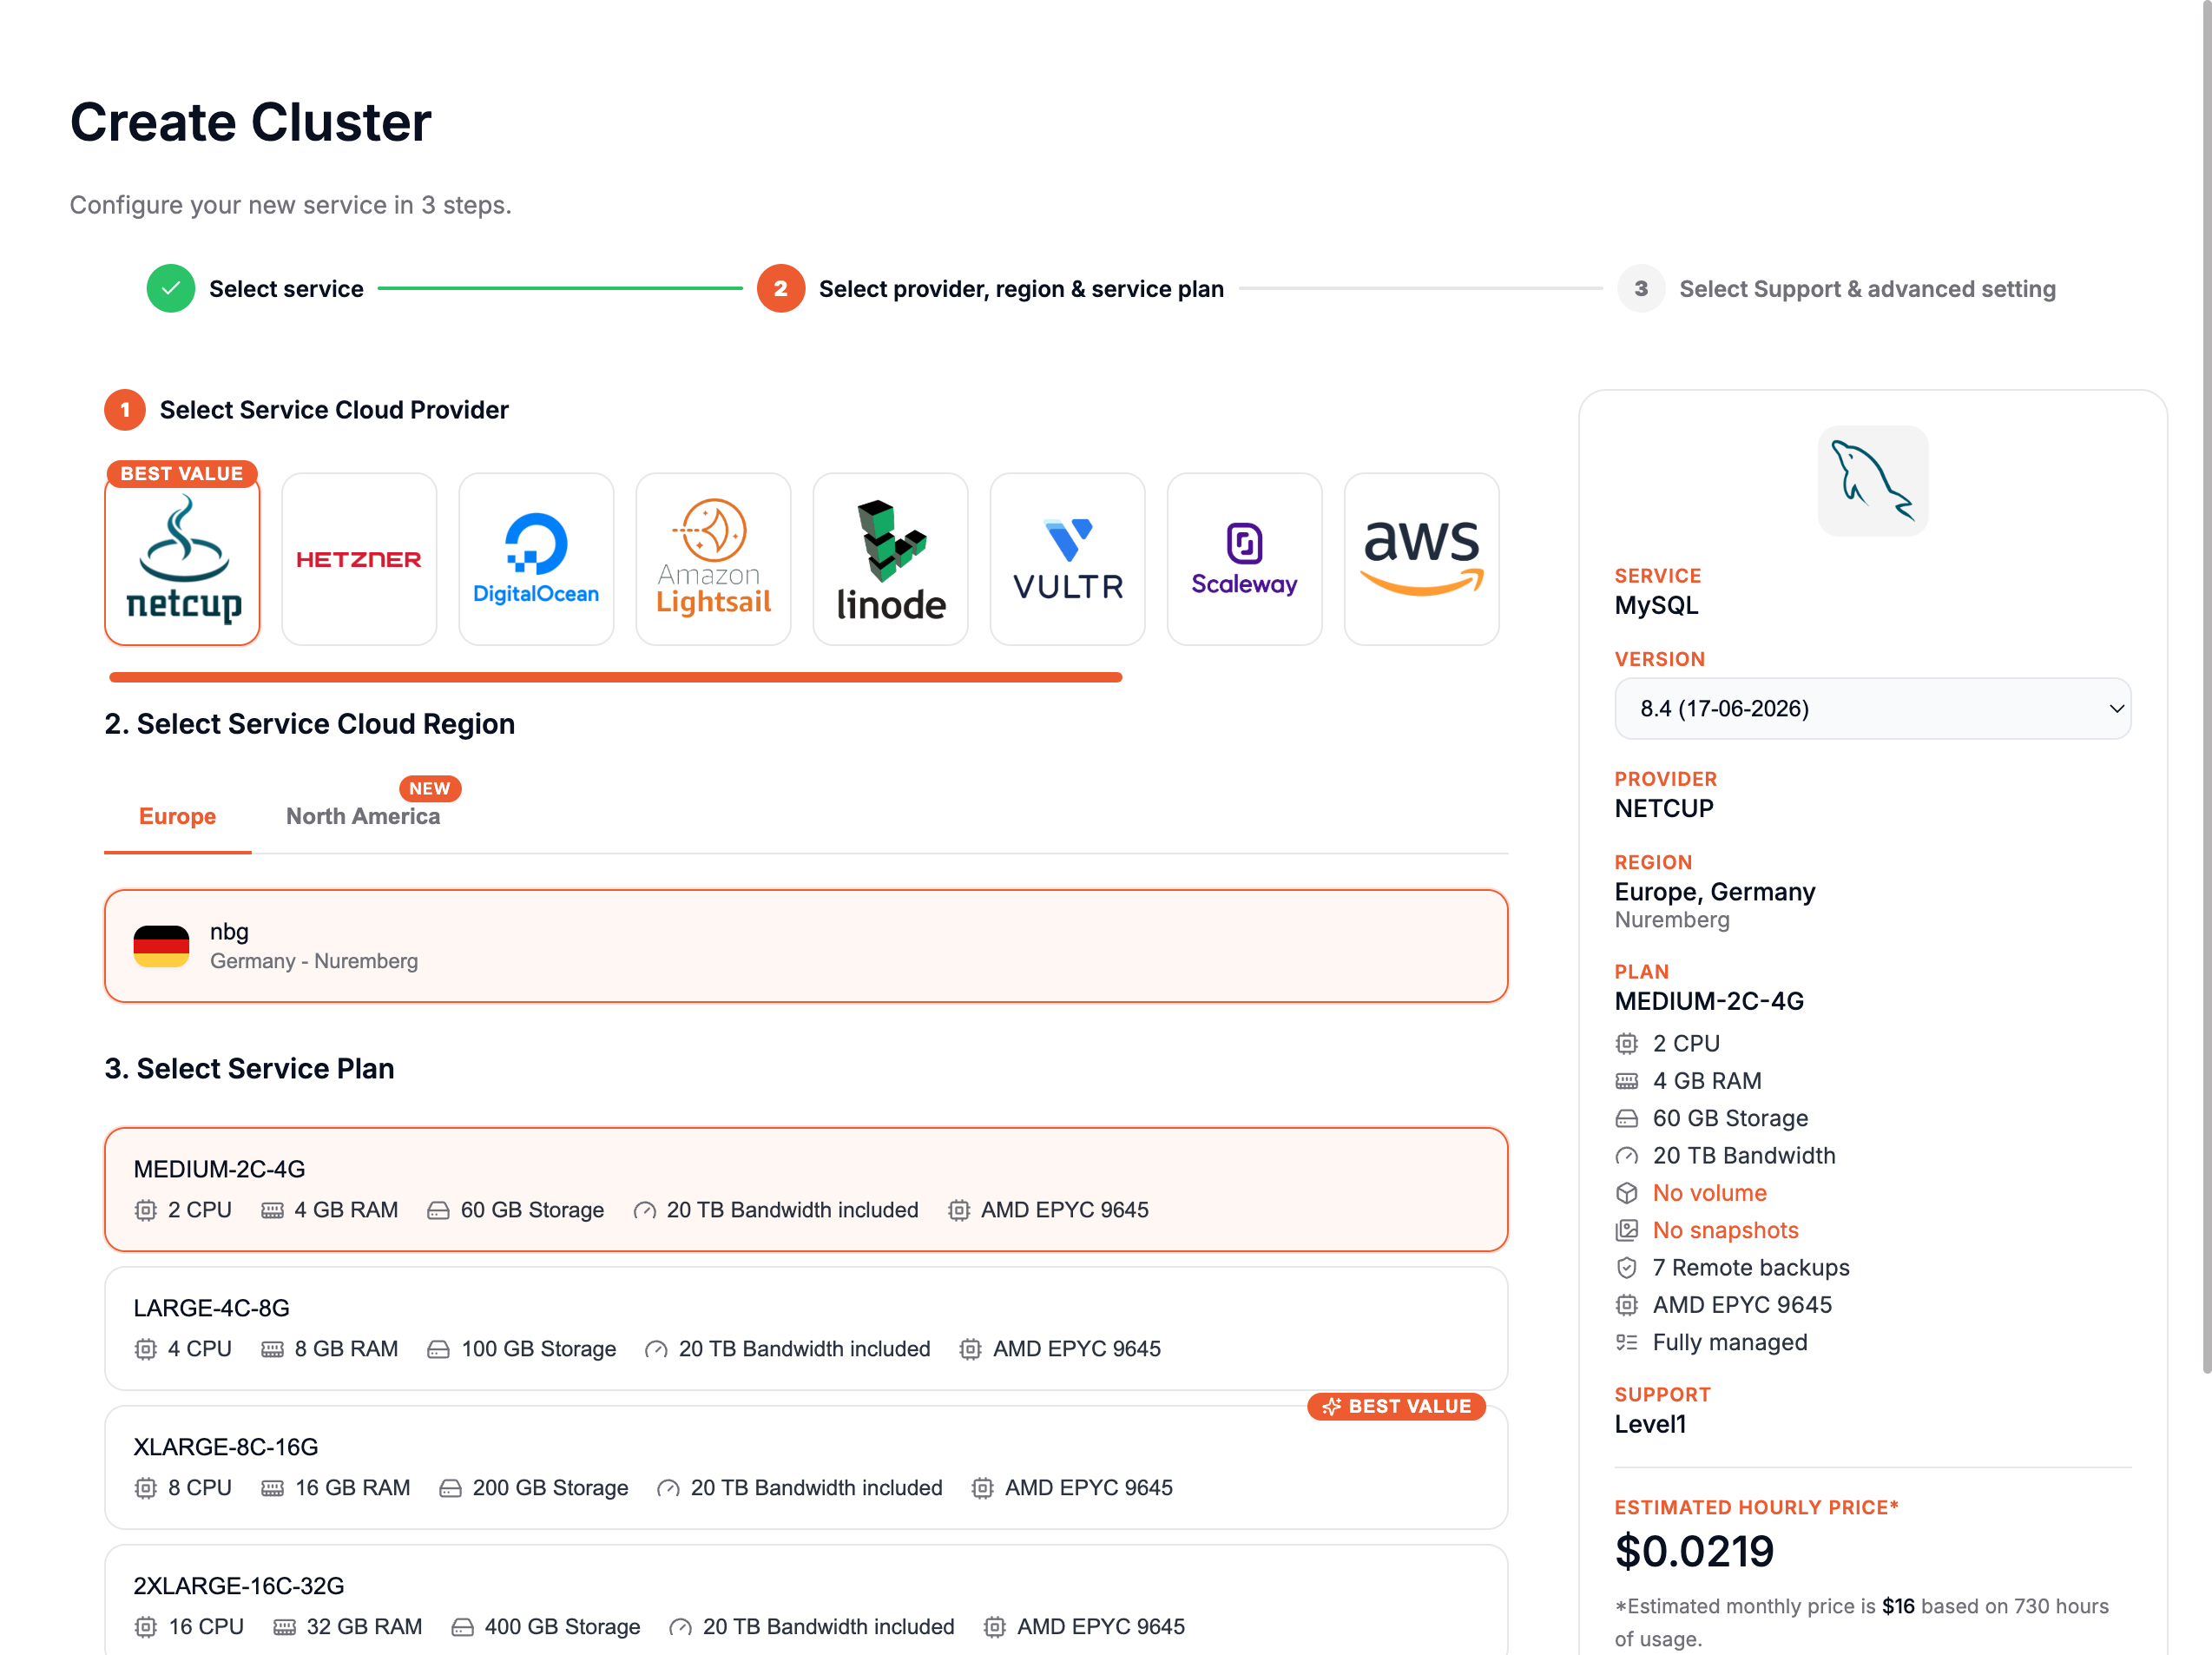
Choose your Provider and Service Plan, then click Next.
-
Choose a name for your cluster, for example mysql-cluster
-
On Select Support & advanced setting part, scroll down until Cluster configuration(Optional) part.
Here, you'll have three configuration options:
- Single Node
- Primary/Replica
- Multi-Master
Single node
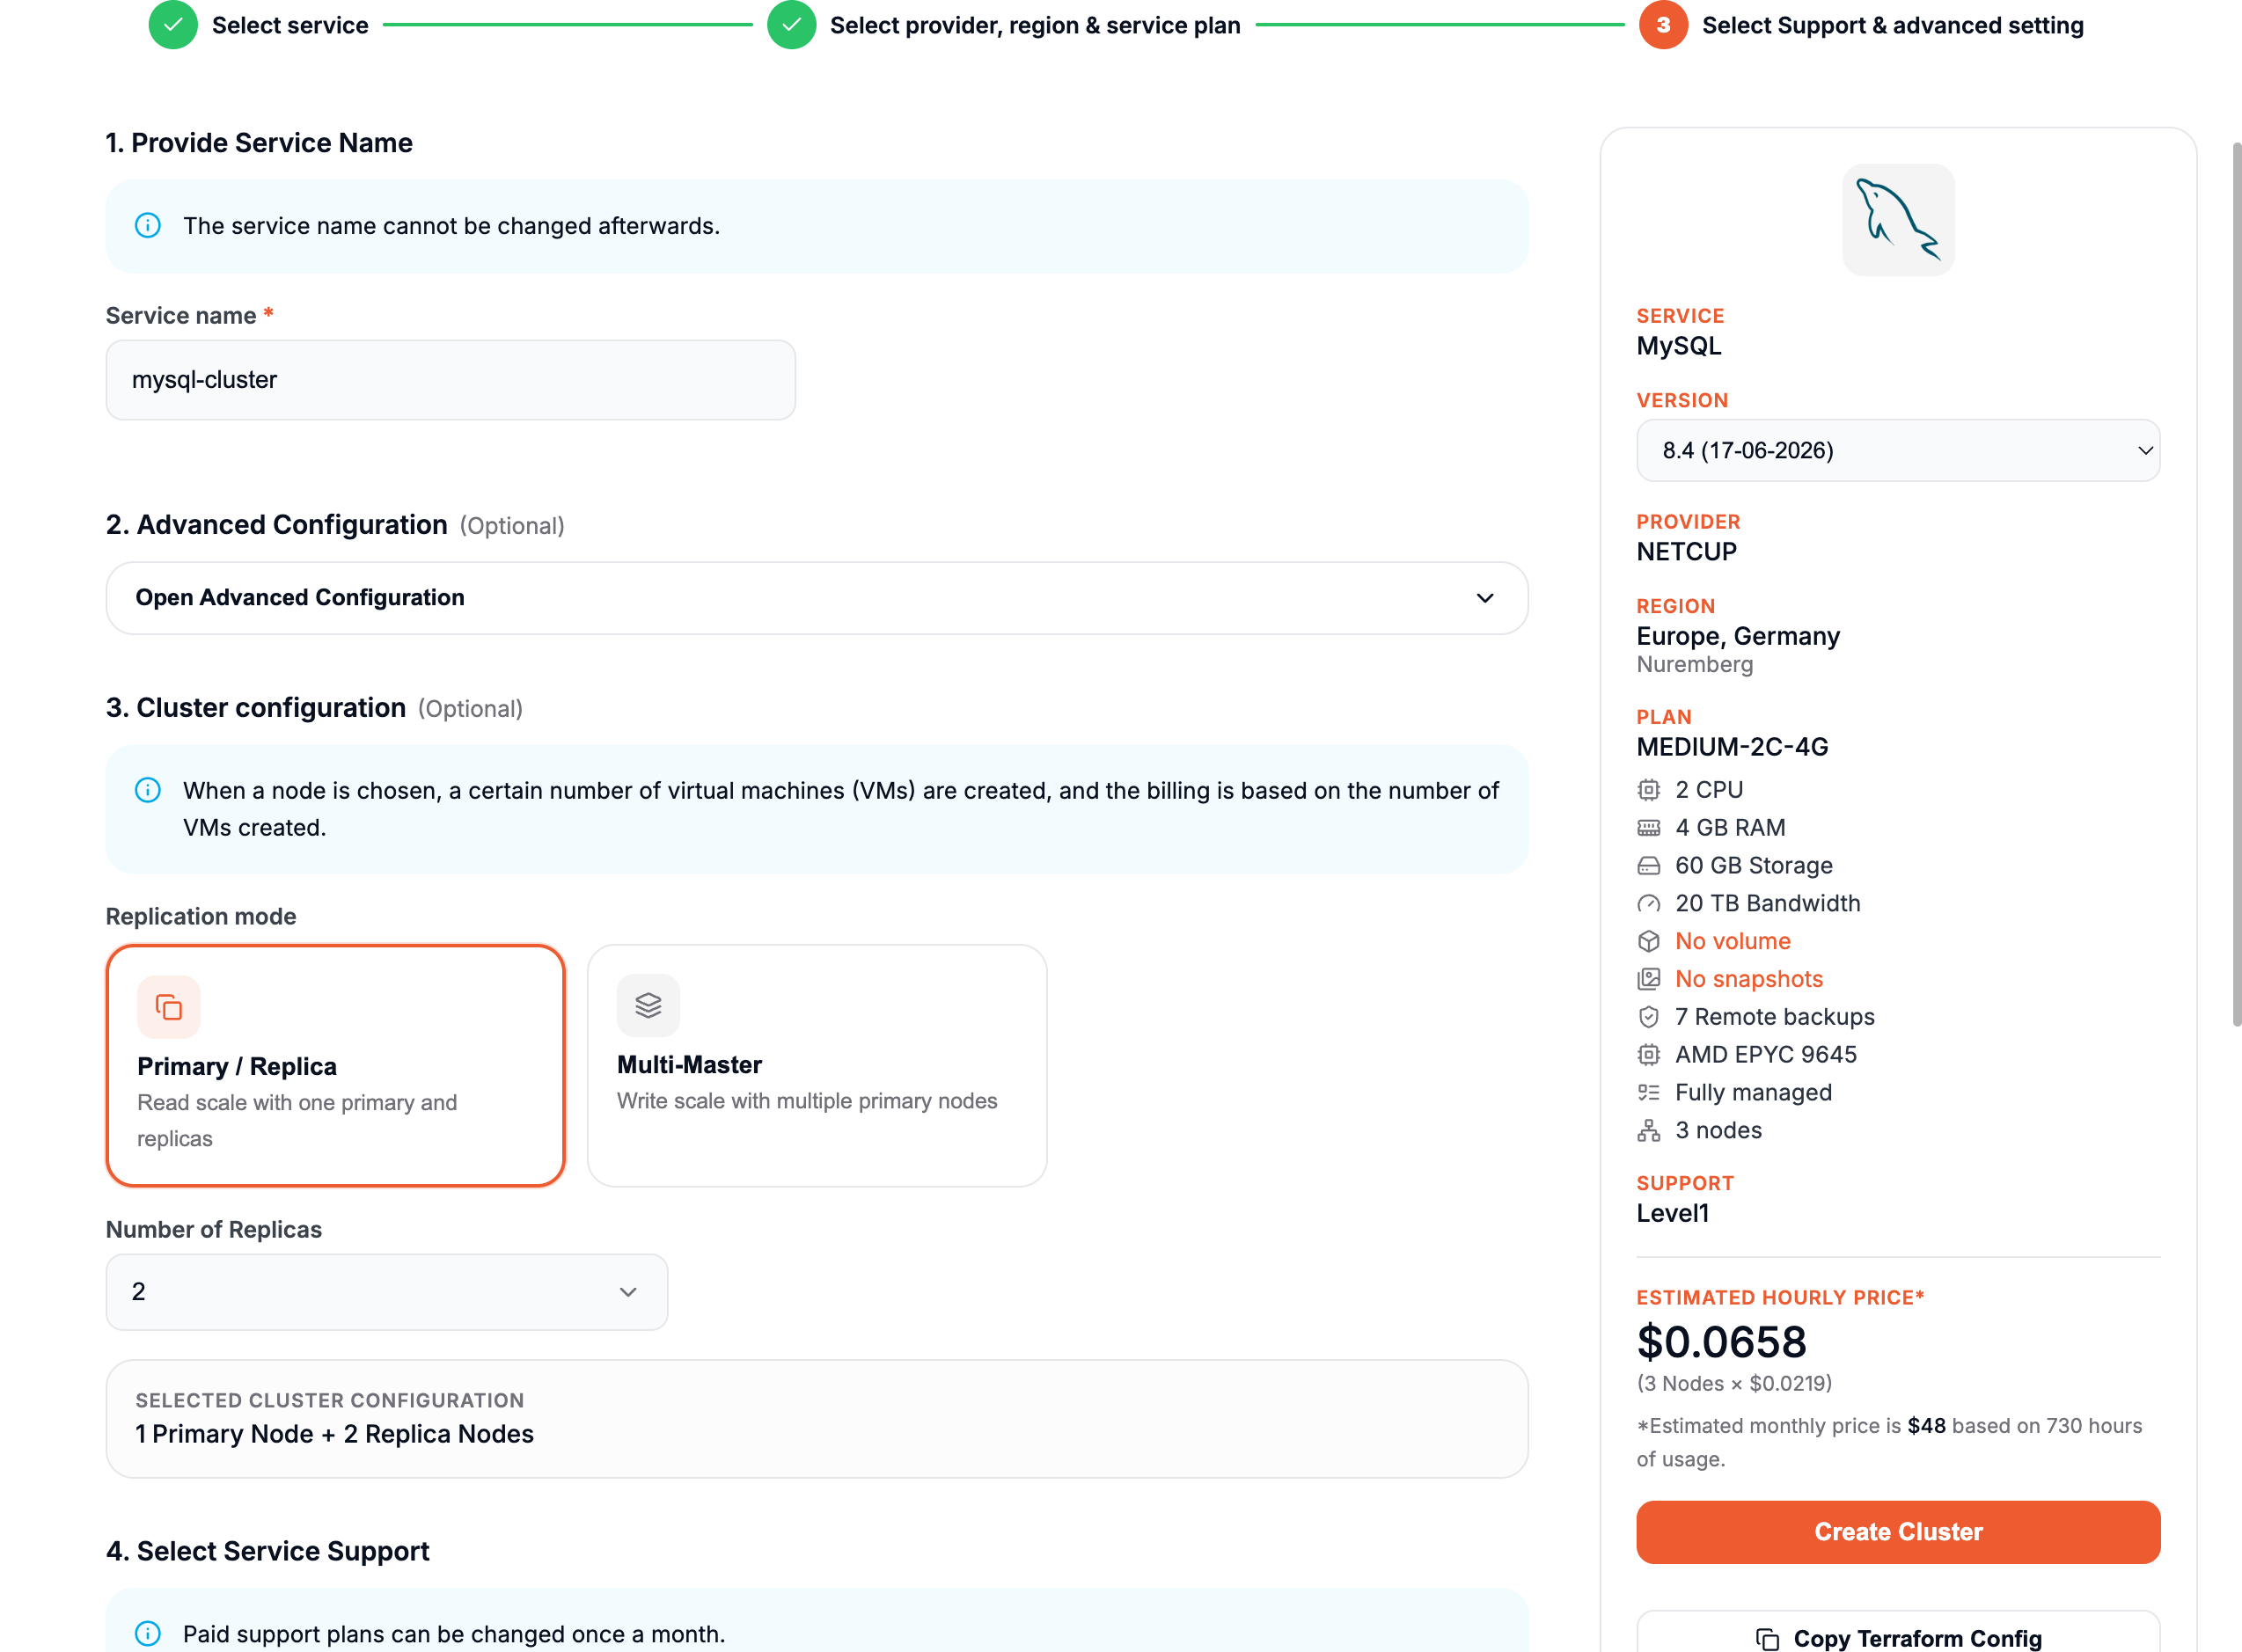
When choosing the Single Node option, you'll deploy a standalone node for MySQL. This means only one node will be set up, but it will already be configured as a Primary node. This setup ensures that, in the future, if you want to scale by adding one or more nodes, it will be seamlessly possible without requiring reconfiguration.
Primary/Replica
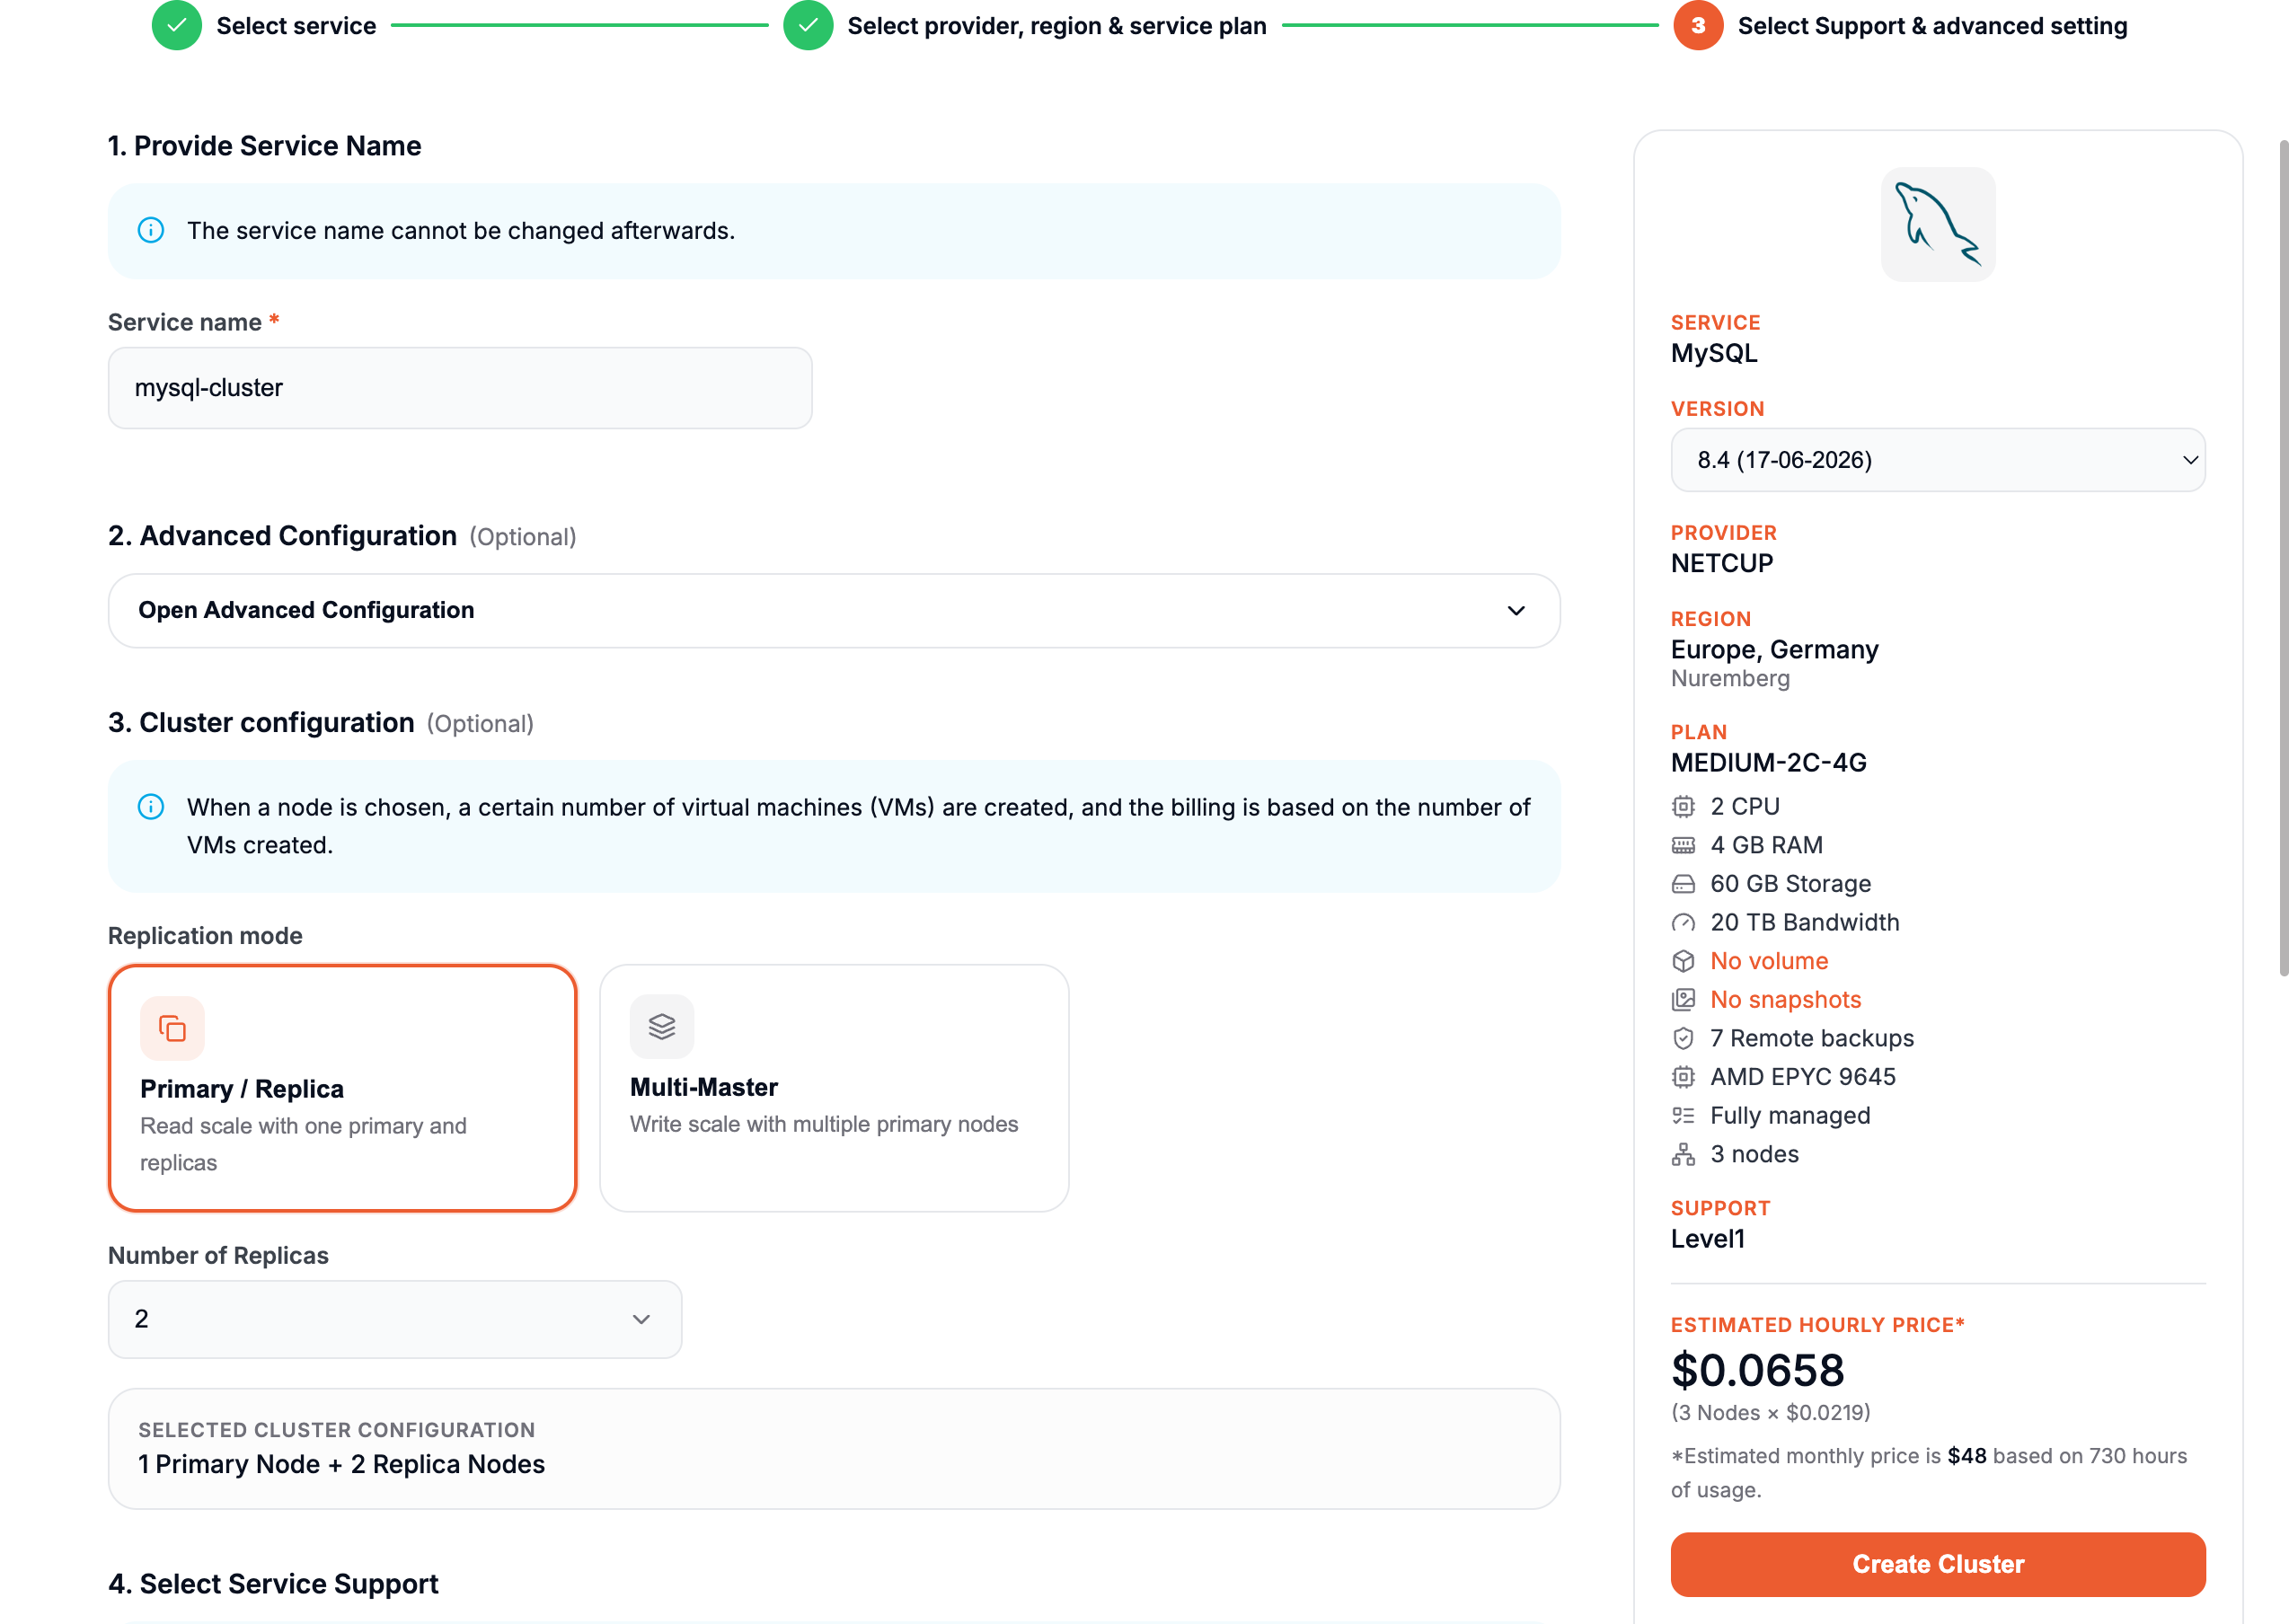
When choosing the Primary/Replica option, you will deploy at least one Primary node, and you can specify the number of replicas to include in the cluster.
By default, the number of replicas will be determined by the minimum required for the selected software. However, you can increase the number of replicas as long as it fits within your Service Quota.
For example, if you select 3 replicas from the dropdown, your cluster will consist of 4 nodes: 1 Primary and 3 Replicas.
Multi-Master
When choosing the Multi-Master option, you will deploy 2 Primary nodes that are connected to each other, ensuring mutual synchronization and redundancy.
It's important to note that not all software supports this option. Make sure to verify compatibility with your selected software before proceeding.
- Click on Create Service.
Now your cluster will be configured. Depending on the selected software, this process may take a little time.
CNAME
When deploying a new cluster, you will choose a CNAME. In our example, we used mysql-cluster.
Each node in the cluster will inherit the base name and receive a number incrementally.
For example, if you deploy a Primary/Replica cluster with 3 nodes, the nodes will be named:
- mysql-cluster1
- mysql-cluster2
- mysql-cluster3
These names will also be used for their individual CNAMEs, automatically created by Elestio.
In addition, you will have a CNAME for the base name itself, such as mysql-cluster.
This base CNAME will always point to the Primary Node. If you promote a new node to Primary, the base CNAME will automatically update to reflect the change, ensuring seamless continuity without requiring reconfiguration across your services.
Overview
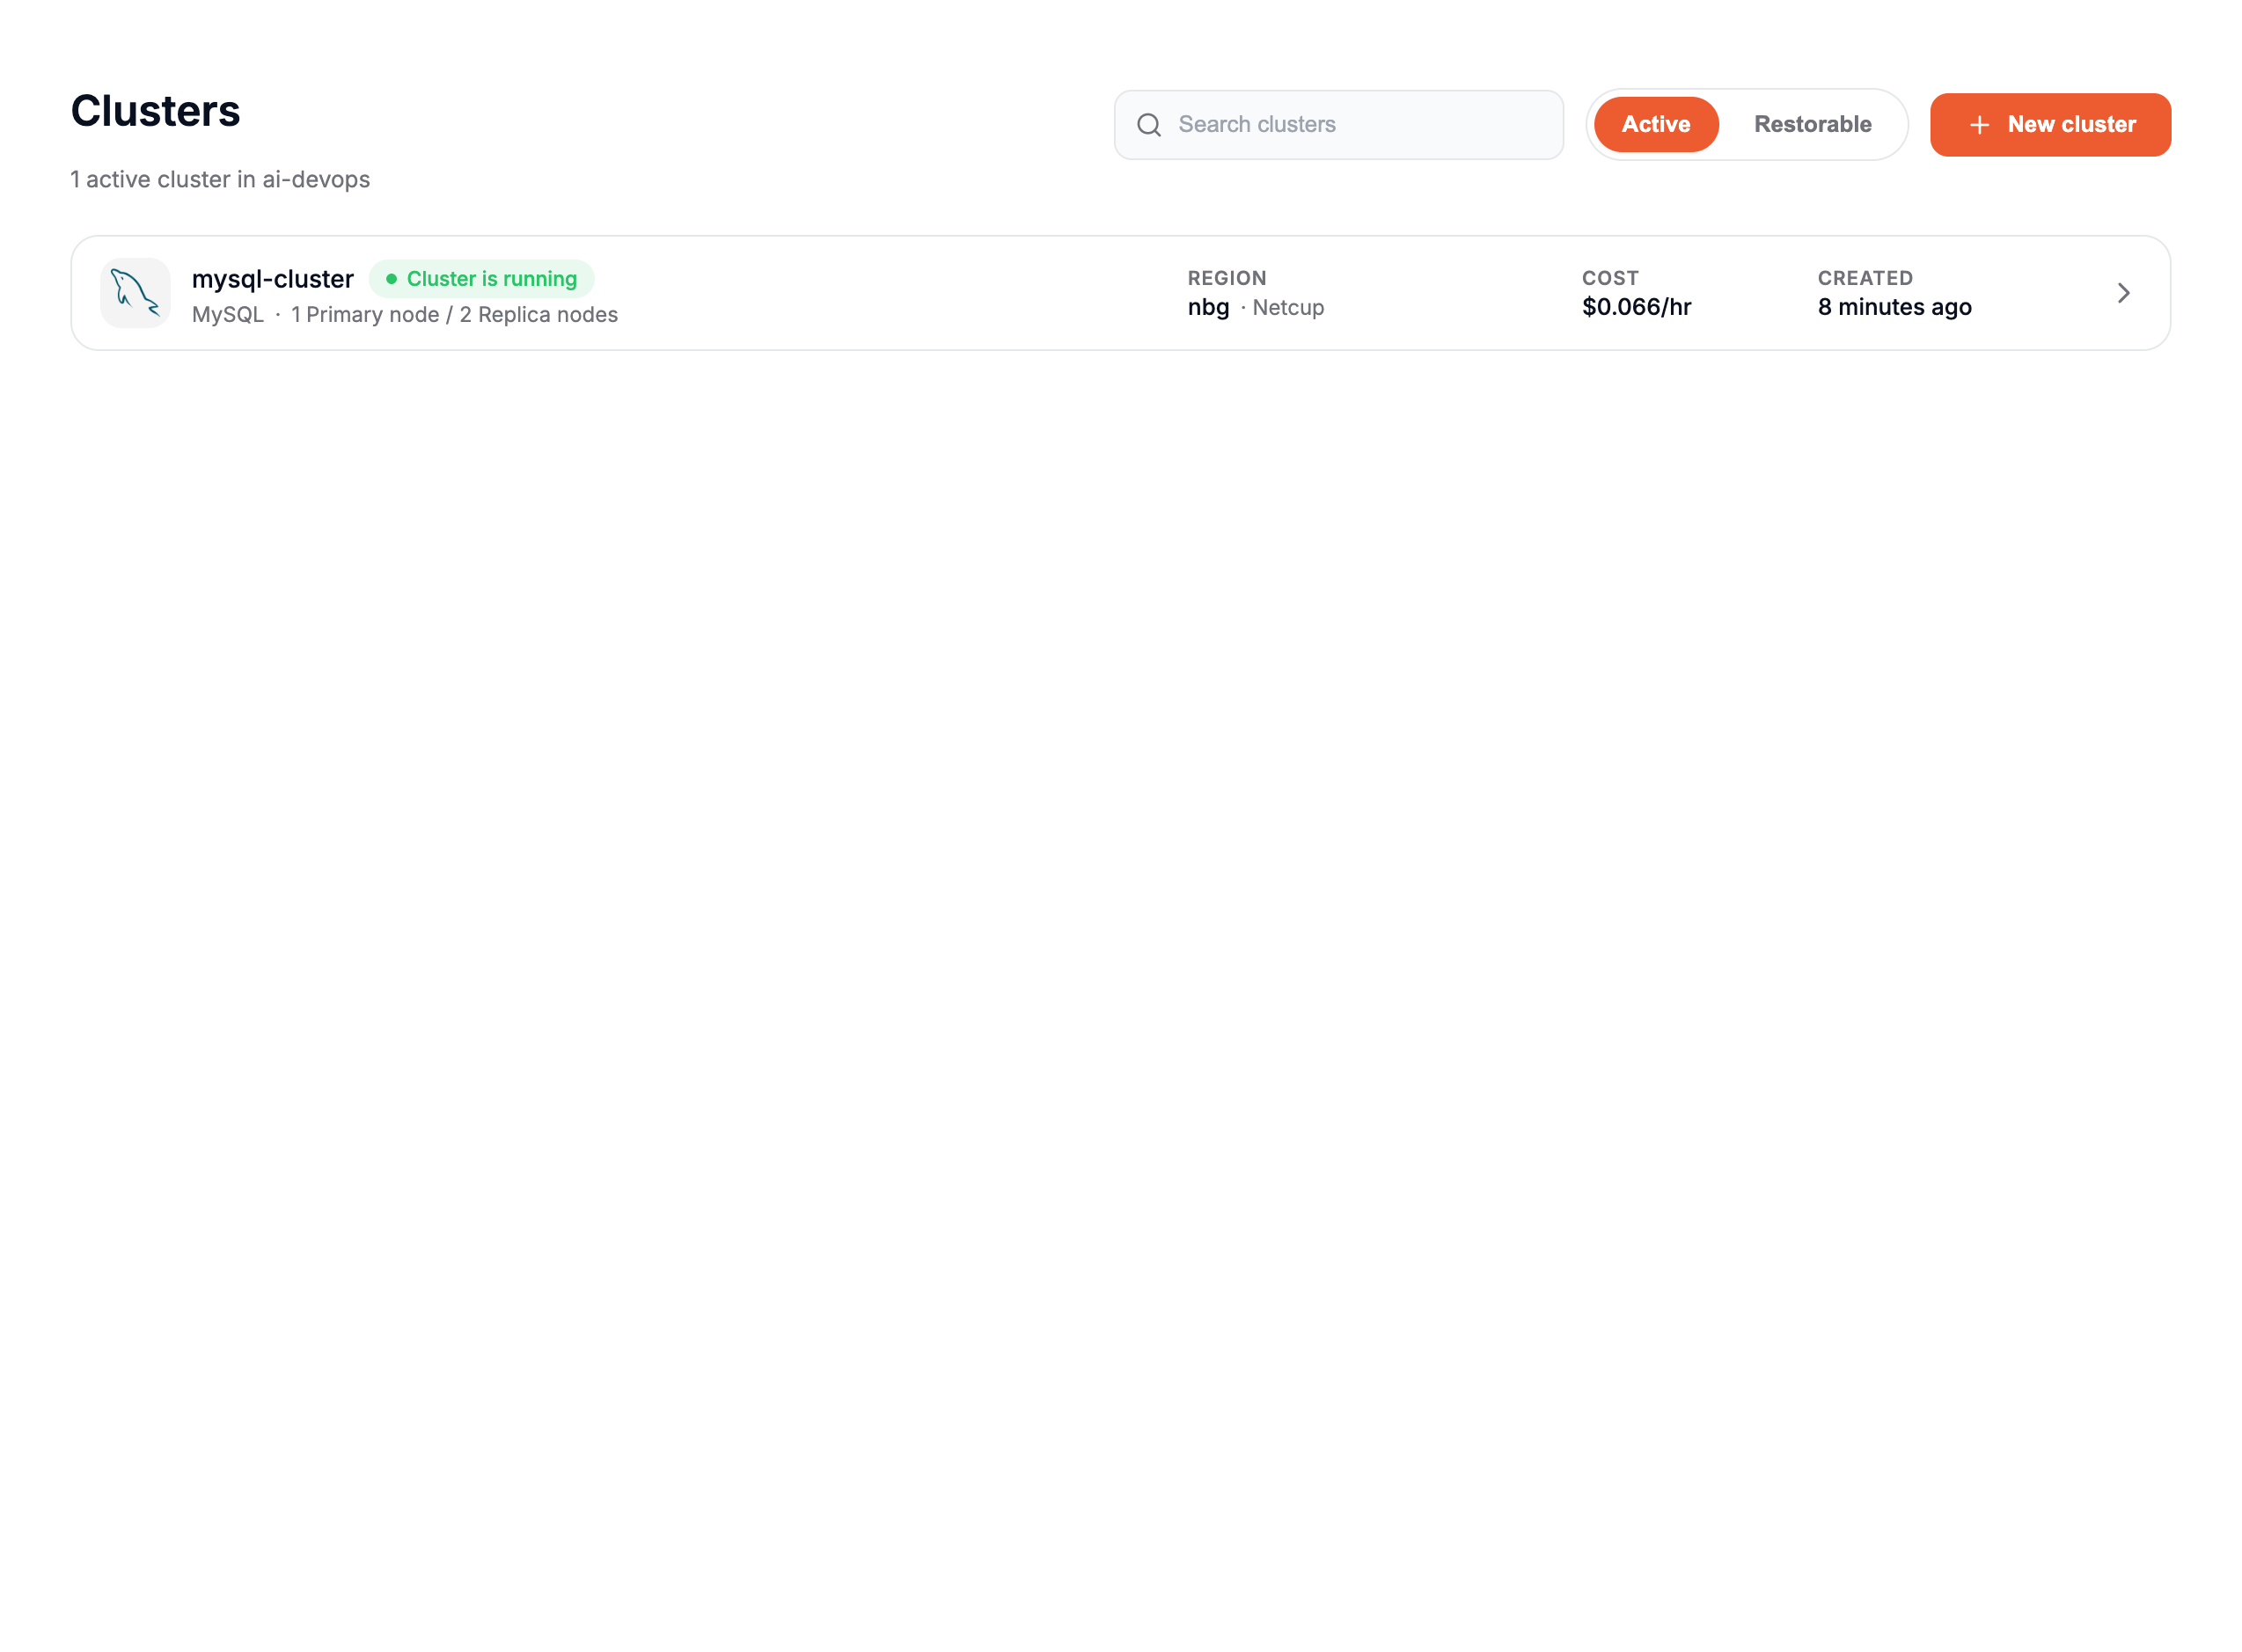
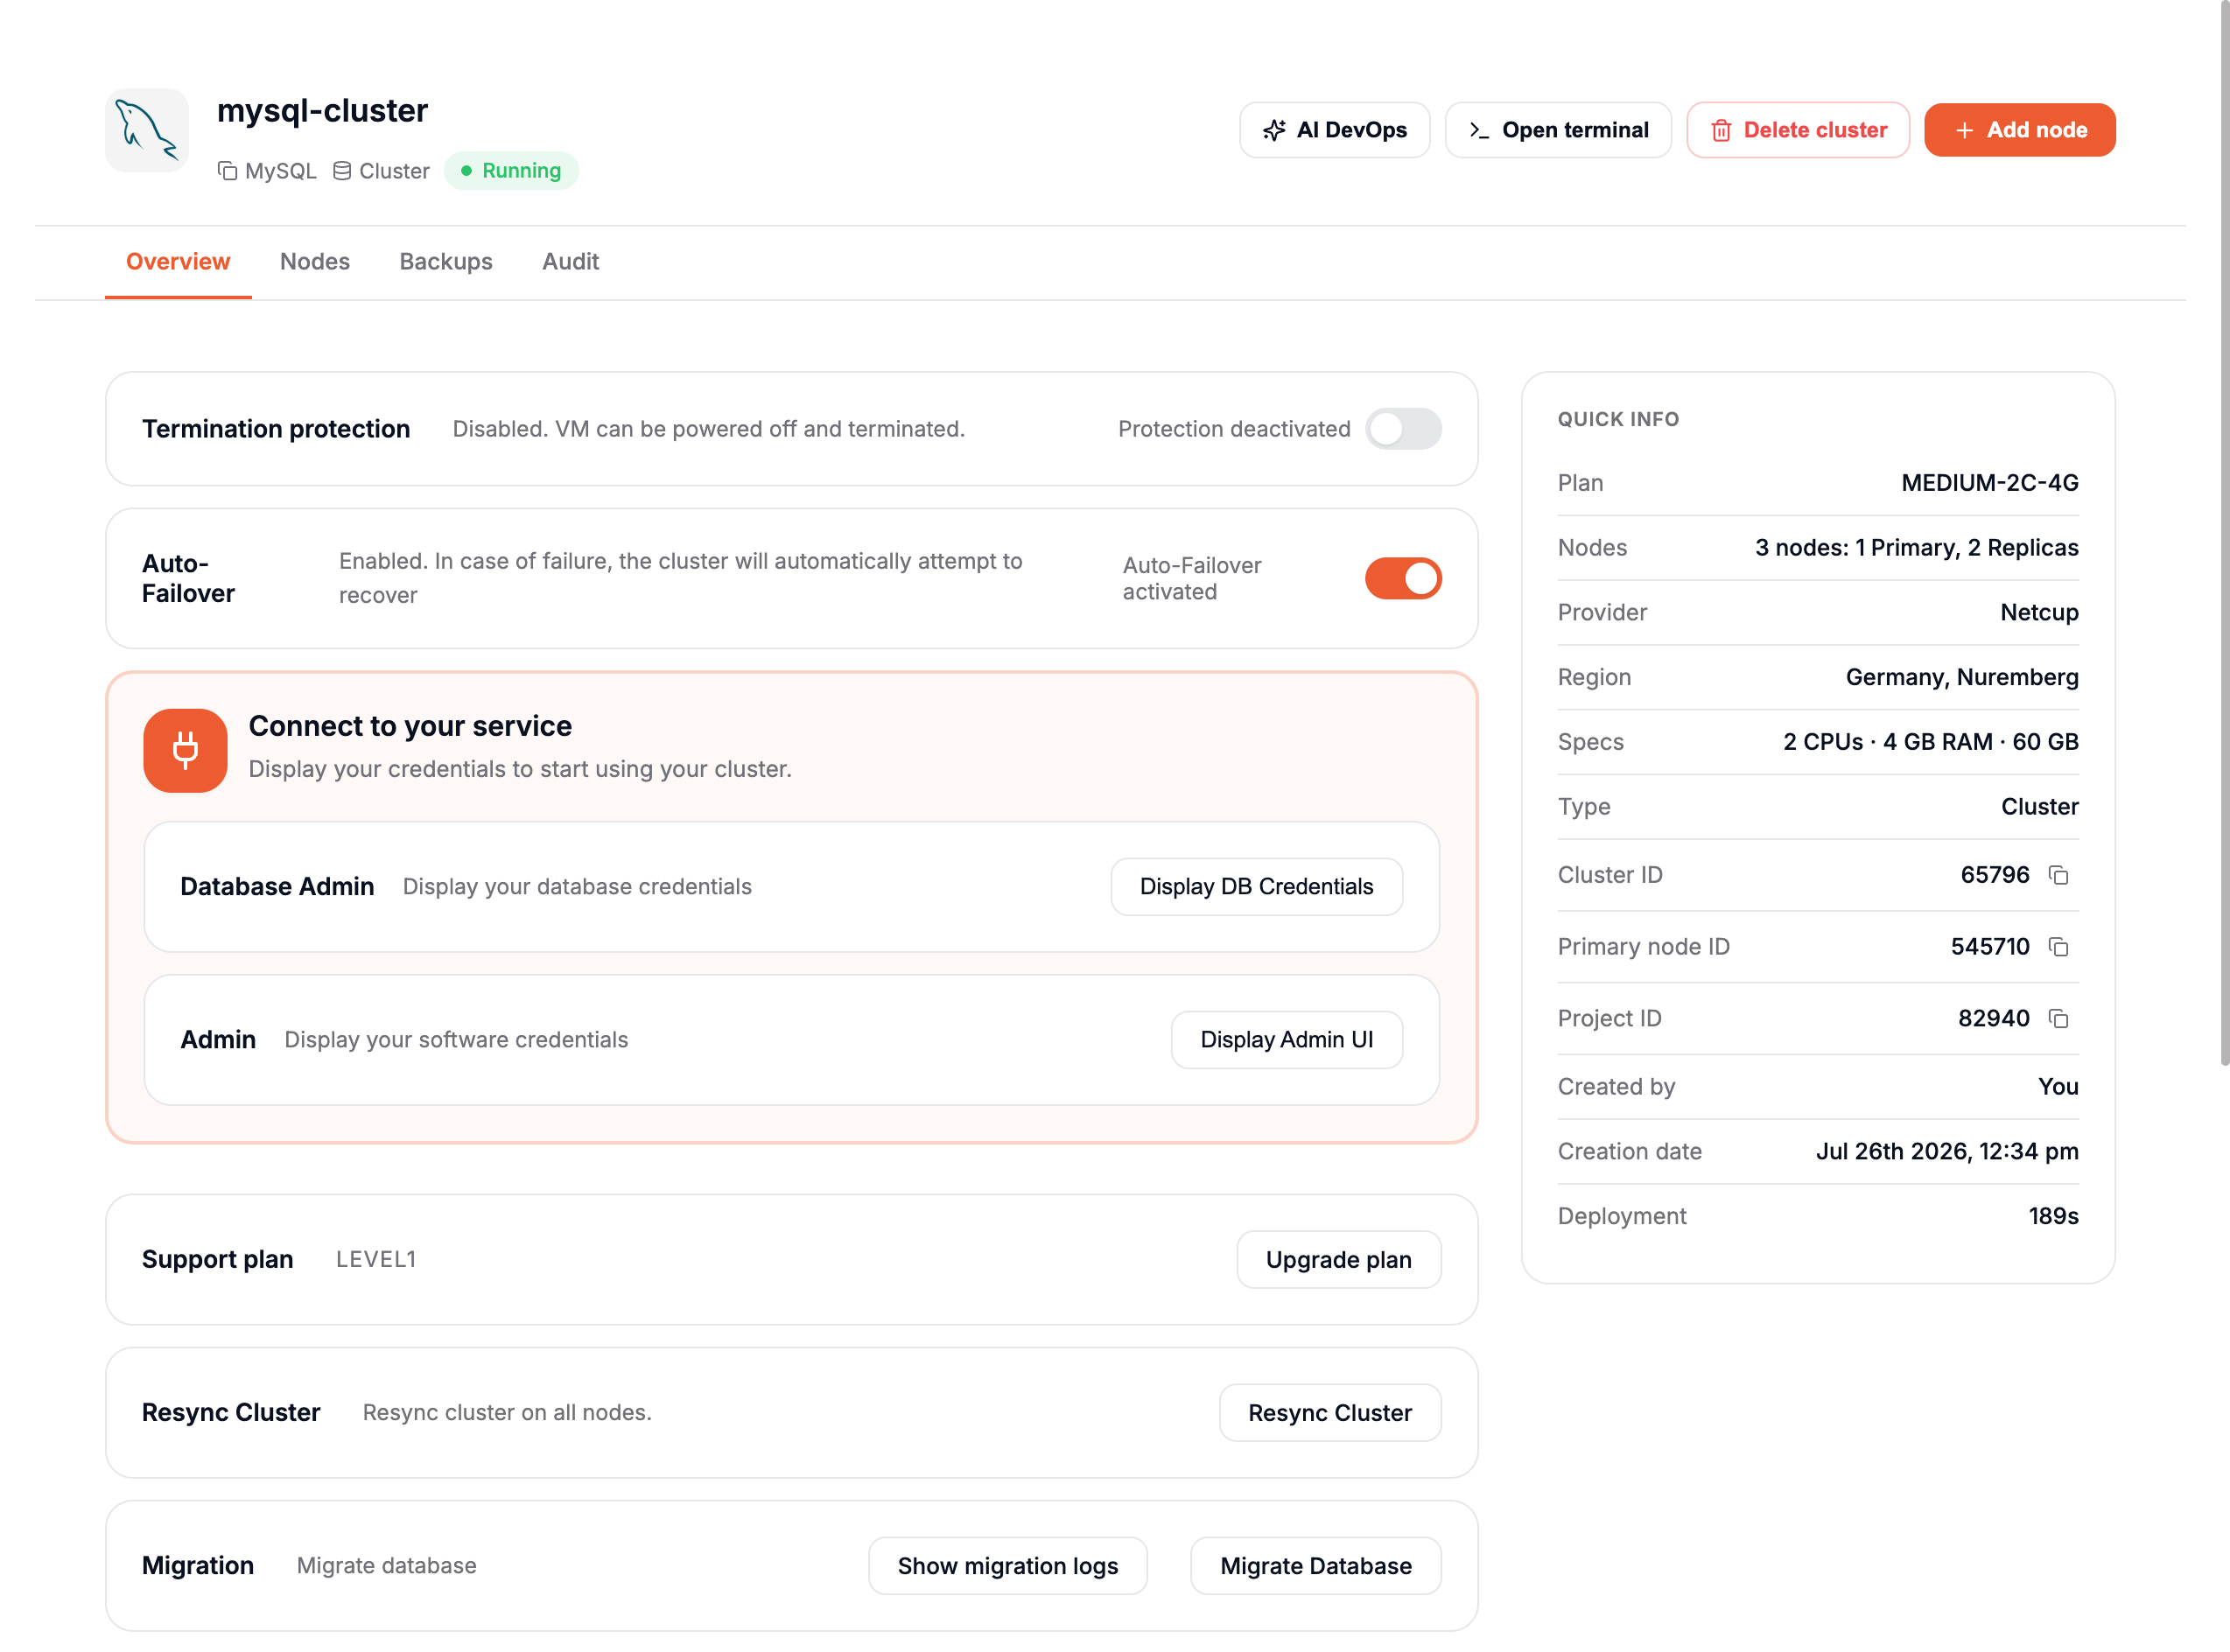
Once your cluster is deployed, you can access it through the Clusters tab on the left. Here, you will see a new entry with the name of your cluster. In our example, it will appear as mysql-cluster.
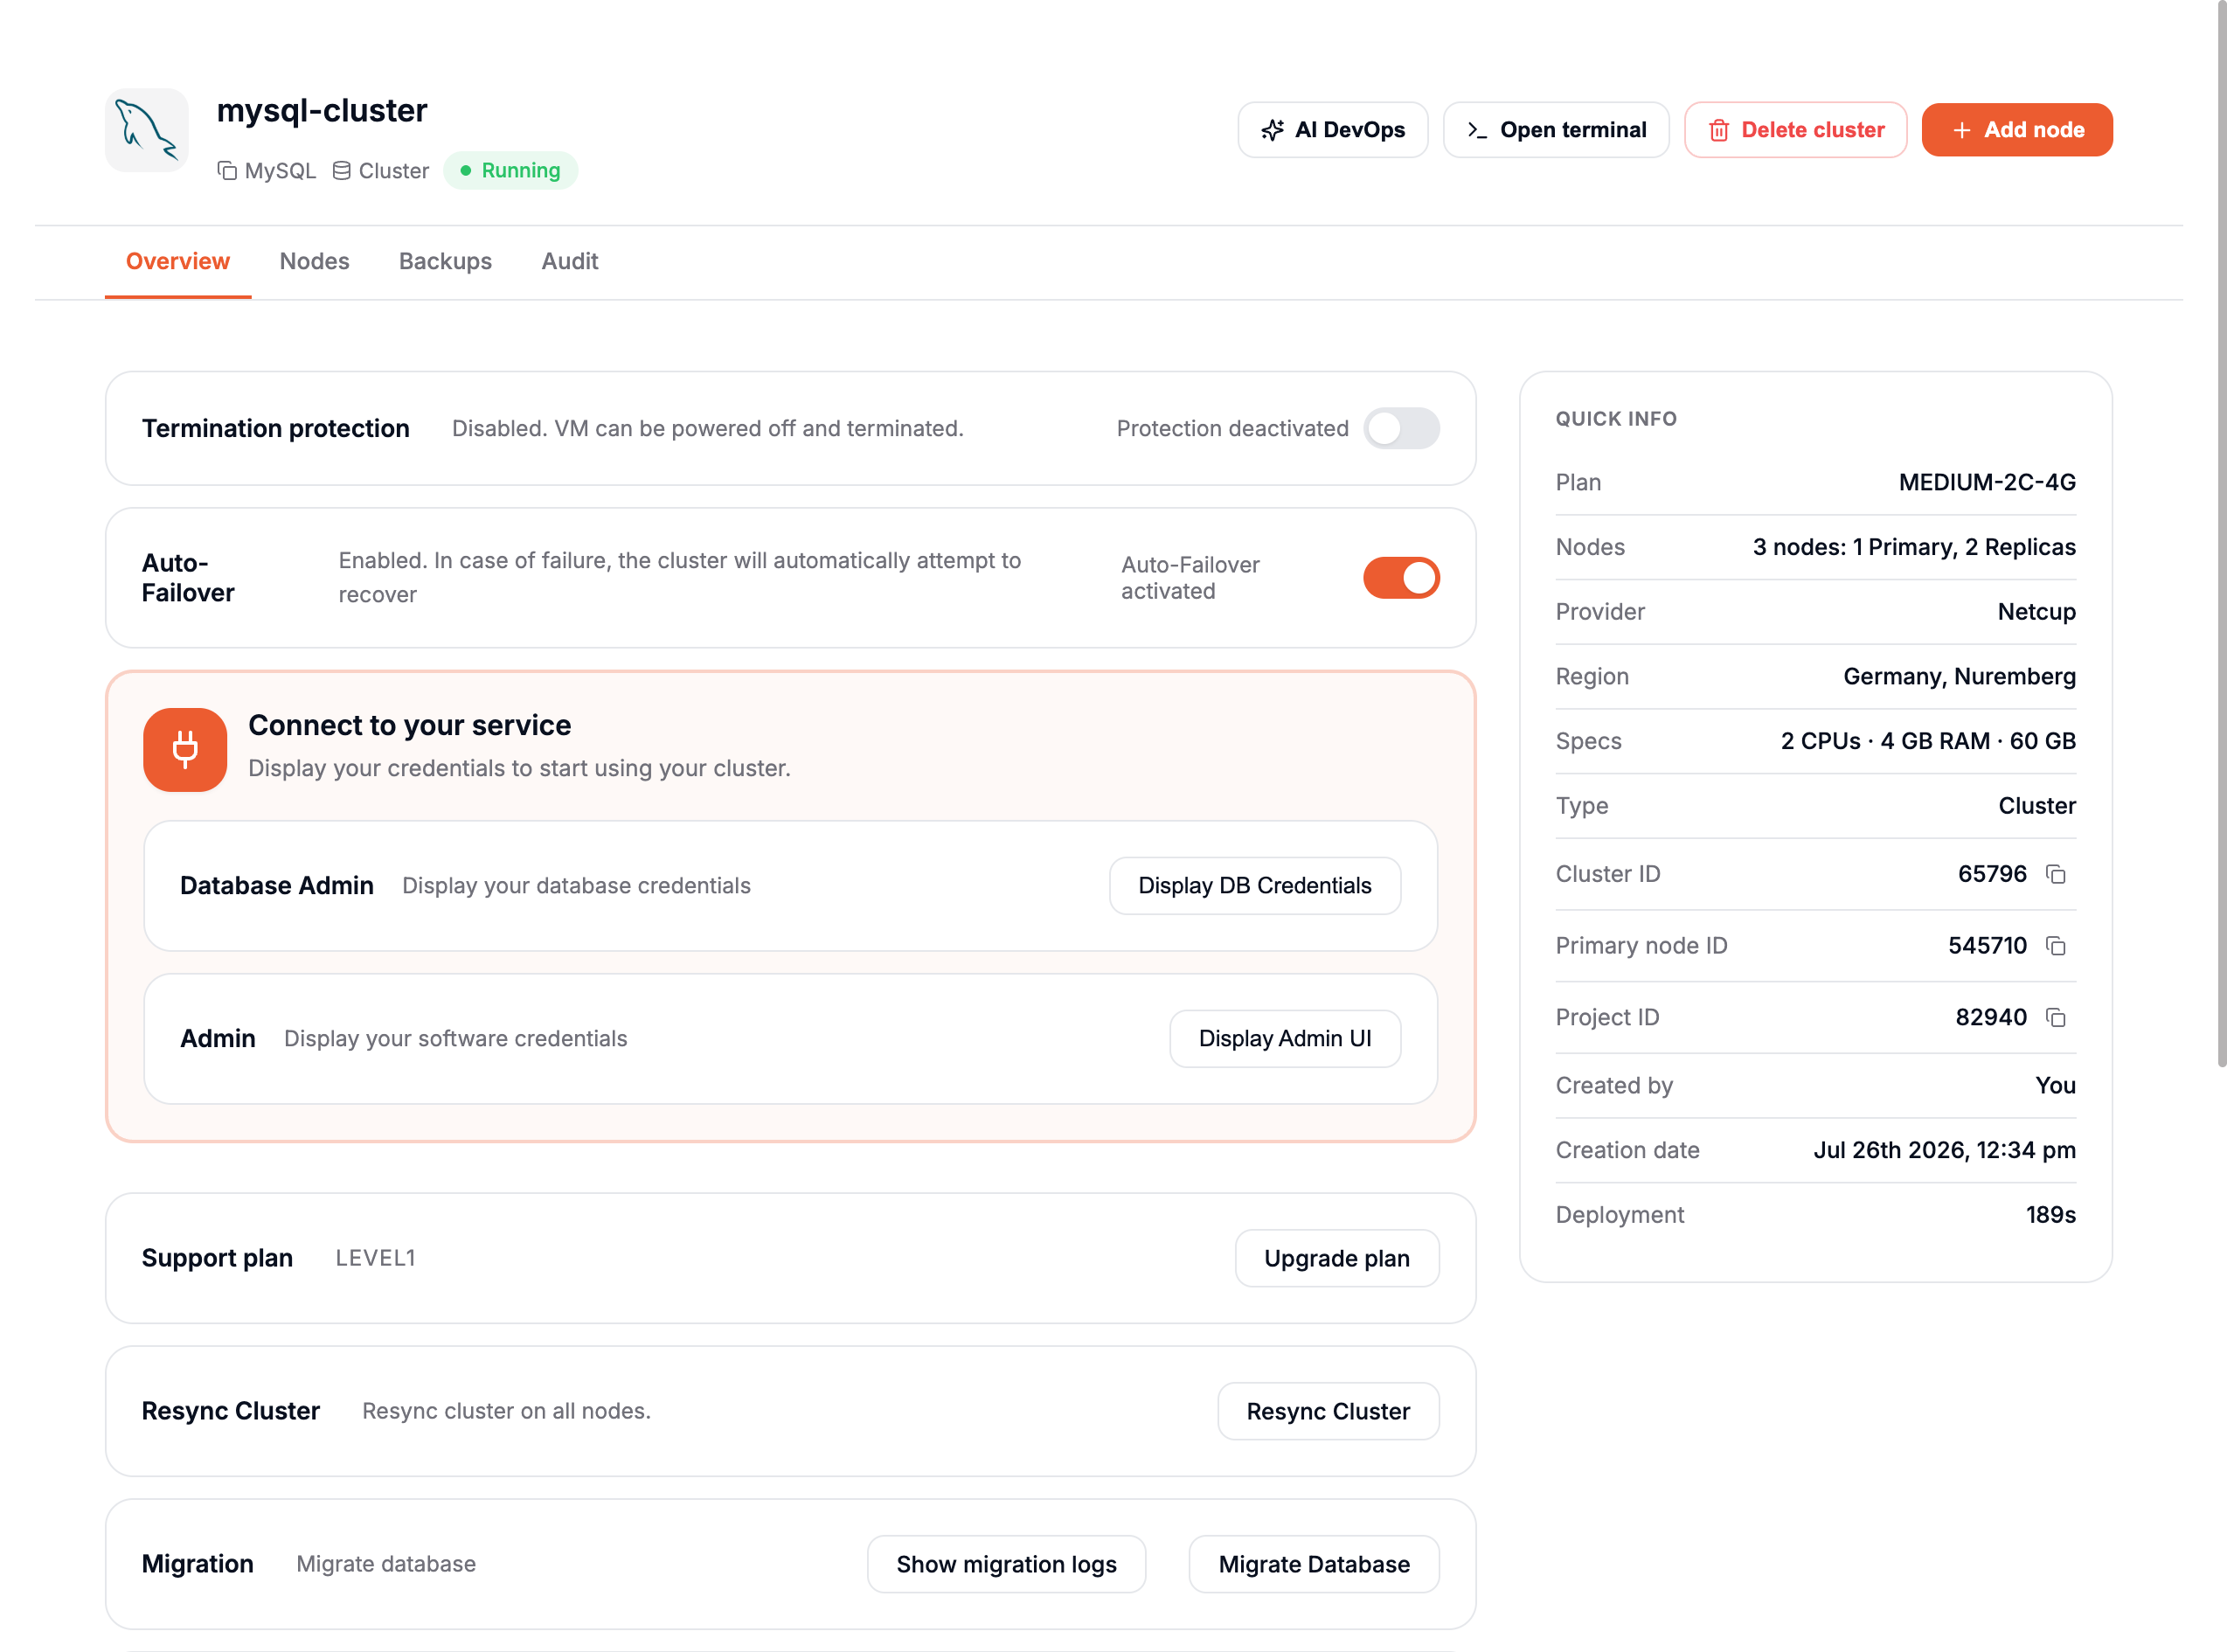
By clicking on the cluster name, you will access the Overview of your cluster.
The Overview is divided into two parts:
- Cluster Management Options
- General informations
Cluster Management Options
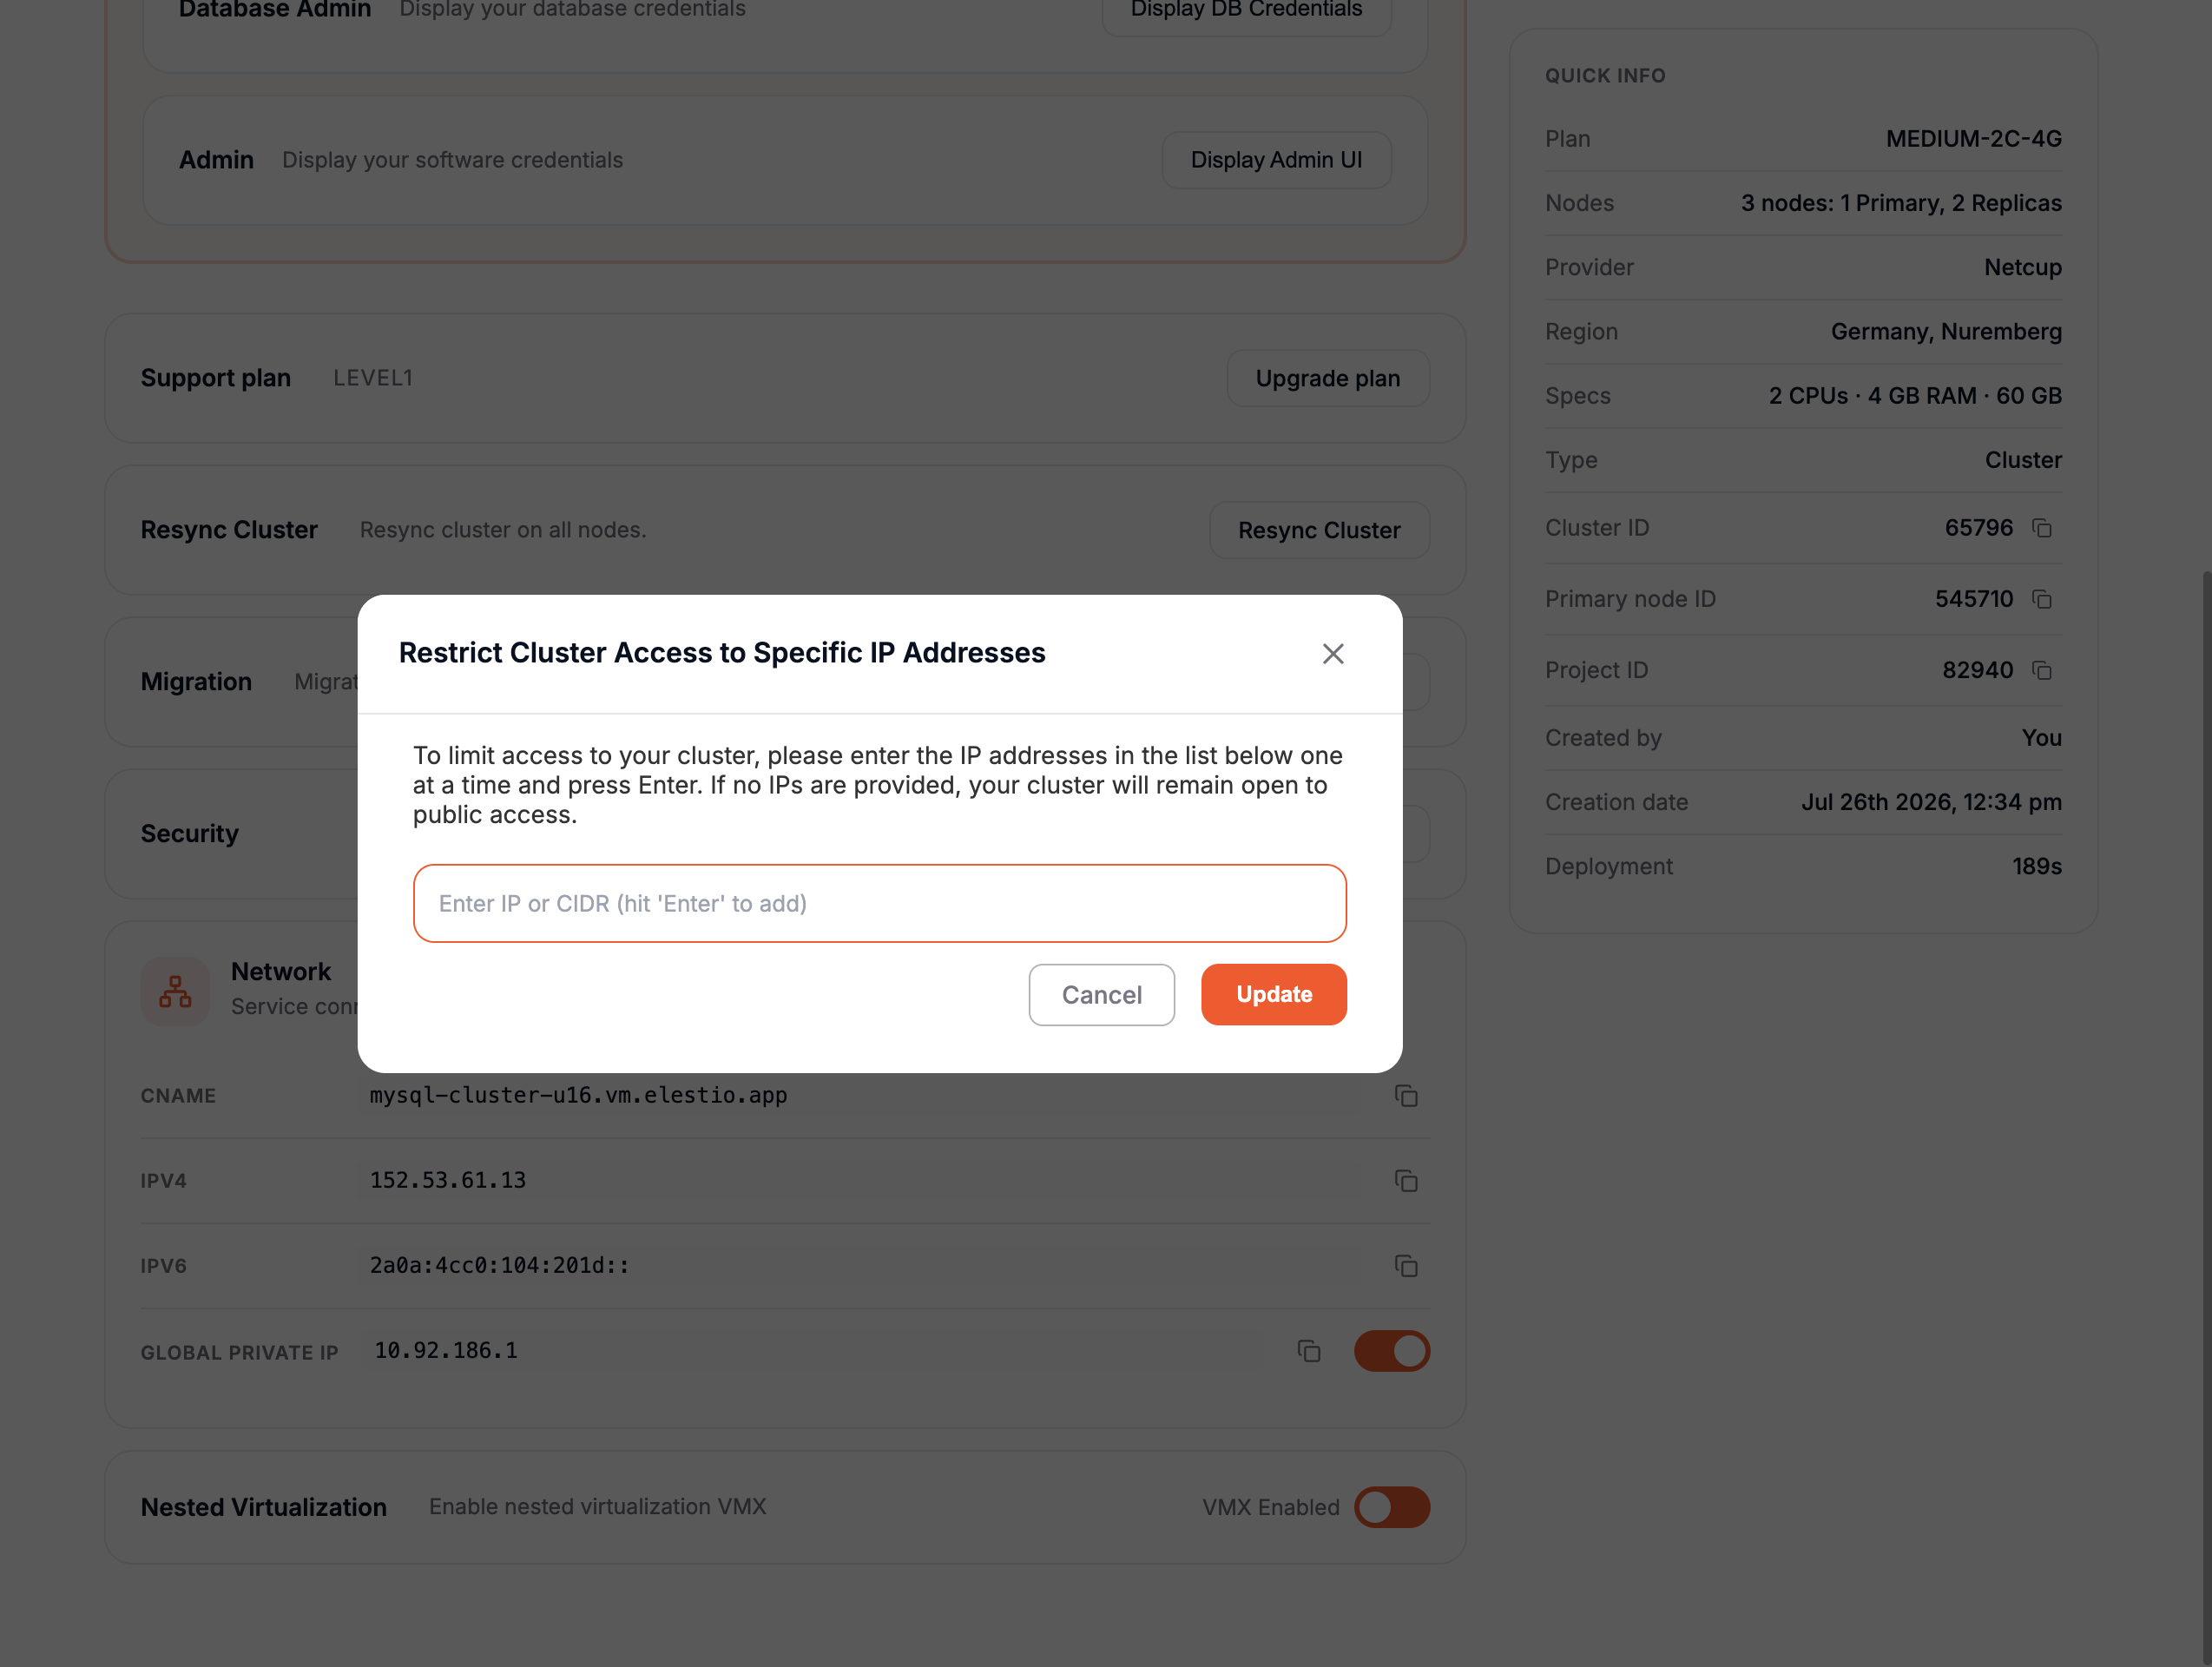
This section provides tools to manage and control your cluster:
- Protection: Prevent accidental deletion of your cluster by enabling the lock option.
- Add Node: Add a new node to your cluster. Any added node will automatically function as a replica.
- Upgrade Plan: Update the support plan for your cluster to higher levels, such as Level 2 or Level 3.
- Resync Cluster: If one or more replicas go down, use this option to resynchronize them with the primary node.
- Migration: Seamlessly migrate a database to your cluster.
- Limit Access per IP: Restrict access to your cluster to specific IP addresses for improved security.
General Information
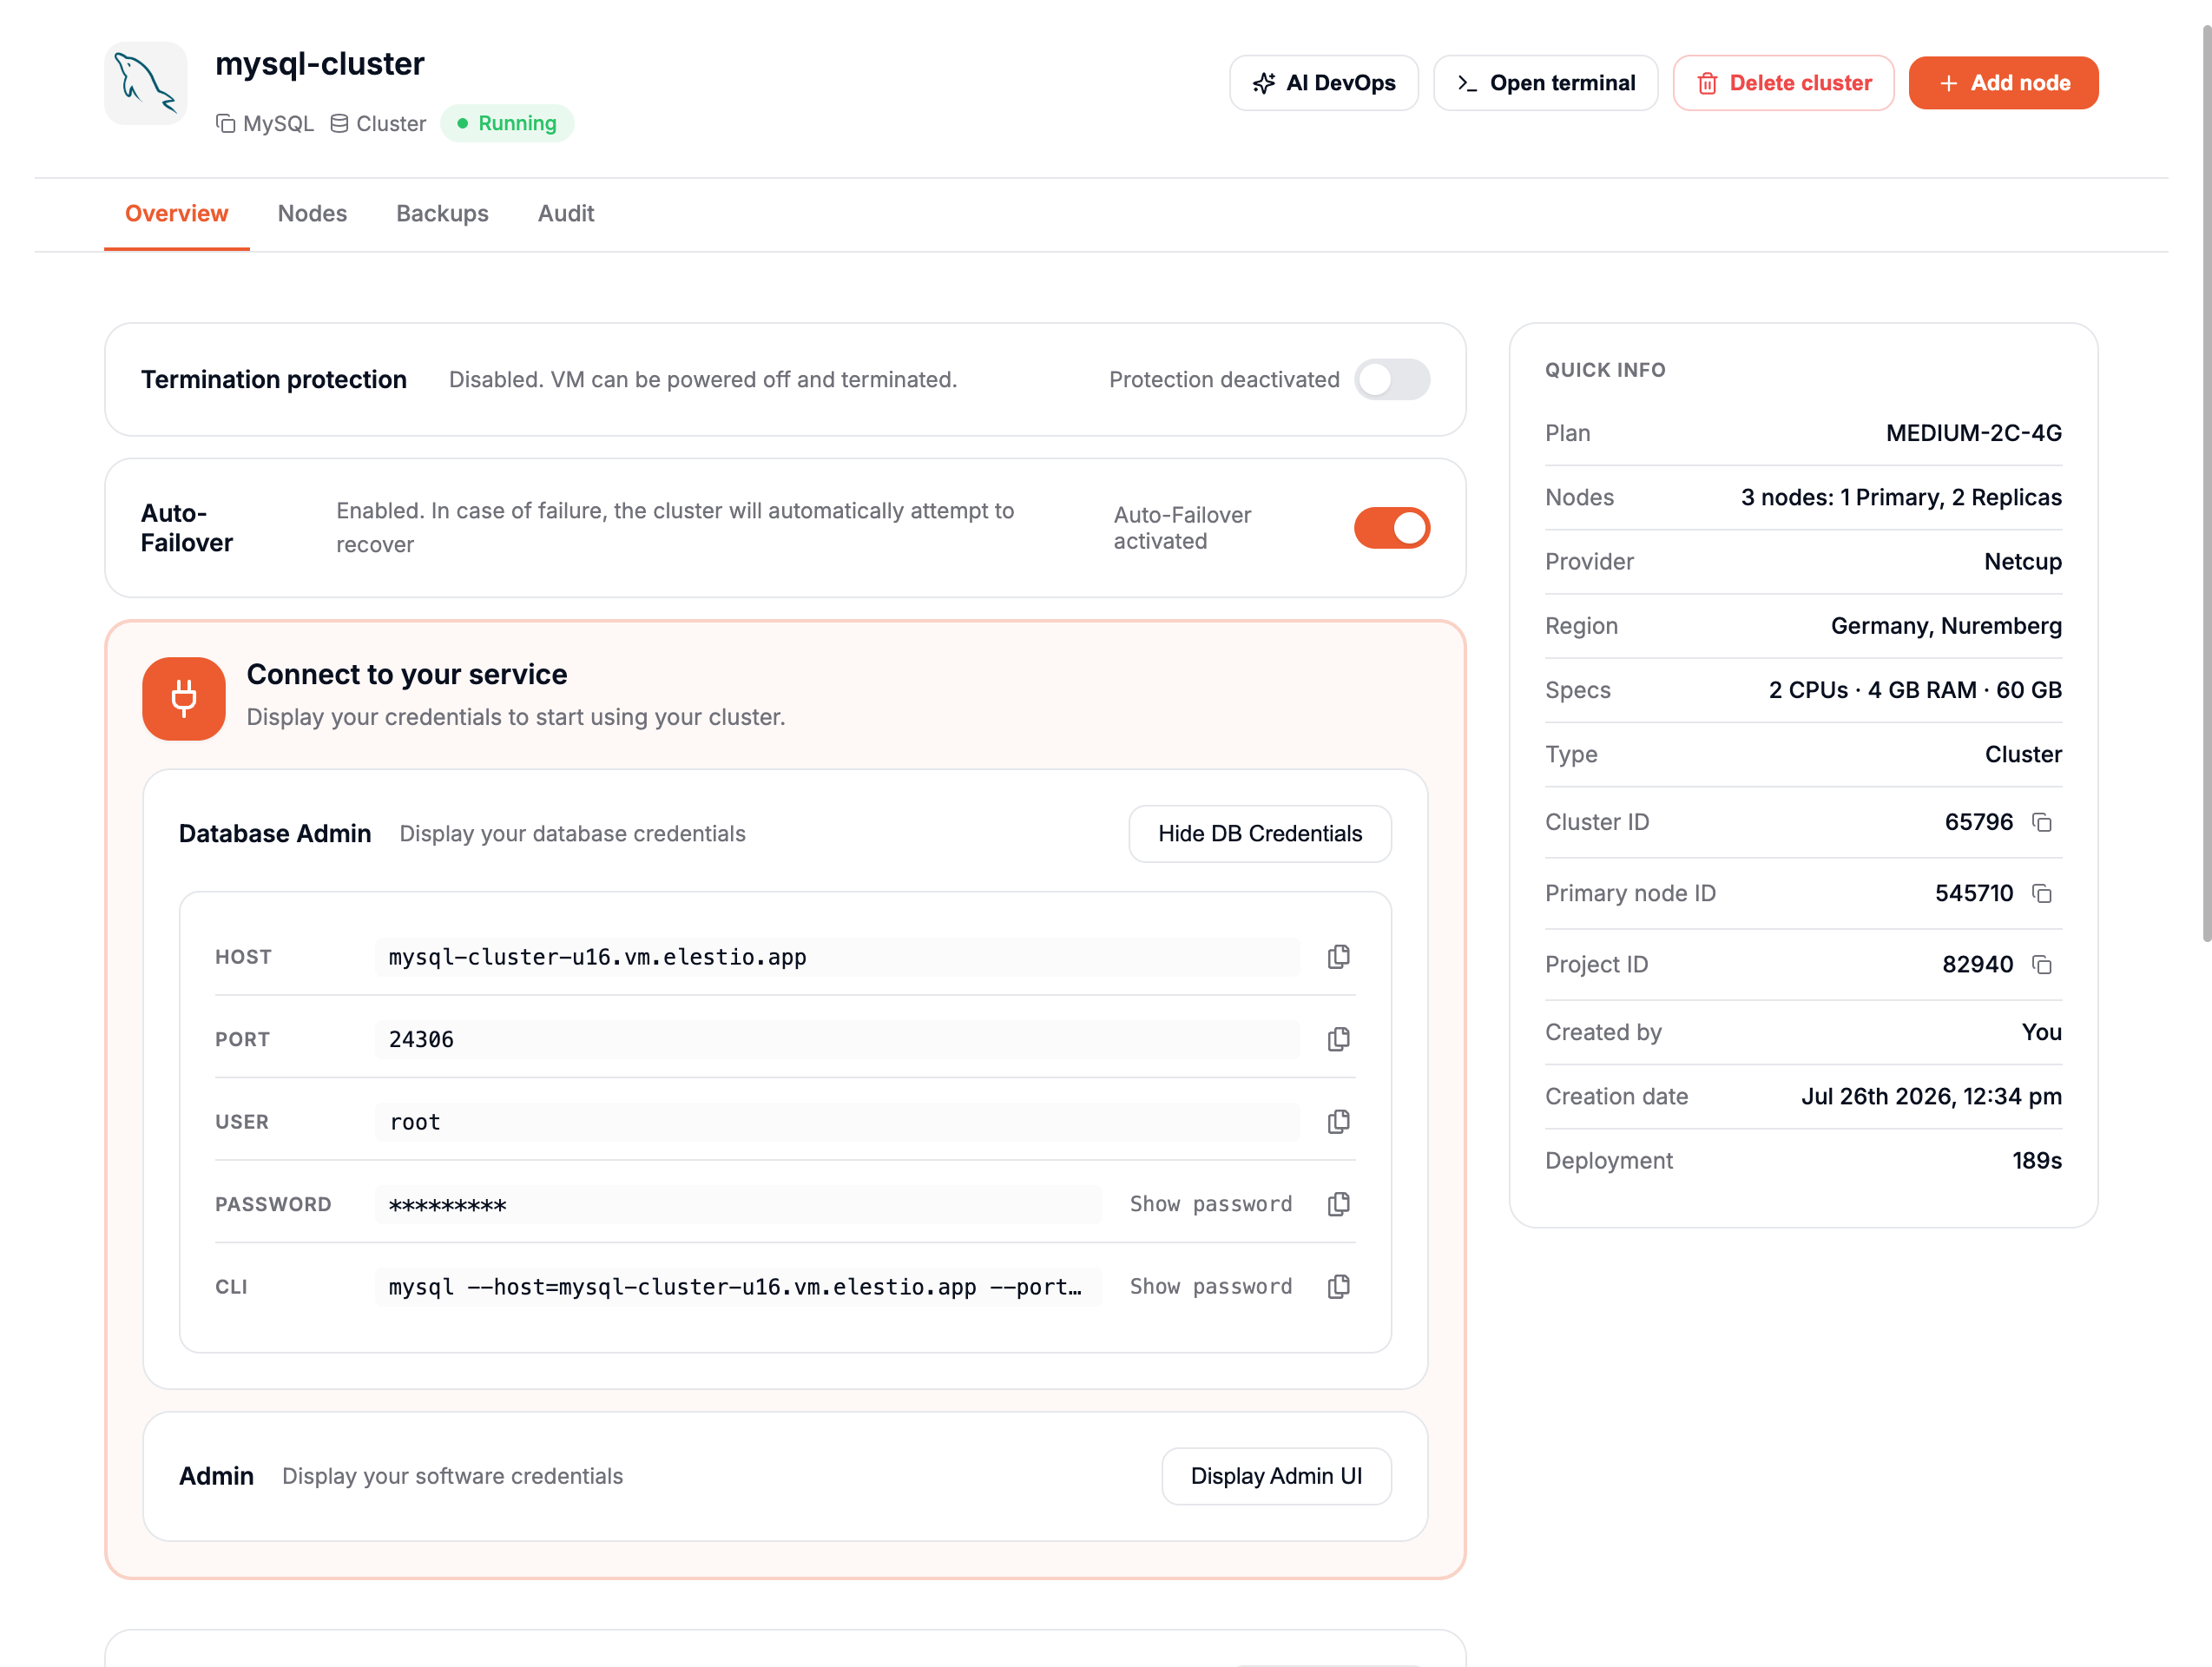
This section provides key details about your cluster, including:
-
CNAME: The fully qualified domain name for your cluster. In our example:
mysql-cluster-u161.vm.appdrag.net. -
Displays the IP addresses associated with the cluster:
- IPv4:
x.x.x.x - IPv6:
x:x:x:x::/xx - Global Private IP:
x.x.x.x
- IPv4:
-
Deployment Duration: The time taken to deploy the cluster.
-
Project ID: The unique identifier for the project.
-
Cluster ID: The unique identifier for the cluster.
-
Primary Node ID: The ID of the primary node.
-
Service Type: Specifies the type of service.
-
Created By: The creator of the cluster.
-
Creation Time: The date and time the cluster was created.
Nodes management
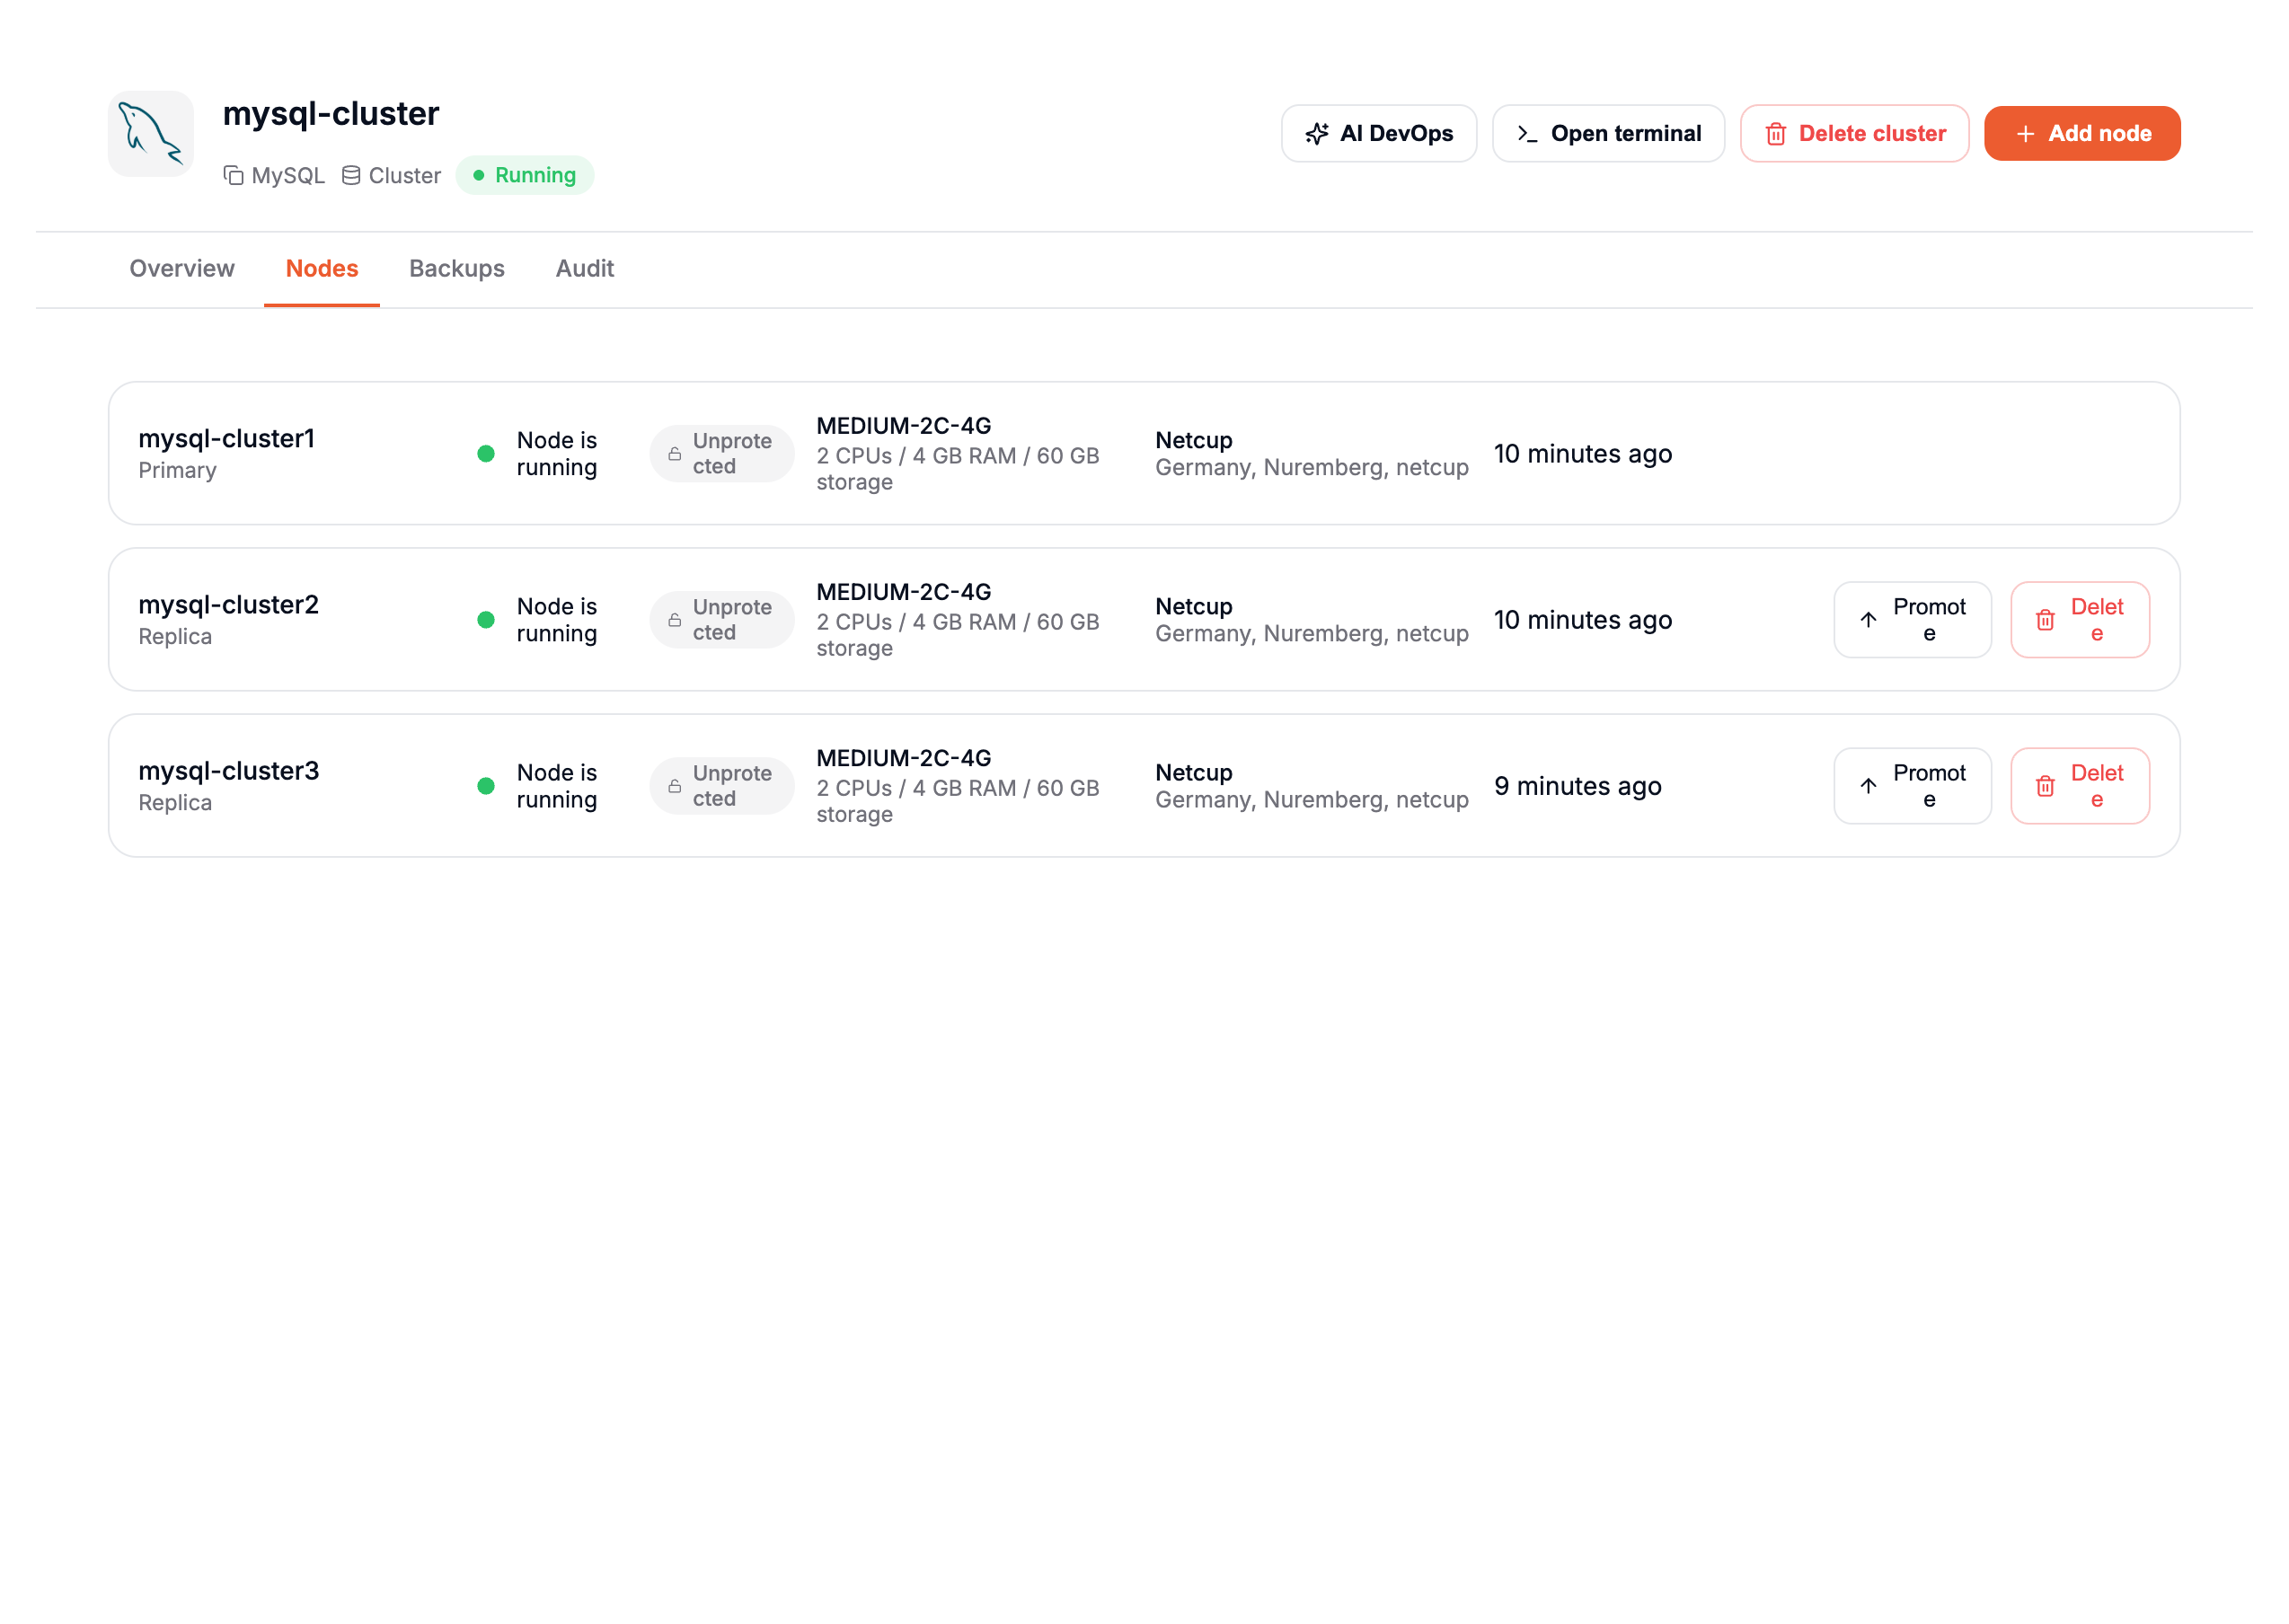
If you click on the Nodes tab, you will see a list of all your nodes with detailed information, such as:
- Node Role: Indicates whether the node is a Primary or a Replica.
- Status: Displays whether the node is running or not.
- Specifications: Includes details about CPU, RAM, and storage.
- Location: Shows the data center and provider hosting the node.
- Actions:
- Promote: Allows you to promote a Replica node to a Primary node.
- Delete: Provides the option to remove a node from the cluster.
This interface makes it easy to monitor and manage your nodes efficiently.
Add a node
If you want to add a new node to your cluster, you can:
- Click on the Add Node button in the top-right corner of your cluster page.
- Alternatively, in the Overview tab, click on Add Node.
A prompt will appear, asking for confirmation to add a new node.
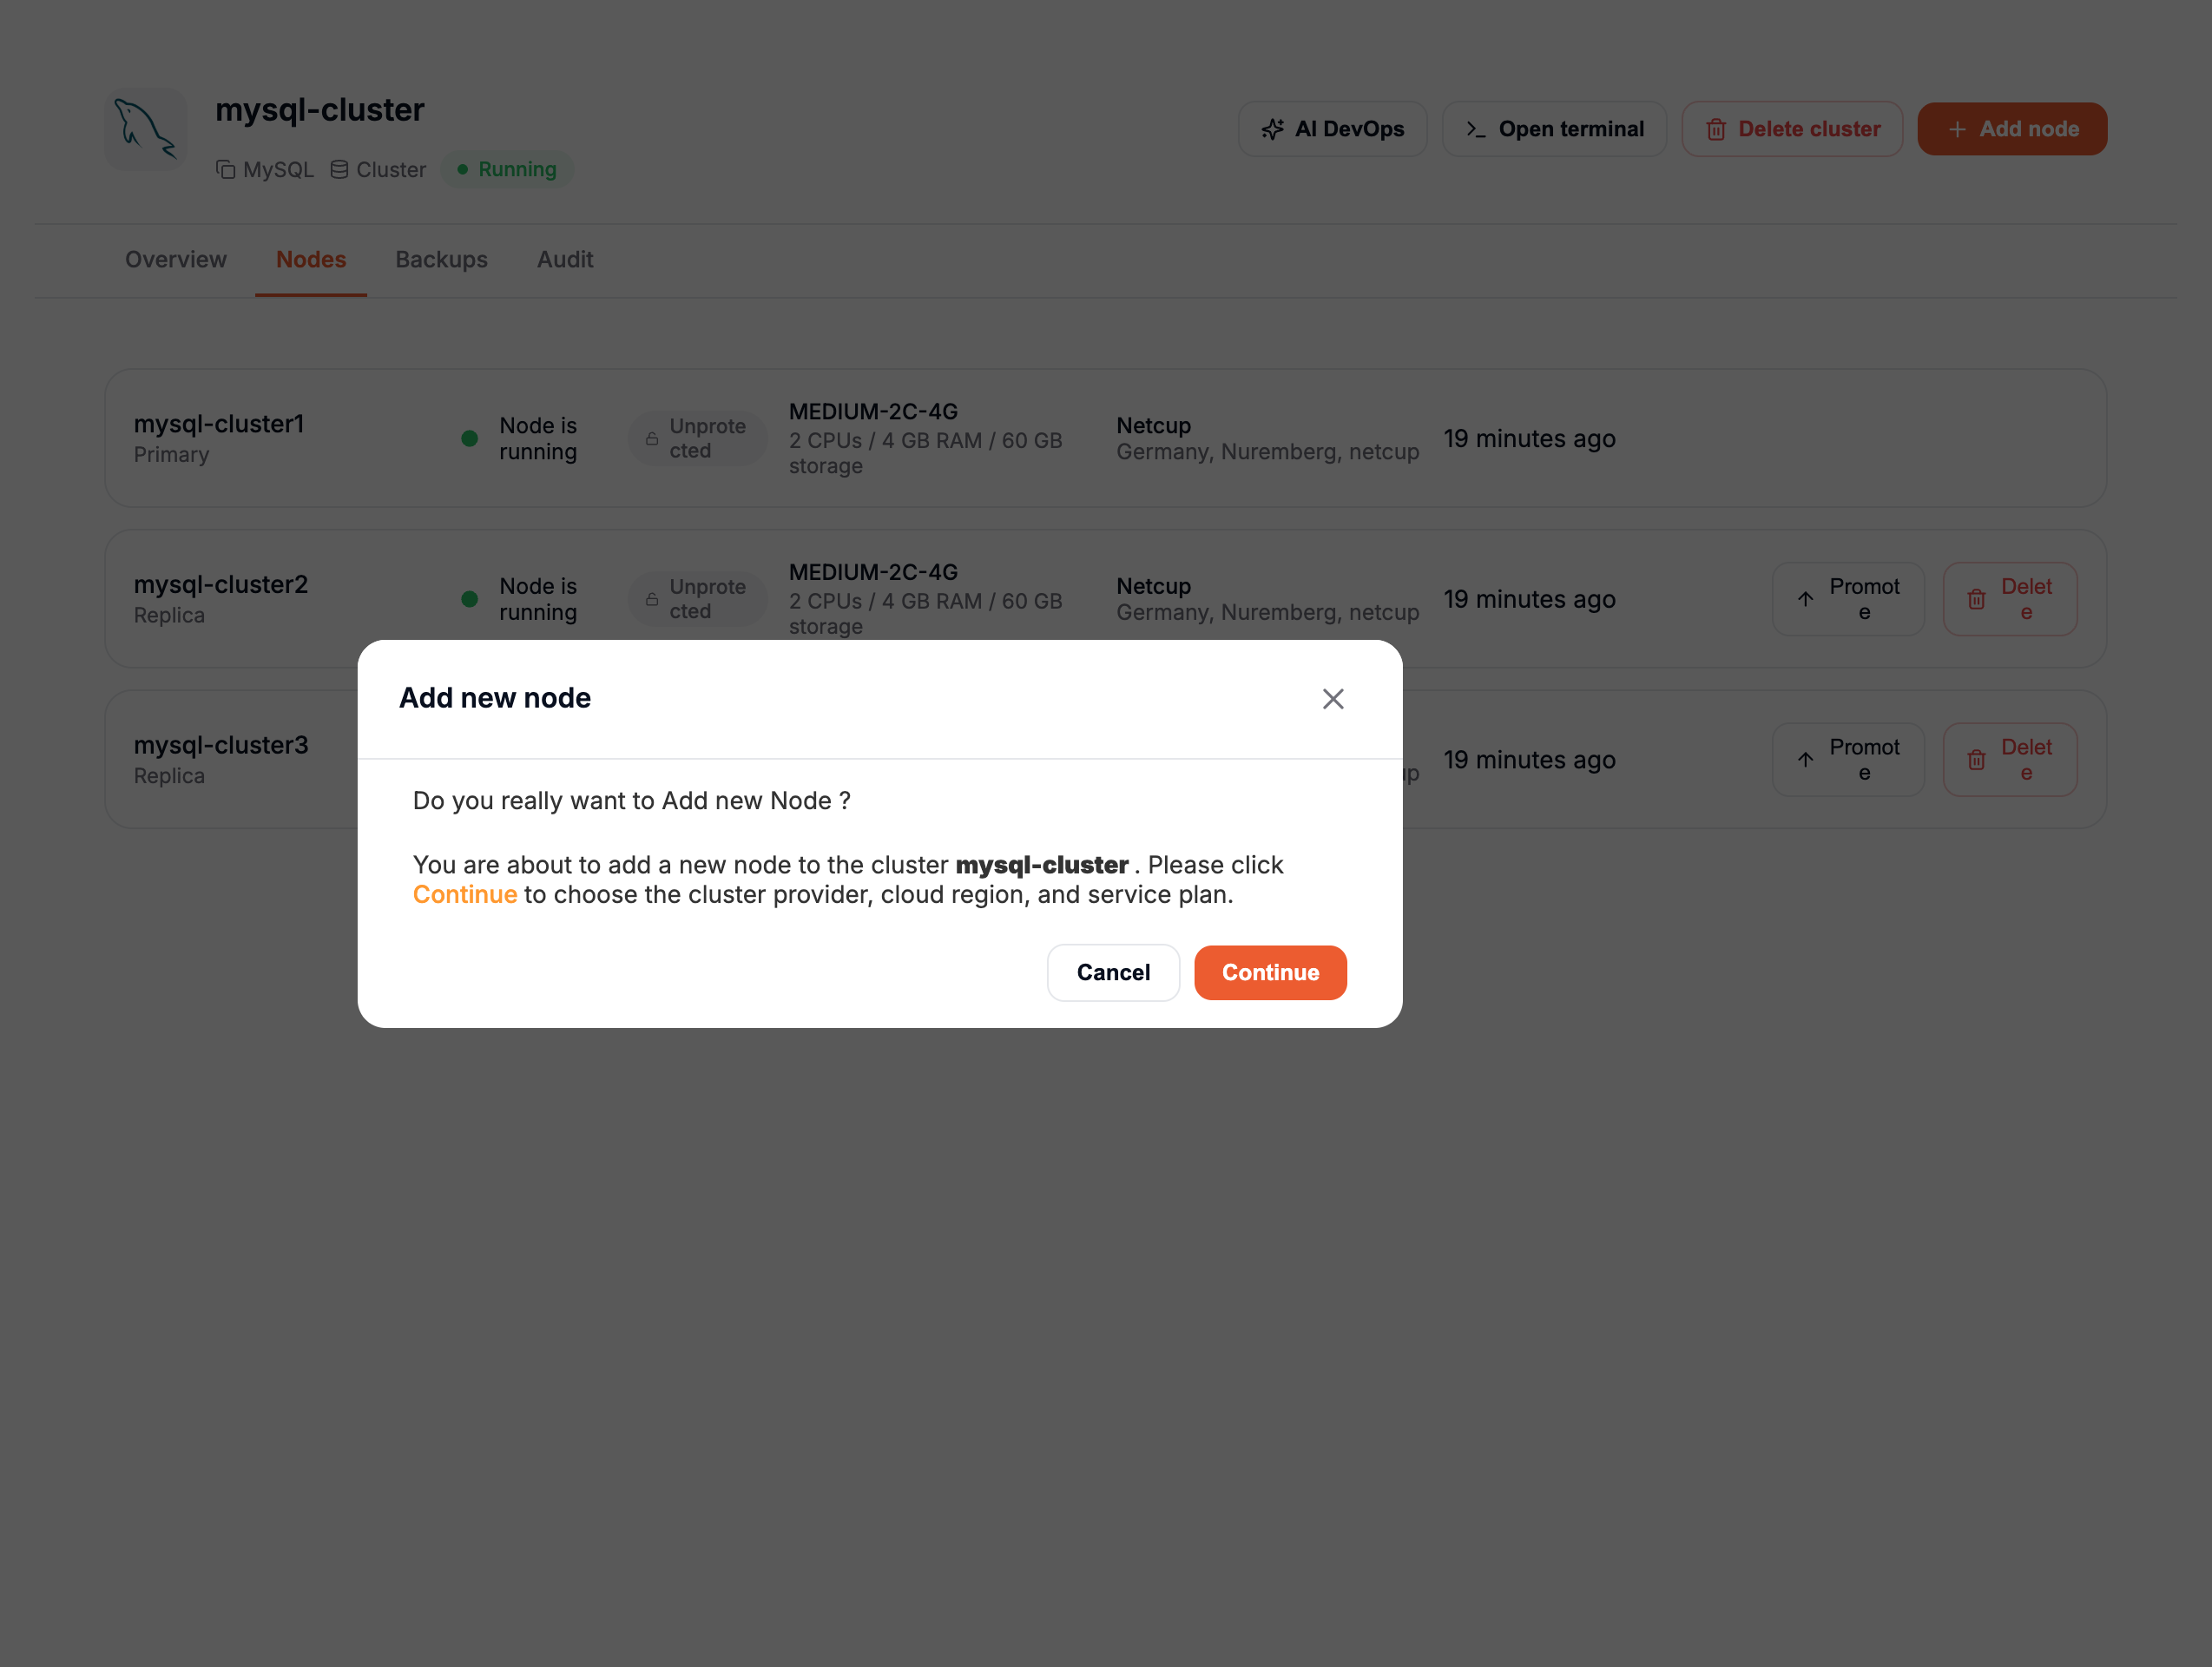
If you confirm, you will be redirected to a new page to choose your Cloud Provider and Service Plan. Once selected, click the Create Node button to proceed.
Since this node is part of an existing cluster, you cannot choose a custom name. The node's name will automatically follow the naming convention, incrementing the node number, even if a previous node has been deleted. For example:
mysql-cluster1mysql-cluster2mysql-cluster4(ifmysql-cluster3was deleted previously).
Once the new node is deployed, it will be automatically synchronized with the primary node and will receive all the data from it.
Remove a node
If you want to remove a node from your cluster, you can:
- Click on the Delete button with the trash icon in the Nodes tab.
- Alternatively, click on a node to view its details, then click Delete Node in the top-left corner.
A confirmation popup will appear, asking you to enter the name of the node to confirm the deletion.
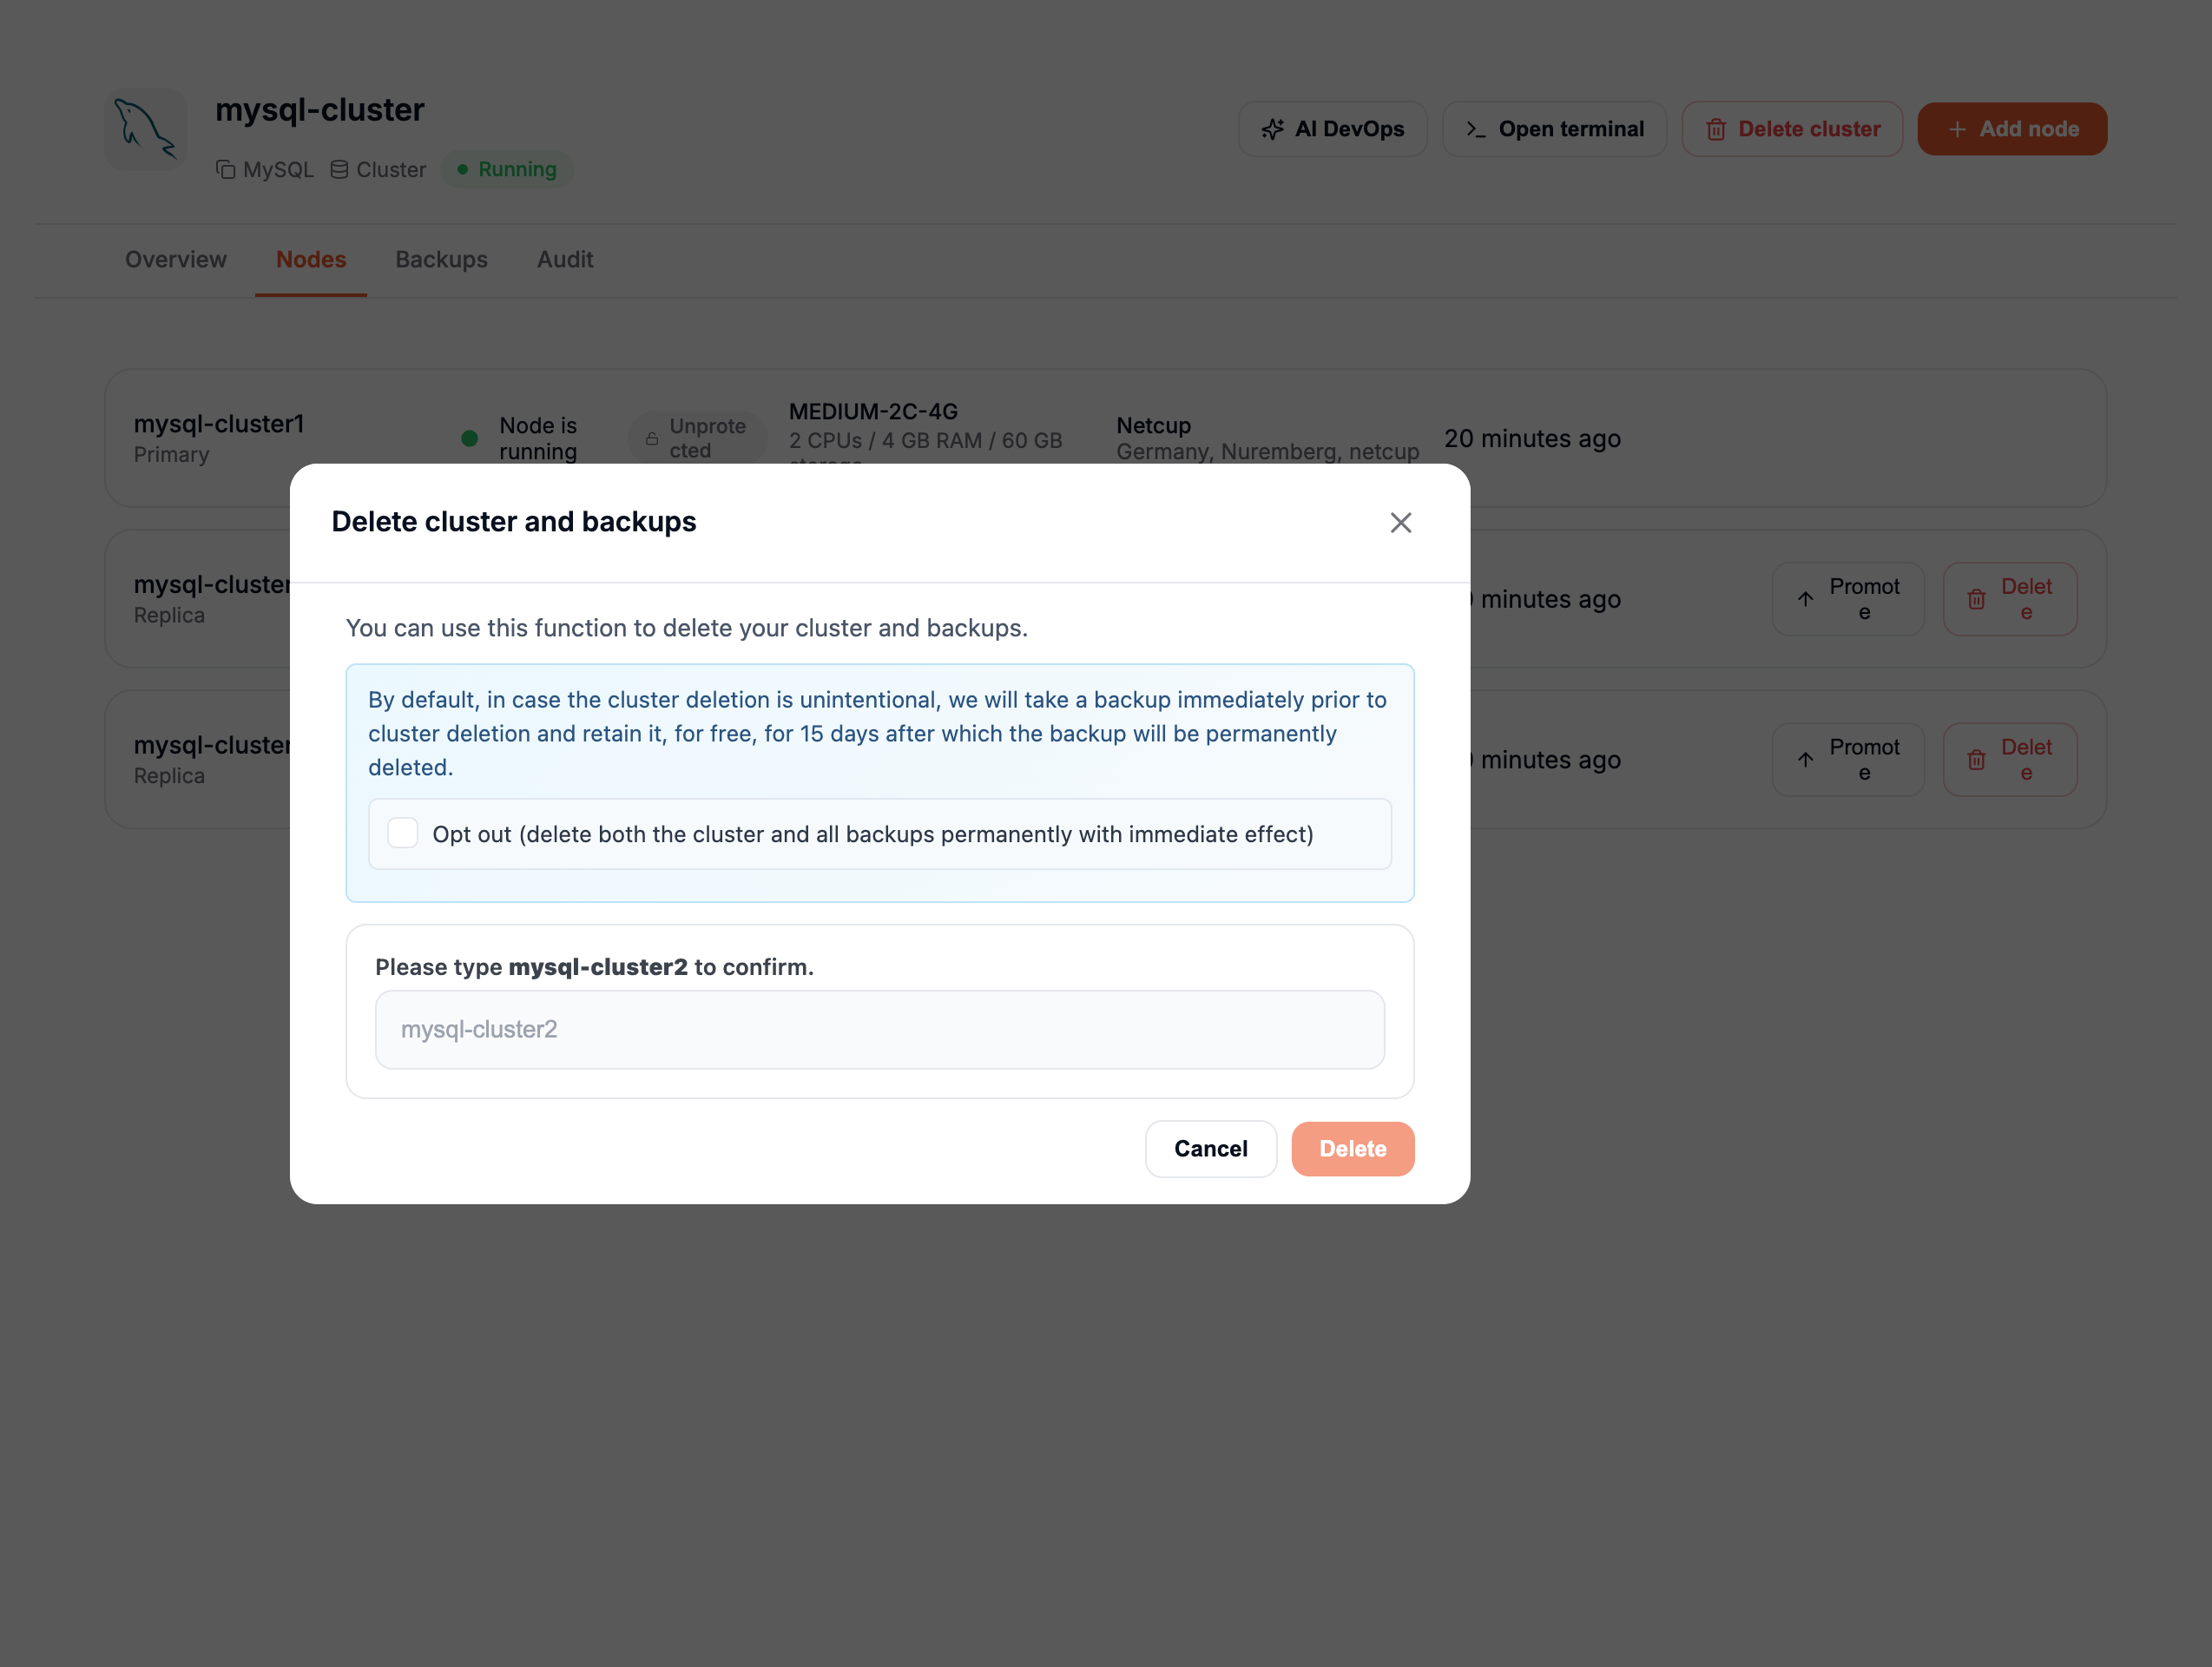
Once you enter the correct node name and click Delete, the node will be removed from your cluster.
Promote a node
If you want to promote a node to Primary in your cluster, follow these steps:
- Go to the Nodes tab.
- Click on the Promote button with the arrow icon next to the node you wish to promote.
A confirmation popup will appear, asking if you really want to promote this node.
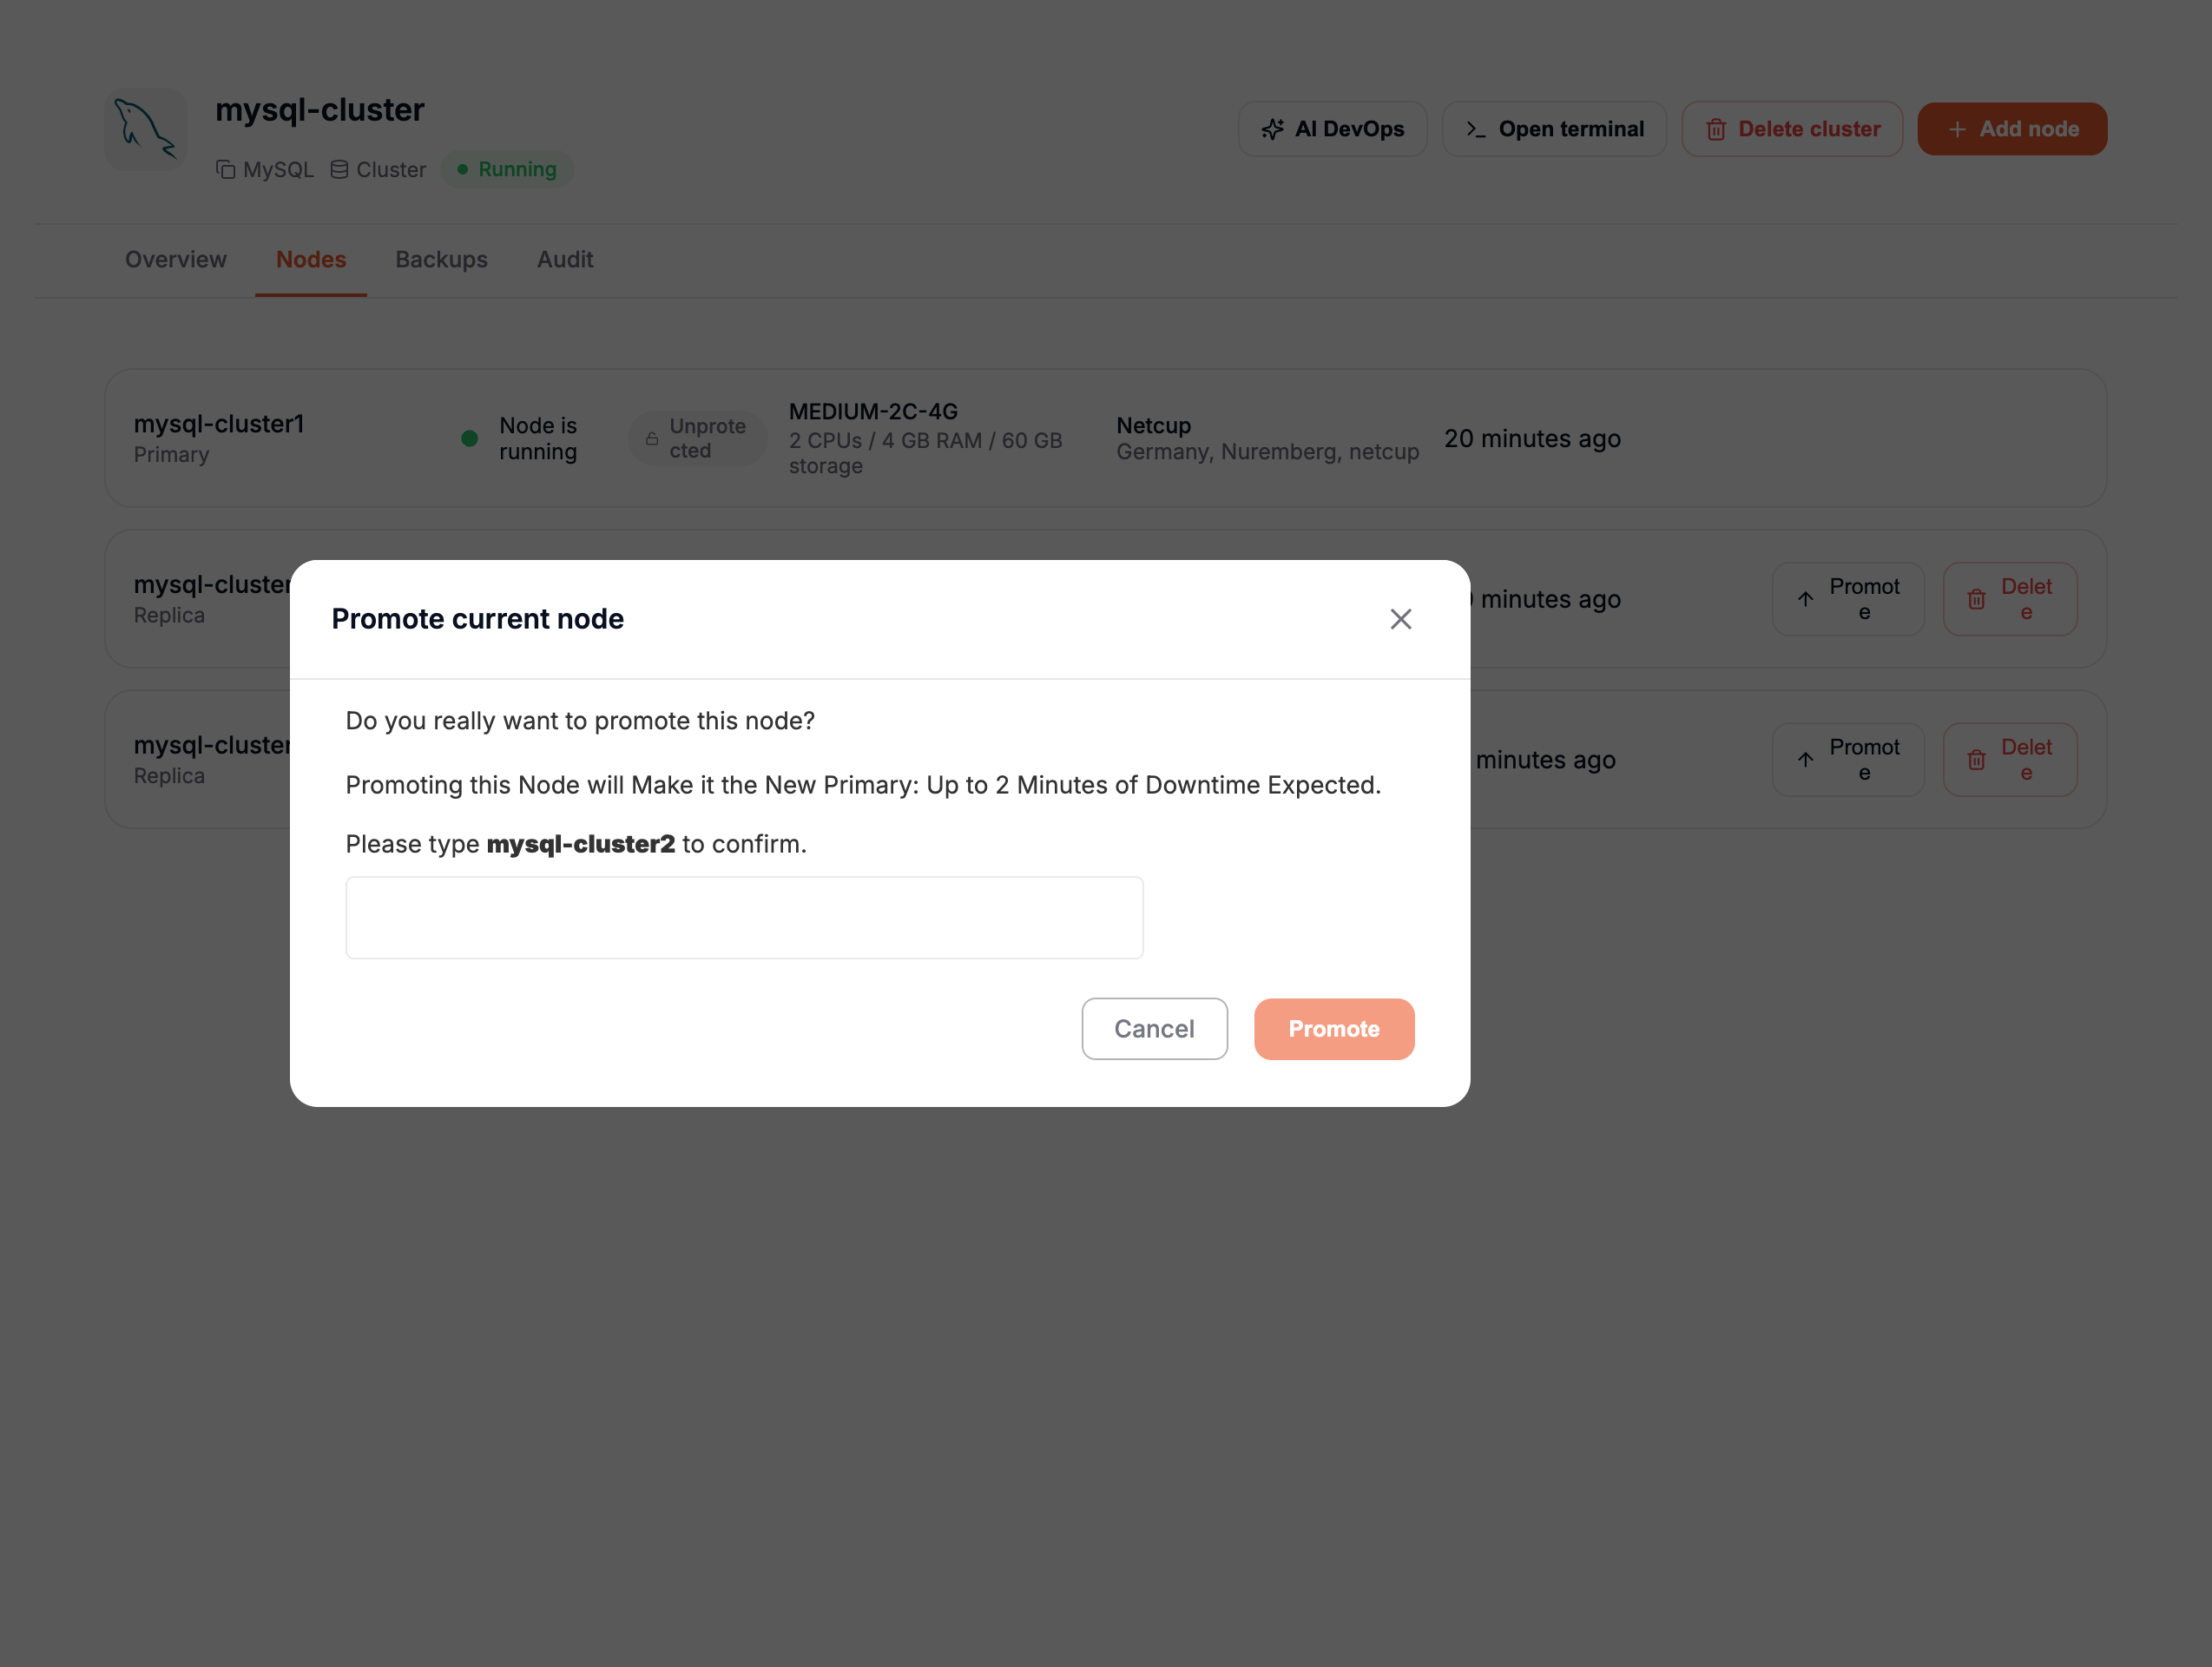
If you confirm, a health check will be processed before the promotion process begins:
- If the node is not healthy, another popup will appear, warning you that the node cannot be promoted.
- If the node is healthy, the following steps will occur:
- The selected node will be reconfigured as the Primary node.
- All other nodes will be reconfigured as Replicas, pointing to the new Primary.
- Once the process is complete, a backup will be automatically created with the new Primary.
⚠ WARNING: During the promotion process, your cluster will be temporarily unavailable.
Once the process is complete, you will receive an email notification confirming that your cluster is active and operational again.
Backups and restores
Elestio offers a Backup section specifically for managing backups.
For clusters, only the backups of the Primary node are supported.
If you promote a new node to Primary, a new backup will automatically be created for security purposes, ensuring a healthy backup of your cluster. From that point, new backups will target the new Primary.
Backups
Backups are created automatically once per day, but you can also create them manually.
To create a manual backup:
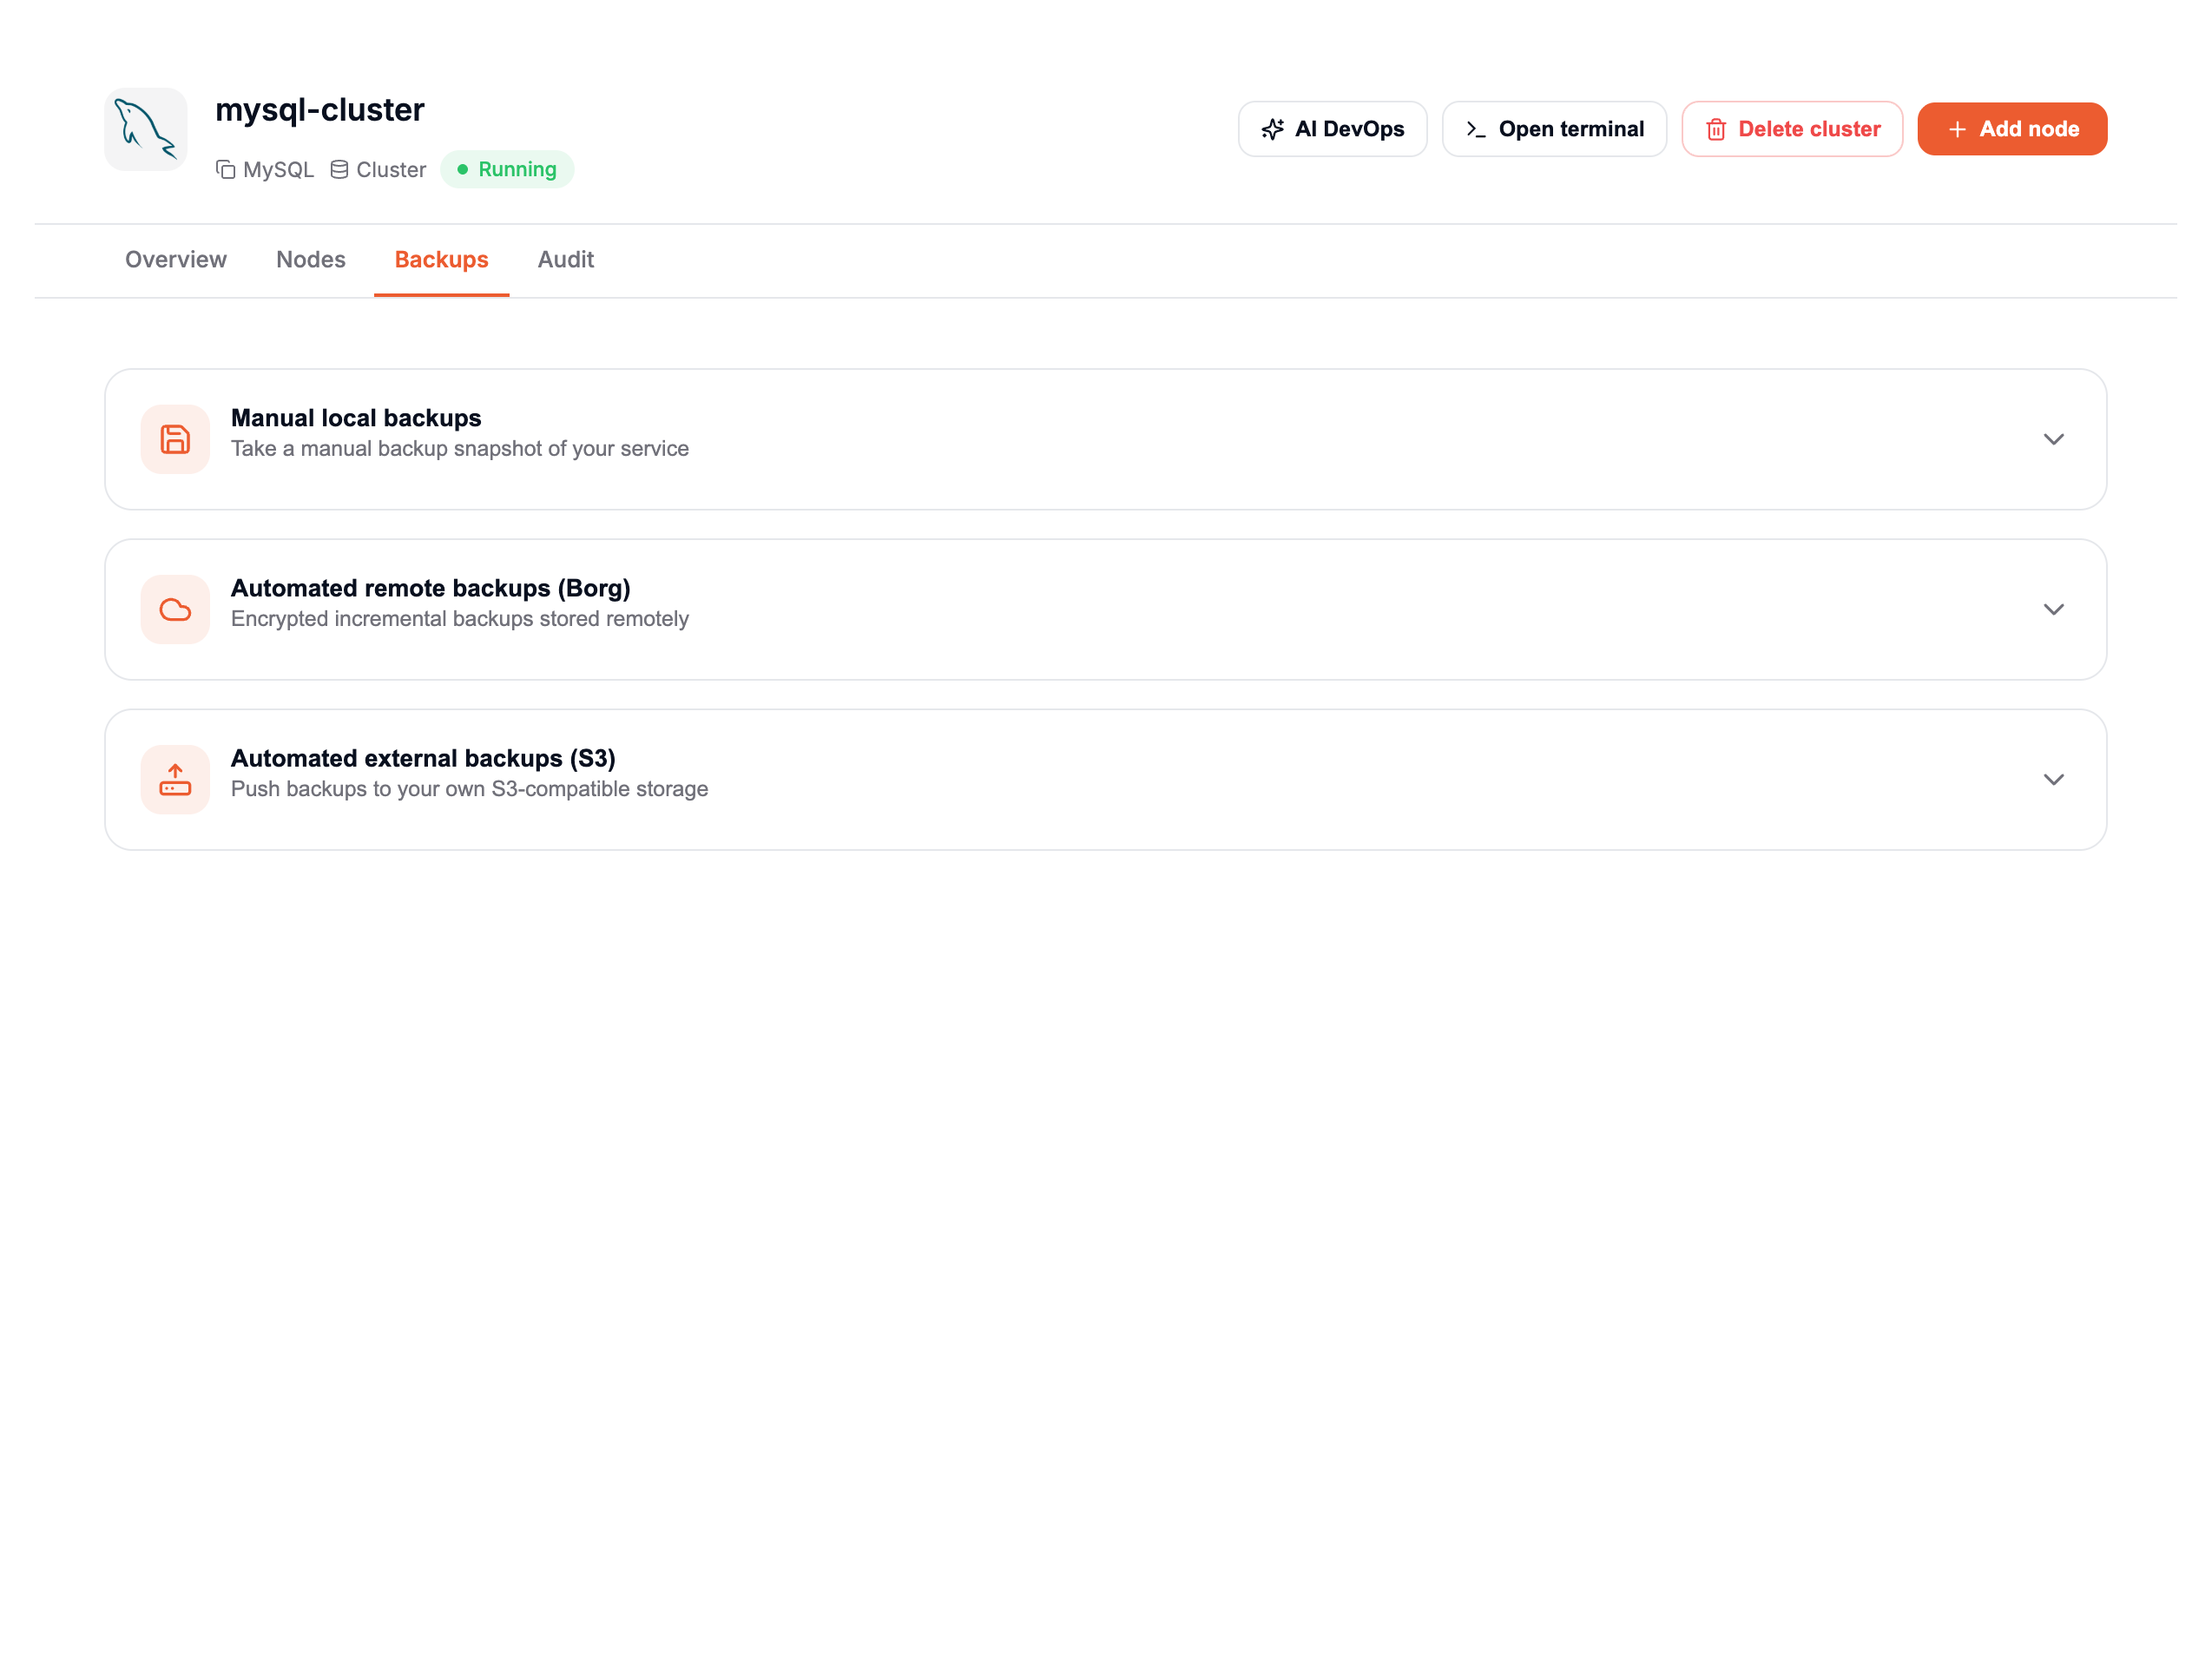
- Go to the Backups tab of your cluster.
- In the Automated Remote Backups section, click the + button to expand the section.
- Click the Back Up Now button to create a newbackup.
Restores
To restore a backup:
- Go to the Backups tab of your cluster.
- Click the + button to display the list of your backups.
- Find the backup you wish to restore and click the Restore button (with a rounded arrow icon).
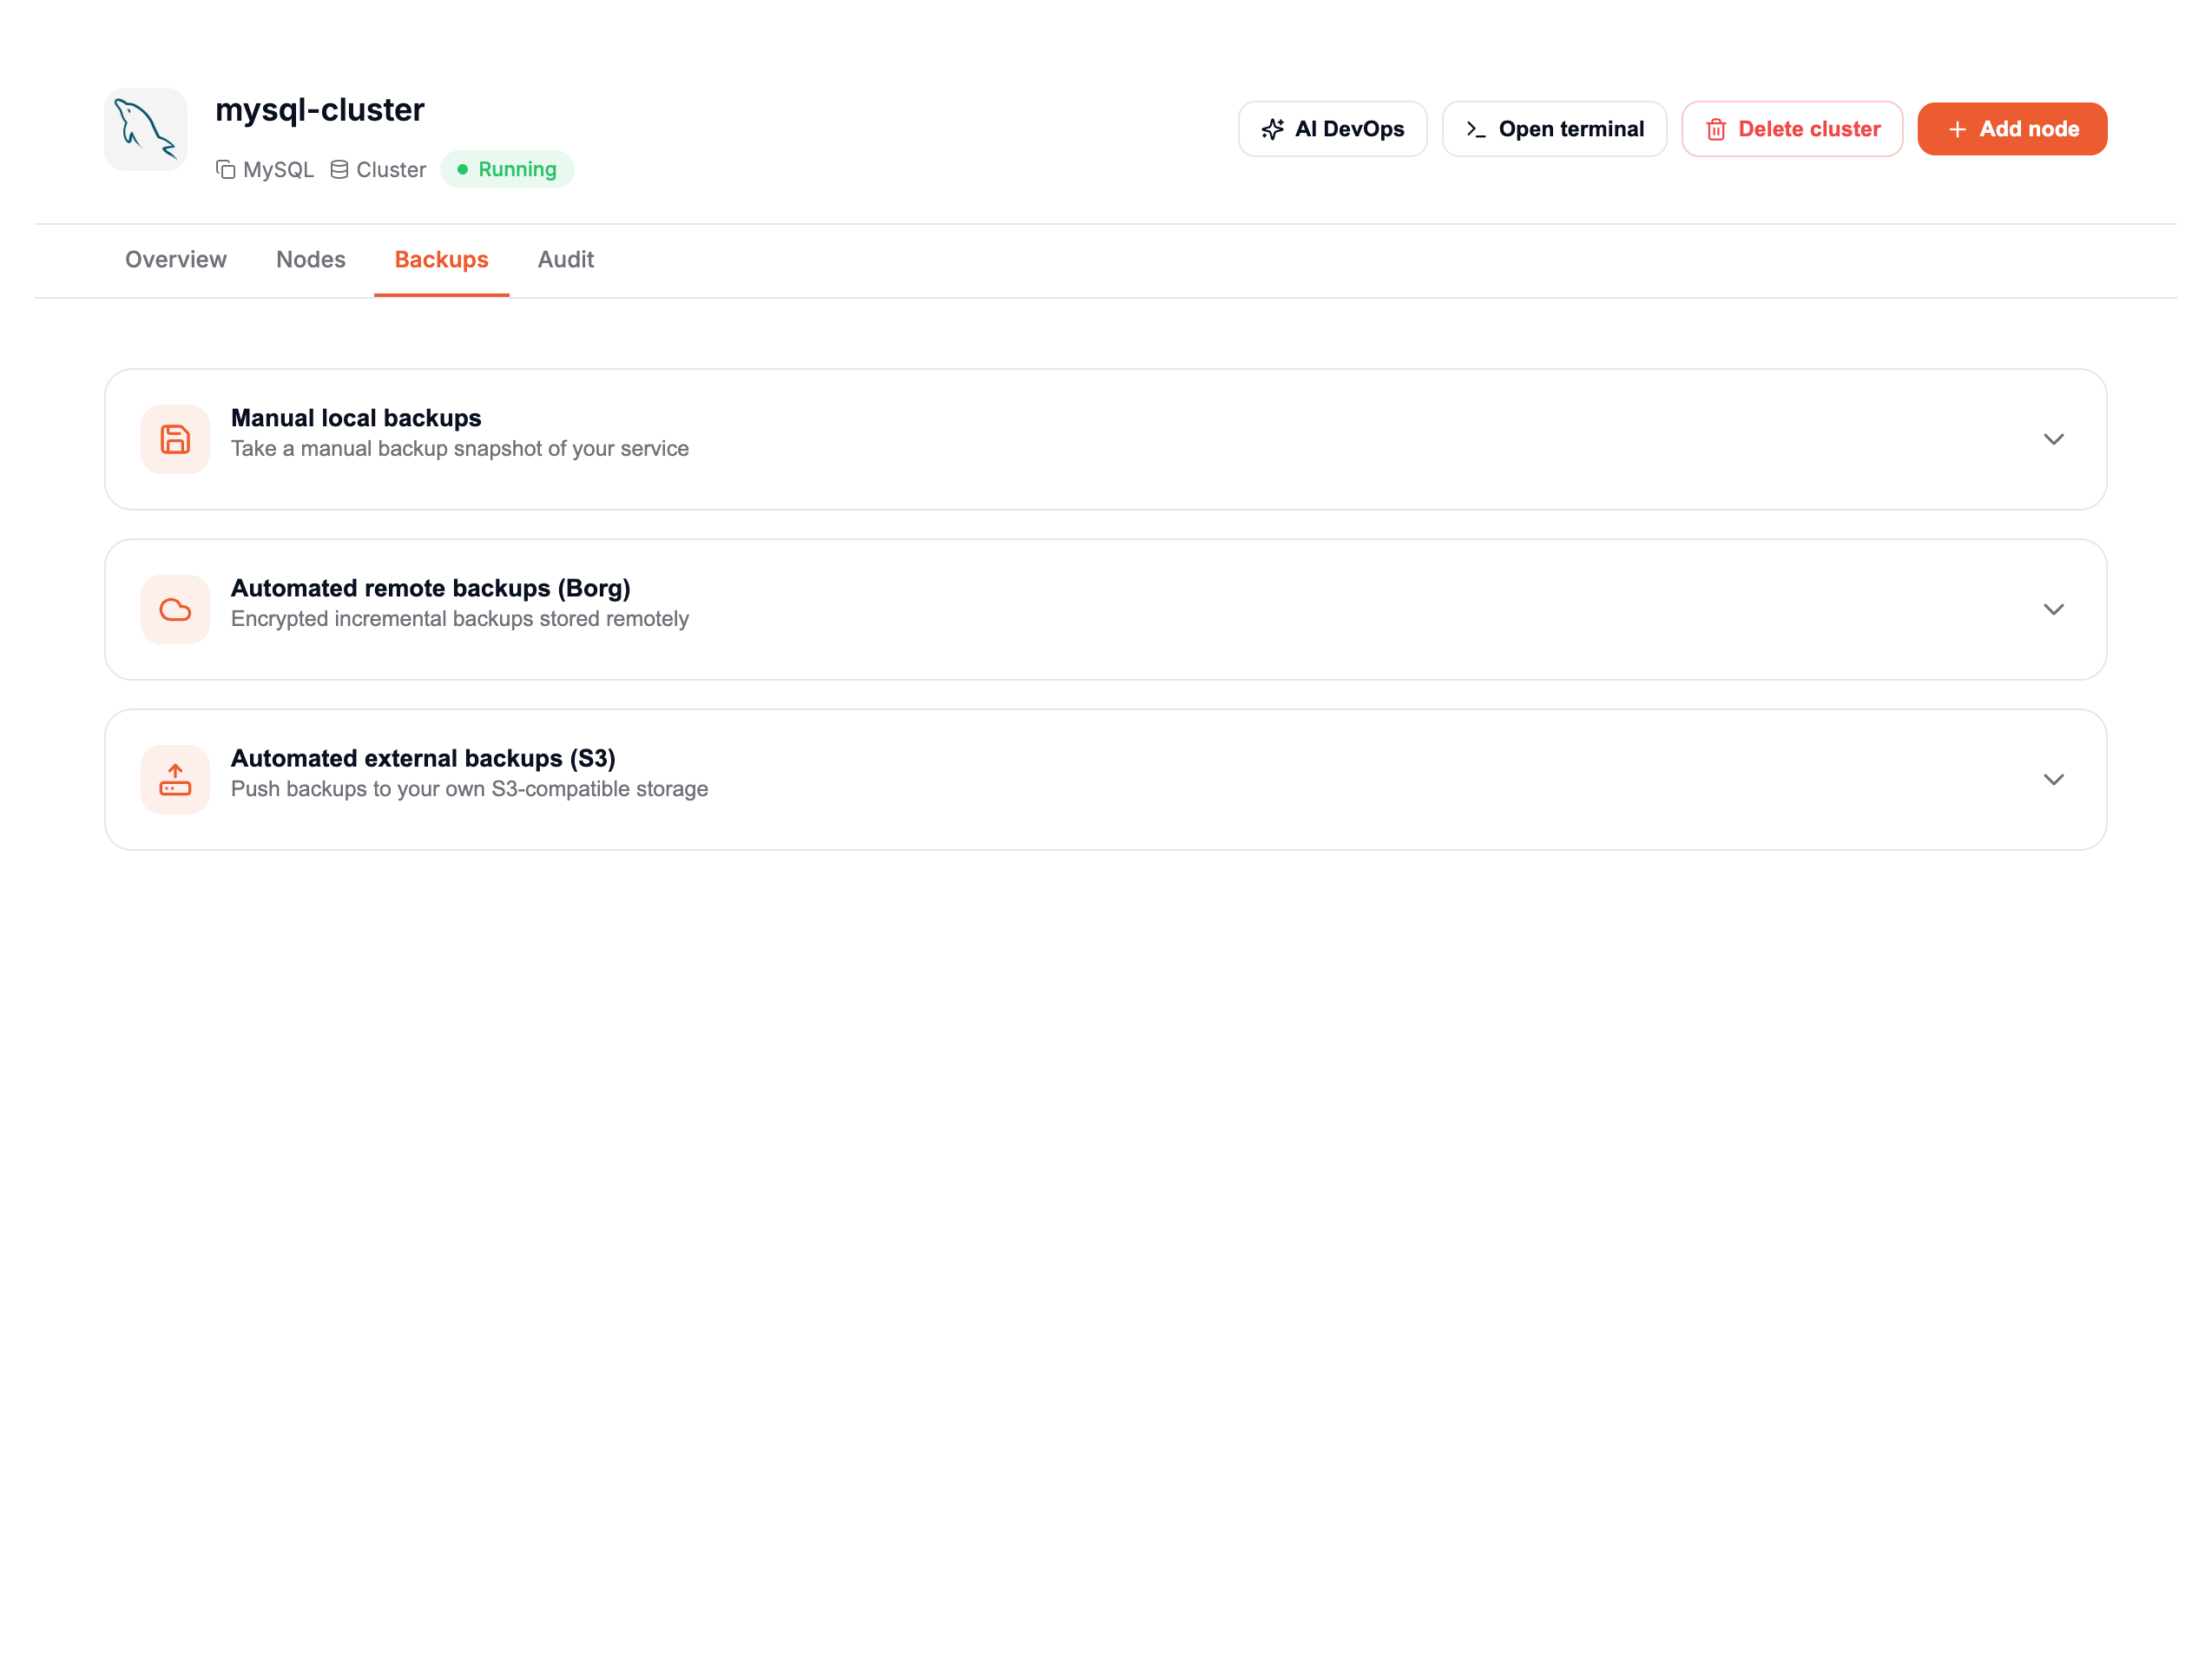
A popup will appear to confirm that the restore process is in progress.
⚠ WARNING: During the restoration process, your cluster will experience temporary downtime in two phases: :::1. Primary Node Downtime: The Primary node will be offline until the restoration process is complete. 2. Replica Downtime: Once the Primary is fully restored and running, all Replicas will be taken offline to be reset and synchronized:
- Each Replica will be reset from scratch.
- After being cleared and reconfigured to point to the Primary, each Replica will be restored using a backup directly from the Primary node to ensure full synchronization.
Once the process is complete, you will receive an email notifying you that your cluster is active and operational again.
Limit access per IP
If you want to restrict your cluster to specific IPs for enhanced security, follow these steps:
- Go to the Overview tab.
- Click on the Limit Access per IP button.
A popup will appear where you can configure IP restrictions:
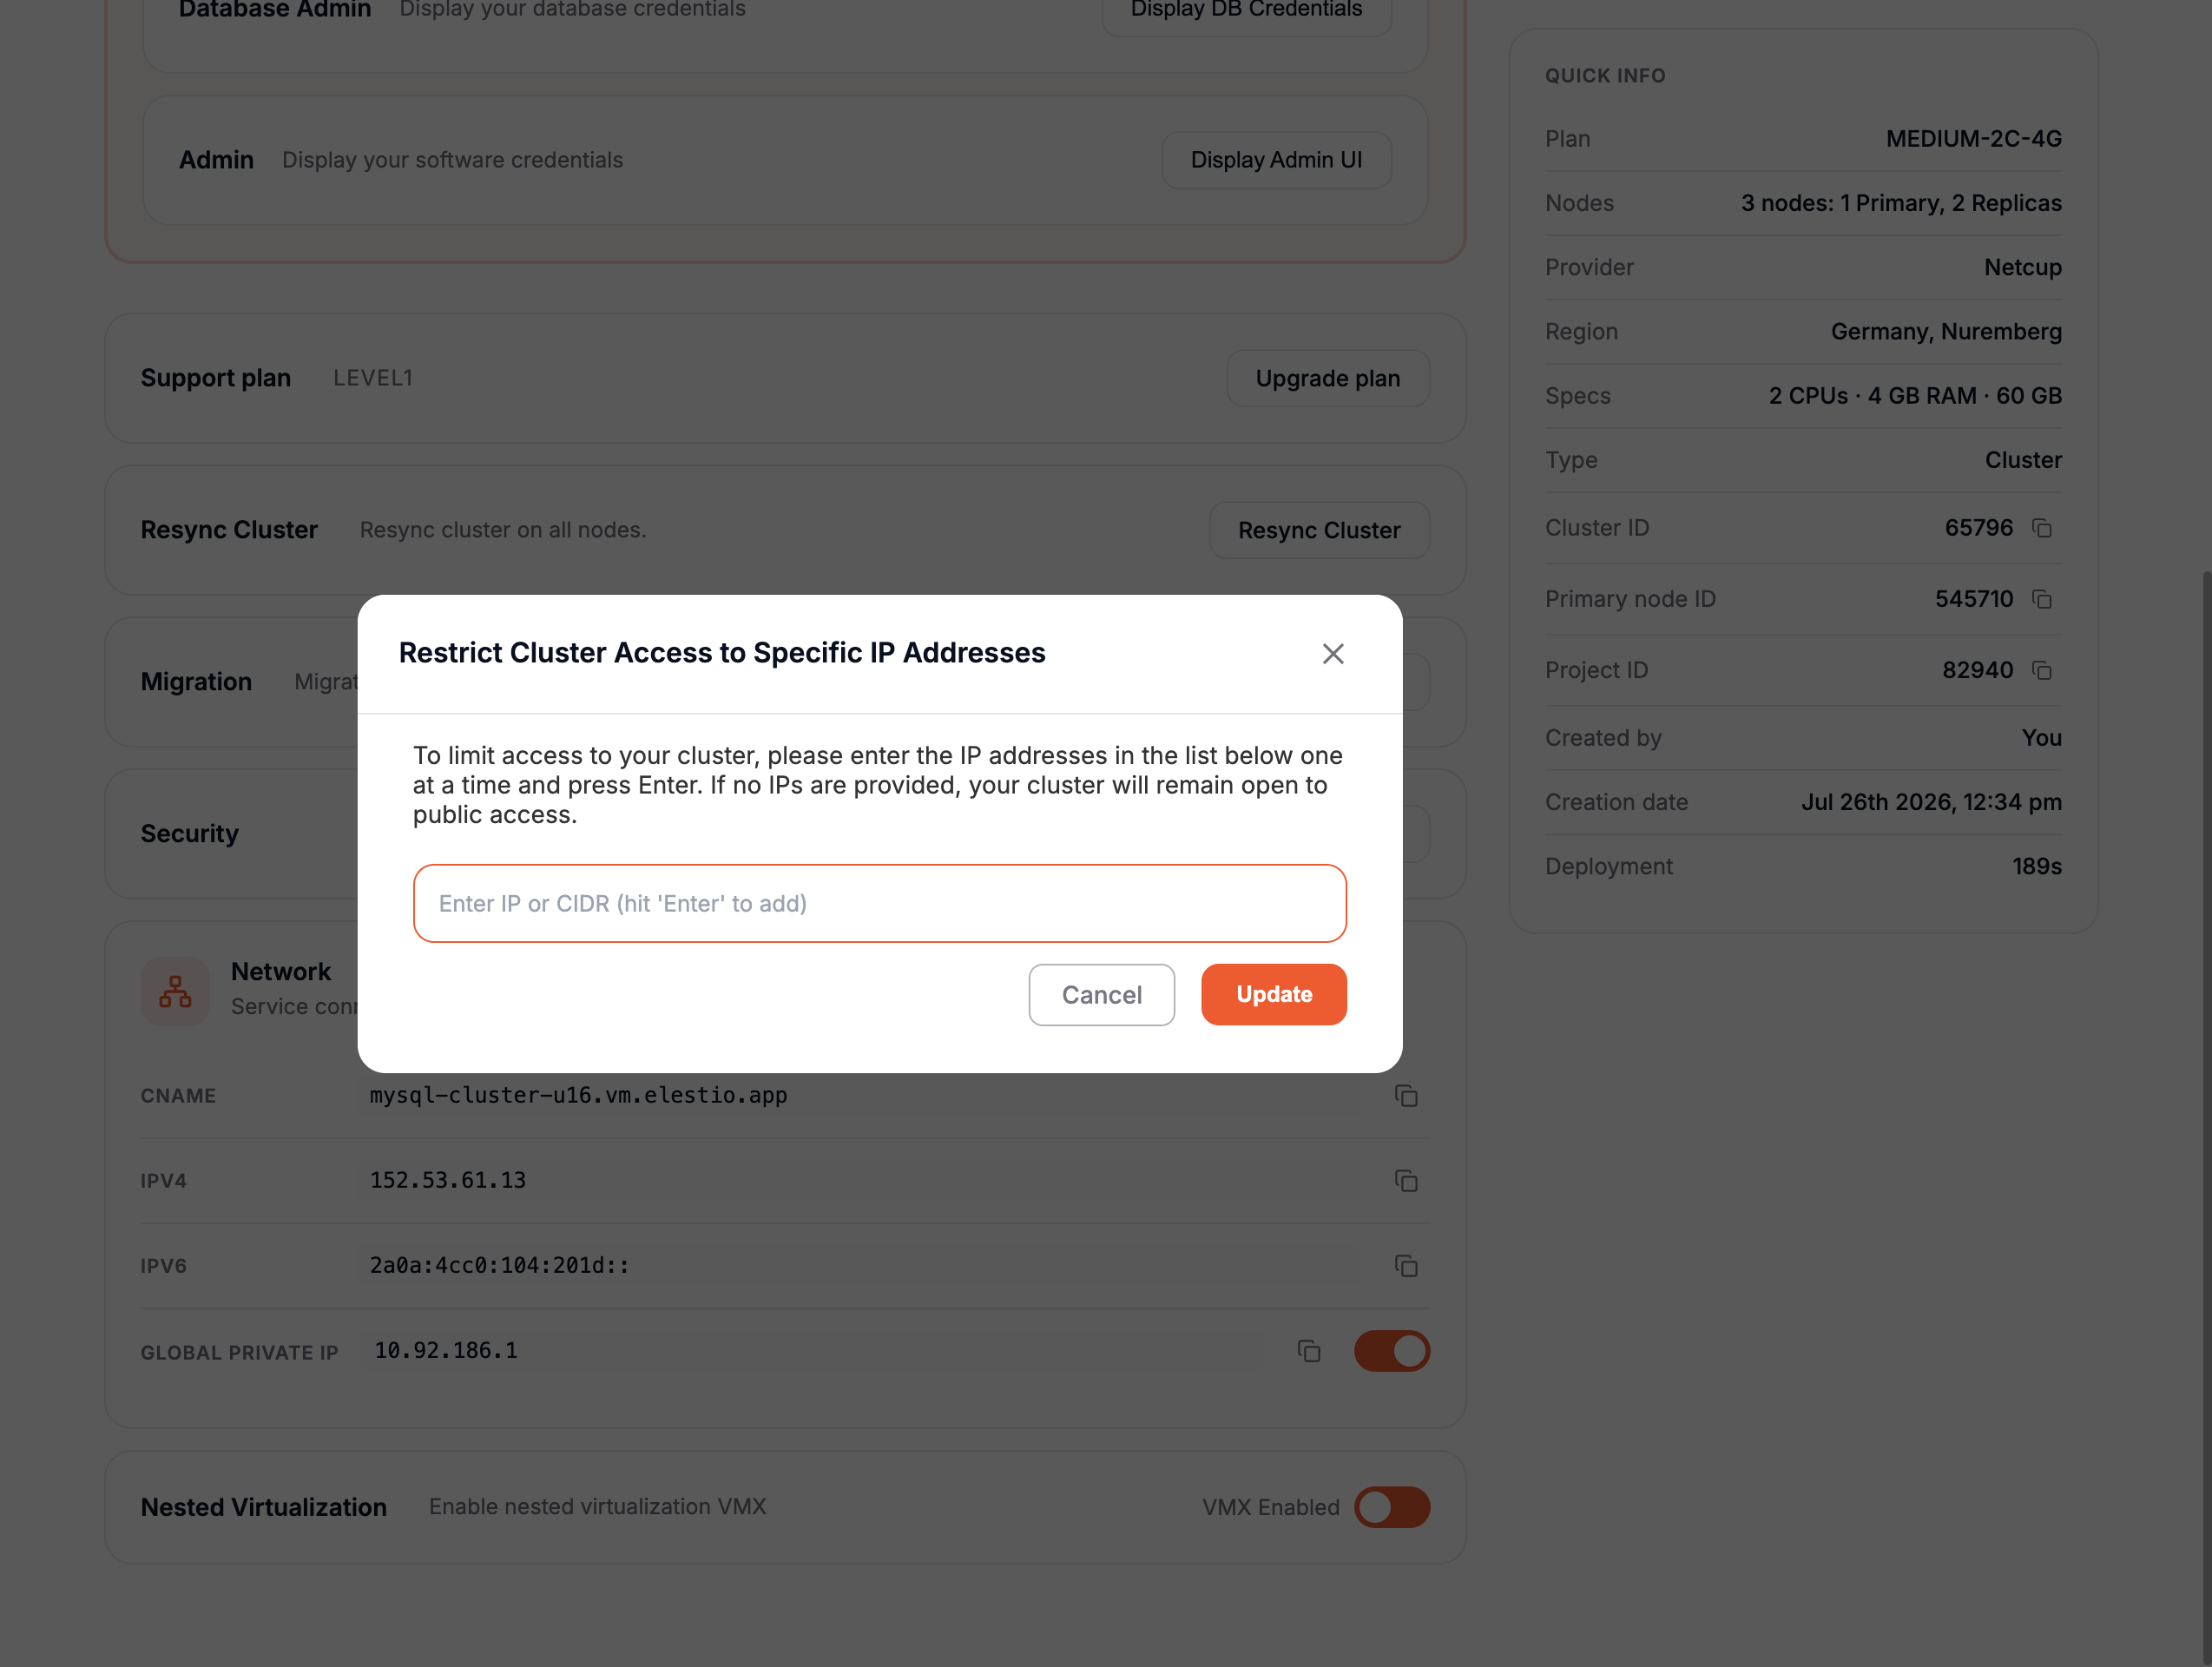
- In the text field, add the IPv4 or IPv6 address you want to allow access to your cluster.
- Add one IP at a time. After entering an IP, press the Enter key. The IP will appear at the top of the text field.
- Repeat this process to add more IPs as needed.
Once you've added all the IPs, click the Update button. All nodes in your cluster will automatically adopt these IP restrictions—no need to configure each node individually.
Removing IPs
If you want to remove an IP:
- Click the cross (X) button next to the IP you want to delete.
- Click Update to apply the changes.
If no IPs are listed in this section, your cluster will be open to all IPs.
Adding New Nodes
If you've configured IP restrictions and later add a new node, the new node will automatically inherit the existing IP restrictions.
Cluster resynchronization
If one or more Replica nodes are unhealthy or desynchronized, you can resynchronize them with the Primary node by following these steps:
- Go to the Overview tab of your cluster.
- Click on the Resync Cluster button.
A confirmation popup will appear to ensure you want to resync your cluster.
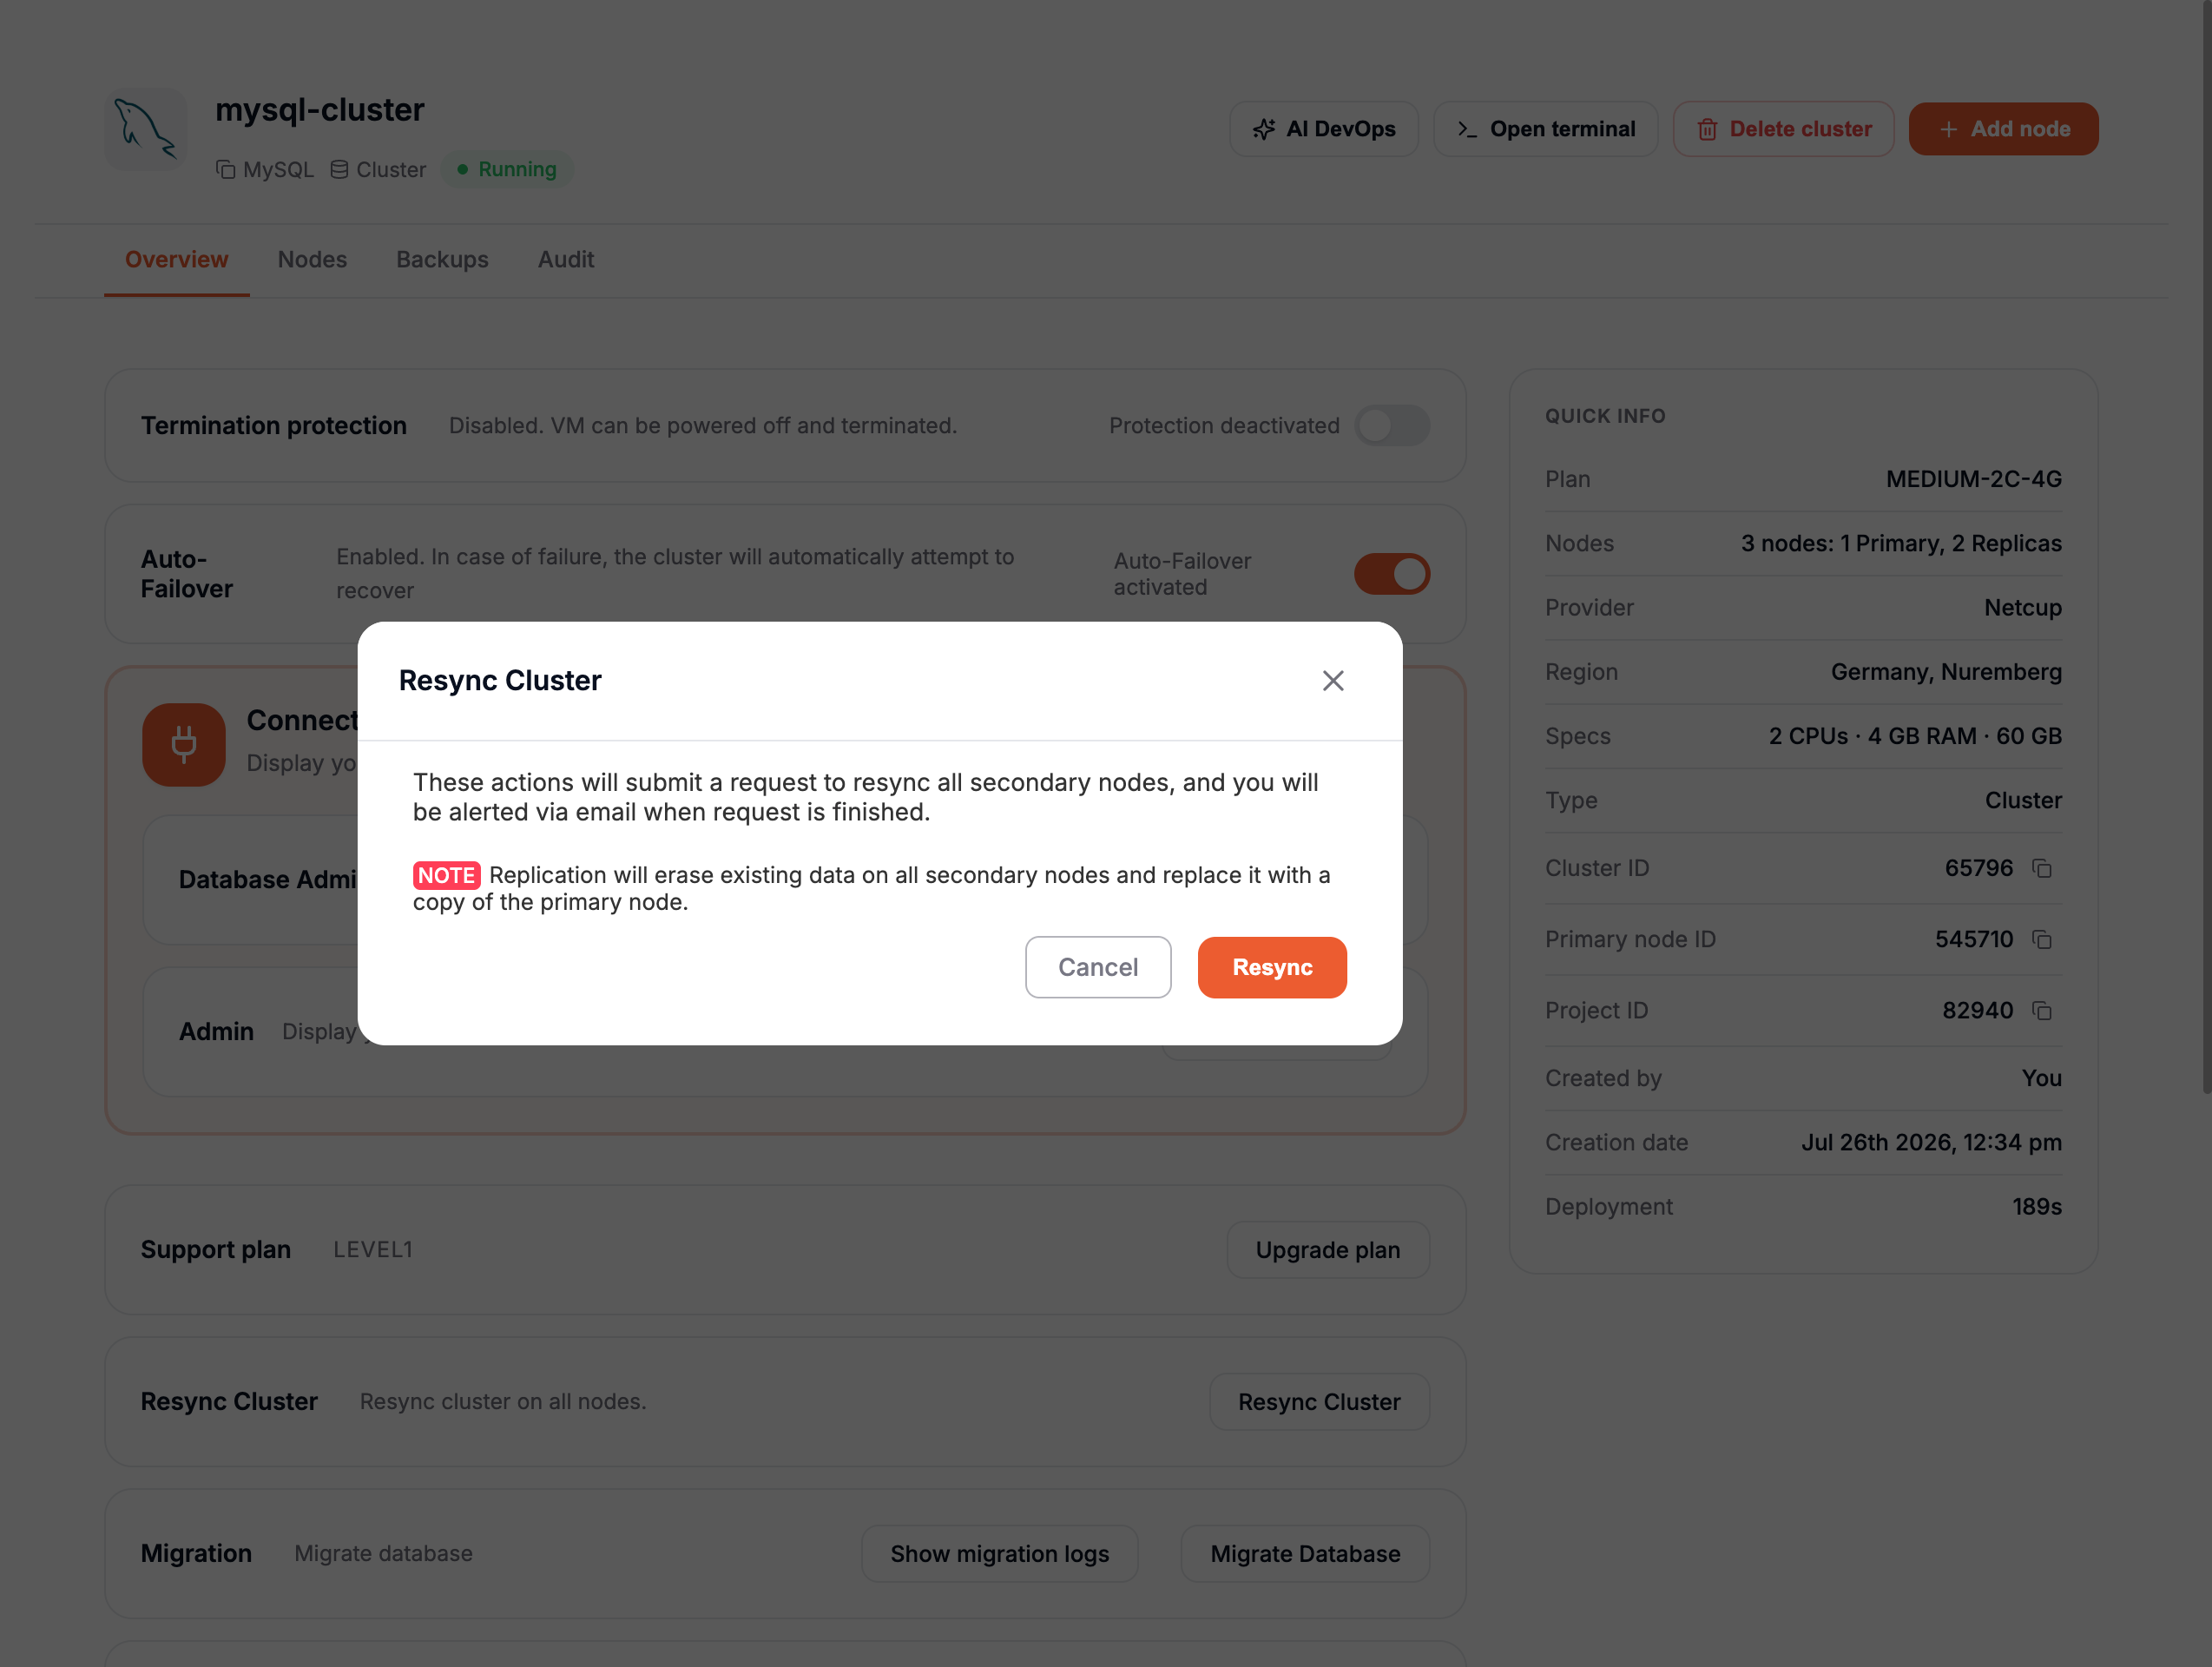
Resynchronization Process
-
Health Check of the Primary:
- Before the resynchronization begins, a health check is performed on the Primary node to ensure the process can proceed successfully.
- If the Primary is unhealthy, a warning popup will appear, and the process will stop.
- If the Primary is healthy, the resynchronization process will continue.
-
Replica Reconfiguration:
- All Replica nodes will be reset from scratch.
- Once cleared, each Replica will be reconfigured to point to the Primary.
- A backup from the Primary node will then be restored to each Replica to ensure full synchronization.
⚠ WARNING: During the resynchronization process, only the Replicas will be temporarily unavailable. The Primary node will remain operational. :::Once the process is complete, you will receive an email notifying you that your cluster is active and operational again.
Database migrations
If you want to migrate an existing database to your cluster, you can do so easily by following these steps:
- Go to the Overview tab of your cluster.
- Click on the Migrate Database button.
Migration Process
-
Start the Migration:
- A popup will appear.
- Click on the Get Started button.
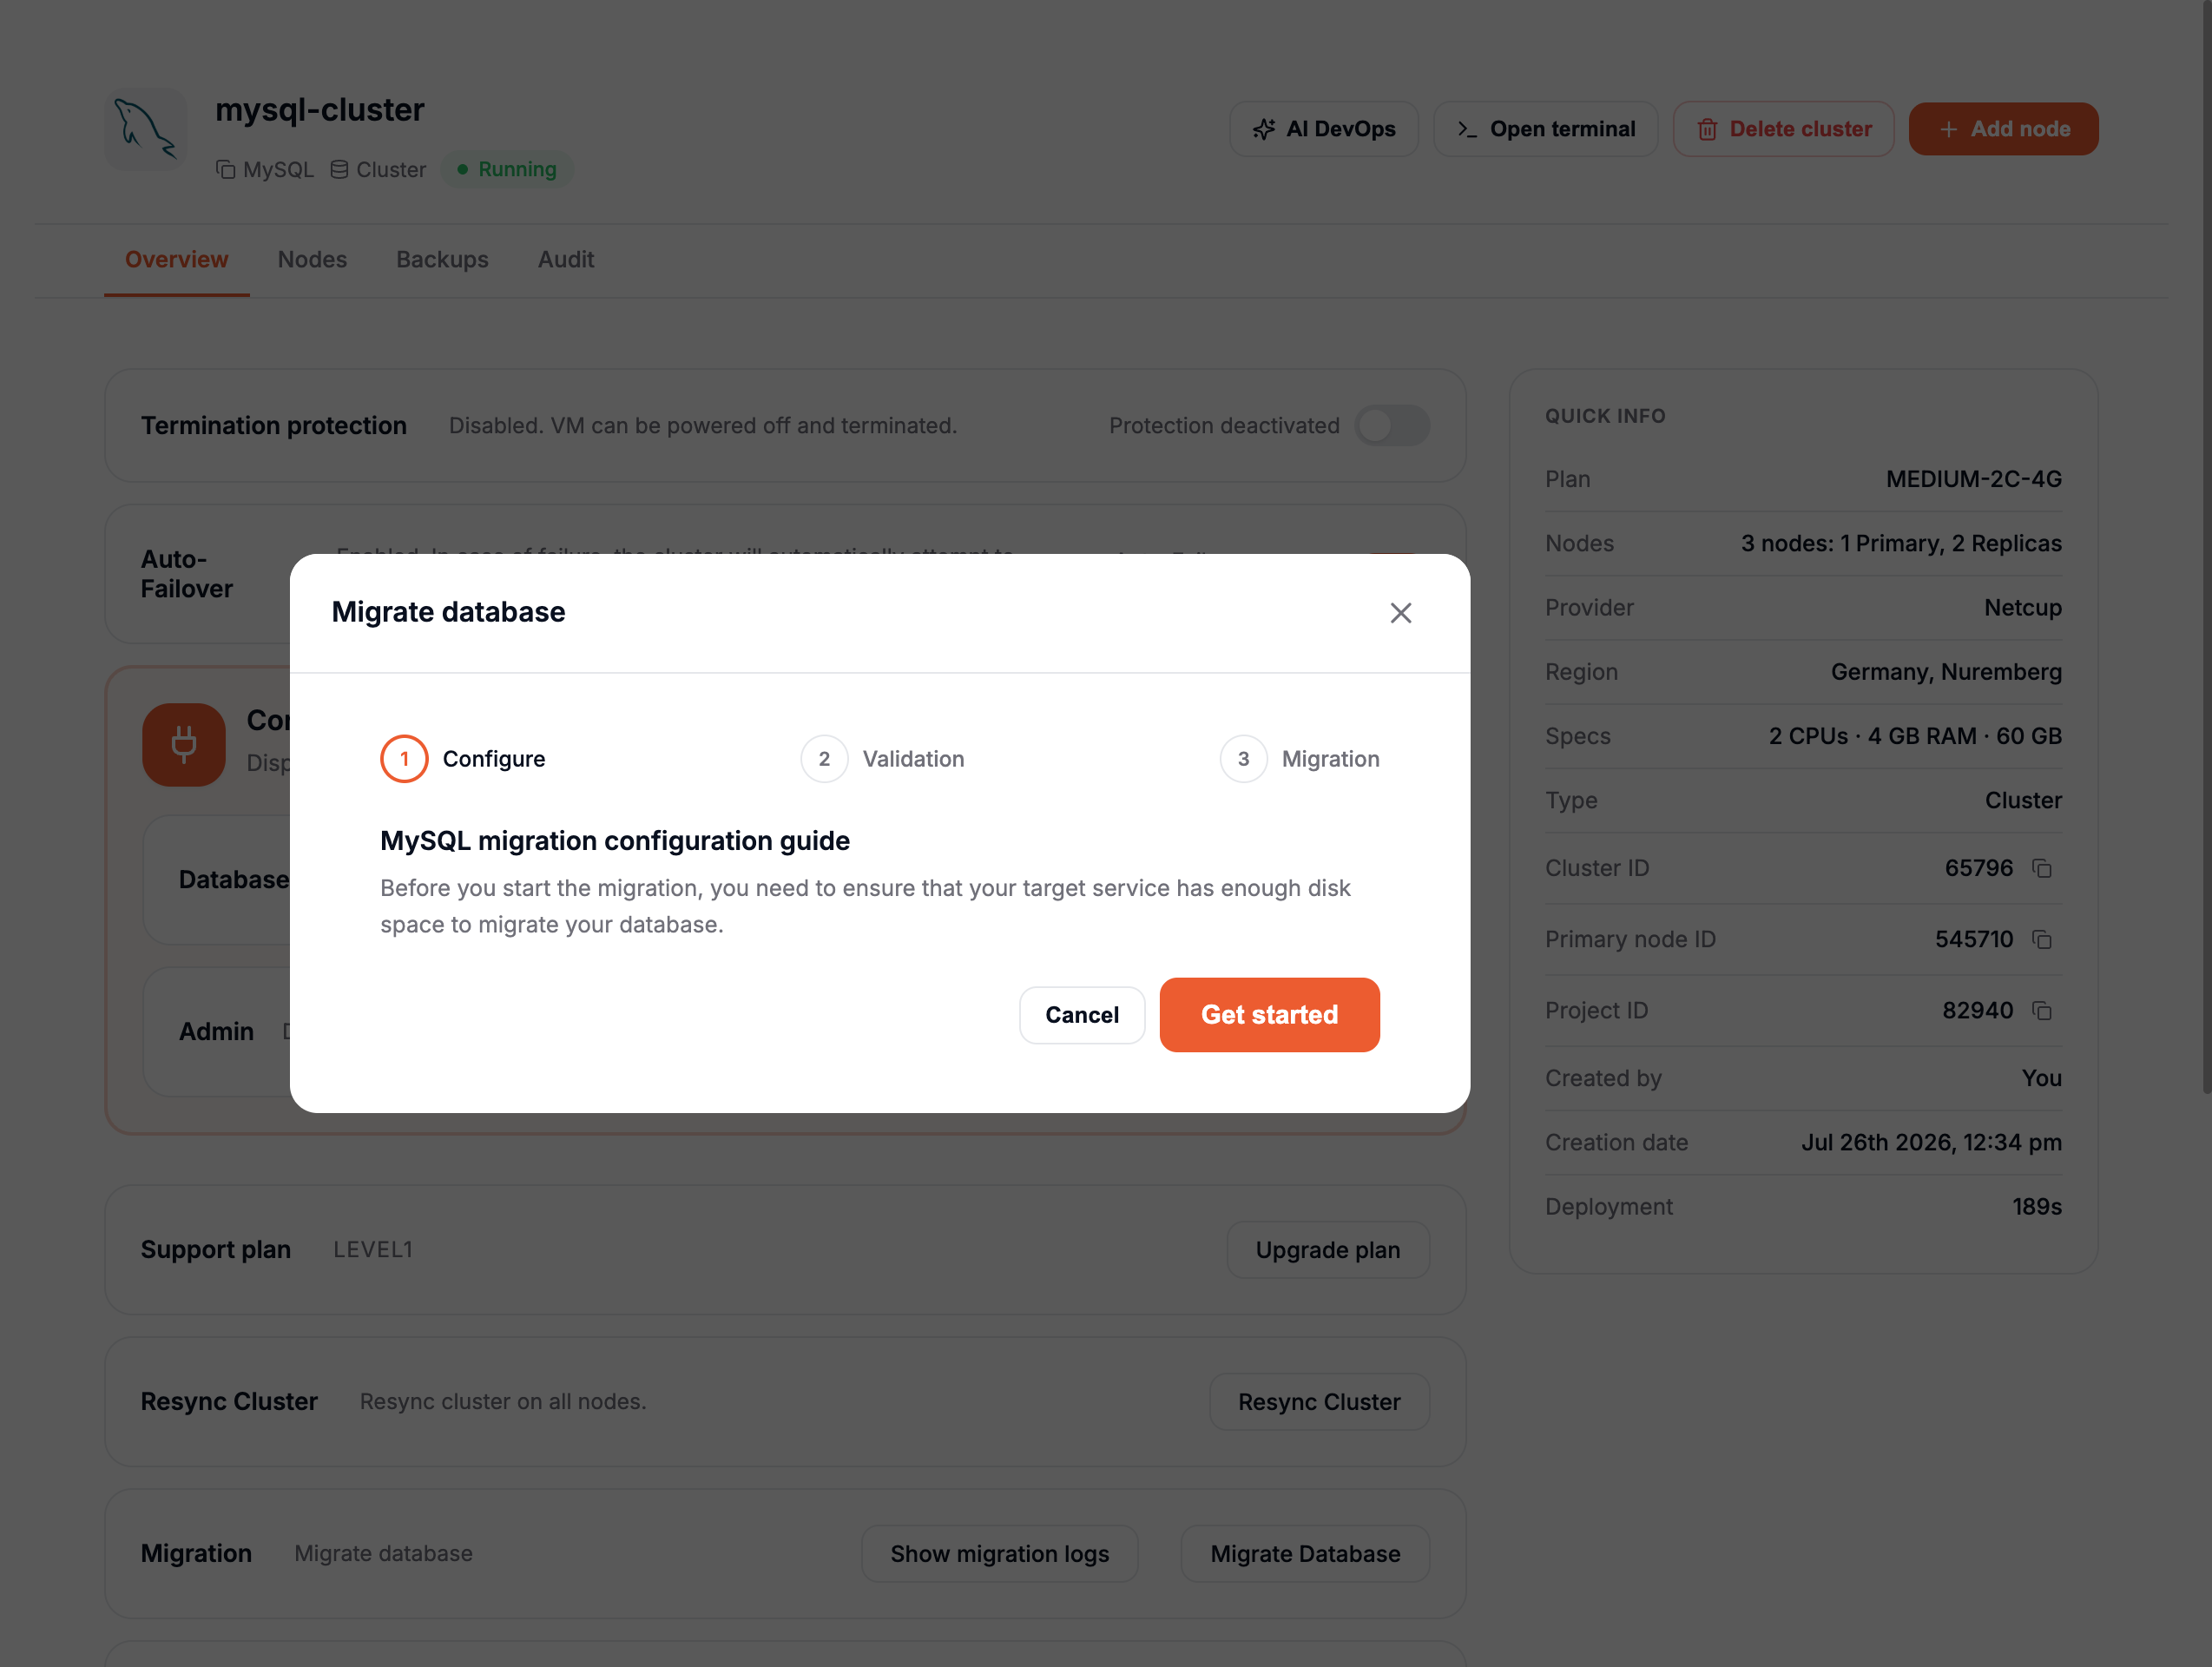
- A second page will appear where you'll need to enter the credentials of your source database.
- Once entered, click the Run Check button to validate the credentials and connection.
-
Begin the Migration:
- If the check is successful, a third page will appear.
- Click the Start Migration button to begin the migration process.
-
Primary and Replica Synchronization:
- The migration will be performed on the Primary Node.
- Once completed, all Replicas will be reconfigured as follows:
- Replicas will be reset from scratch.
- After being cleared and reconfigured to point to the Primary, each Replica will be restored with a backup directly from the Primary node to ensure full synchronization
During the migration process, your cluster will be temporarily unavailable.
Once the process is complete, you will receive an email notifying you that your cluster is active and operational again.
Delete a cluster
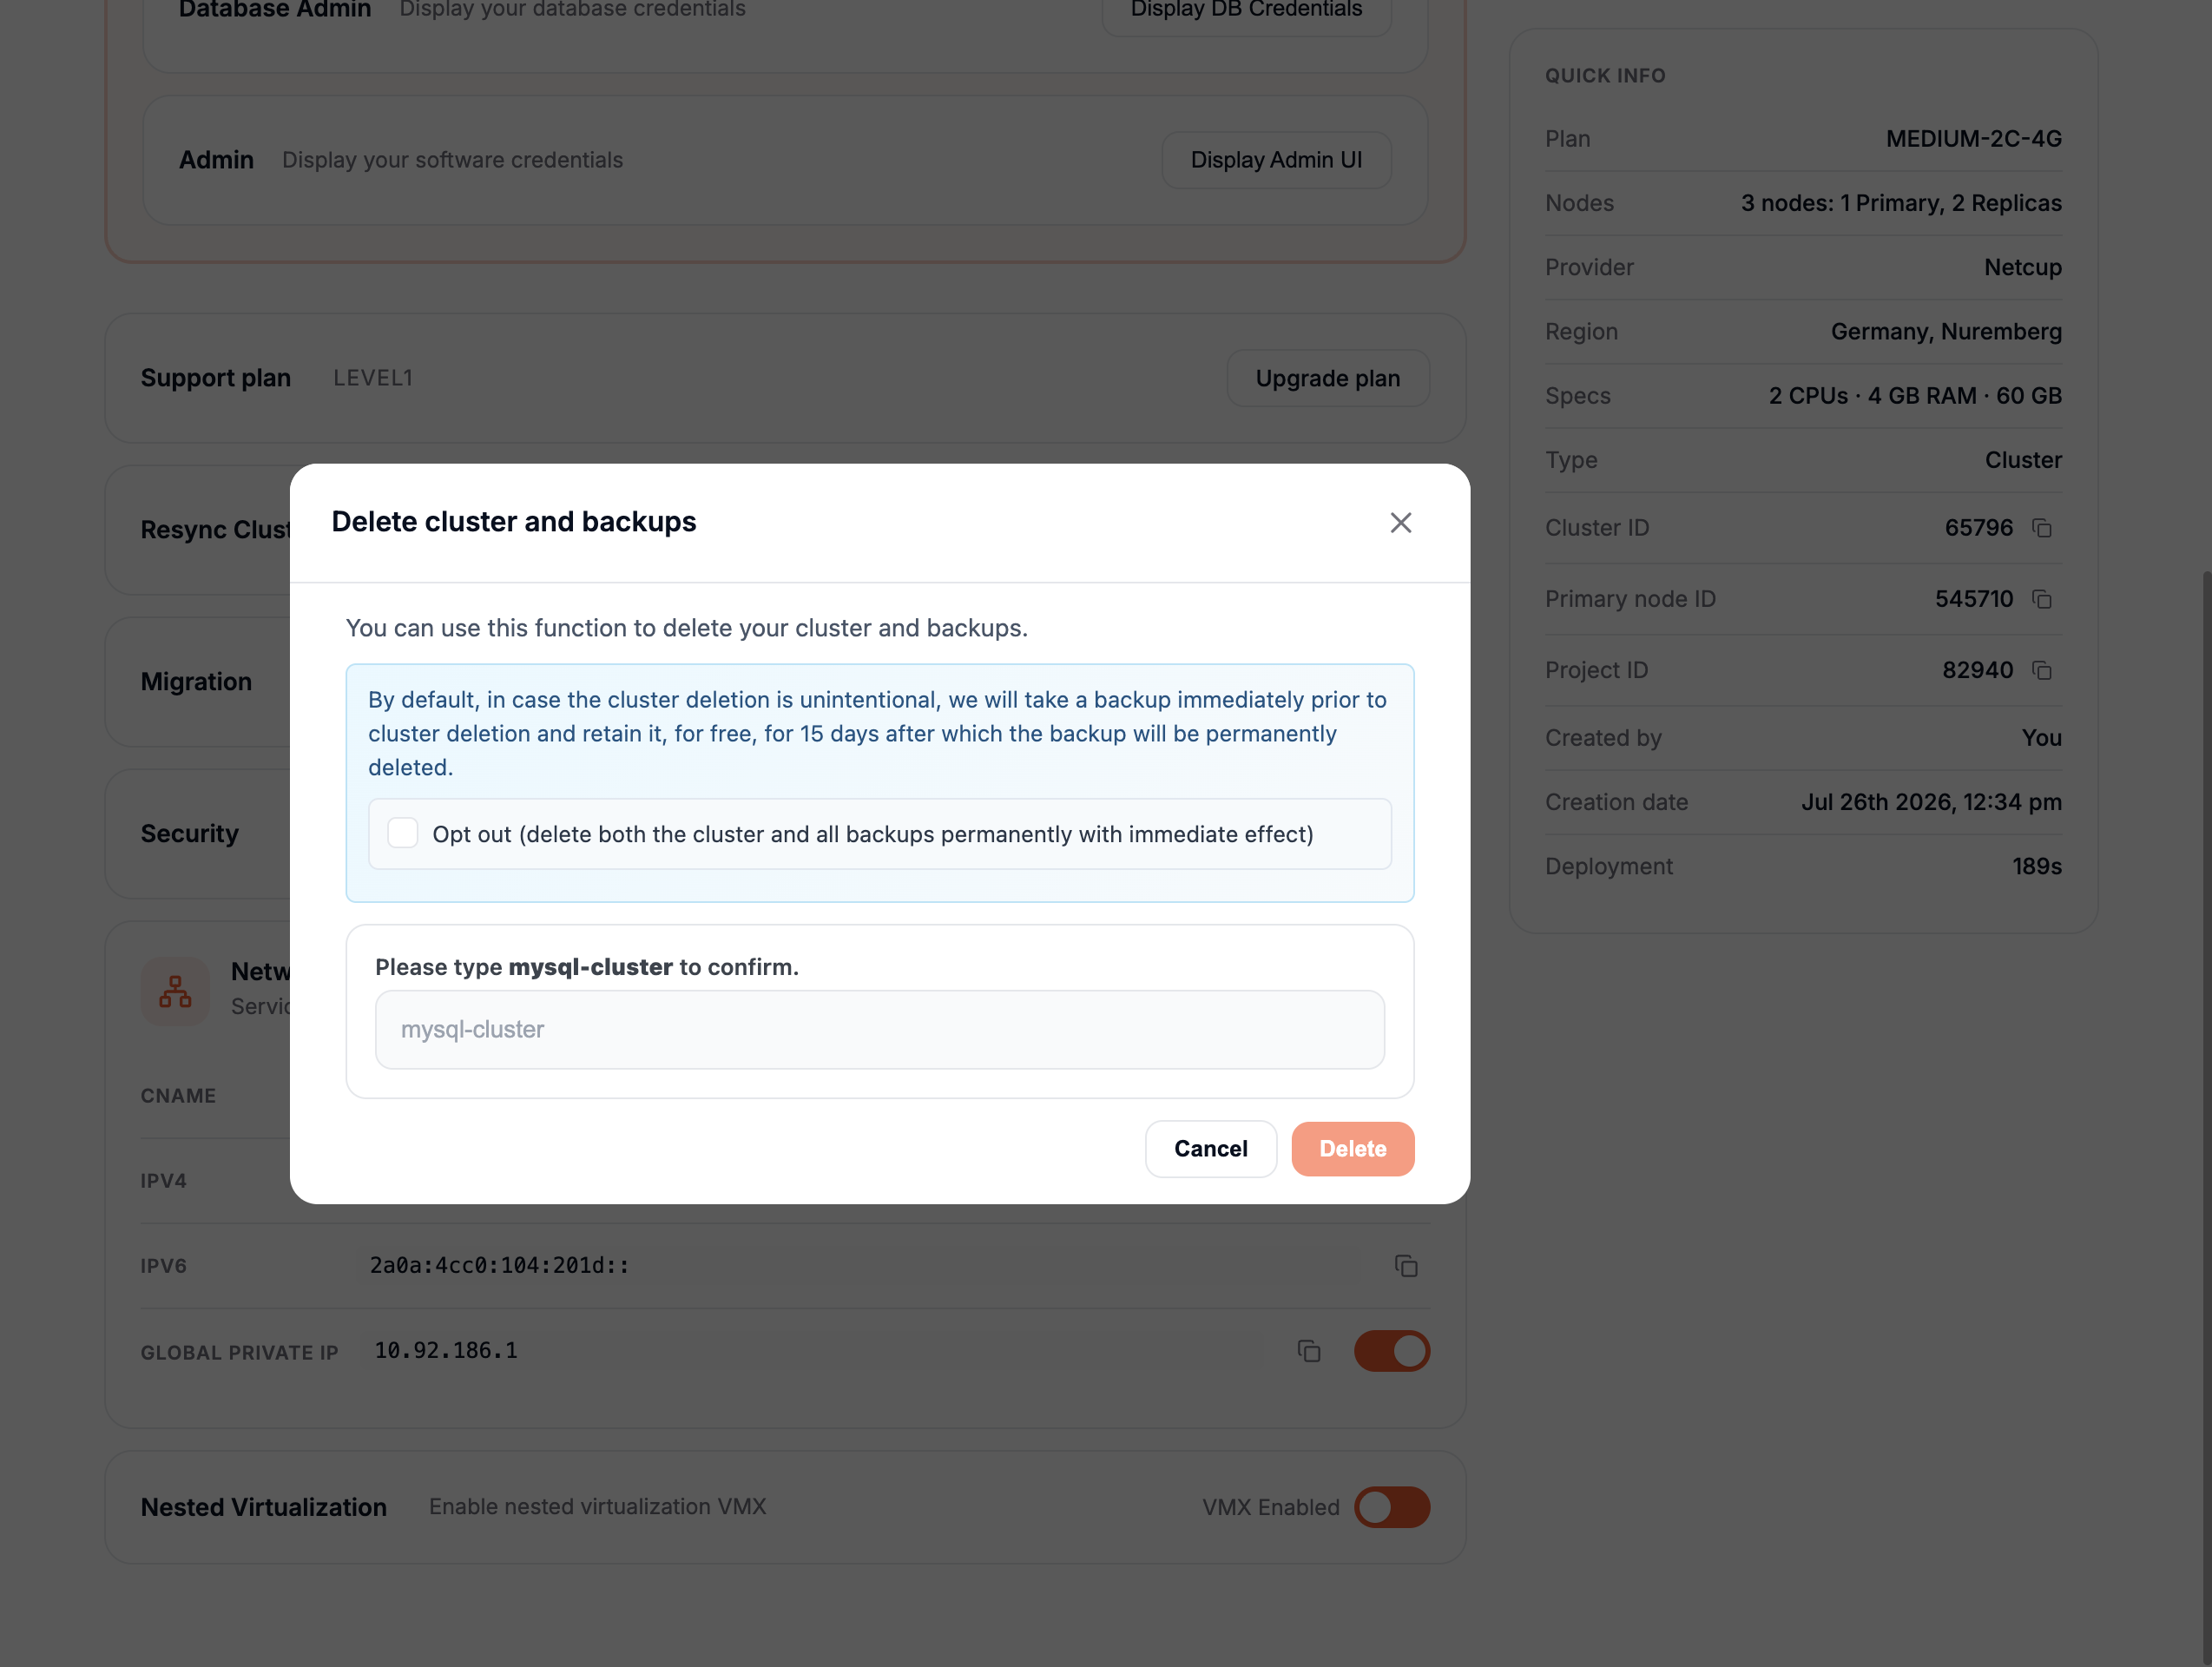
If you want to delete your cluster, follow these steps:
- Go to the Overview tab of your cluster.
- Click on the Delete Cluster button located in the top-right corner.
A confirmation popup will appear to ensure you want to proceed.
- Enter the name of your cluster in the text field to confirm the deletion.
- Click on the Delete button.
Once confirmed, your entire cluster will be deleted.