Connect to MySQL
Connect to your Elestio MySQL database from Node.js, Python, PHP, Go, Java, phpMyAdmin, and the mysql CLI.
Connecting with Node.js
This guide explains how to establish a connection between a Node.js application and a MySQL database using the mysql2 package. It walks through the necessary setup, configuration, and execution of a simple SQL query.
Variables
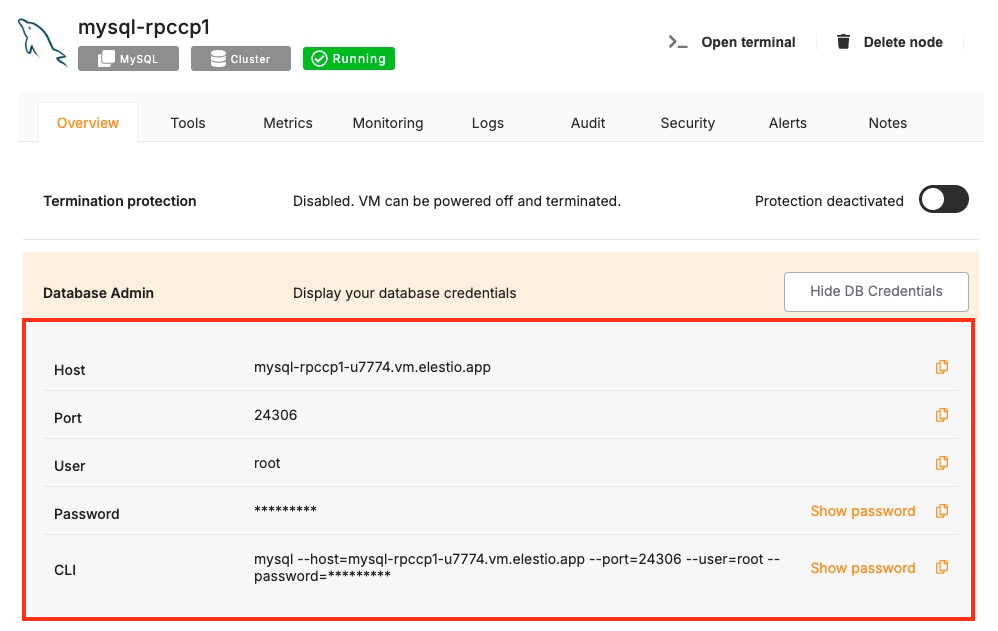
Certain parameters must be provided to establish a successful connection to a MySQL database. Below is a breakdown of each required variable, its purpose, and where to find it. Here’s what each variable represents:
| Variable | Description | Purpose |
|---|---|---|
USER | MySQL username, from the Elestio service overview page | Identifies the database user who has permission to access the MySQL database. |
PASSWORD | MySQL password, from the Elestio service overview page | The authentication key is required for the specified USER to access the database. |
HOST | Hostname for MySQL connection, from the Elestio service overview page | The address of the server hosting the MySQL database. |
PORT | Port for MySQL connection, from the Elestio service overview page | The network port used to connect to MySQL. The default port is 3306. |
DATABASE | Database Name for MySQL connection, from the Elestio service overview page | The name of the database being accessed. A MySQL instance can contain multiple databases. |
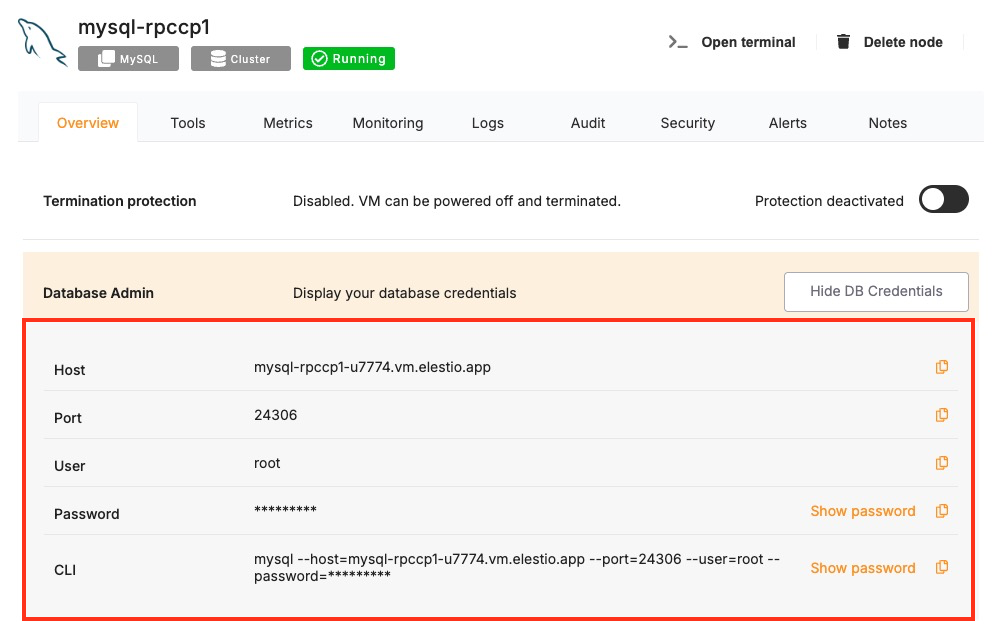
These values can usually be found in the Elestio service overview details as shown in the image below, make sure to take a copy of these details and add it to the code moving ahead.
Prerequisites
-
Install Node.js and NPM
- Check if Node.js is installed by running:
node -v
- Check if Node.js is installed by running:
-
- If not installed, download it from nodejs.org and install. Additionally, verify npm installation:
npm -v
- If not installed, download it from nodejs.org and install. Additionally, verify npm installation:
-
Install the mysql2 Package
- The mysql2 package enables Node.js applications to interact with MySQL. Install it using:
npm install mysql2 --save
- The mysql2 package enables Node.js applications to interact with MySQL. Install it using:
Code
Once all prerequisites are set up, create a new file named mysql.js and add the following code:
const mysql = require("mysql2");

// Database connection configuration
const config = {
  host: "HOST",
  user: "USER",
  password: "PASSWORD",
  database: "DATABASE",
  port: PORT,
};

// Create a MySQL connection
const connection = mysql.createConnection(config);

// Connect to the database
connection.connect((err) => {
  if (err) {
    console.error("Connection failed:", err);
    return;
  }
  console.log("Connected to MySQL");

  // Run a test query to check the MySQL version
  connection.query("SELECT VERSION() AS version", (err, results) => {
    if (err) {
      console.error("Query execution failed:", err);
      connection.end();
      return;
    }

    console.log("MySQL Version:", results[0]);

    // Close the database connection
    connection.end((err) => {
      if (err) console.error("Error closing connection:", err);
    });
  });
});
To execute the script, open the terminal or command prompt and navigate to the directory where mysql.js is located. Once in the correct directory, run the script with the command:
node mysql.js
If the connection is successful, the terminal will display output similar to:
Connected to MySQL
MySQL Version: { version: '8.0.41' }
Connecting with Python
This guide explains how to establish a connection between a Python application and a MySQL database using the mysql-connector-python package. It walks through the necessary setup, configuration, and execution of a simple SQL query.
Variables
Certain parameters must be provided to establish a successful connection to a MySQL database. Below is a breakdown of each required variable, its purpose, and where to find it. Here’s what each variable represents:
| Variable | Description | Purpose |
|---|---|---|
USER | MySQL username, from the Elestio service overview page | Identifies the database user who has permission to access the MySQL database. |
PASSWORD | MySQL password, from the Elestio service overview page | The authentication key is required for the specified USER to access the database. |
HOST | Hostname for MySQL connection, from the Elestio service overview page | The address of the server hosting the MySQL database. |
PORT | Port for MySQL connection, from the Elestio service overview page | The network port used to connect to MySQL. The default port is 3306. |
DATABASE | Database Name for MySQL connection, from the Elestio service overview page | The name of the database being accessed. A MySQL instance can contain multiple databases. |
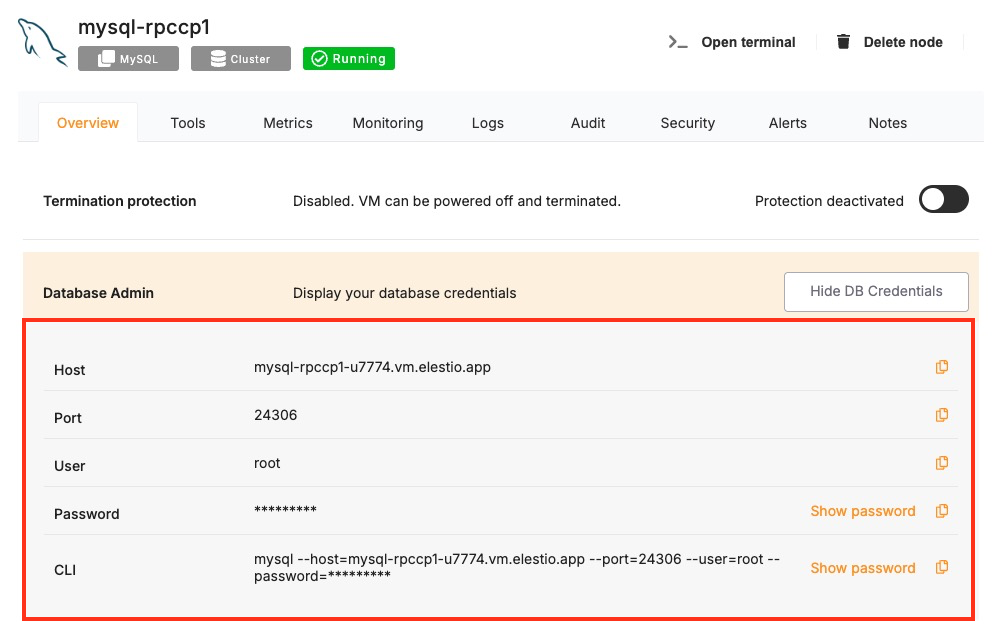
These values can usually be found in the Elestio service overview details as shown in the image below, make sure to take a copy of these details and add it to the code moving ahead.
Prerequisites
-
Install Python
- Check if Python is installed by running:
python --version - If not installed, download it from python.org and install it.
- Check if Python is installed by running:
-
Install the
mysql-connector-pythonPackage- The mysql-connector-python package enables Python applications to interact with MySQL. Install it using:
pip install mysql-connector-python
- The mysql-connector-python package enables Python applications to interact with MySQL. Install it using:
Code
Once all prerequisites are set up, create a new file named mysql_connect.py and add the following code:
import mysql.connector

# Database connection configuration
config = {
    "host": "HOST",
    "user": "USER",
    "password": "PASSWORD",
    "database": "DATABASE",
    "port": PORT
}

try:
    # Establish the connection
    connection = mysql.connector.connect(**config)
    print("Connected to MySQL")

    # Create a cursor and execute a test query
    cursor = connection.cursor()
    cursor.execute("SELECT VERSION()")

    # Fetch and print the result
    version = cursor.fetchone()
    print("MySQL Version:", version[0])

except mysql.connector.Error as err:
    print("Connection failed:", err)

finally:
    if 'cursor' in locals():
        cursor.close()
    if 'connection' in locals() and connection.is_connected():
        connection.close()
        print("Connection closed")
To execute the script, open the terminal or command prompt and navigate to the directory where mysql_connect.py is located. Once in the correct directory, run the script with the command:
python mysql_connect.py
If the connection is successful, the terminal will display output similar to:
Connected to MySQL
MySQL Version: 8.0.41
Connection closed
Connecting with PHP
This guide explains how to establish a connection between a PHP application and a MySQL database using the mysqli extension. It walks through the necessary setup, configuration, and execution of a simple SQL query.
Variables
Certain parameters must be provided to establish a successful connection to a MySQL database. Below is a breakdown of each required variable, its purpose, and where to find it. Here’s what each variable represents:
| Variable | Description | Purpose |
|---|---|---|
| USER | MySQL username, from the Elestio service overview page | Identifies the database user who has permission to access the MySQL database. |
| PASSWORD | MySQL password, from the Elestio service overview page | The authentication key is required for the specified USER to access the database. |
| HOST | Hostname for MySQL connection, from the Elestio service overview page | The address of the server hosting the MySQL database. |
| PORT | Port for MySQL connection, from the Elestio service overview page | The network port used to connect to MySQL. The default port is 3306. |
| DATABASE | Database Name for MySQL connection, from the Elestio service overview page | The name of the database being accessed. A MySQL instance can contain multiple databases. |
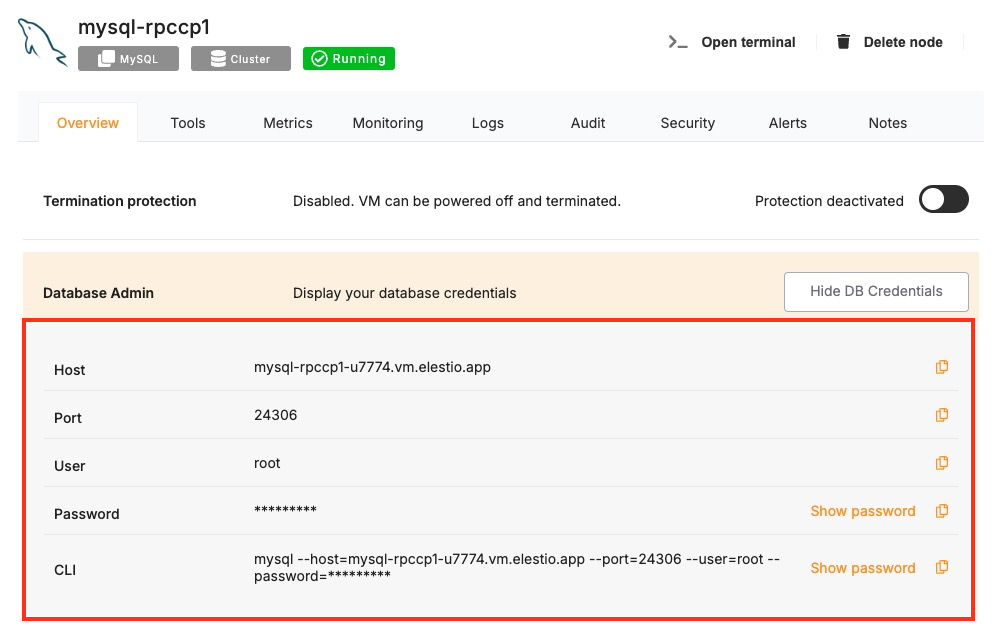
These values can usually be found in the Elestio service overview details as shown in the image below, make sure to take a copy of these details and add it to the code moving ahead.
Prerequisites
- Install PHP
- Check if PHP is installed by running:
php -v - If not installed, download it from php.net and install.
- Make sure the mysqli extension is enabled in your php.ini configuration.
- Check if PHP is installed by running:
Code
Once all prerequisites are set up, create a new file named mysql_connect.php and add the following code:
<?php
$host = "HOST";
$user = "USER";
$password = "PASSWORD";
$database = "DATABASE";
$port = PORT;

// Create connection
$conn = new mysqli($host, $user, $password, $database, $port);

// Check connection
if ($conn->connect_error) {
    die("Connection failed: " . $conn->connect_error);
}
echo "Connected to MySQL<br>";

// Run a test query to check the MySQL version
$result = $conn->query("SELECT VERSION()");

if ($result) {
    $row = $result->fetch_assoc();
    echo "MySQL Version: " . $row["VERSION()"];
    $result->free();
} else {
    echo "Query execution failed: " . $conn->error;
}

// Close connection
$conn->close();
?>
To execute the script, run the PHP server in the directory where mysql_connect.php is located using:
php -S localhost:8000
Then, open a browser and go to:
http://localhost:8000/mysql_connect.php
If the connection is successful, the browser will display output similar to:
Connected to MySQL
MySQL Version: 8.0.36
Connecting with Go
This guide explains how to establish a connection between a Go application and a MySQL database using the go-sql-driver/mysql package. It walks through the necessary setup, configuration, and execution of a simple SQL query.
Variables
Certain parameters must be provided to establish a successful connection to a MySQL database. Below is a breakdown of each required variable, its purpose, and where to find it. Here’s what each variable represents:
| Variable | Description | Purpose |
|---|---|---|
USER | MySQL username, from the Elestio service overview page | Identifies the database user who has permission to access the MySQL database. |
PASSWORD | MySQL password, from the Elestio service overview page | The authentication key is required for the specified USER to access the database. |
HOST | Hostname for MySQL connection, from the Elestio service overview page | The address of the server hosting the MySQL database. |
PORT | Port for MySQL connection, from the Elestio service overview page | The network port used to connect to MySQL. The default port is 3306. |
DATABASE | Database Name for MySQL connection, from the Elestio service overview page | The name of the database being accessed. A MySQL instance can contain multiple databases. |
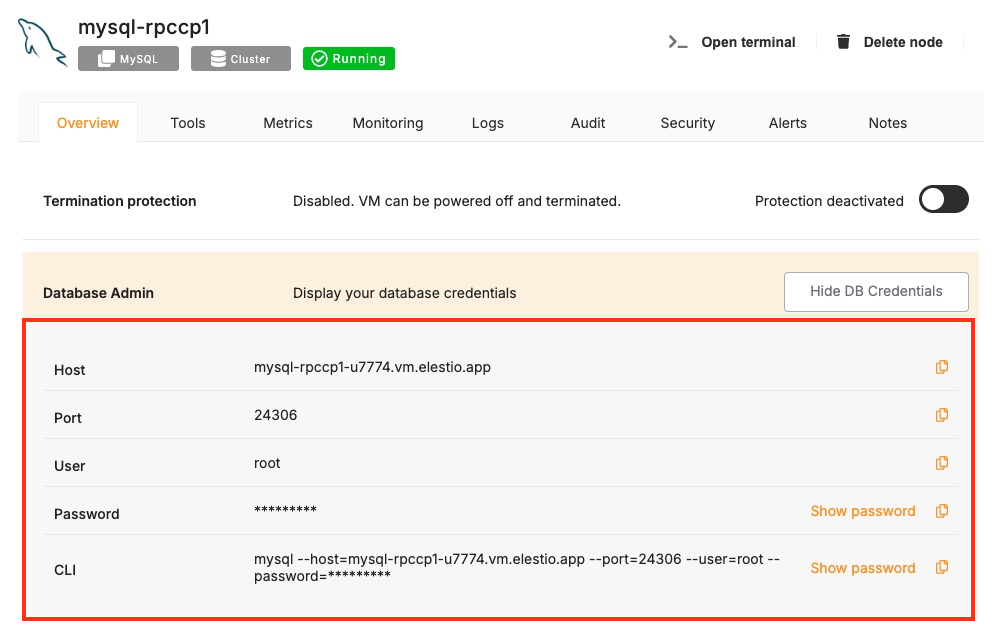
These values can usually be found in the Elestio service overview details, as shown in the image below. Make sure to take a copy of these details and add them to the code moving ahead.
Prerequisites
-
Install Go
- Check if Go is installed by running:
go version - If not installed, download it from golang.org and install.
- Check if Go is installed by running:
-
Install the MySQL Driver
- Use the following command to install the go-sql-driver/mysql driver:
go get -u github.com/go-sql-driver/mysql
- Use the following command to install the go-sql-driver/mysql driver:
Code
Once all prerequisites are set up, create a new file named mysql_connect.go and add the following code:
package main

import (
	"database/sql"
	"fmt"
	"log"

	_ "github.com/go-sql-driver/mysql"
)

func main() {
	user := "USER"
	password := "PASSWORD"
	host := "HOST"
	port := "PORT"
	database := "DATABASE"

	// Construct DSN (Data Source Name)
	dsn := fmt.Sprintf("%s:%s@tcp(%s:%s)/%s", user, password, host, port, database)

	// Open a connection
	db, err := sql.Open("mysql", dsn)
	if err != nil {
		log.Fatalf("Connection failed: %v", err)
	}
	defer db.Close()

	// Ping to verify connection
	if err := db.Ping(); err != nil {
		log.Fatalf("Ping failed: %v", err)
	}
	fmt.Println("Connected to MySQL")

	// Run a test query to check the MySQL version
	var version string
	err = db.QueryRow("SELECT VERSION()").Scan(&version)
	if err != nil {
		log.Fatalf("Query execution failed: %v", err)
	}
	fmt.Printf("MySQL Version: %s\n", version)
}
To execute the script, open the terminal and navigate to the directory where mysql_connect.go is located. Once in the correct directory, run the script with the commands:
go mod init example.com/mysqlconnect
go run mysql_connect.go
If the connection is successful, the terminal will display output similar to:
Connected to MySQL
MySQL Version: 8.0.36
Connecting with Java
This guide explains how to establish a connection between a Java application and a MySQL database using the mysql-connector-j JDBC driver. It walks through the necessary setup, configuration, and execution of a simple SQL query.
Variables
Certain parameters must be provided to establish a successful connection to a MySQL database. Below is a breakdown of each required variable, its purpose, and where to find it. Here’s what each variable represents:
| Variable | Description | Purpose |
|---|---|---|
USER | MySQL username, from the Elestio service overview page | Identifies the database user who has permission to access the MySQL database. |
PASSWORD | MySQL password, from the Elestio service overview page | The authentication key is required for the specified USER to access the database. |
HOST | Hostname for MySQL connection, from the Elestio service overview page | The address of the server hosting the MySQL database. |
PORT | Port for MySQL connection, from the Elestio service overview page | The network port used to connect to MySQL. The default port is 3306. |
DATABASE | Database Name for MySQL connection, from the Elestio service overview page | The name of the database being accessed. A MySQL instance can contain multiple databases. |
These values can usually be found in the Elestio service overview details as shown in the image below, make sure to take a copy of these details and add it to the code moving ahead.
Prerequisites
-
Install Java
- Check if Java is installed by running:
java -version. - If not installed, download it from oracle.com or install OpenJDK.
- Check if Java is installed by running:
-
Install MySQL Connector/J
- Download the latest version
mysql-connector-jfrom the official MySQL site.
- Download the latest version
Code
Once all prerequisites are set up, create a new file named MySQLConnect.java and add the following code:
import java.sql.*;
import java.util.*;

public class MySQLConnect {
    public static void main(String[] args) {
        Map<String, String> config = new HashMap<>();
        for (int i = 0; i < args.length - 1; i += 2)
            config.put(args[i], args[i + 1]);

        String url = String.format("jdbc:mysql://%s:%s/%s?useSSL=true",
                config.get("-host"), config.get("-port"), config.get("-database"));

        try {
            Class.forName("com.mysql.cj.jdbc.Driver");
            try (Connection conn = DriverManager.getConnection(url, config.get("-username"), config.get("-password"));
                 Statement stmt = conn.createStatement();
                 ResultSet rs = stmt.executeQuery("SELECT VERSION()")) {
                System.out.println("Connected to MySQL");
                if (rs.next()) System.out.println("MySQL Version: " + rs.getString(1));
            }
        } catch (Exception e) {
            System.err.println("Connection error: " + e.getMessage());
        }
    }
}
To compile and run the Java program, use the following commands in your terminal:
javac MySQLConnect.java && java -cp mysql-connector-j-9.3.0.jar:. MySQLConnect -host HOST -port PORT -database DATABASE -username avnadmin -password PASSWORD
If the connection is successful, the terminal will display output similar to:
Connected to MySQL
MySQL Version: 8.0.41
Connecting with phpMyAdmin
phpMyAdmin is a widely used web-based interface for MySQL that allows you to manage databases, run SQL queries, and administer users through a graphical interface.
Variables
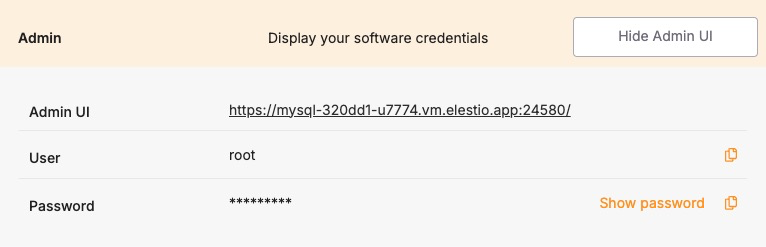
To connect using phpMyAdmin, you’ll need the following connection parameters. When you deploy a MySQL service on Elestio, you also get a phpMyAdmin dashboard configured for you to use with these variables. These details are available in the Elestio service overview page:
| Variable | Description | Purpose |
|---|---|---|
| USER | phpMyAdmin username | Identifies the database user. |
| PASSWORD | phpMyAdmin password | Authentication key for the USER. |
You can find these values in your Elestio project dashboard under the Admin section.
Prerequisites
Make sure the MySQL service is correctly deployed on Elestio and you are able to access the Admin section where phpMyAdmin is listed, similar to the example shown in the image above.
Setting Up the Connection
Launch phpMyAdmin using the Admin UI URL and log in with the credentials acquired from the Elestio service dashboard. Once the login screen is loaded, enter the following:
- Username: USER
- Password: PASSWORD
Click on Go to access the phpMyAdmin interface.
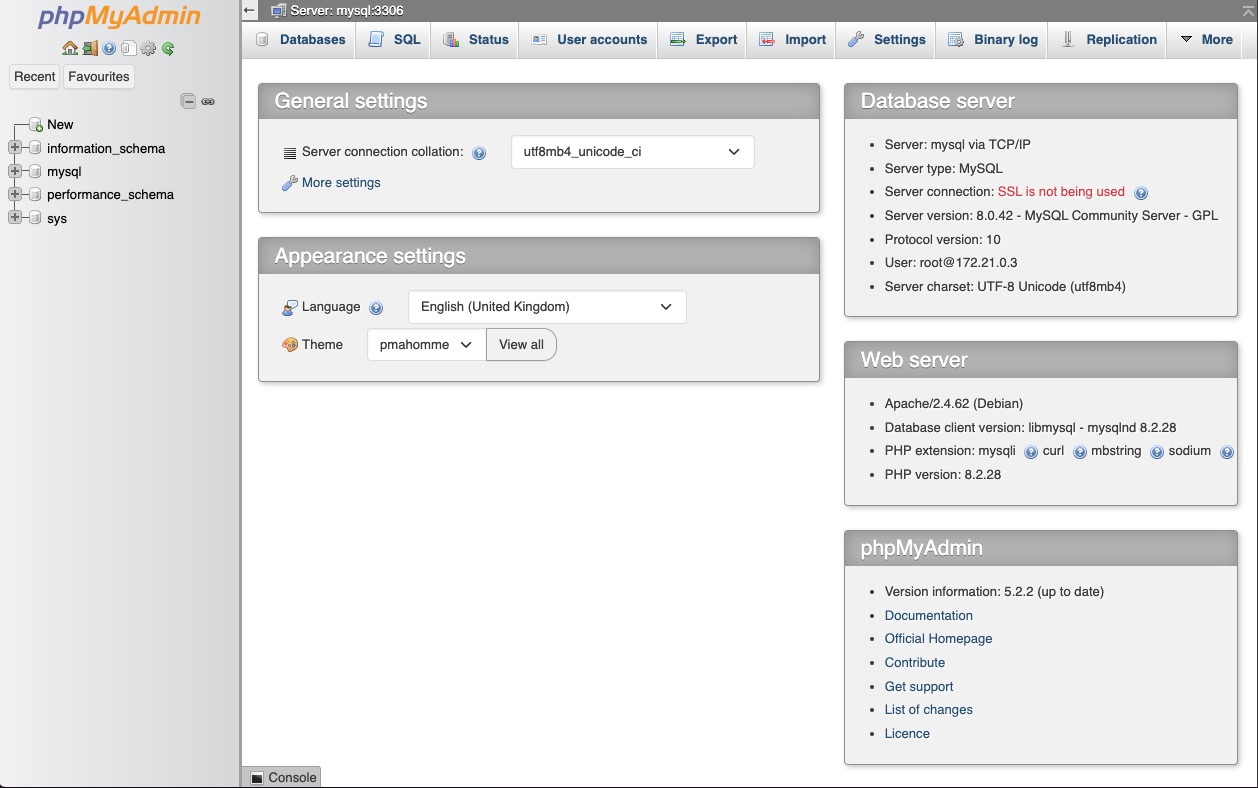
Once logged in, you can see your available databases listed in the left panel. From here, you can:
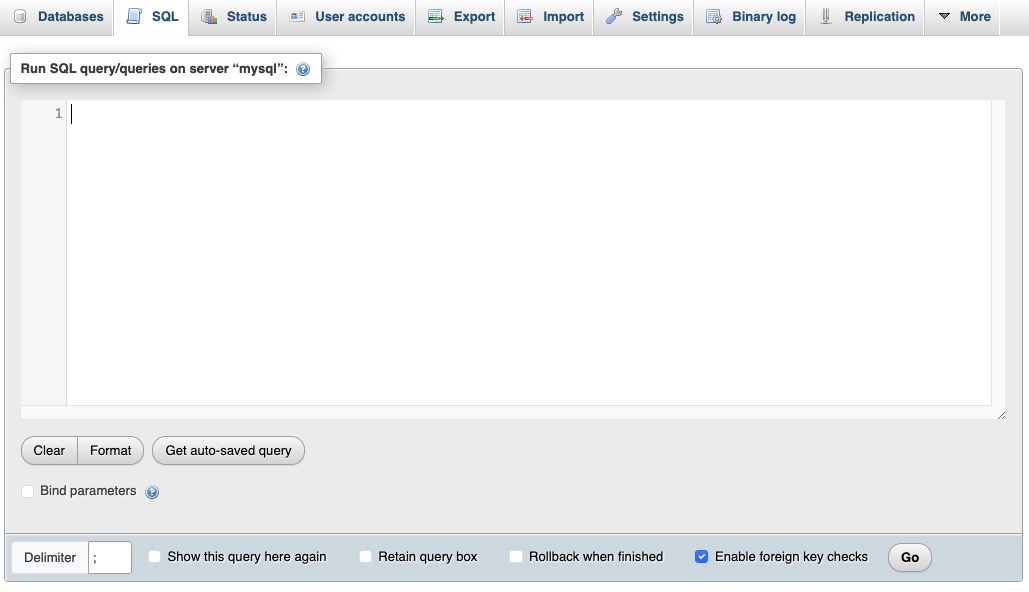
- Run SQL queries through the SQL tab
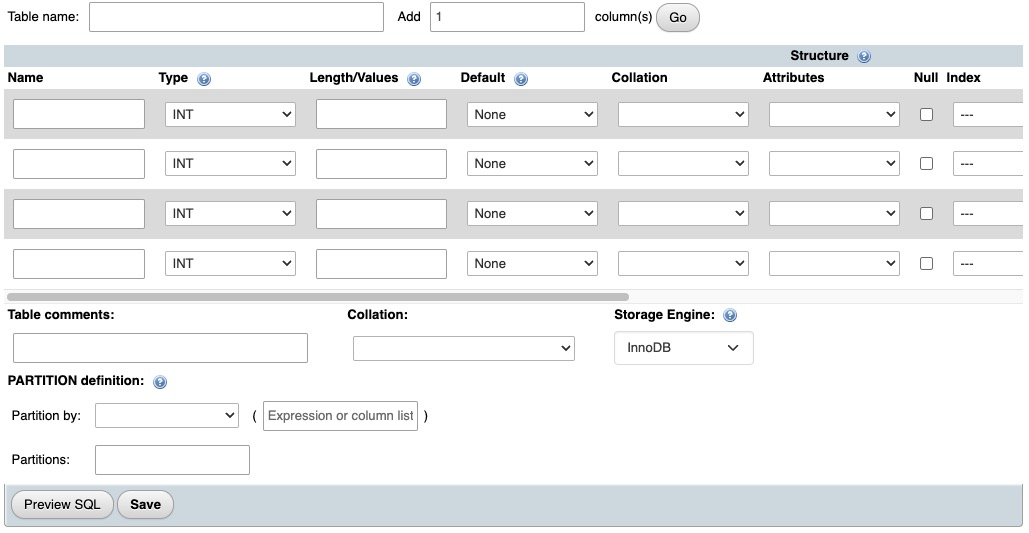
- View or modify table structures
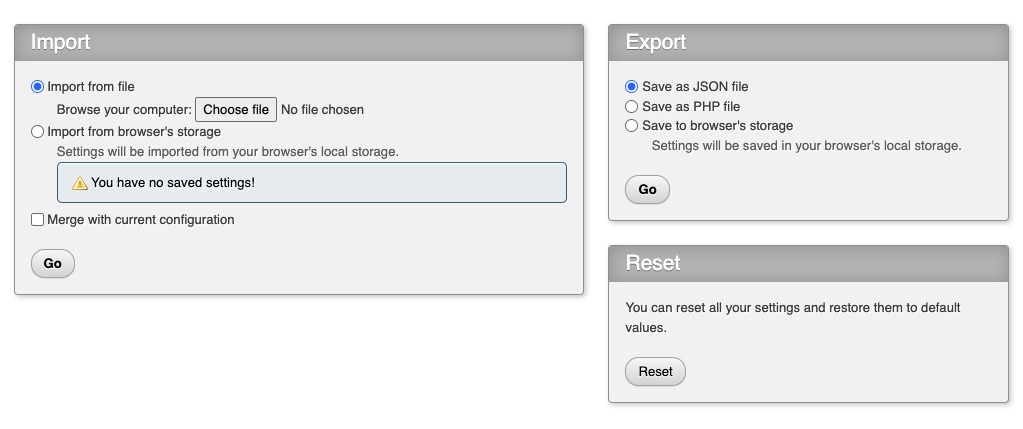
- Export or import database backups
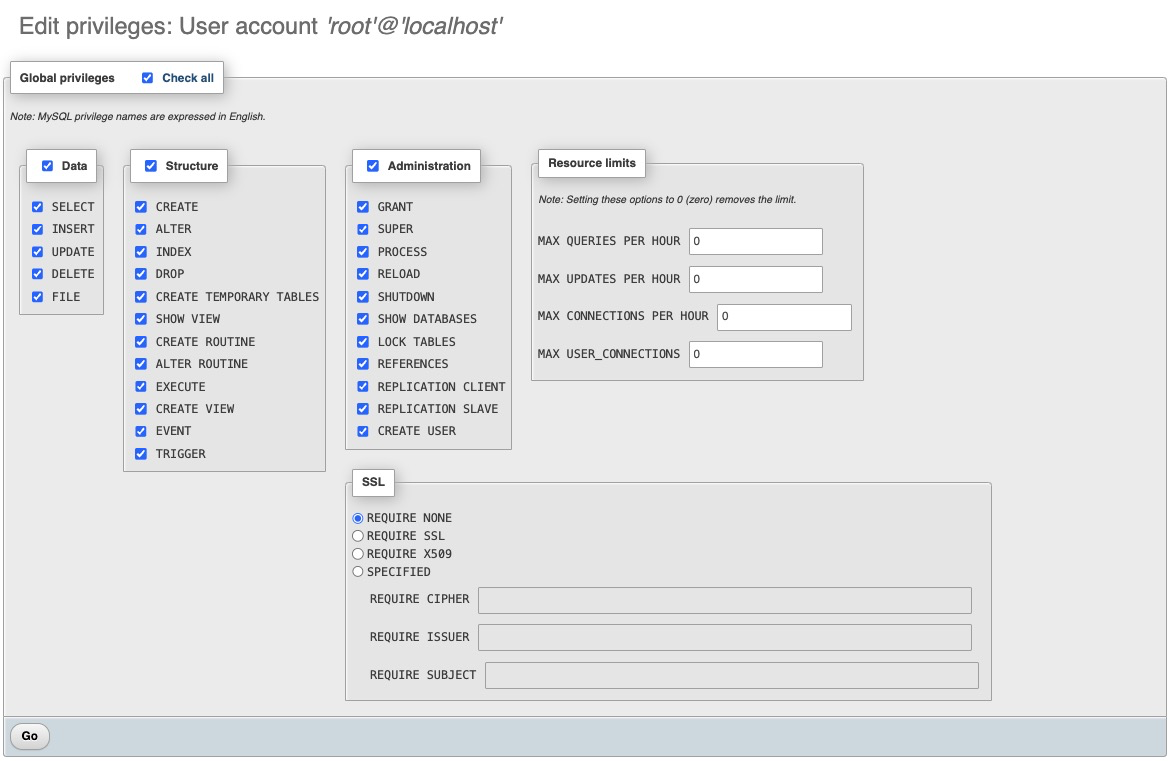
- Manage users and privileges if applicable
Connecting with mysql
This guide explains how to connect to a MySQL database using the mysql command-line tool. It walks through the necessary setup, connection process, and execution of a simple SQL query.
Variables
To connect to a MySQL database, you will need the following individual connection parameters. These are available on the Elestio service overview page:
| Variable | Description | Purpose |
|---|---|---|
USER | MySQL username | Identifies the database user. |
PASSWORD | MySQL password | Authenticates the user. |
HOST | MySQL host address | Endpoint to connect to the database service. |
PORT | MySQL port number | Default is usually 3306, unless otherwise configured. |
DATABASE | Database name | The specific database you want to connect to. |
You can find all of these values in your Elestio project dashboard under the Admin or Database Info section.
Prerequisites
Make sure the MySQL client is installed on your local system. If not, download and install it from:
https://dev.mysql.com/downloads/
Connecting to MySQL
Open your terminal and run the following command to connect to the MySQL database using the values you copied from your Elestio service:
mysql -h HOST -P PORT -u USER -p DATABASE
- Replace
HOST,PORT,USER, andDATABASEwith the actual values. - After running the command, you will be prompted to enter the
PASSWORD.
If the connection is successful, you will see output similar to this:
Welcome to the MySQL monitor.  Commands end with ; or \g.
Your MySQL connection id is 18
Server version: 8.0.34 MySQL Community Server - GPL

Type 'help;' or '\h' for help. Type '\c' to clear the current input statement.

mysql>
Verifying the Connection
To ensure you’re connected correctly, run the following command in the MySQL prompt:
SELECT VERSION();
You should see output like this:
+-----------+
| version() |
+-----------+
| 8.0.34    |
+-----------+
1 row in set (0.00 sec)
This confirms that your connection to the Elestio-hosted MySQL service is working correctly.