Create a new service
1. To create a new service, first open Elestio Dashboard
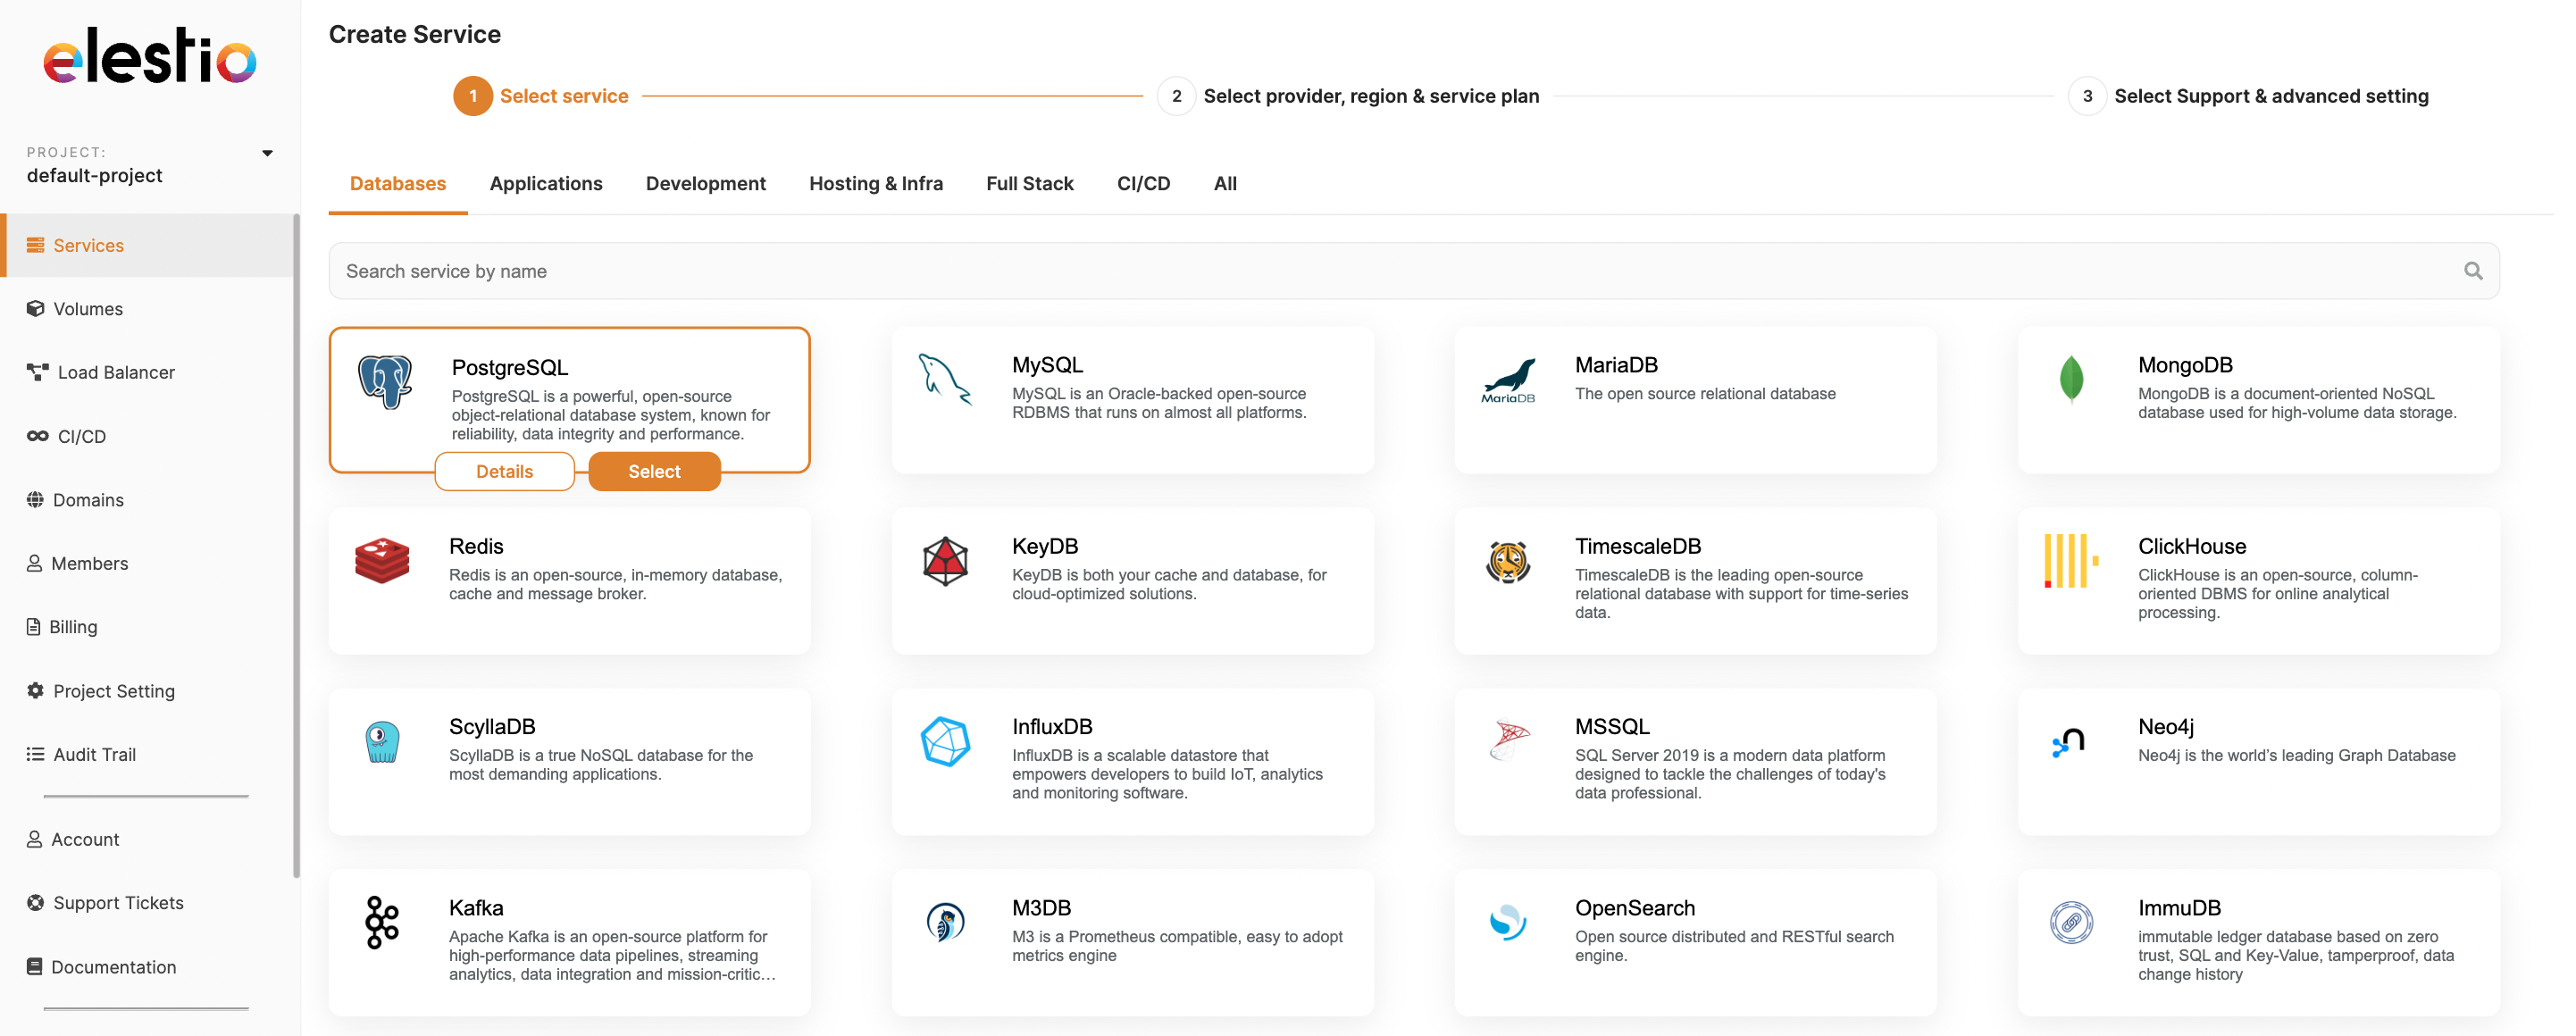
Use the category tabs to filter the selection of software.
Choose the template you want to deploy and click the select button for the next step. If you want to learn more about that template, click the details button.
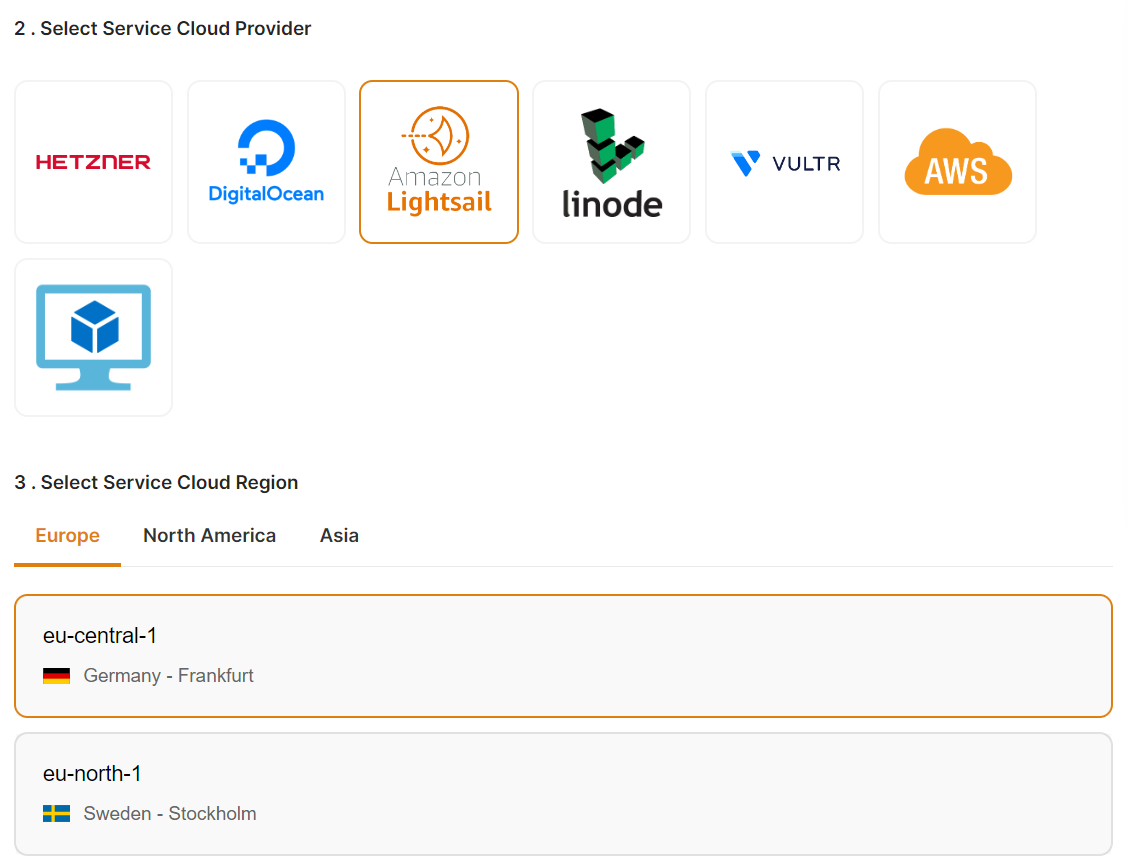
2. Select a provider, region, and data center in which to deploy your service
If you want to deploy the service on AWS, please see our documentation on how to do so.
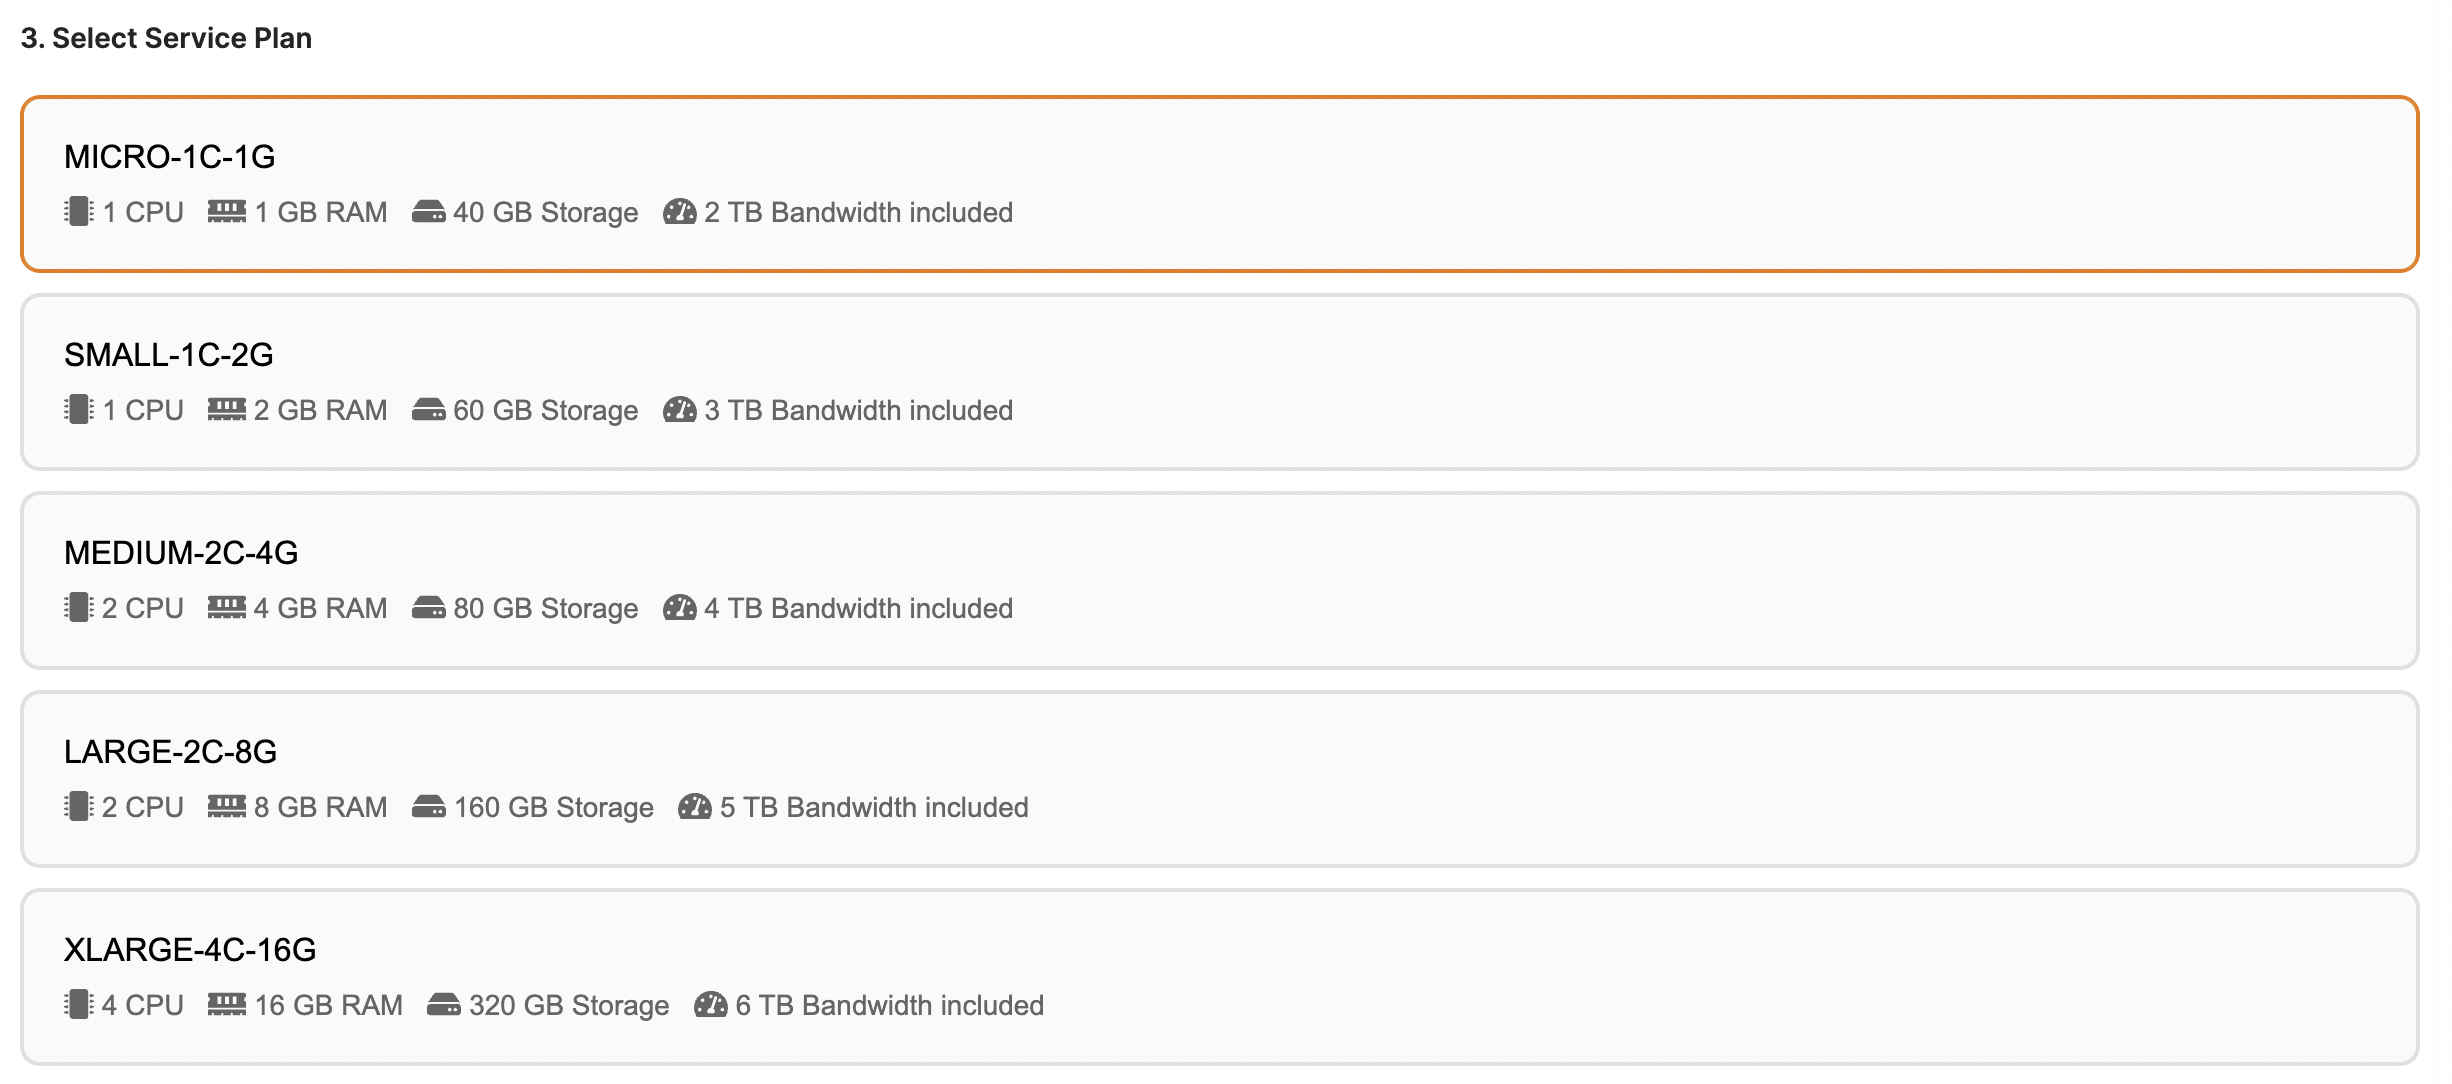
3. Select the instance size that works for you
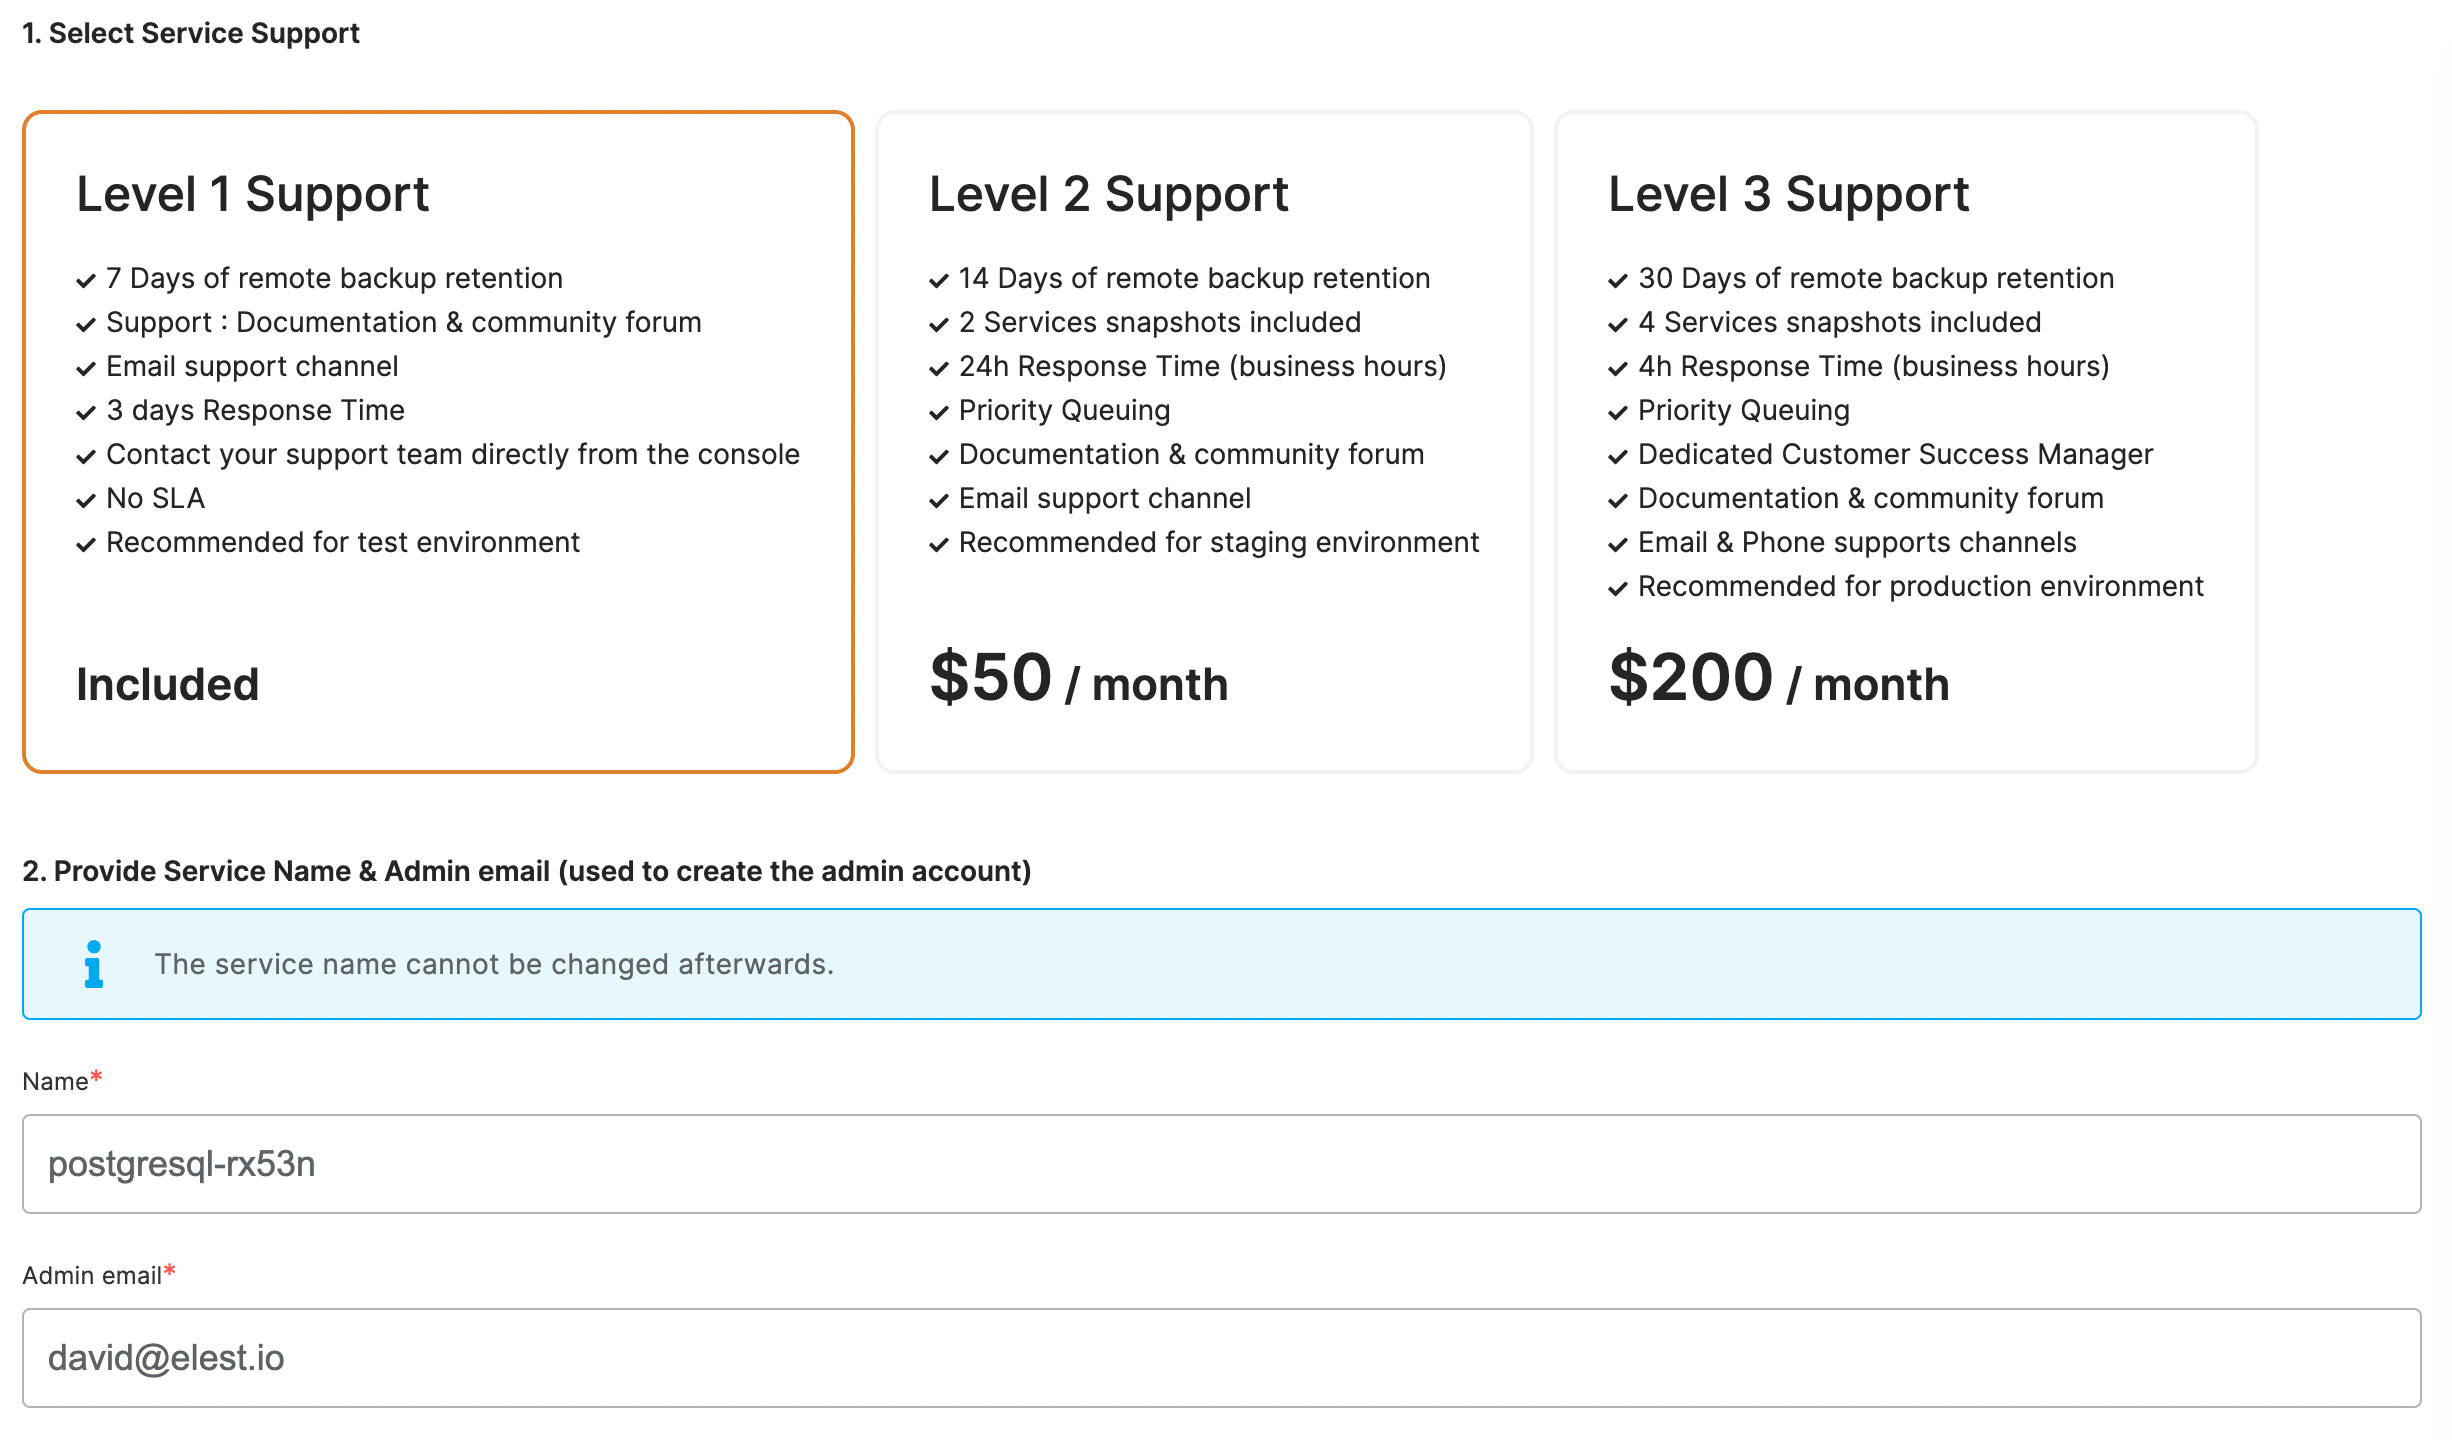
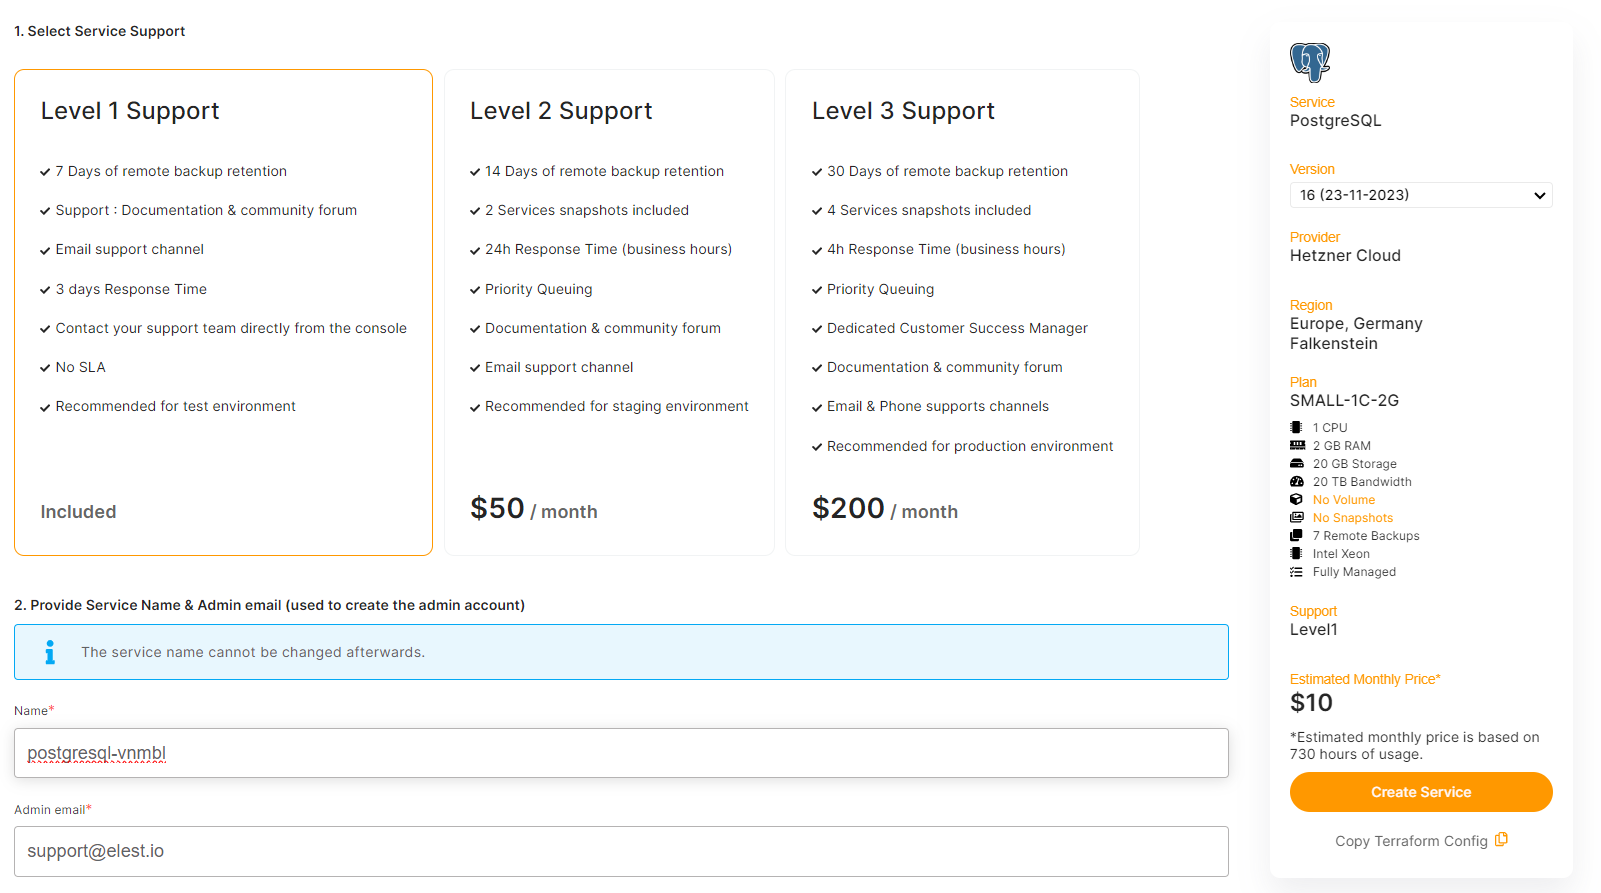
5. Set the support plans, and maintenance windows for OS & software updates and give a name to your new service
OS updates include updates to the Linux kernel, security patches, and other important maintenance to keep your instance running smoothly.
Software updates update the code of the open-source application itself. We respect semantic versioning, so we will only implement minor and patch updates, in order to avoid non-breaking changes.
Maintenance windows are specified in UTC
6. Click the "Create Service" button on the right when you are ready to deploy

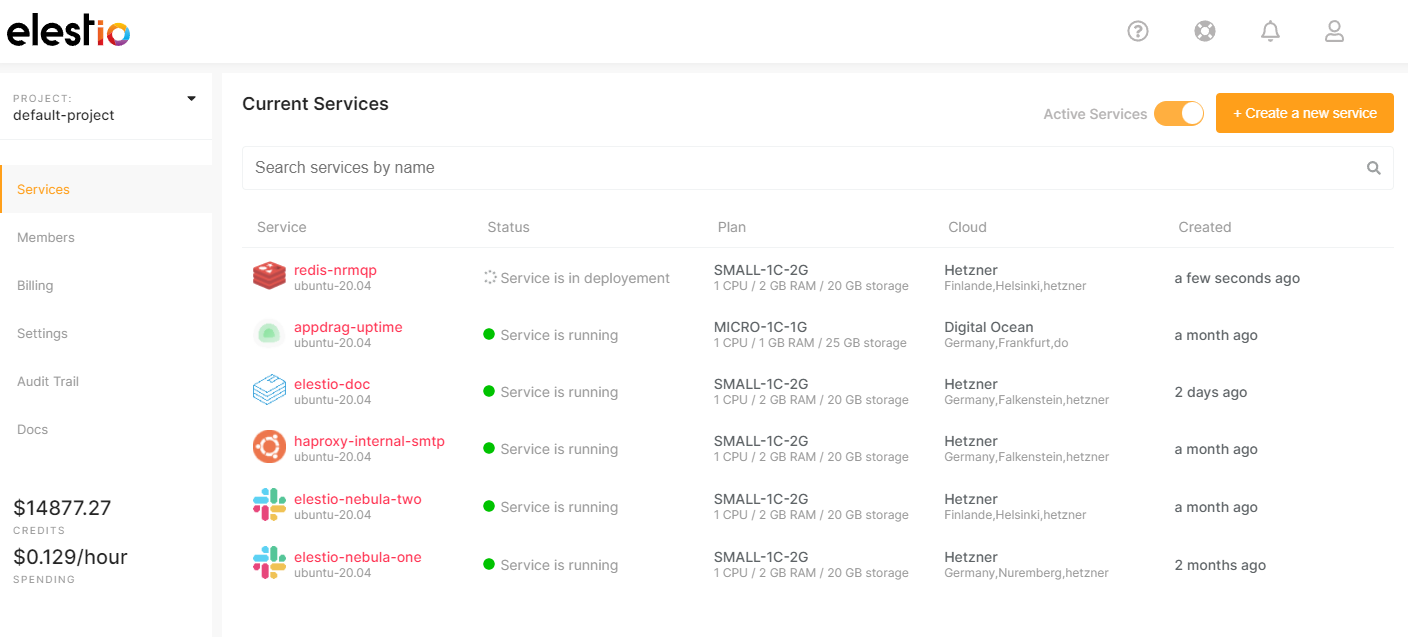
7. After a few seconds your new service will appear in the list with a status: "Service is in deployment". It should only take 2-3 minutes before your service will be ready to use.