
Adding and Managing Users in Keycloak
Users in Keycloak represent the individuals or system accounts that authenticate and interact with your applications. This guide explains multiple methods to create and manage users via the Admin Console, REST API, and Docker CLI while covering required roles, best practices, and common issues.
Creating Users via Keycloak Admin Console
The Admin Console is the most user-friendly method to manage users and assign roles.
Access the Admin Console
Log in to your Keycloak Admin Console:
http://<your-keycloak-domain>/admin/Choose the realm where you want to manage users.
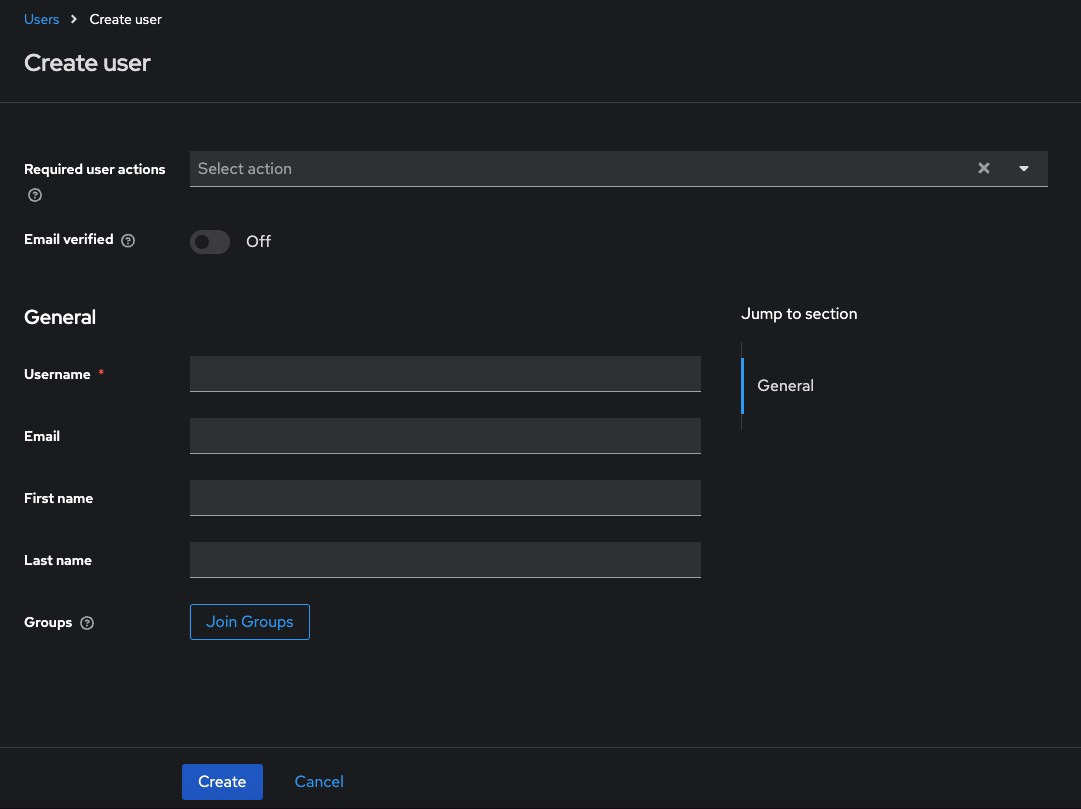
Add a New User
-
Go to Users > Add User
-
Fill in the following:
-
Username (required)
-
Email, First Name, Last Name (optional but recommended)
-
Set Email Verified if applicable
-
-
Click Create
Set Credentials
After creating the user:
-
Go to the Credentials tab
-
Set a password
-
Toggle Temporary to OFF if you don’t want the user to reset on first login
-
Click Set Password
Creating Users via Keycloak REST API
This method is suitable for CI/CD pipelines or automated scripts.
Get Access Token
curl -X POST "https://<keycloak-domain>/realms/master/protocol/openid-connect/token" \
  -H "Content-Type: application/x-www-form-urlencoded" \
  -d "username=admin" \
  -d "password=admin-password" \
  -d "grant_type=password" \
  -d "client_id=admin-cli"
Copy the access_token from the response.
Create User
curl -X POST "https://<keycloak-domain>/admin/realms/<realm>/users" \
  -H "Content-Type: application/json" \
  -H "Authorization: Bearer <access_token>" \
  -d '{
    "username": "johndoe",
    "email": "johndoe@example.com",
    "enabled": true,
    "emailVerified": true,
    "firstName": "John",
    "lastName": "Doe"
  }'
Set Password
curl -X PUT "https://<keycloak-domain>/admin/realms/<realm>/users/<user-id>/reset-password" \
  -H "Authorization: Bearer <access_token>" \
  -H "Content-Type: application/json" \
  -d '{
    "type": "password",
    "value": "StrongPassword123!",
    "temporary": false
  }'
To get <user-id>, call:
curl -H "Authorization: Bearer <access_token>" \
  https://<keycloak-domain>/admin/realms/<realm>/users?username=johndoe
Creating Users via Docker CLI
Step into the Container
docker exec -it keycloak bashUse Admin CLI Script
/opt/keycloak/bin/kcadm.sh config credentials --server http://localhost:8080 \
  --realm master --user admin --password admin

/opt/keycloak/bin/kcadm.sh create users -r <realm> -s username=jane -s enabled=true
Set Password
/opt/keycloak/bin/kcadm.sh set-password -r <realm> --username jane --new-password "SecurePass!123"Required Permissions for User Management
-
Requires manage-users role in the realm.
-
Admin token used via CLI or REST must be scoped with user management privileges.
To assign permission via Admin Console:
Users > admin > Role Mappings > Realm Roles > Assign 'manage-users'Best Practices for Managing Users
Use Verified Emails
Ensure emailVerified is set to true for pre-created users to skip email confirmation.
Avoid Temporary Passwords for API Imports
If scripting user creation, set temporary: false to avoid forcing password reset on first login.
Group Users by Role or Department
Organize users into groups (e.g., devs, sales, ops) for easier role management and policy application.
Monitor Login History
Enable event logging to track user login activity under Events > Settings.
Enforce Strong Passwords
Go to Authentication > Password Policy and configure rules like minimum length, digits, special chars, etc.
Common Issues and Troubleshooting
|
Issue |
Possible Cause |
Solution |
|---|---|---|
|
409 Conflict: User exists |
Username already taken |
Use a unique username or search existing users |
|
403 Forbidden on API |
Missing permission or token scope |
Ensure admin has manage-users in the correct realm |
|
User not able to log in |
Password not set or user is disabled |
Check status under the user’s profile and verify credentials |
|
Password reset fails |
Temporary password not set correctly |
Use "temporary": false if you want permanent password via API |
|
Email not received for verification |
SMTP not configured |
Go to Realm Settings > Email and add SMTP server details |