
Connecting External Identity Providers
This guide explains how to integrate external identity providers (IdPs) like Google, GitHub, Facebook, or LDAP/Active Directory into a Keycloak realm. It walks through the necessary setup, configuration, and execution of a login flow that delegates authentication to the external provider.
Variables
Certain parameters must be provided to integrate an external identity provider into Keycloak. Below is a breakdown of each required variable, its purpose, and where to find it. Here’s what each variable represents:
|
Variable |
Description |
Purpose |
|---|---|---|
|
|
Unique alias name for the identity provider in Keycloak |
Used to identify and manage the identity provider internally |
|
|
OAuth2/OpenID Connect Client ID provided by the external IdP |
Authenticates Keycloak with the external provider |
|
|
Client secret provided by the external IdP |
Used for secure communication with the IdP |
|
|
Authorization endpoint of the external provider |
Used to start the OAuth2 login flow |
|
|
Token endpoint of the external provider |
Used to exchange authorization code for access token |
|
|
User info endpoint of the external provider (for OIDC) |
Fetches profile info for the logged-in user |
These values are available from the external identity provider’s developer console (e.g., Google Cloud Console, GitHub Developer Settings, Facebook for Developers, or LDAP configuration).
Prerequisites
Keycloak Admin Access
Make sure you are logged into the Keycloak Admin Console with sufficient permissions to:
-
Modify identity providers
-
Configure clients and mappers
-
Assign default roles or groups (optional)
External Provider Setup
You must first register your Keycloak app with the external identity provider (e.g., Google, GitHub, etc.) and obtain the client ID and client secret, along with redirect URI.
Example (Google):
-
Register a new OAuth2 Client under APIs & Services > Credentials
-
Set redirect URI to:
https://<keycloak-domain>/realms/<your-realm>/broker/google/endpointCode-Free Setup (via Keycloak Admin UI)
-
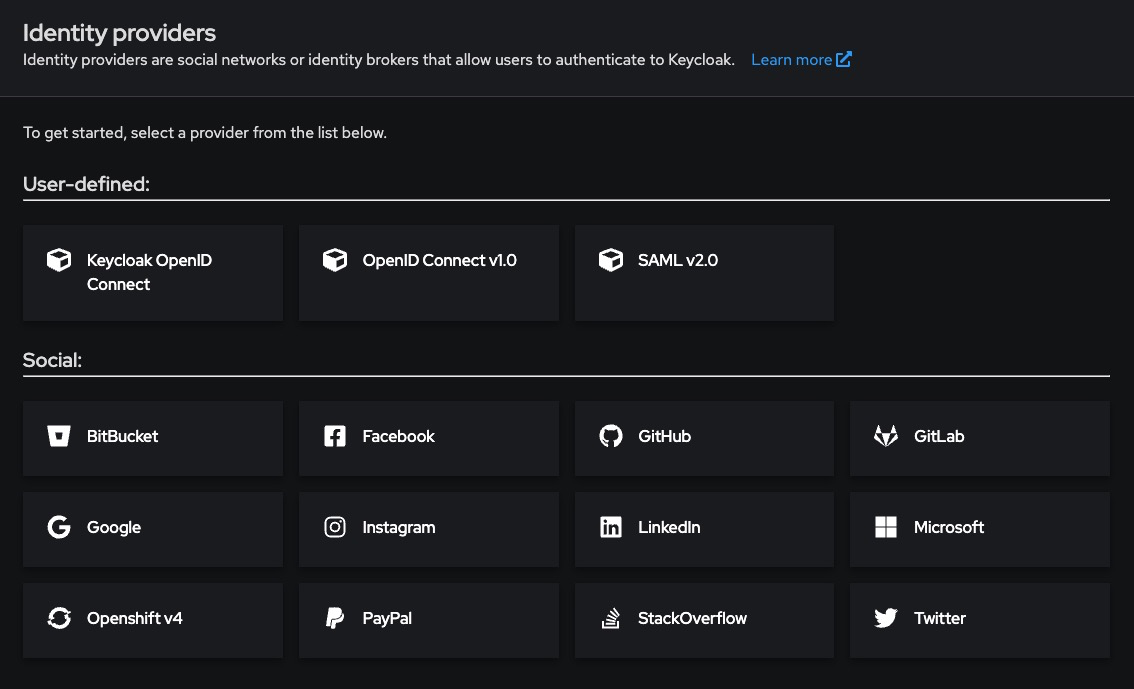
Go to your realm > Identity Providers
-
Click “Add provider” → Choose from list (e.g., Google, GitHub, Facebook, etc.)

-
Enter the required fields:
-
Alias: google, github, etc.
-
Client ID: From the external IdP
-
Client Secret: From the external IdP
-
-
Configure Default Scopes and any user attribute mappers (e.g., email, name)
-
Enable the provider by checking “Enabled”
-
Save
You’ll now see the provider appear on your login page as a social button or link.
LDAP / Active Directory Integration
For enterprise identity backends like LDAP or Active Directory, follow these steps:
- Go to User Federation > Add Provider → LDAP
- Fill in the following fields:
|
Field |
Example |
|---|---|
|
Connection URL |
ldap://ldap.mycompany.com |
|
Users DN |
ou=users,dc=mycompany,dc=com |
|
Bind DN |
cn=admin,dc=mycompany,dc=com |
|
Bind Credential |
Your LDAP admin password |
|
Vendor |
Choose from Active Directory, Novell, Red Hat, etc. |
- Set Edit Mode to READ_ONLY or WRITABLE based on your use case
- Enable periodic sync if needed under Sync Settings
- Save and test the connection
Execution
Once saved, test the login by:
You can manage the linked identity in the Keycloak Admin Console under:
Users > [user] > Identity Provider Links