Deploy a CI/CD Pipeline via GitLab Self-Hosted
Connect a self-hosted GitLab repository and deploy it through an Elestio CI/CD pipeline.
This guide walks you through deploying a CI/CD pipeline using a self-hosted GitLab instance on Elestio.
Prerequisites
Before you begin, make sure you have:
- A running self-hosted GitLab instance (e.g.
https://gitlab.example.com) - A Personal Access Token (PAT) with the
apiscope (see note below) - A repository hosted on your GitLab instance
- An active project in Elestio
⚠️ Important: Only the
apiscope is required. Additional scopes likeread_repositoryorread_userare not necessary whenapiis enabled.
*]:pointer-events-auto R6Vx5W_threadScrollVars scroll-mb-[calc(var(--scroll-root-safe-area-inset-bottom,0px)+var(--thread-response-height))] scroll-mt-[calc(var(--header-height)+min(200px,max(70px,20svh)))]" dir="auto">
You can follow our documentation to generate the PAT.
Step 1: Select Deployment Method
- Open your project in the Elestio dashboard
- Navigate to CI/CD → Create Pipeline
- Under Deployment Method, select GitLab

Step 2: Choose Hosting Type
After selecting GitLab, choose your hosting type:
| Option | Description |
|---|---|
| Cloud | Connect to GitLab.com via OAuth |
| Self-Hosted | Connect using your own GitLab instance and PAT |
Select Self-Hosted to continue.

Switching between Cloud and Self-Hosted will reset previously selected repositories and settings.
Step 3: Connect Your Self-Hosted GitLab Instance
Enter your connection details:
-
GitLab Instance URL
- Example:
https://gitlab.example.com - Must include protocol (
http://orhttps://) - No trailing slash
- Example:
-
Personal Access Token (PAT)
- Paste your token (
glpat-xxxxxxxxxxxx) - Field is masked for security
- Paste your token (
-
Click Connect
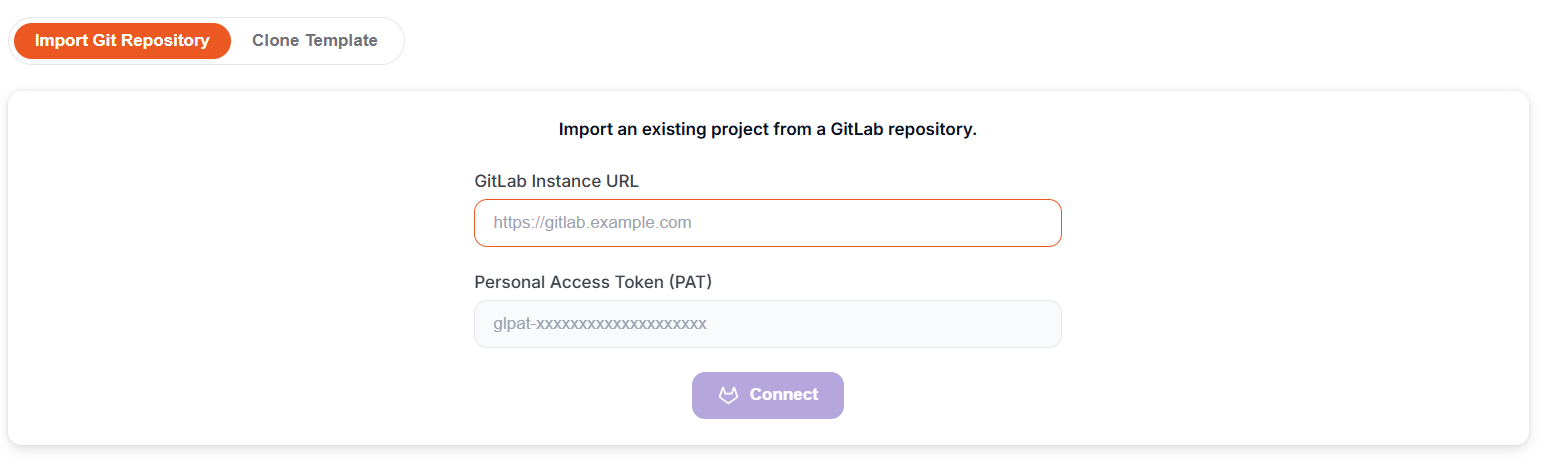
Expected result
- ✅ Connected message:
“Connected as [username] on [instance URL]." - Repository selection UI loads automatically
If connection fails
Check:
- Instance is publicly reachable
- Token includes
apiscope - Token has not expired
Step 4: Select a Repository
Once connected, the Import Git Repository section appears.
-
Git Account
- Your connected account is pre-selected
- Use Add Git Account to connect another instance
-
Git Scope (if available)
- Select a user, group, or organization
-
Repository List
- Search or browse repositories
- Private repos show a 🔒 icon
- Click "Import" on your chosen repository
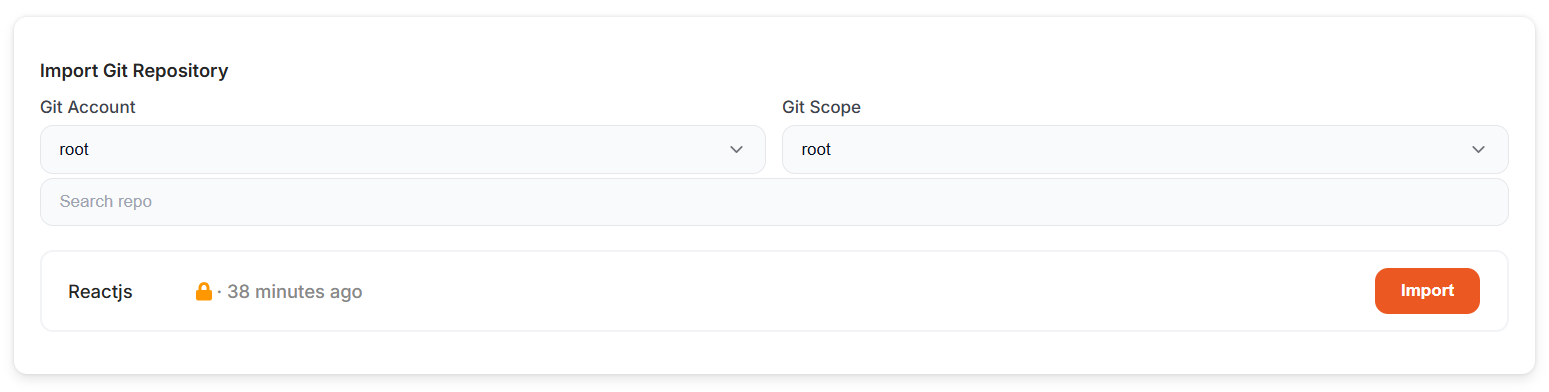
*]:pointer-events-auto R6Vx5W_threadScrollVars scroll-mb-[calc(var(--scroll-root-safe-area-inset-bottom,0px)+var(--thread-response-height))] scroll-mt-[calc(var(--header-height)+min(200px,max(70px,20svh)))]" dir="auto">> Now, click "Next," then choose the cloud provider, region, and plan. After that, configure the pipeline settings by selecting the application type, runtime, and port configuration to proceed with the deployment.
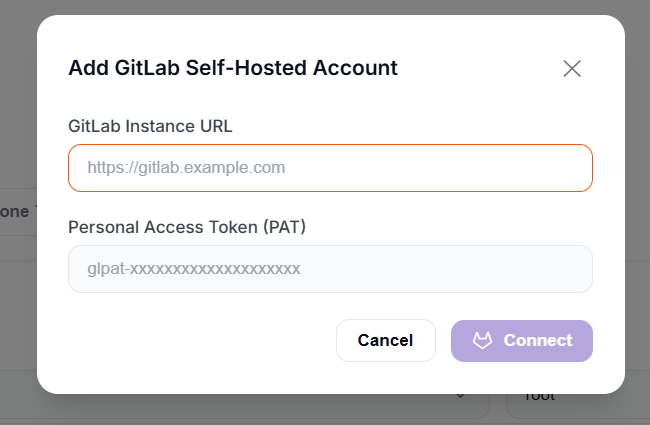
Adding Additional Self-Hosted Accounts
To connect another GitLab instance:
-
Open the Git Account dropdown
-
Click Add Git Account
-
Enter:
- Instance URL
- Personal Access Token (
apiscope)
-
Click Connect
The new account becomes active immediately.
Troubleshooting
| Issue | Likely Cause | Fix |
|---|---|---|
| Connection fails | Invalid URL or token | Verify URL format and regenerate the PAT. |
| No repositories listed | Missing api scope | Recreate token with api |
| Branch not found | Empty repo or wrong branch | Ensure branch exists and has commits |