
Removing a Node
Over time, infrastructure needs change. You may scale down a cluster after peak load, decommission outdated resources, or remove a node that is no longer needed for cost, isolation, or maintenance reasons. Removing a node from a cluster is a safe and structured process designed to avoid disruption. The dashboard provides an accessible interface for performing this task while preserving workload stability.
Why Remove a Node?
Node removal is typically part of resource optimization or cluster reconfiguration. You might remove a node when reducing costs in a staging environment, when redistributing workloads across fewer or more efficient machines, or when phasing out a node for maintenance or retirement.
Another common scenario is infrastructure rebalancing, where workloads are shifted to newer nodes with better specs or different regions. Removing an idle or underutilized node can simplify management and reduce noise in your monitoring stack. It also improves scheduling efficiency by removing unneeded targets from the orchestration engine.
In high-availability clusters, node removal may be preceded by data migration or role reassignment (such as promoting a replica). Proper planning helps maintain system health while reducing reliance on unnecessary compute resources.
Remove a Node
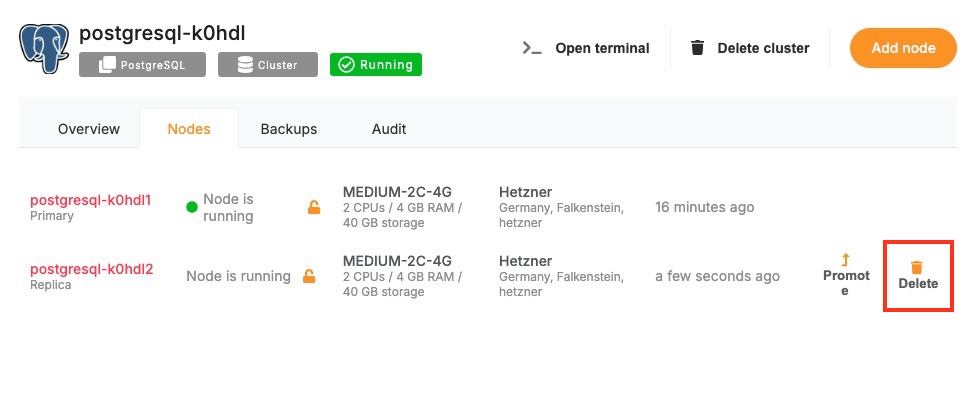
To begin the removal process, open the Elestio dashboard and navigate to the Clusters section. Select the cluster that contains the node you want to remove. From within the cluster view, open the Nodes tab to access the list of active nodes and their statuses.
Find the node you want to delete from the list. If the node is currently running services, ensure that those workloads can be safely rescheduled to other nodes or are no longer needed. Since Elestio does not have a built-in drain option, any workload redistribution needs to be handled manually, either by adjusting deployments or verifying that redundant nodes are available. Once the node is drained and idle, open the action menu for that node and select “Delete Node”.
The dashboard may prompt you to confirm the operation. After confirmation, Elestio will begin the decommissioning process. This includes detaching the node from the cluster, cleaning up any residual state, and terminating the associated virtual machine.
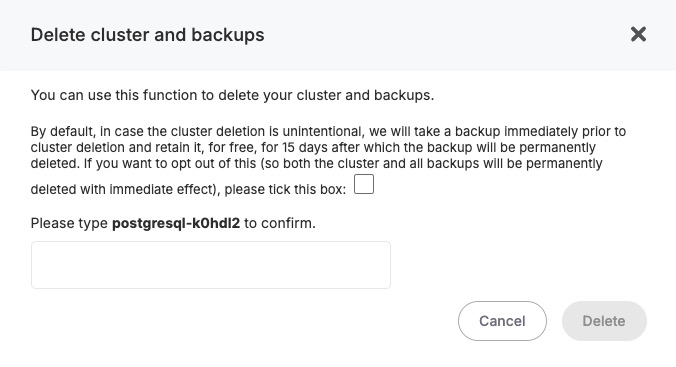
Once the operation completes, the node will no longer appear in the cluster’s node list, and its resources will be released.
Considerations for Safe Node Removal
Before removing a node in Elestio, it’s important to review the services and workloads currently running on that node. Since Elestio does not automatically redistribute or migrate workloads during node removal, you should ensure that critical services are either no longer in use or can be manually rescheduled to other nodes in the cluster. This is particularly important in multi-node environments running stateful applications, databases, or services with specific affinity rules.
You should also verify that your cluster will have sufficient capacity after the node is removed. If the deleted node was handling a significant portion of traffic or compute load, removing it without replacement may lead to performance degradation or service interruption. In high-availability clusters, ensure that quorum-based components or replicas are not depending on the node targeted for deletion. Additionally, confirm that the node is not playing a special role such as holding primary data or acting as a manually promoted leader before removal. If necessary, reconfigure or promote another node prior to deletion to maintain cluster integrity.