
Connecting with keydb-cli
This guide explains how to establish a connection between valkey-cli and a Valkey database instance. It walks through the necessary setup, configuration, and execution of a simple Valkey command from the terminal.
Variables
Certain parameters must be provided to establish a successful connection to a Valkey database. Below is a breakdown of each required variable, its purpose, and where to find it. Here’s what each variable represents:
|
Variable |
Description |
Purpose |
|---|---|---|
|
|
Valkey hostname, from the Elestio service overview page |
The address of the server hosting your Valkey instance. |
|
|
Port for Valkey connection, from the Elestio service overview page |
The network port used to connect to Valkey. The default port is 6379. |
|
|
Valkey password, from the Elestio service overview page |
The authentication key required to connect securely to Valkey. |
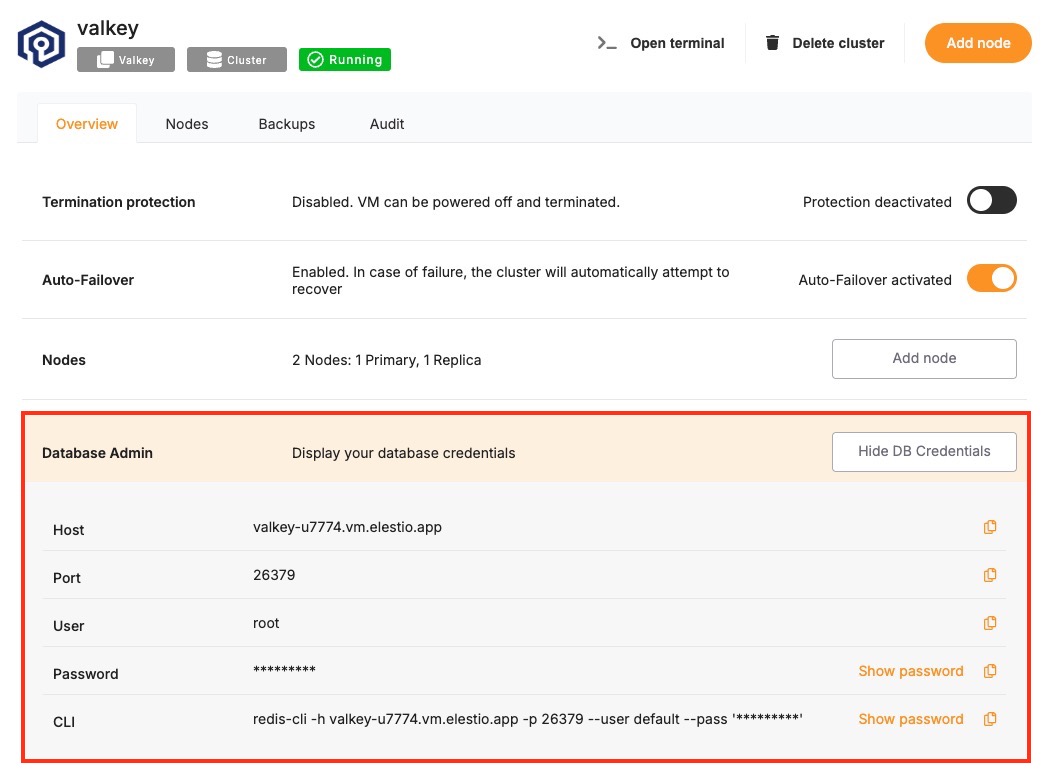
These values can usually be found in the Elestio service overview details as shown in the image below. Make sure to take a copy of these details and use them in the command moving ahead.
Prerequisites
Install valkey-cli
Check if valkey-cli is installed by running:
valkey-cli --versionIf not installed, you can install it via:
-
macOS:
brew install valkey-
Ubuntu/Debian:
sudo apt-get install valkey-tools-
Windows:
Use Windows Subsystem for Linux (WSL) or download the CLI binaries from the Valkey GitHub releases page.
Command
Once all prerequisites are set up, open the terminal or command prompt and run the following command:
valkey-cli -h HOST -p PORT -a PASSWORDReplace HOST, PORT, and PASSWORD with the actual values from your Elestio Valkey service.
If the connection is successful, the terminal will display a Valkey prompt like this:
127.0.0.1:6379>Test the Connection
You can then run a simple command to test the connection:
set testkey "Hello Valkey"
get testkey
Expected output:
OK
"Hello Valkey"
If the connection is successful, the terminal will display output similar to the above.