Migrate Custom Applications to Elestio
This migration document is for services not supported by Elestio as fully managed options. If you're unsure about software support, check here. For supported software, use the Managed Services Migration Guide.
1️⃣ Pre-requisites
- Verify Support: Check if your service is in Elestio's software catalogue here
- Create Account: Set up your account on Elestio
- Check Application Health: Ensure your application works correctly with no critical errors in logs
- Version Compatibility: Use the same software version as your current service to prevent migration failures
2️⃣ Git Repository Migration
If your service/application is hosted on Git repositories (public & private), follow these steps for easy migration:
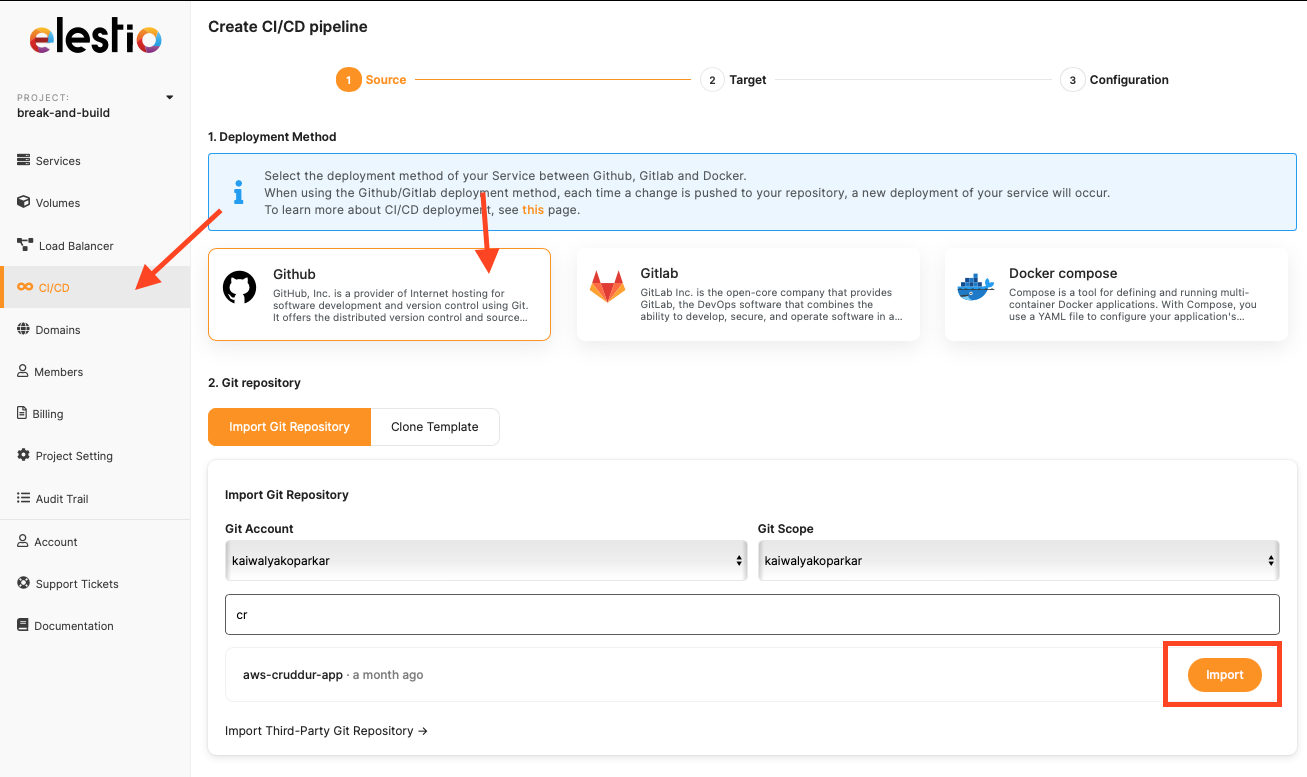
Step 1: Import Repository
Navigate to the CI/CD section and import your Git repository
Step 2: Select Infrastructure
Choose your preferred cloud provider, region, and service plan

Step 3: Configure Tech Stack
Select your tech stack or docker-compose if available in your Git repository
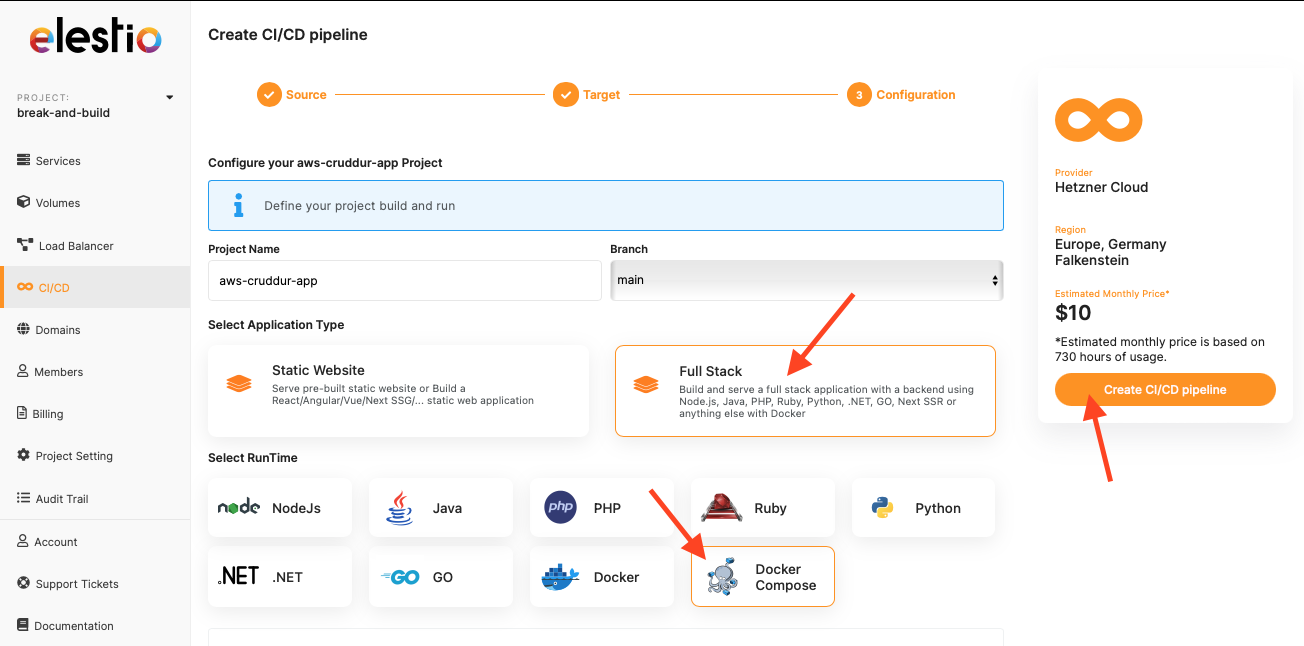
Step 4: Additional Configuration
Add extra configurations through the "Build and Deploy" option. For missing components, use manual migration steps below.
3️⃣ Containerized Migration
For containerized applications using pre-built Docker images:
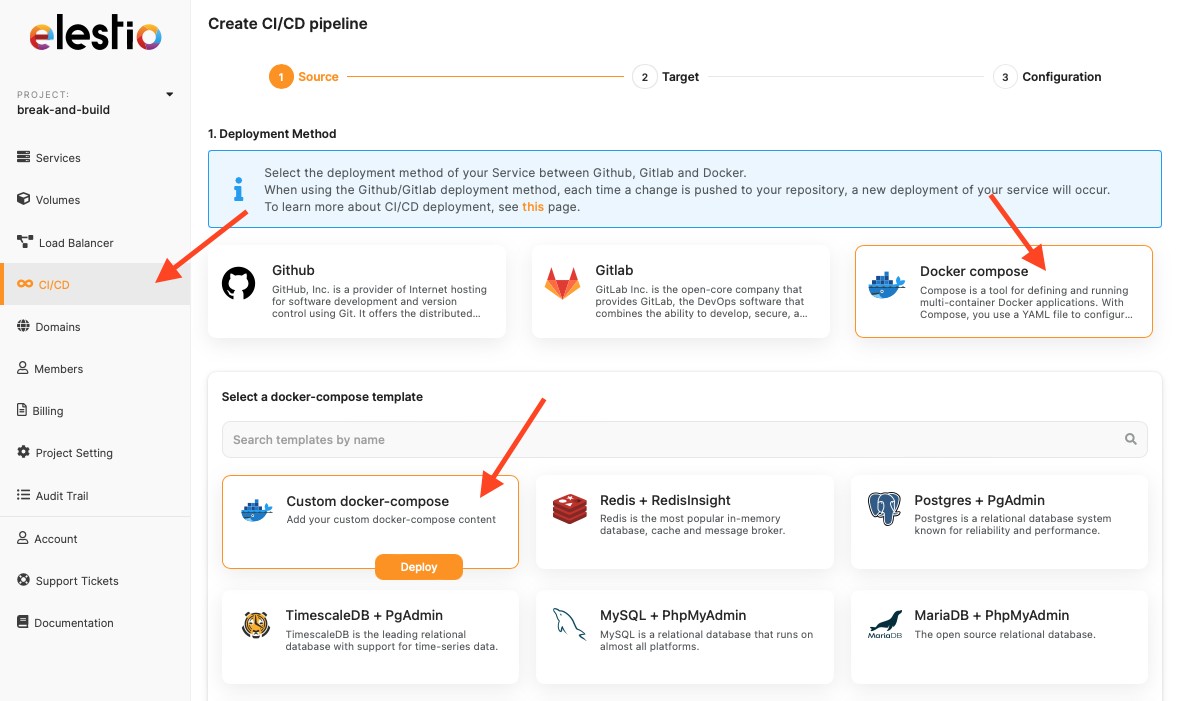
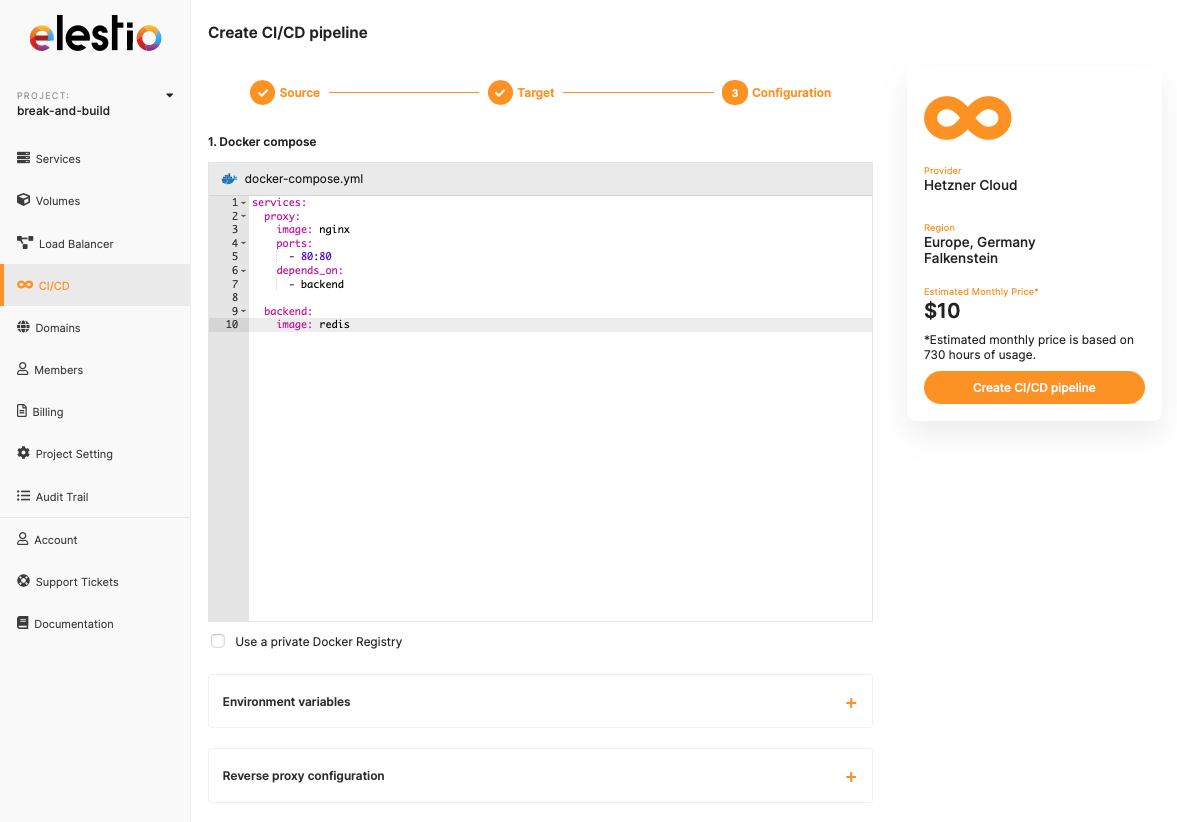
Step 1: Access Docker Compose Option
Go to Elestio dashboard, navigate to CI/CD section, select custom docker-compose, and click Deploy
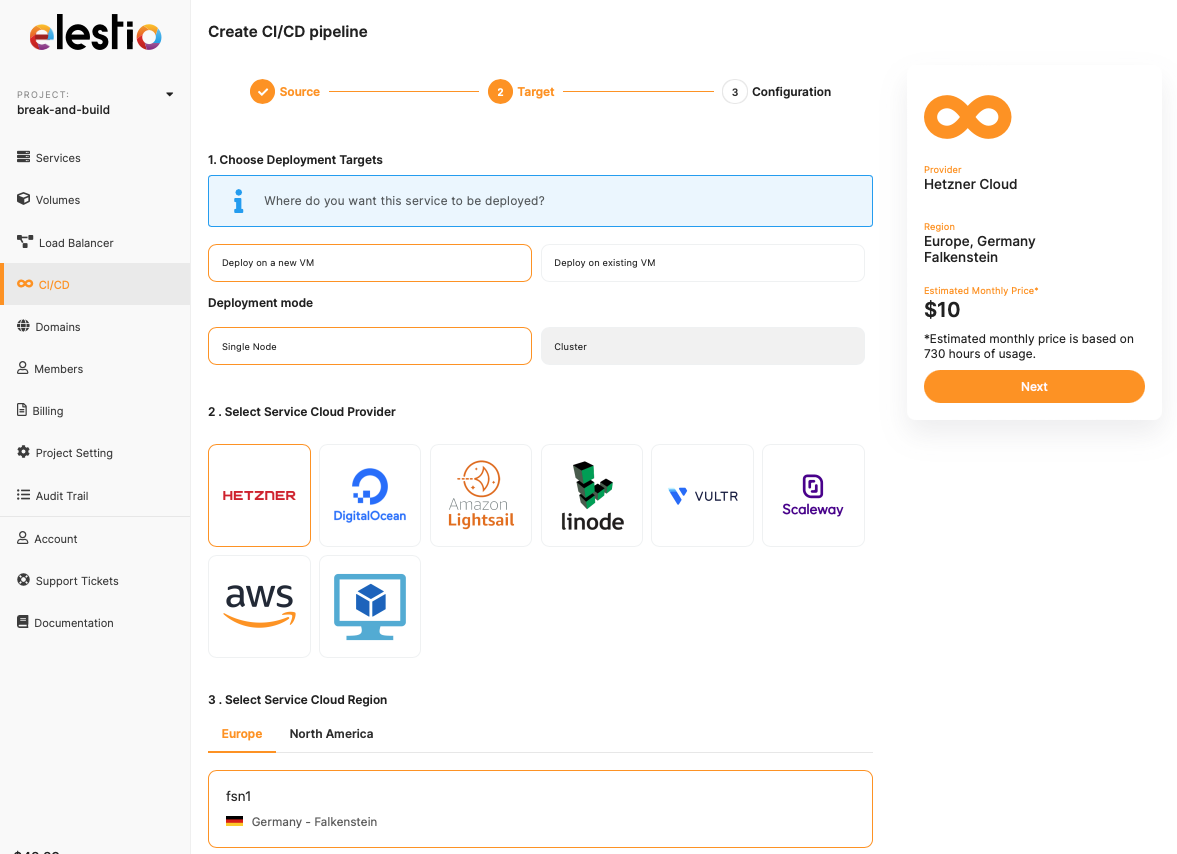
Step 2: Select Infrastructure
Choose your cloud service provider, region, and service plan
Step 3: Configure Docker Compose
Add your docker-compose configuration code. Check the private repository option if using private Docker repositories
4️⃣ Manual Migration
For non-containerized applications requiring manual migration:
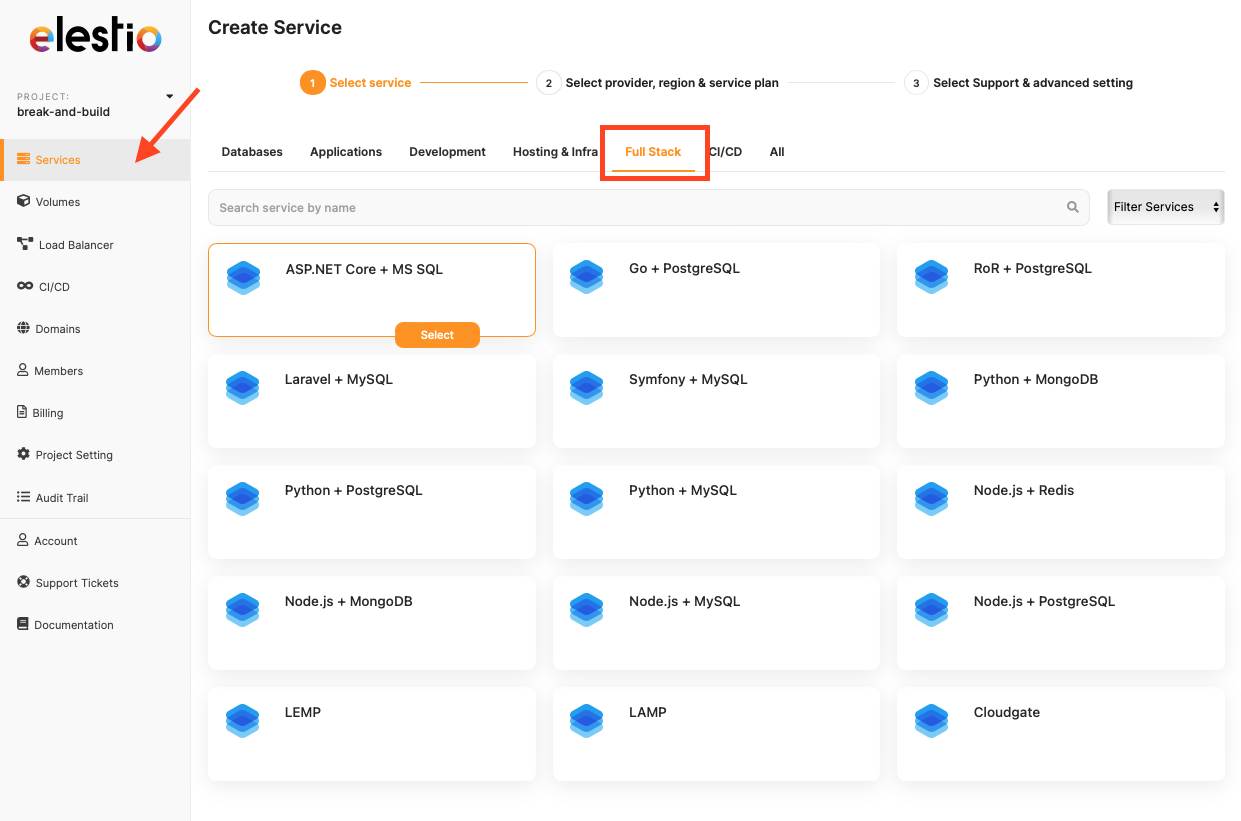
Step 1: Select Template
Choose a template that matches your application's tech stack
Step 2: Access Tools
After deployment, go to the "Tools" tab and select your preferred method to upload assets and data

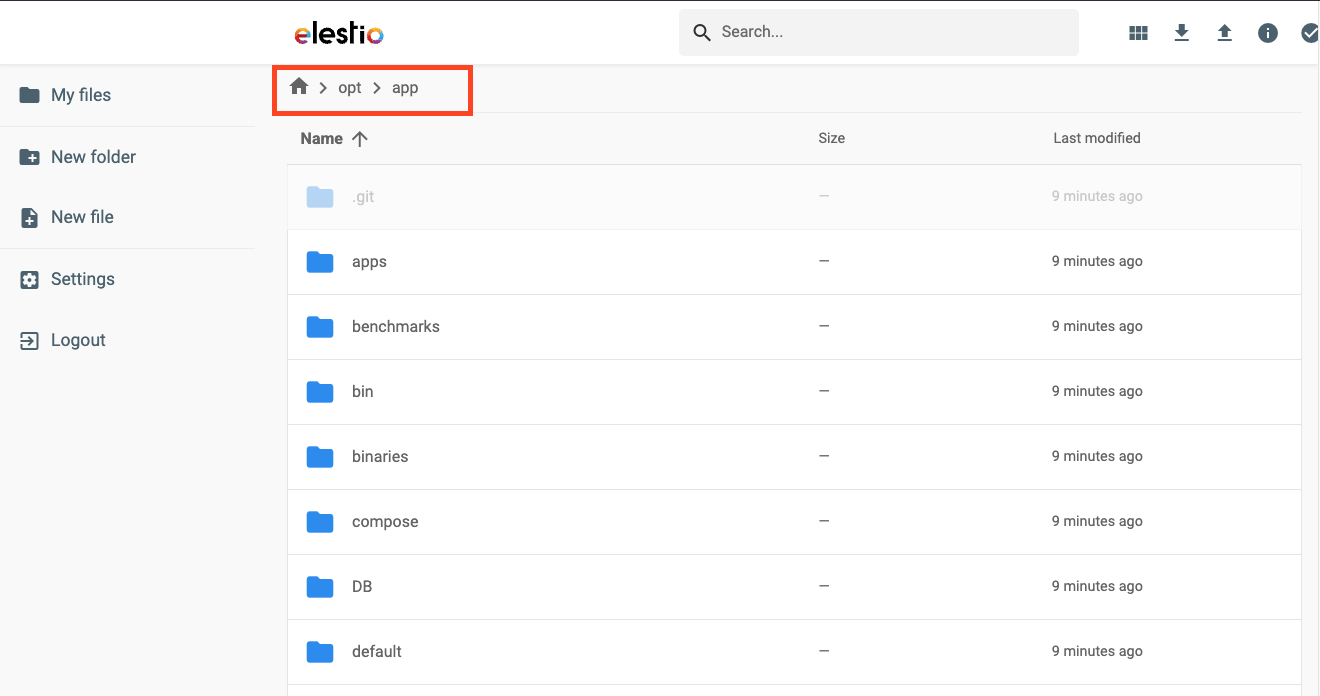
Step 3: Upload Files
Using File Explorer (example), navigate to /opt/app/PIPELINE_NAME and upload your code files and assets exactly as organized in your project directory
Step 4: Update Settings
After successful upload, update the settings in the dashboard
5️⃣ Database Migration
For applications with database components:
UI-Based Databases
If your database provides UI options (e.g., phpMyAdmin, pgAdmin):
- Export data from the original database using the UI
- Import the exported file into the Elestio instance through the UI
Command-Line Databases
For databases without UI export/import options:
- Export data using command-line tools
- Upload the exported file to the VM using manual migration steps
- Restore the file in the database using appropriate commands
6️⃣ Testing the Migration
-
Verify Functionality: Test that your application runs as intended on Elestio
-
Use Integrated Tools: Utilize File Explorer, VSCode, or FileZilla for additional data and asset configuration
-
Troubleshooting: If issues occur, restart your instance and containers:
docker-compose down;
docker-compose up -d --build -
Check Logs: Review logs for failures, considering potential version differences between your original application and Elestio's version
7️⃣ Need Additional Help?
Stuck somewhere? We're here to help! Create a support ticket and we'll get back to you promptly.
Related Guides
- Managed Services - For applications supported by Elestio
- Best Practices - General migration tips and best practices
- Database Specific Migrations - For specific database migration needs