Migrate MySQL Database to Elestio
This migration document focuses on MySQL, which is supported by Elestio. Find the complete software list here
NEW: Check our Data Migration Service for MySQL for easier migration
This document provides a step-by-step guide for migrating your existing MySQL database to Elestio. Elestio is designed to enhance performance, scalability, and overall system efficiency.
1️⃣ Pre-requisites
- Create Account: Set up your account on Elestio
- Access Current Database: Log in to your MySQL admin dashboard where your database is currently hosted
- Check Database Health: Ensure your application works correctly with no critical errors in logs
- Version Matching: Use the same MySQL version on Elestio as your current service to prevent migration failures
2️⃣ Exporting the Data
Step 1: Access phpMyAdmin
Navigate to your phpMyAdmin UI with admin credentials and ensure you can see your database, tables, and data.
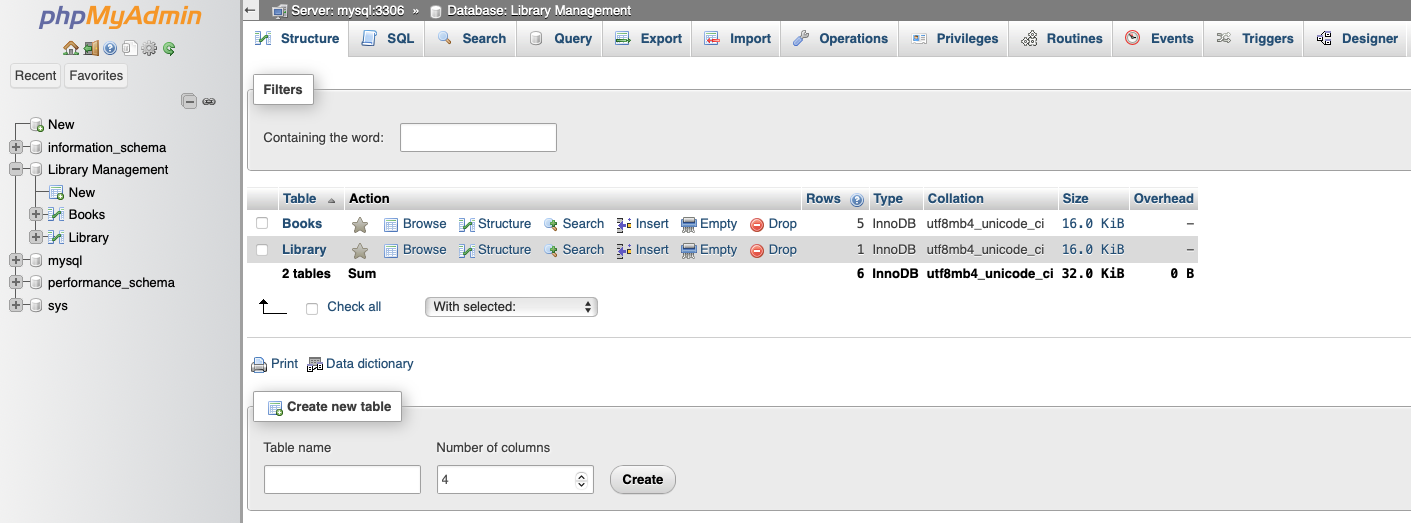
Step 2: Review Database Structure
For this example, we'll migrate a Library Management database with 2 tables: Books and Library
Step 3: Verify Sample Data
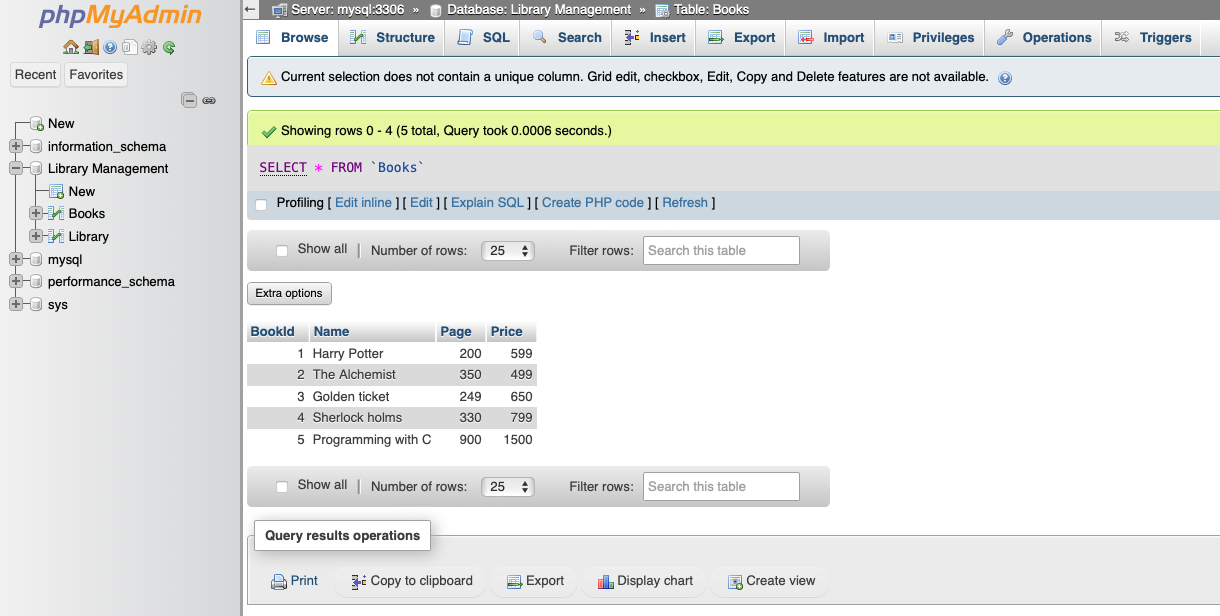
Here's the dummy data under the Books table to verify migration success:
Step 4: Choose Export Scope
You can export specific tables or entire databases. For this tutorial, we'll export the entire database with all tables.
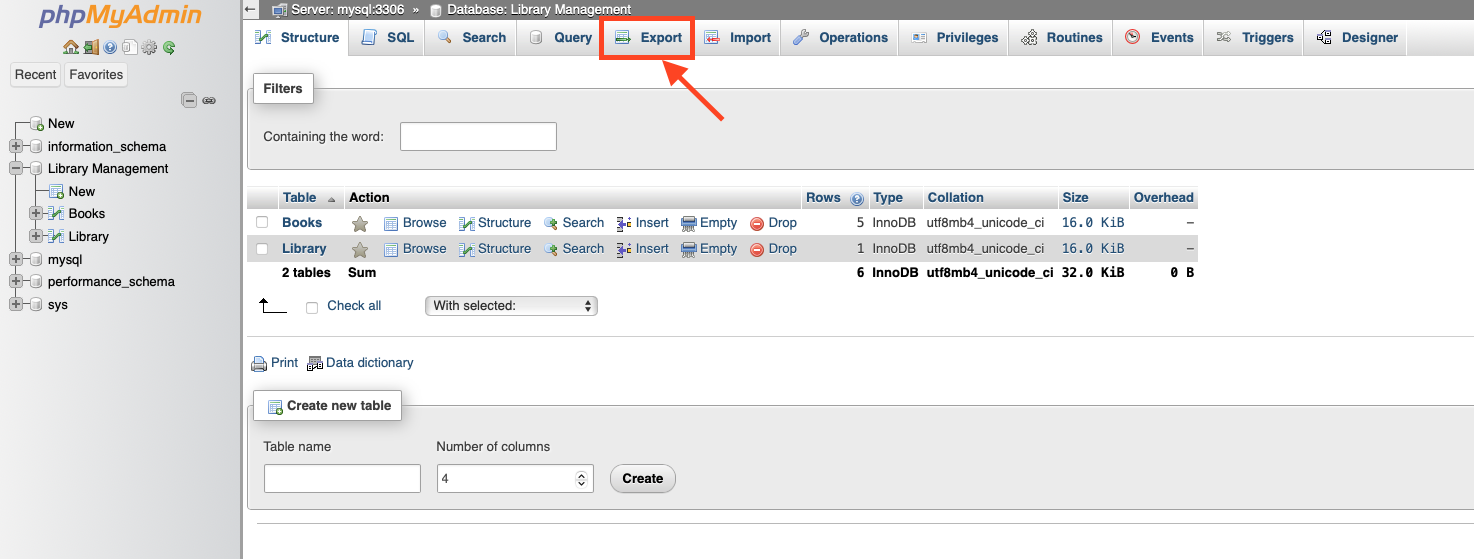
Step 5: Access Export Function
Click on your database to display all tables, then navigate to the "Export" option in the top panel
Step 6: Configure Export Settings
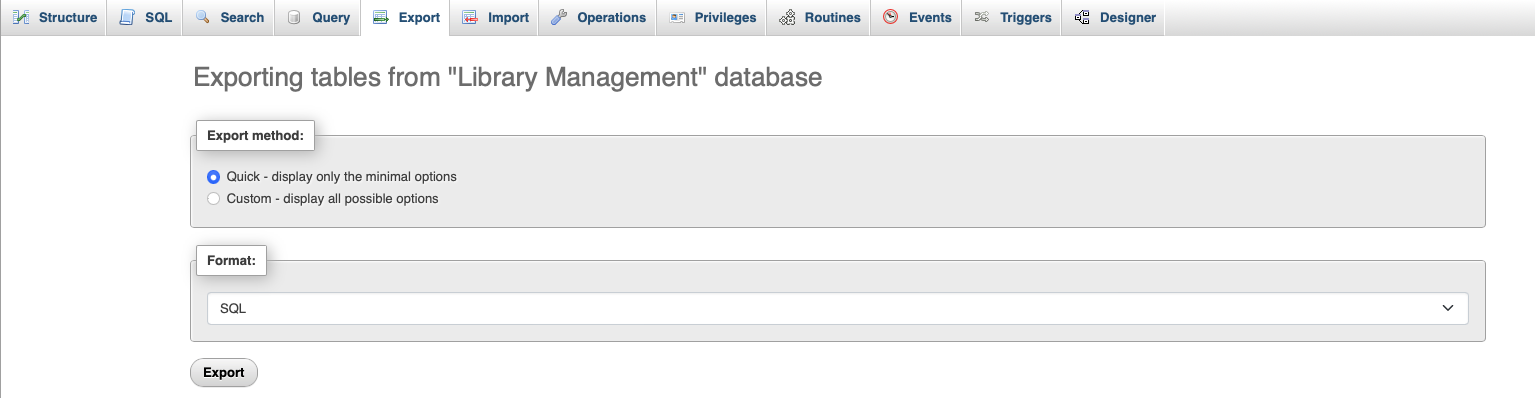
You can use the "Quick" option for standard exports or choose "Custom" to modify export settings as needed
Step 7: Download Export File
Click "Export" and save the file to your local machine. The file will have a .sql extension (since we selected SQL format). Change the format if required for your specific needs.
3️⃣ Setting Up MySQL on Elestio
Step 1: Create MySQL Service
- Log in to your Elestio account
- Go to "Create Services" and select "MySQL"
Step 2: Configure Service
Select your service provider, region, and machine preferences
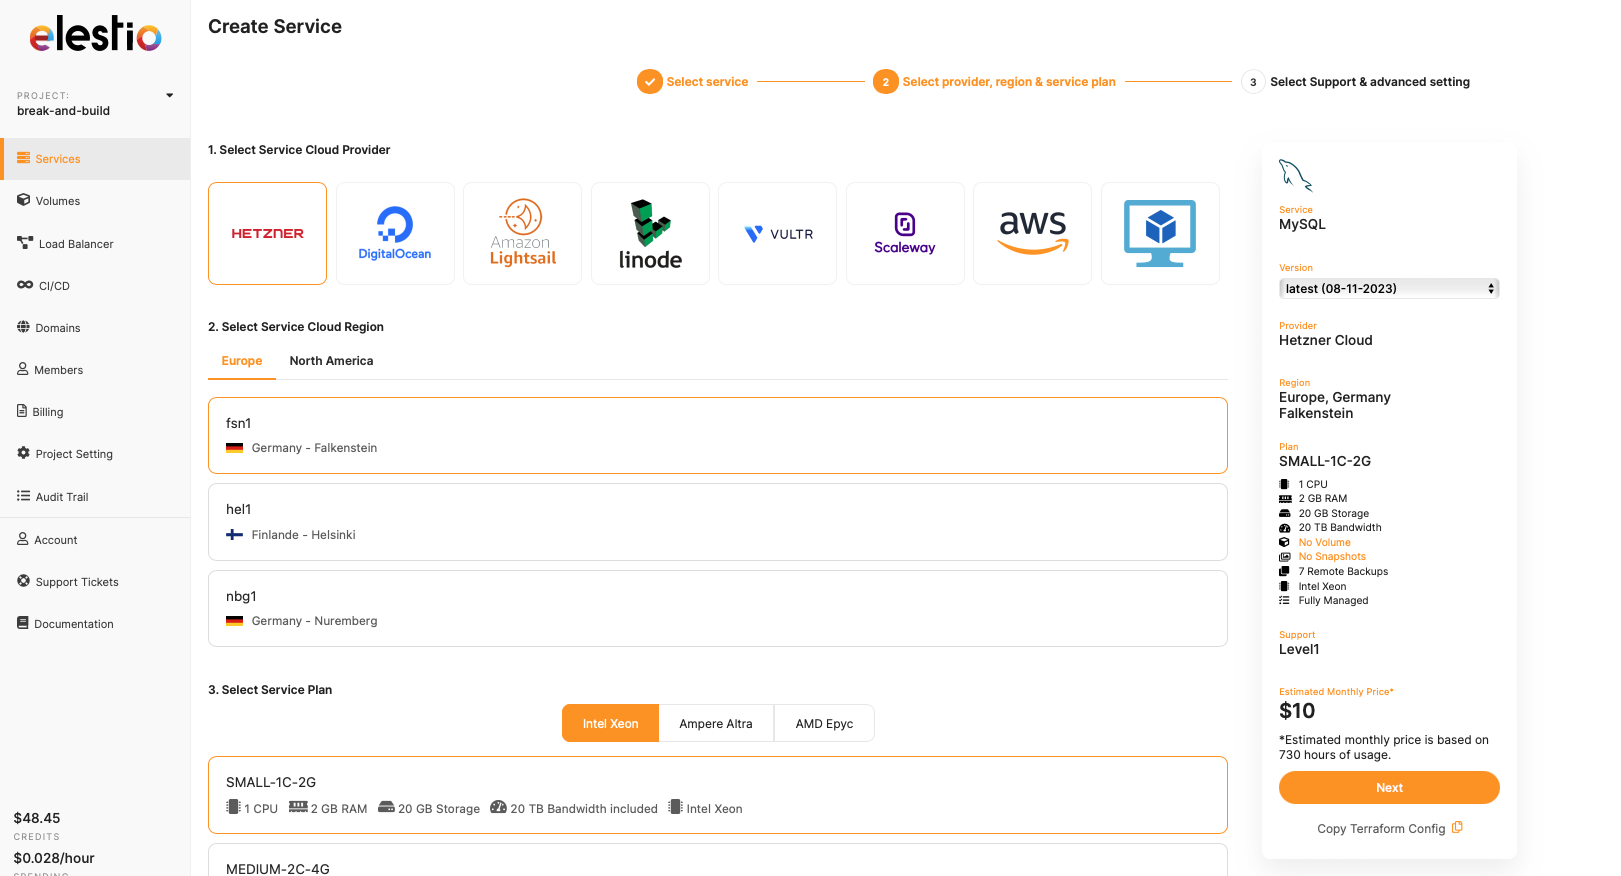
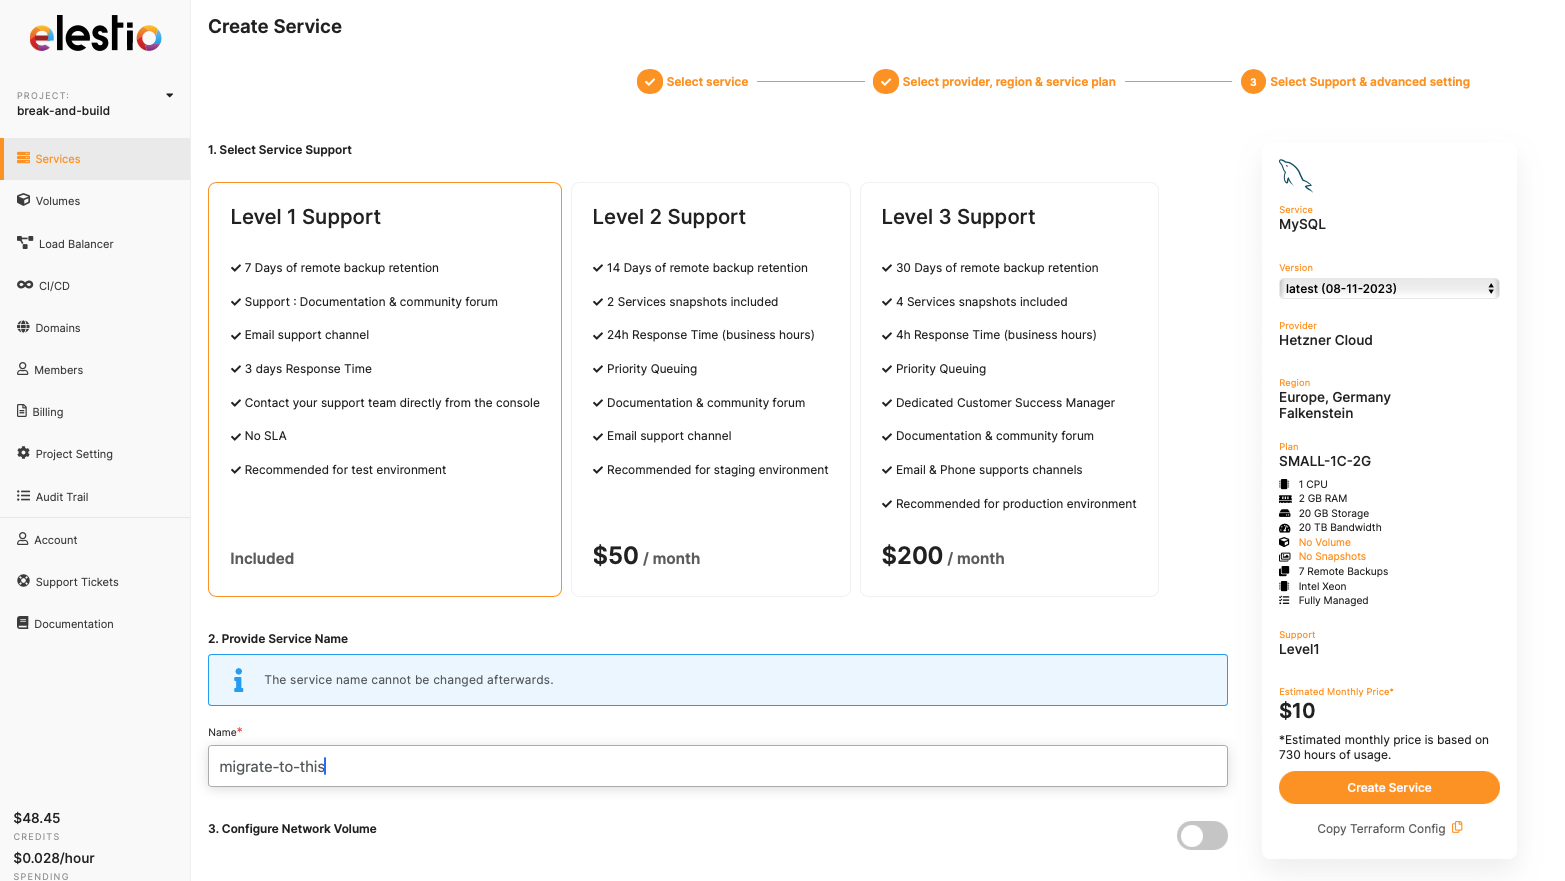
Step 3: Deploy Service
Name your service, configure settings and support level, then click "Create Service"
4️⃣ Importing the Data
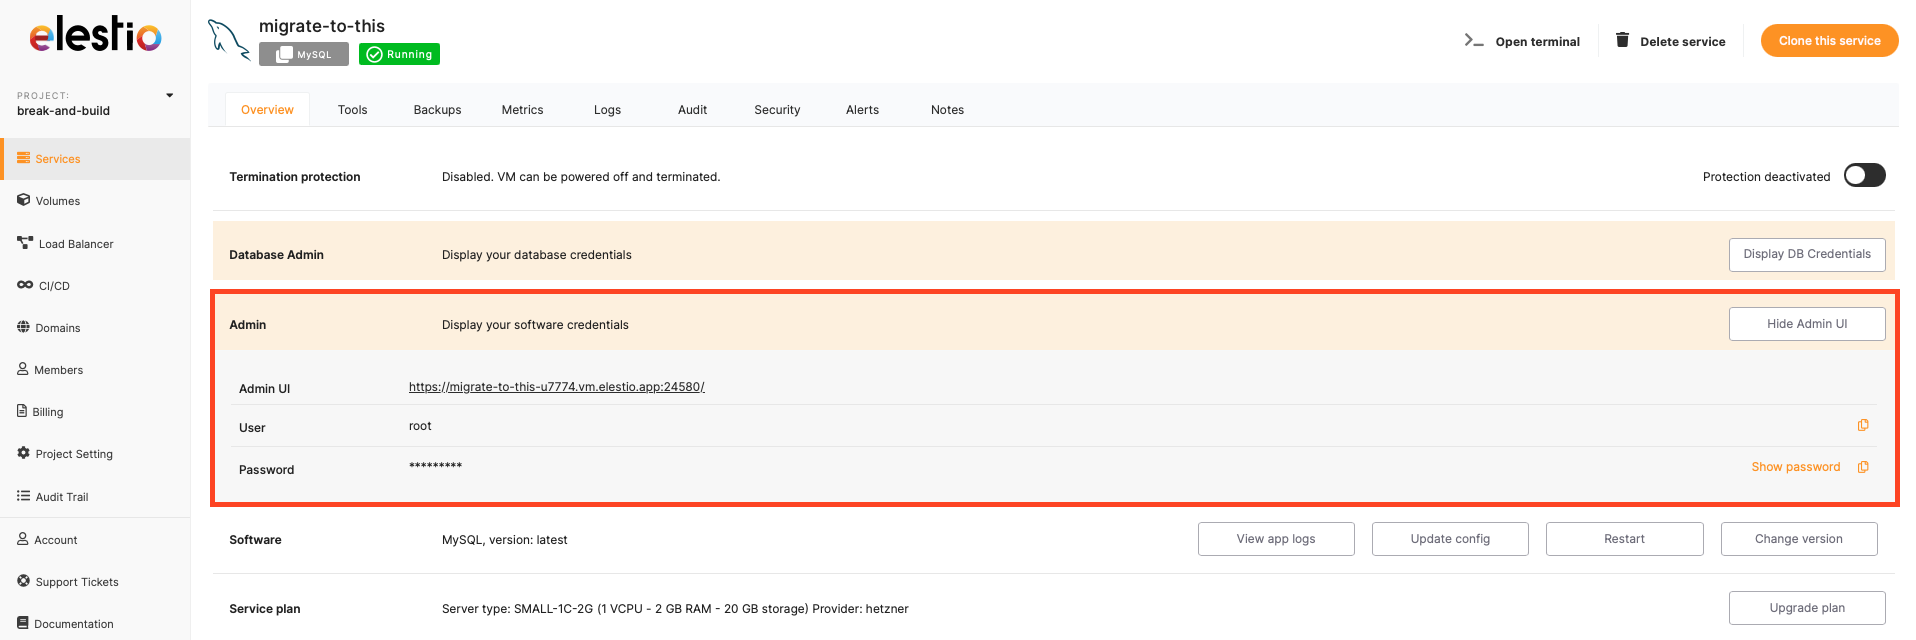
Step 1: Access Elestio MySQL
Once your service is running, navigate to the service and use the credentials provided under "Admin UI" to access phpMyAdmin
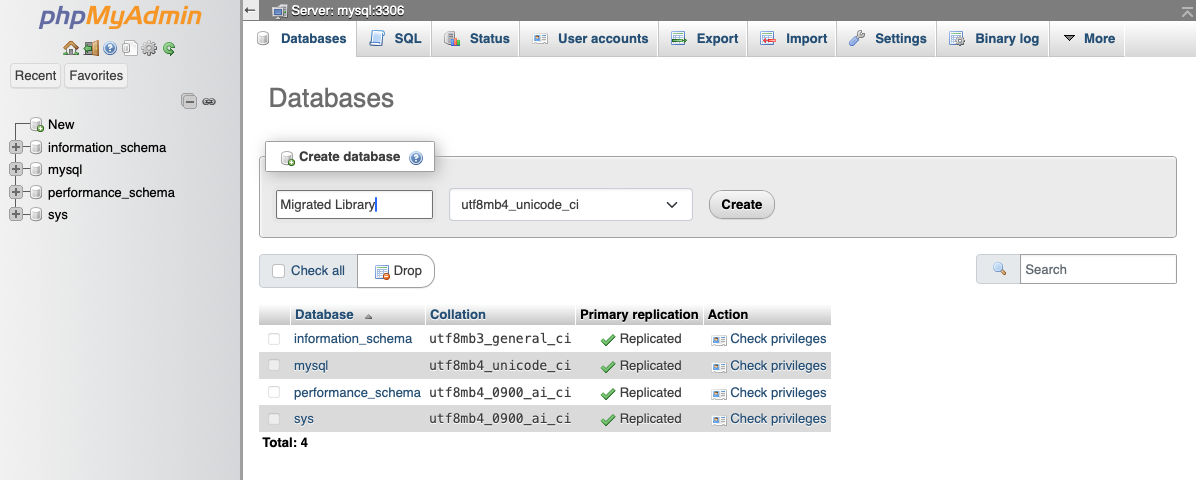
Step 2: Create Database
Create a new database for your imported data. For this example, we'll create "Migrated Library" to distinguish from the original
Step 3: Import Data
- Click on the newly created database
- Navigate to the "Import" option in the top panel
- Choose the
.sqlfile you downloaded in step 2
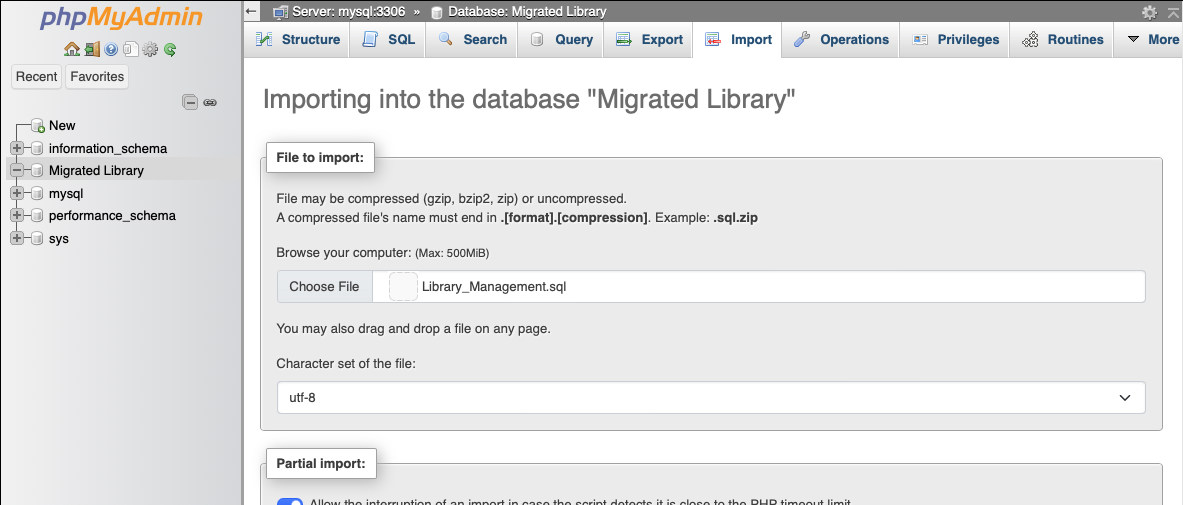
Step 4: Configure Import Settings
If you used custom export settings, you may need to adjust import options to match. Otherwise, use the default settings.
Step 5: Execute Import
After uploading the .sql file, scroll down and click "Import"
Step 6: Verify Import
The tables and data will be imported and visible under your database
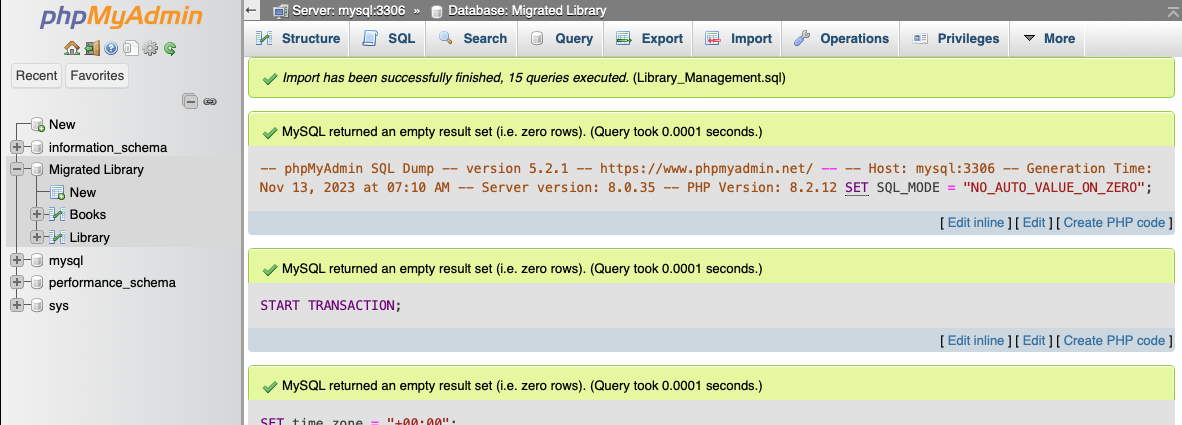
Congratulations! 🎉 You have successfully imported your tables and data to your new MySQL instance.
5️⃣ Testing the Migration
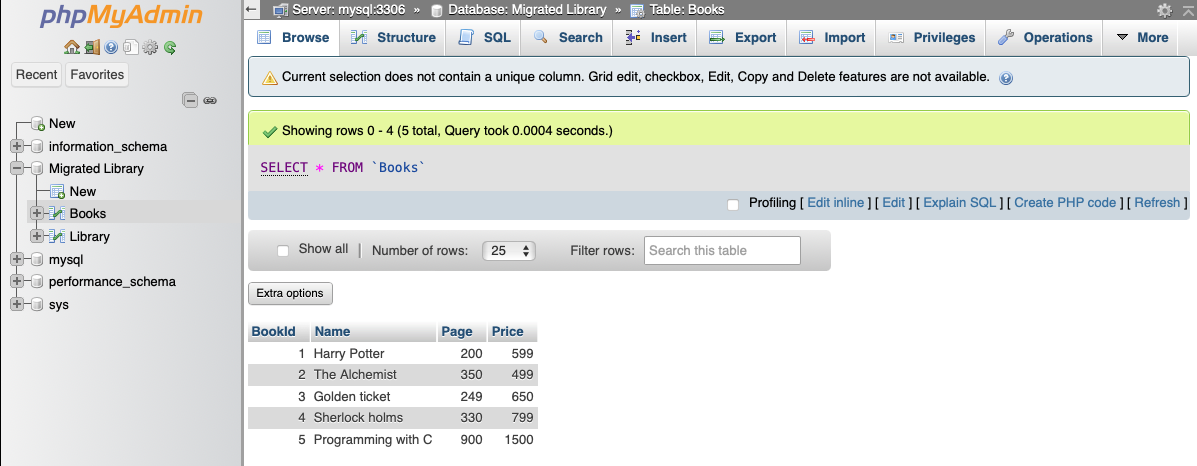
Verify Data Integrity
- Navigate to your tables and verify all data is present as in your previous instance
- Check that all table structures, indexes, and relationships are intact
- Test any stored procedures, triggers, or views that were part of your original database
Example Verification
In our example, the new database successfully imported all tables and data:
6️⃣ Post-Migration Steps
After successful migration, consider these additional steps:
- Update Connection Strings: Update your applications to connect to the new Elestio MySQL instance
- Configure Users: Set up appropriate database users and permissions
- Test Performance: Verify query performance meets your requirements
- Set up Monitoring: Configure monitoring and alerting for your new database
- Schedule Backups: Set up regular backups for your Elestio MySQL instance
7️⃣ Need Additional Help?
Stuck somewhere? We're here to help! Create a support ticket and we'll get back to you promptly.
Related Resources
- MySQL Service Details - Learn more about Elestio's MySQL offering
- Data Migration Service - Automated migration option
- Best Practices - Database migration tips and best practices