Migrate WordPress to Elestio
This migration document focuses on WordPress, which is supported by Elestio. Find the complete software list here
This document provides a step-by-step guide for migrating your existing WordPress site to Elestio. Elestio is designed to enhance performance, scalability, and overall system efficiency.
1️⃣ Pre-requisites
- Create Account: Set up your account on Elestio
- Access Current Site: Log in to your WordPress account where your current site is hosted
- Check Site Health: Ensure your application works correctly with no critical errors in logs
- Version Matching: Use the same WordPress version on Elestio as your current service to prevent migration failures
2️⃣ Exporting the Data
There are two primary ways to export WordPress data. We'll focus on the native method, but you can also consider plugins like WPvivid for migration.
Example Migration
We'll demonstrate migrating a simple site with 2 pages:
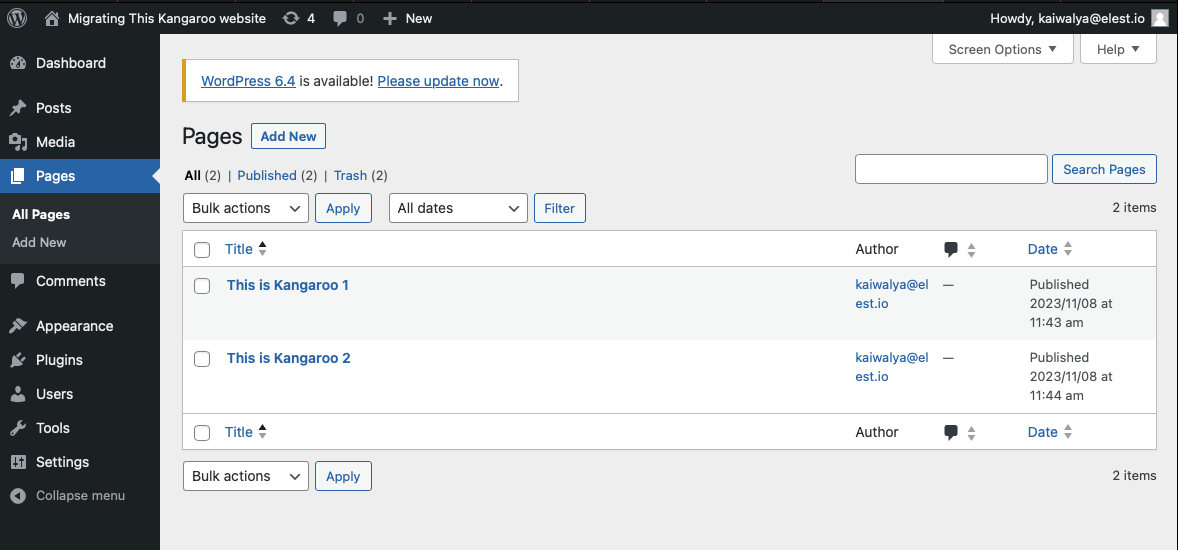
Step 1: Access Export Tools
Navigate to your WordPress dashboard, go to "Tools" in the left panel, and select "Export"
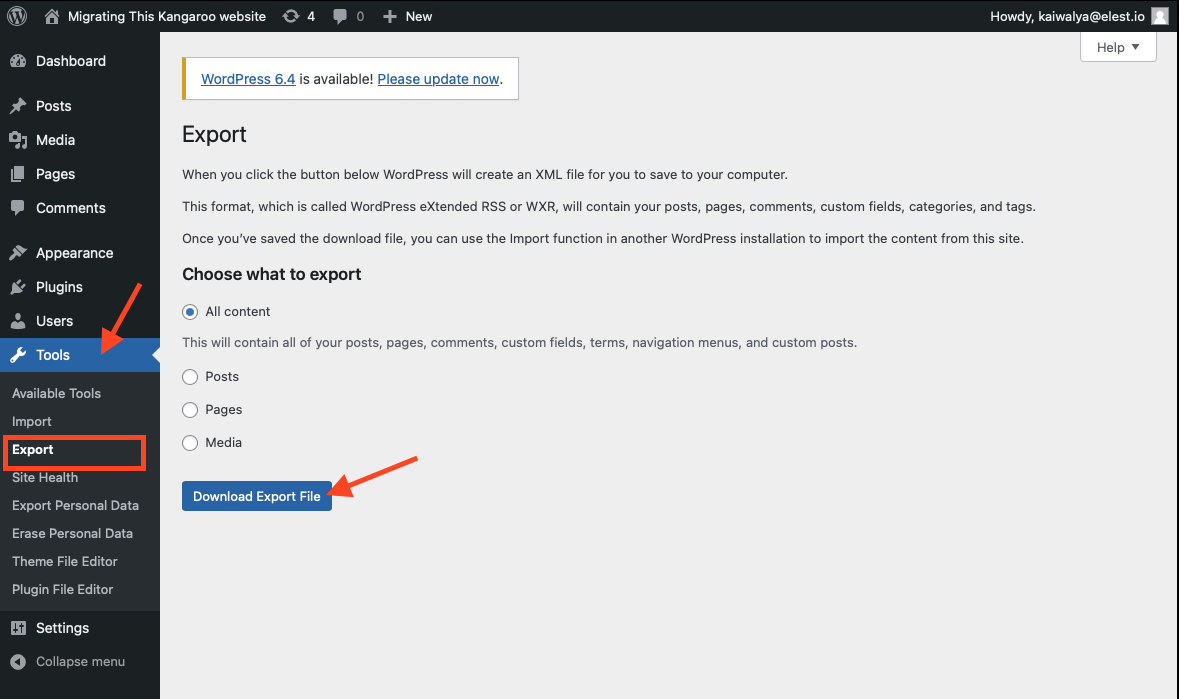
Step 2: Download Export File
Click "Download Export Files". Here we're exporting all content, but you can choose selective export if needed.
Important Notes:
- The exported file will be in XML format and saved to your local machine
- You can optionally create a backup copy of this exported data for additional security
- This backup step is optional but recommended for extra data protection
3️⃣ Setup Elestio WordPress Service
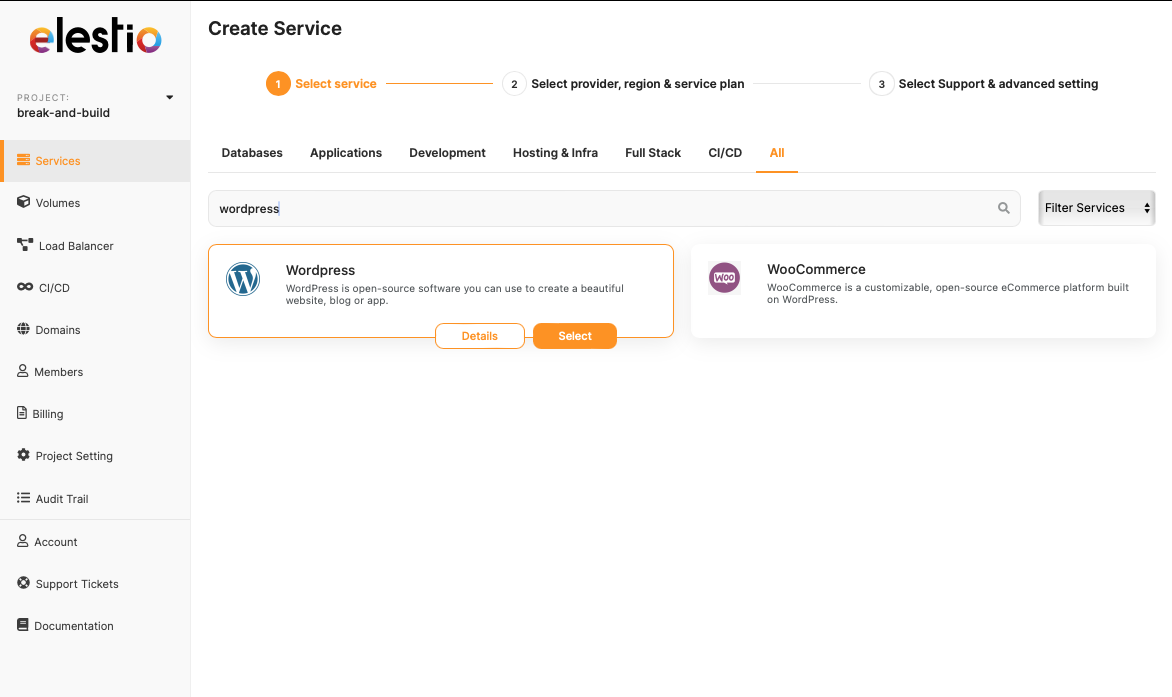
Step 1: Find WordPress Service
Navigate to the Elestio Dashboard and search for the WordPress service
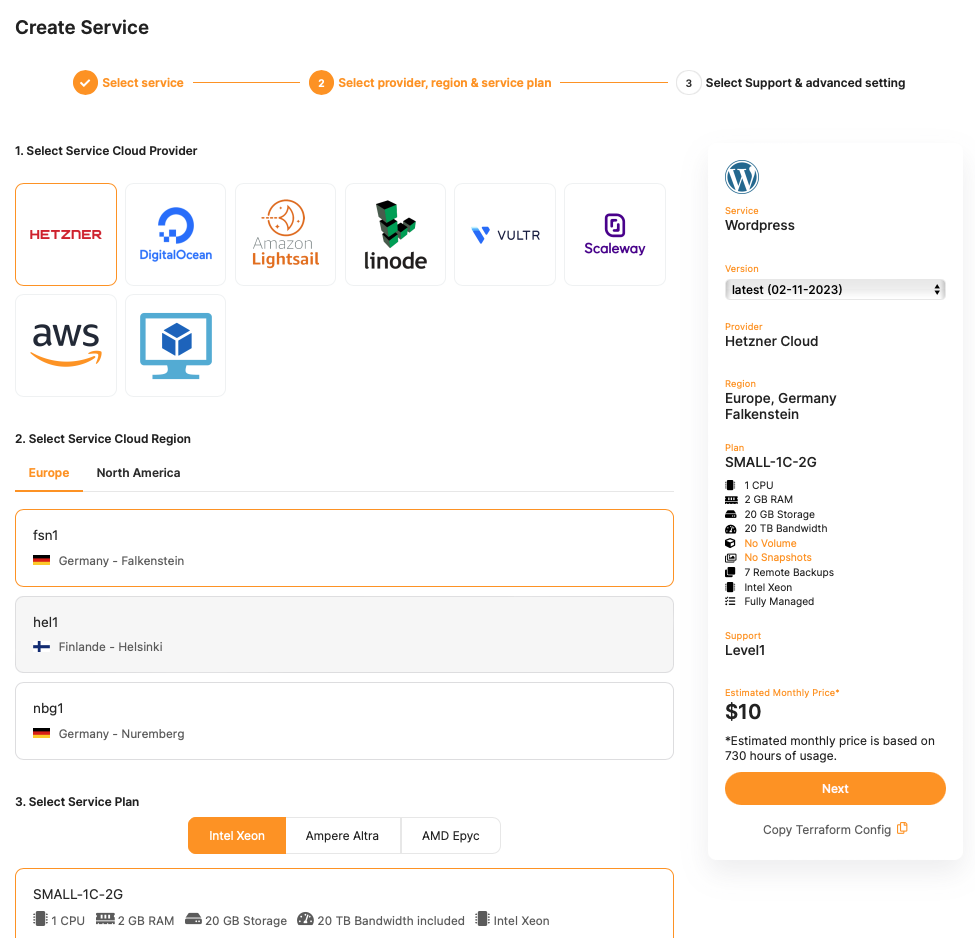
Step 2: Configure Deployment
Select the service and configure your service provider, region, and service plan. If you have no specific preferences, use the defaults.
Step 3: Create Service
Name your service and click "Create Service"
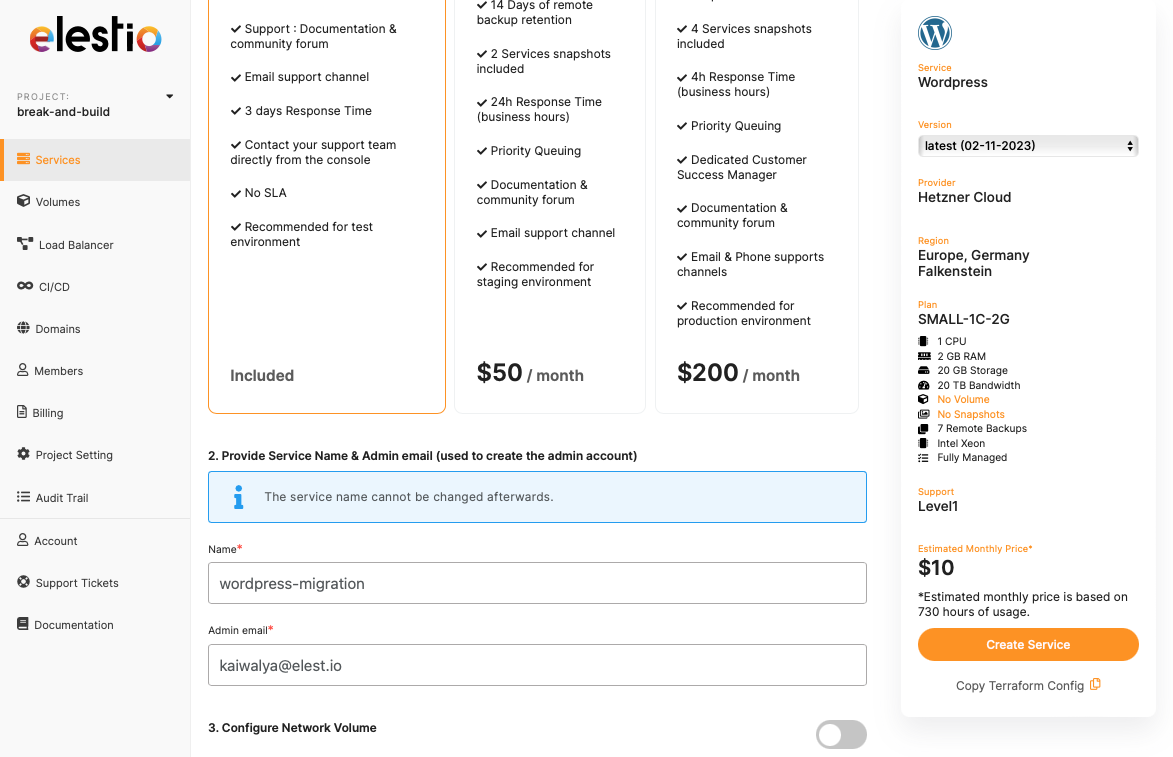
Step 4: Access WordPress
Navigate to your service and click the link provided under the "Admin UI" button
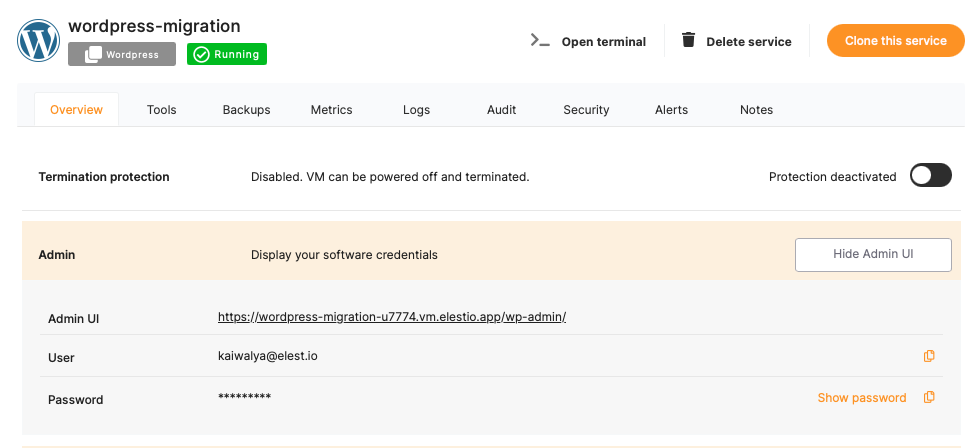
Step 5: Complete WordPress Setup
Create your site using the provided details and log in to the WordPress instance. You'll see a dashboard similar to this:
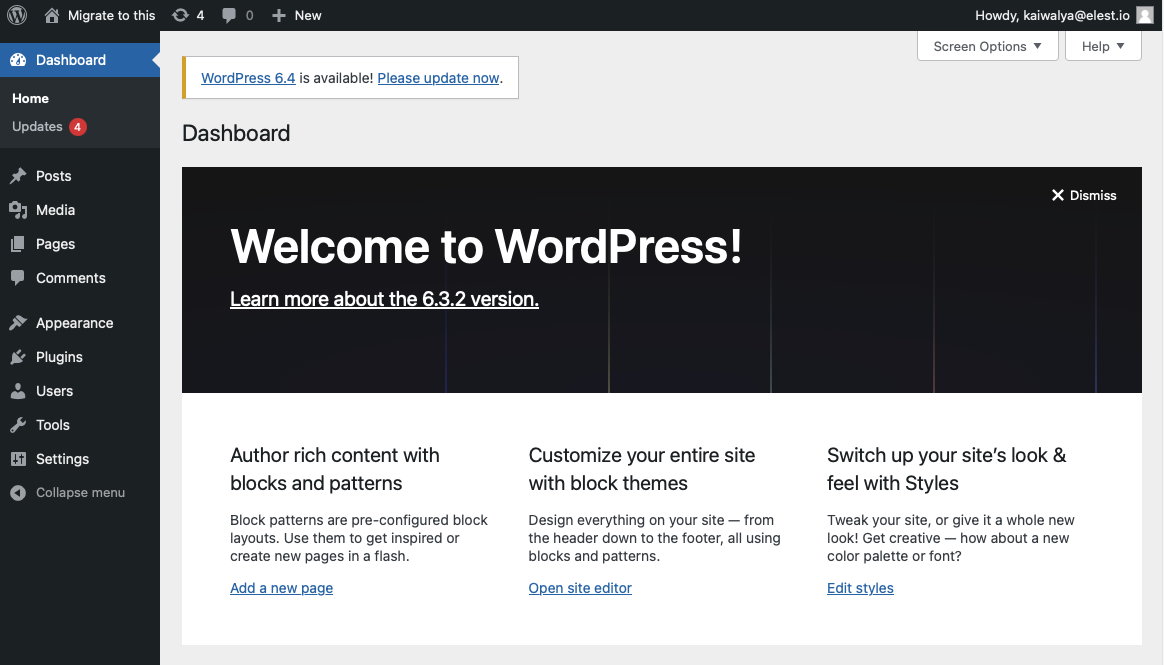
4️⃣ Importing the Data
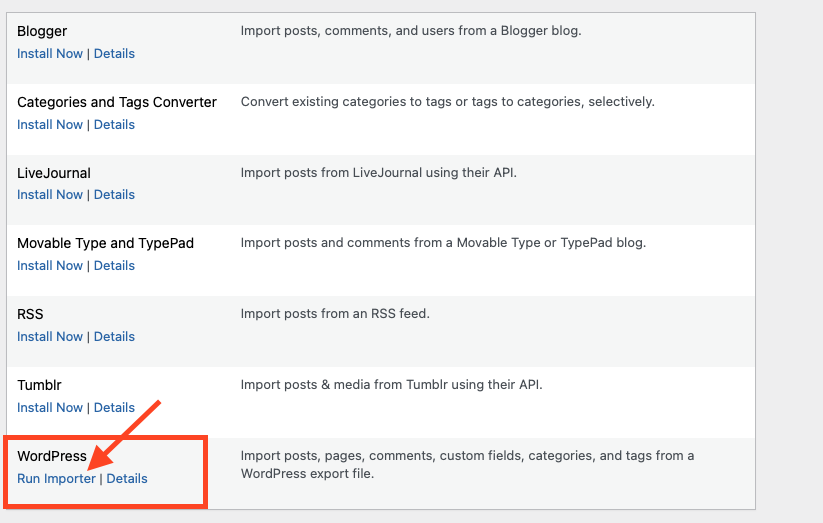
Step 1: Access Import Tools
In your new WordPress instance, navigate to "Tools" and click "Import"
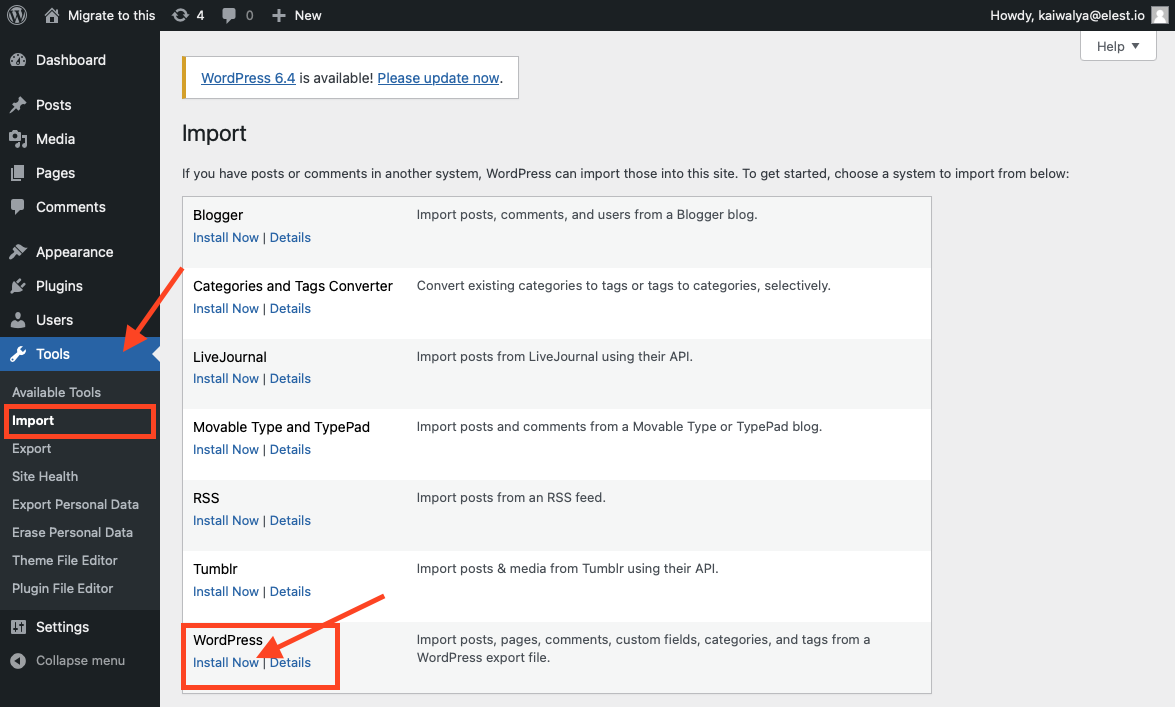
Step 2: Install WordPress Importer
Click "Install Now" for WordPress as shown in the image above
Step 3: Run Importer
After installation, run the importer
Step 4: Upload Export File
Choose the XML file you exported in step 2 and click "Upload file and Import"

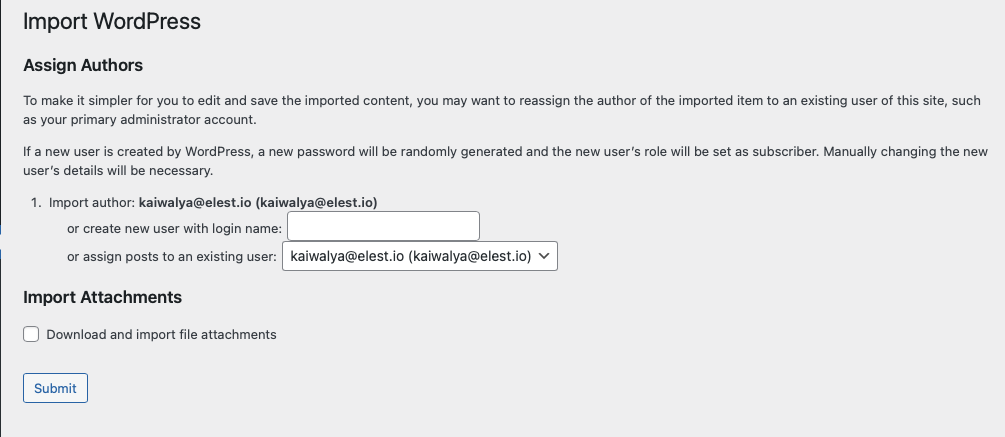
Step 5: Configure Author Information
Fill out the author information and click "Submit"
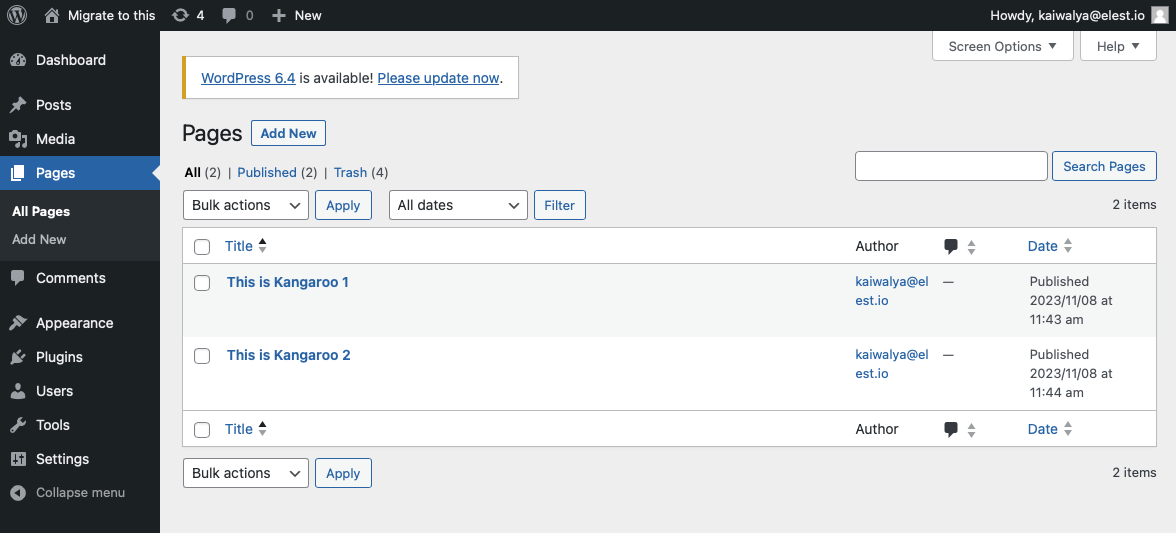
Step 6: Import Complete
Congratulations! Your content has been imported and your site is migrated safely.
5️⃣ Testing the Migration
Verify Site Functionality
Navigate to the top left of the screen where you can see your site name (in this example, "Migrate to this"). Click on the name to view your site as it was before migration.
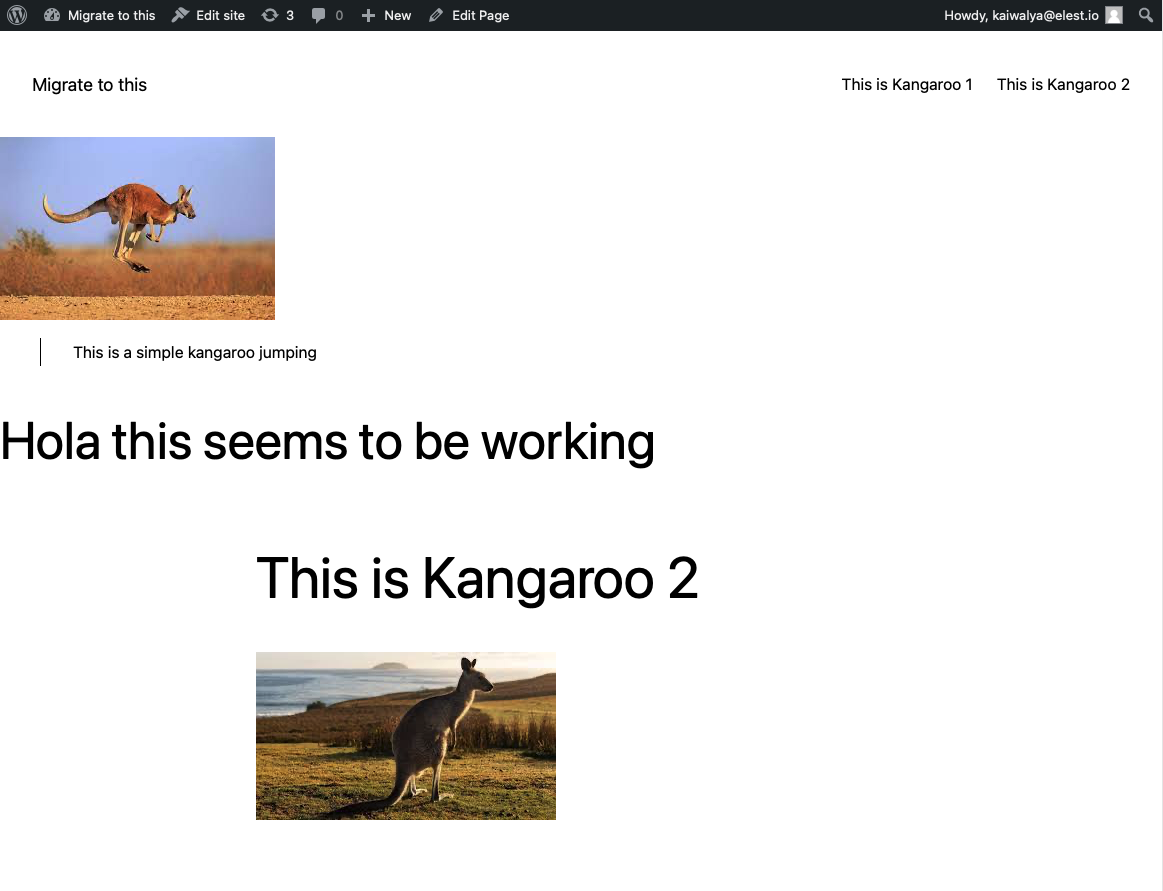
Congratulations! Enjoy your newly migrated WordPress site on Elestio 🎉
6️⃣ Post-Migration Steps
After successful migration, consider these additional steps:
- Update URLs: Ensure all internal links point to your new Elestio domain
- Check Plugins: Verify all plugins are working correctly
- Test Functionality: Test contact forms, e-commerce features, and other interactive elements
- Configure SSL: Ensure your site has proper SSL configuration
- Set up Backups: Configure automatic backups for your new Elestio WordPress instance
7️⃣ Need Additional Help?
Stuck somewhere? We're here to help! Create a support ticket and we'll get back to you promptly.
Related Resources
- WordPress Service Details - Learn more about Elestio's WordPress offering
- General Migration Guide - For other supported applications
- Best Practices - Migration tips and best practices