Custom domain and public access
Serve a bucket on your own domain
Open the Custom domain tab of the bucket.
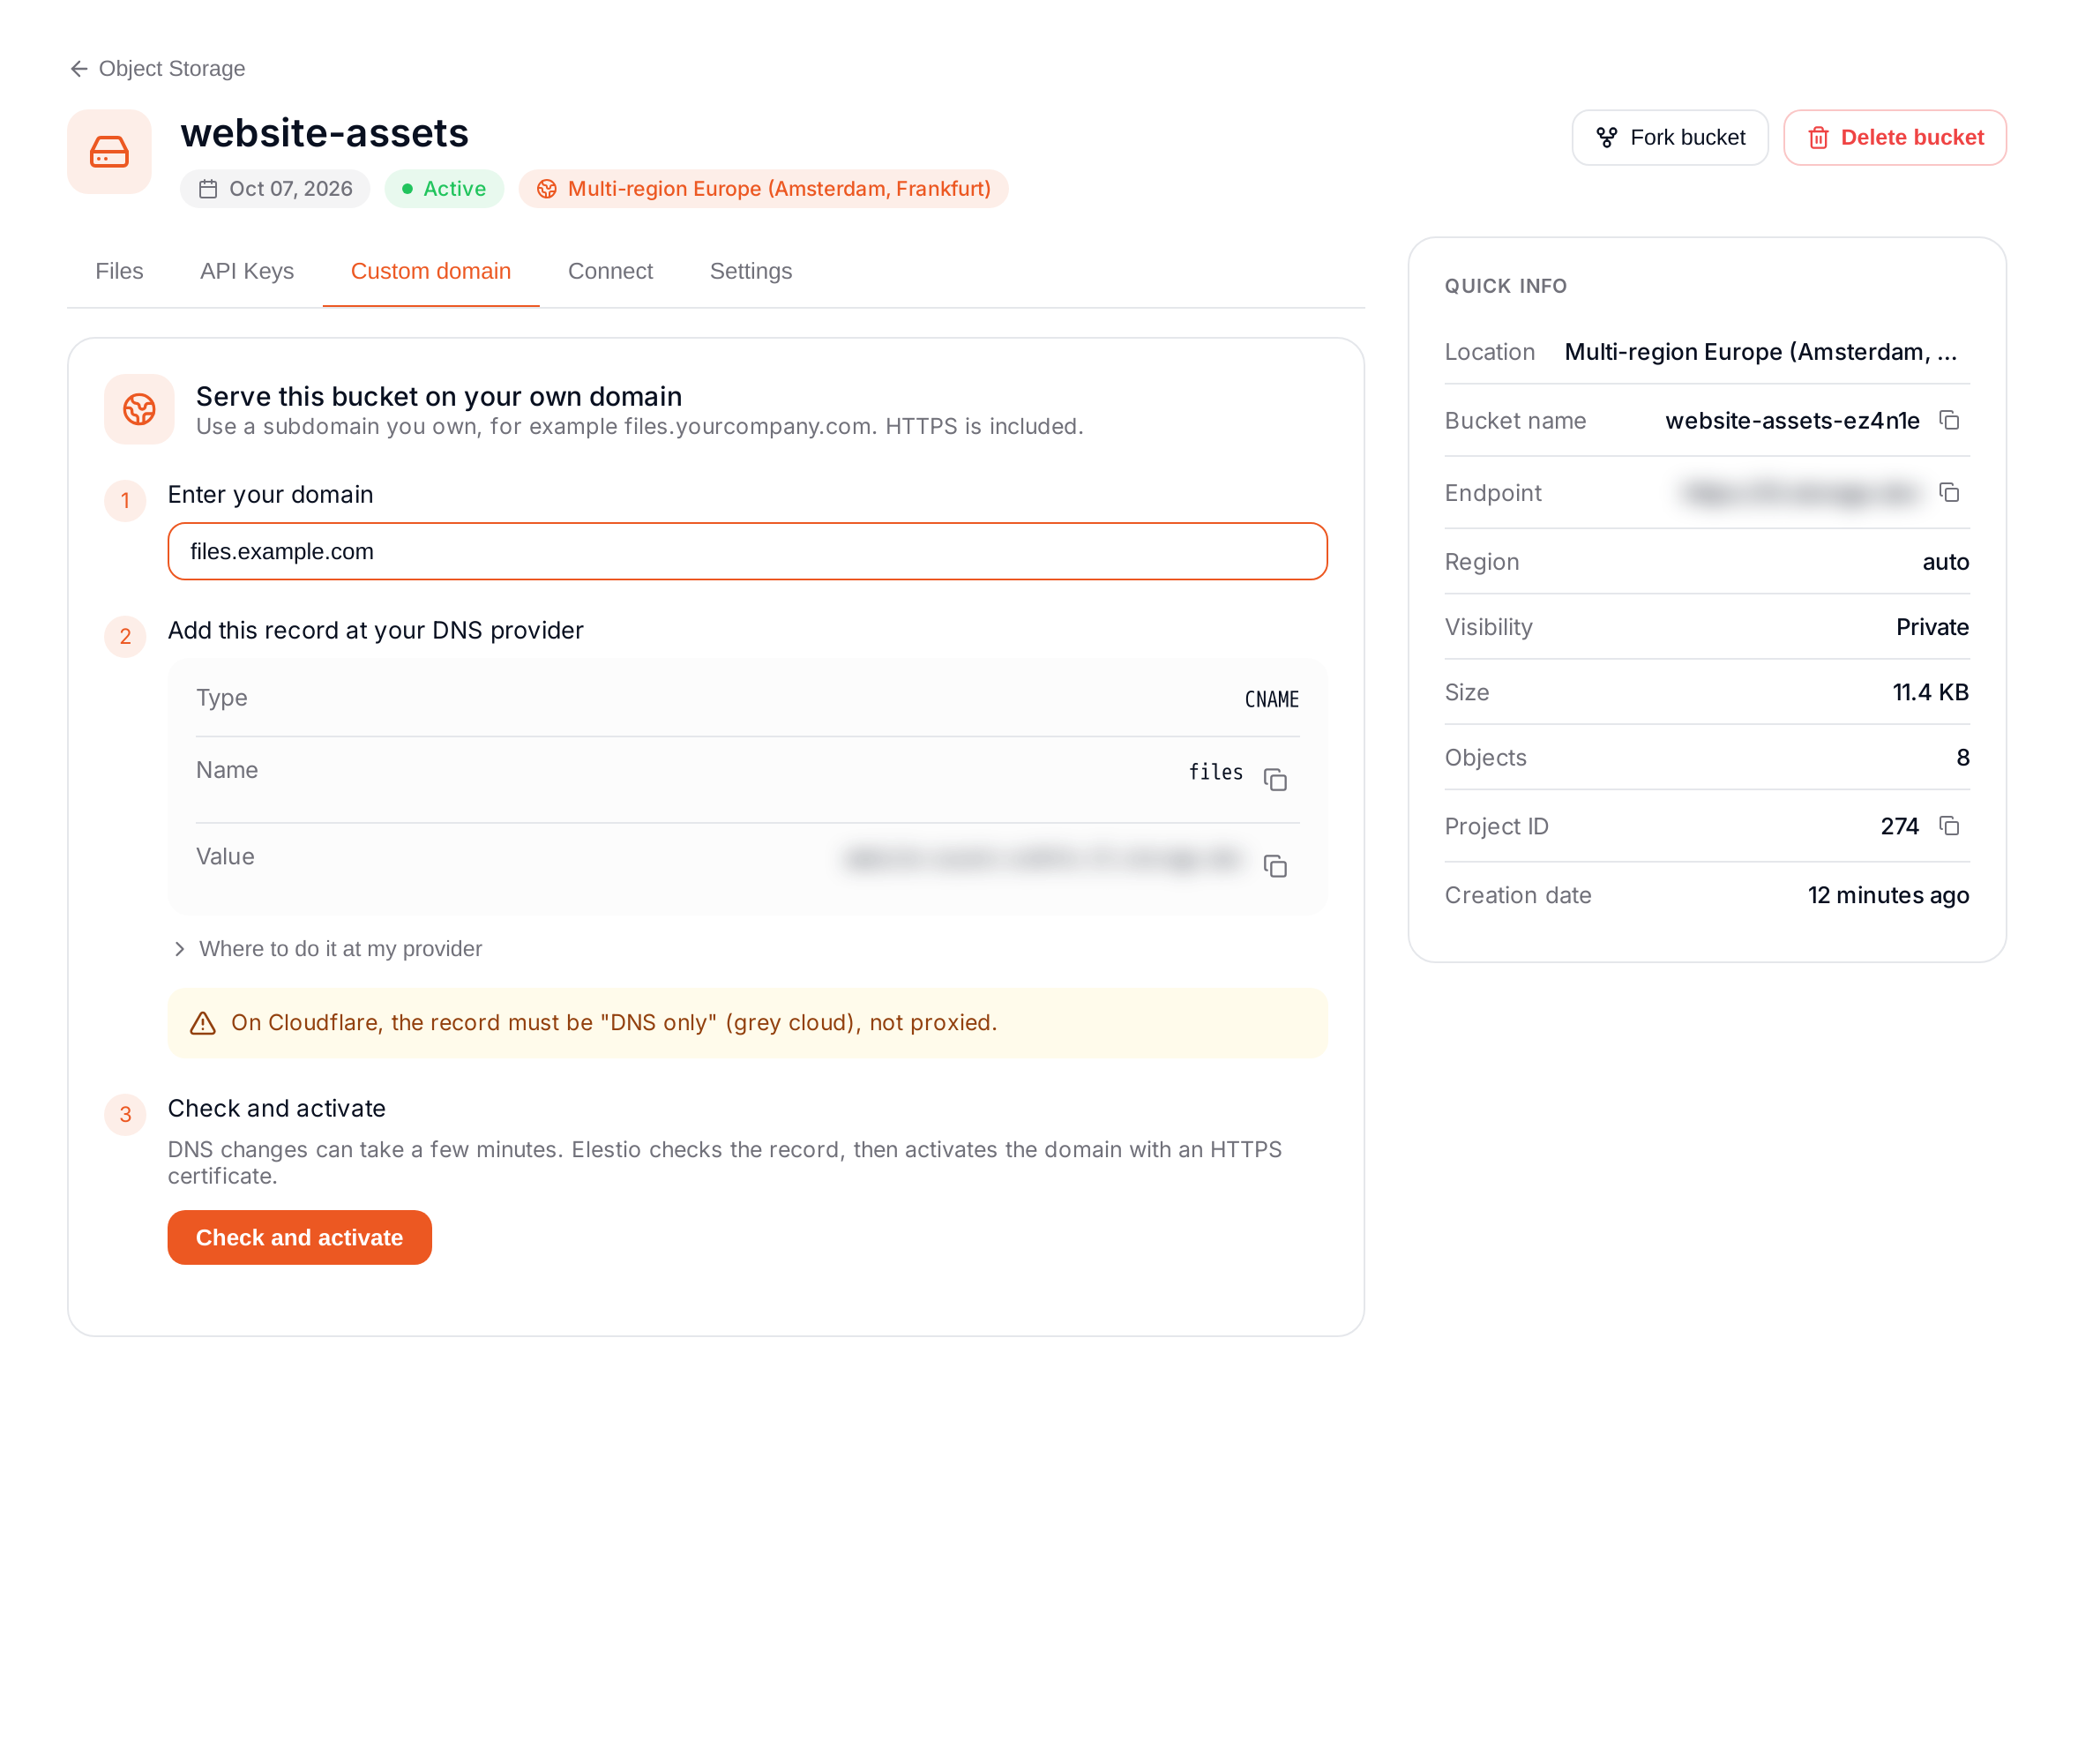
- Enter your domain: a subdomain you own, for example
files.yourcompany.com. - Add the record at your DNS provider: a
CNAMEfrom your domain to the target shown in the dashboard. - Click Check and activate. Elestio checks the record, then activates the domain with an HTTPS certificate.
On Cloudflare, the record must be DNS only (grey cloud), not proxied.
Keep the CNAME record in place: it is used to renew the HTTPS certificate automatically. DNS changes can take a few minutes.
Your files are then served on your domain, for example https://files.yourcompany.com/photos/beach.jpg. Temporary links created from the file browser also use it.
Make a bucket public
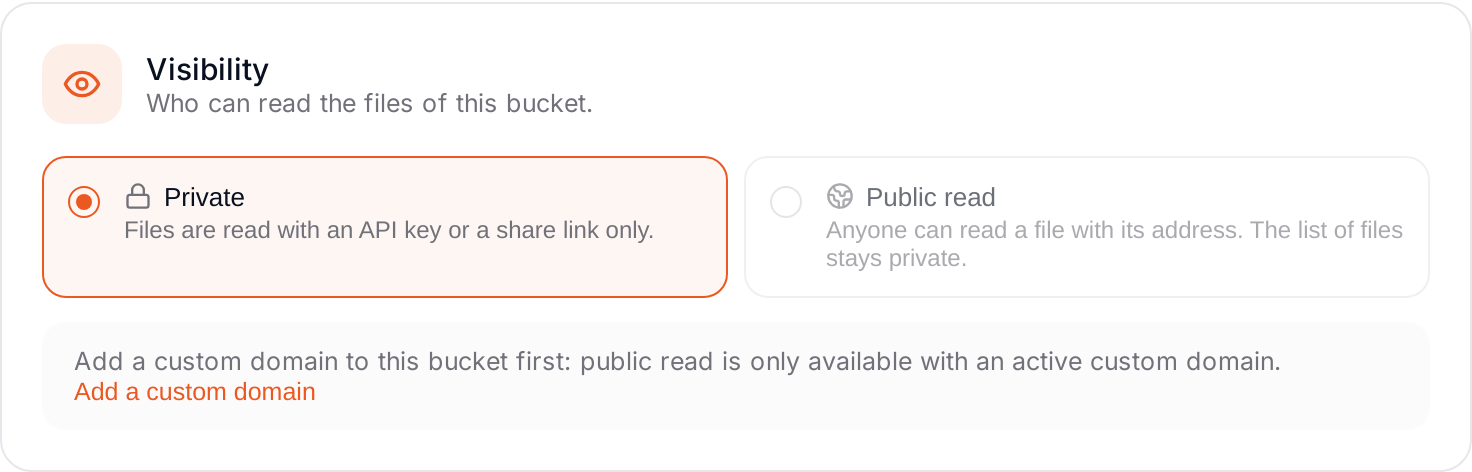
By default a bucket is private: files are read with an API key or a share link only. With a custom domain, you can make it public: anyone can read a file with its address, without a key. The list of files stays private.
In the bucket, open Settings > Visibility and choose Public read.
Read this before making a bucket public:
- Anyone who knows or guesses a file path can download it.
- Every download is a read request billed to you, whoever makes it.
- Files are also readable at the direct storage address of the bucket, not only on your domain.
The bucket goes back to private if you remove the custom domain, if your credit is exhausted, or if the bucket is deleted.
Only the owners and admins of the project can add a custom domain or change the visibility.
Remove a custom domain
Click Remove next to the domain. Links using it stop working; the files stay in the bucket.
Then delete the CNAME record at your DNS provider. A record left in place could later point to a bucket that is not yours. When you delete a bucket that had a domain, Elestio reminds you by email.