Using Cloudflare
You can use Cloudflare for DNS only, or as a proxy in front of your service. Each path needs a different setup.
Cloudflare for DNS only
To use Cloudflare for DNS only, configure it like any other DNS provider and follow the custom domain steps.
Your DNS entry must use a grey cloud, not an orange (proxied) cloud.
Using Cloudflare proxy for your domain without the extra configuration below will cause all incoming connections to fail.

This is the correct setting for DNS-only entries.

Cloudflare as a proxy
Even though Elestio already provides SSL and a firewall, Cloudflare proxying adds value: DDoS protection and automatic filtering of scripted attacks.
Cloudflare only proxies traffic on certain ports. For SSH, FTP, or other services on unlisted ports, set Cloudflare to DNS only, or use Cloudflare Spectrum.
Because Elestio already issues an SSL certificate trusted by a root CA, the recommended setup is Strict SSL verification between Cloudflare and your server.
Before continuing, configure your domain as described in Custom domain and SSL/TLS.
Option 1: Strict SSL for the whole domain
- Open the SSL/TLS section of your domain dashboard.
- Select Full (strict). Changes save automatically.
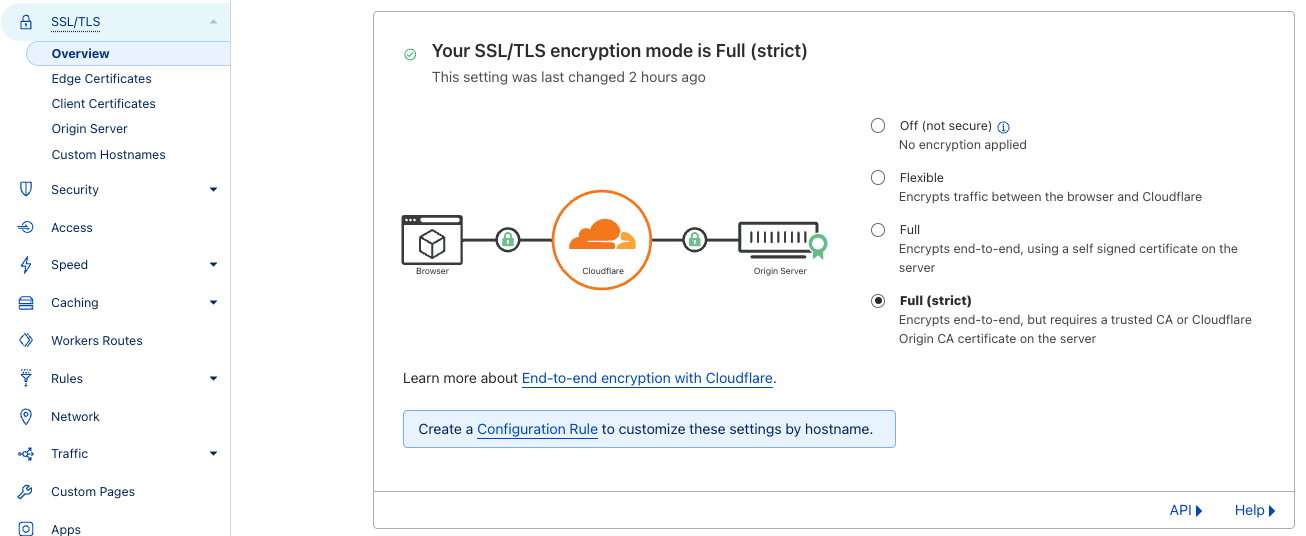
Option 2: Strict SSL for a specific subdomain
- Go to Rules › Configuration Rules and click Create Rule.
- Name the rule and set the incoming request filters.
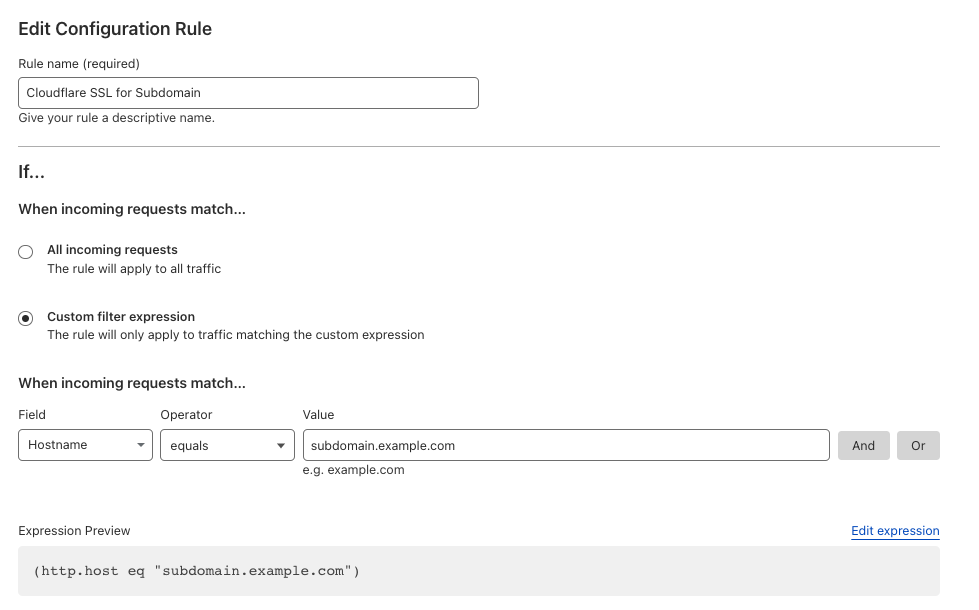
- Set SSL to Strict.
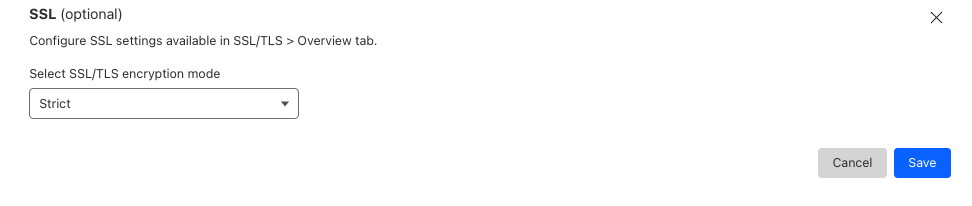
- Click Save.
Option 3: Manual configuration (advanced)
If you need a custom setup, disable Elestio SSL certificate creation:
Create a CNAME record for your Cloudflare entry pointing to the CNAME shown for that service in the Elestio dashboard.
These changes can be overwritten later if you modify the domain list from the Elestio dashboard.
- Connect to the VM with SSH and edit the Nginx env file:
nano /opt/elestio/nginx/.env
- Remove your domain from the first line and save with
Ctrl+X. - Restart Nginx:
cd /opt/elestio/nginx;
docker-compose down;
docker-compose up -d;
Nginx will no longer try to obtain an SSL certificate for your domain.