Cloudflare Tunnel
Cloudflare Tunnel connects your application to Cloudflare's network without exposing your server IP or opening inbound ports. It creates an encrypted tunnel between your server and Cloudflare's edge.
Why use it
- No exposed IP address — Your server IP stays hidden.
- No open inbound ports — Removes a common attack vector.
- Built-in DDoS protection — Backed by Cloudflare's network.
- End-to-end encryption — Secure throughout.
- Easy setup — No complex firewall rules.
- Global performance — Benefits from Cloudflare's CDN.
Prerequisites
- A Cloudflare account (free tier is enough).
- A domain configured in Cloudflare.
- Access to your server.
- Basic command-line knowledge.
Step 1: Open the Zero Trust dashboard
In your Cloudflare dashboard, click Zero Trust in the sidebar. All tunnel management happens here.
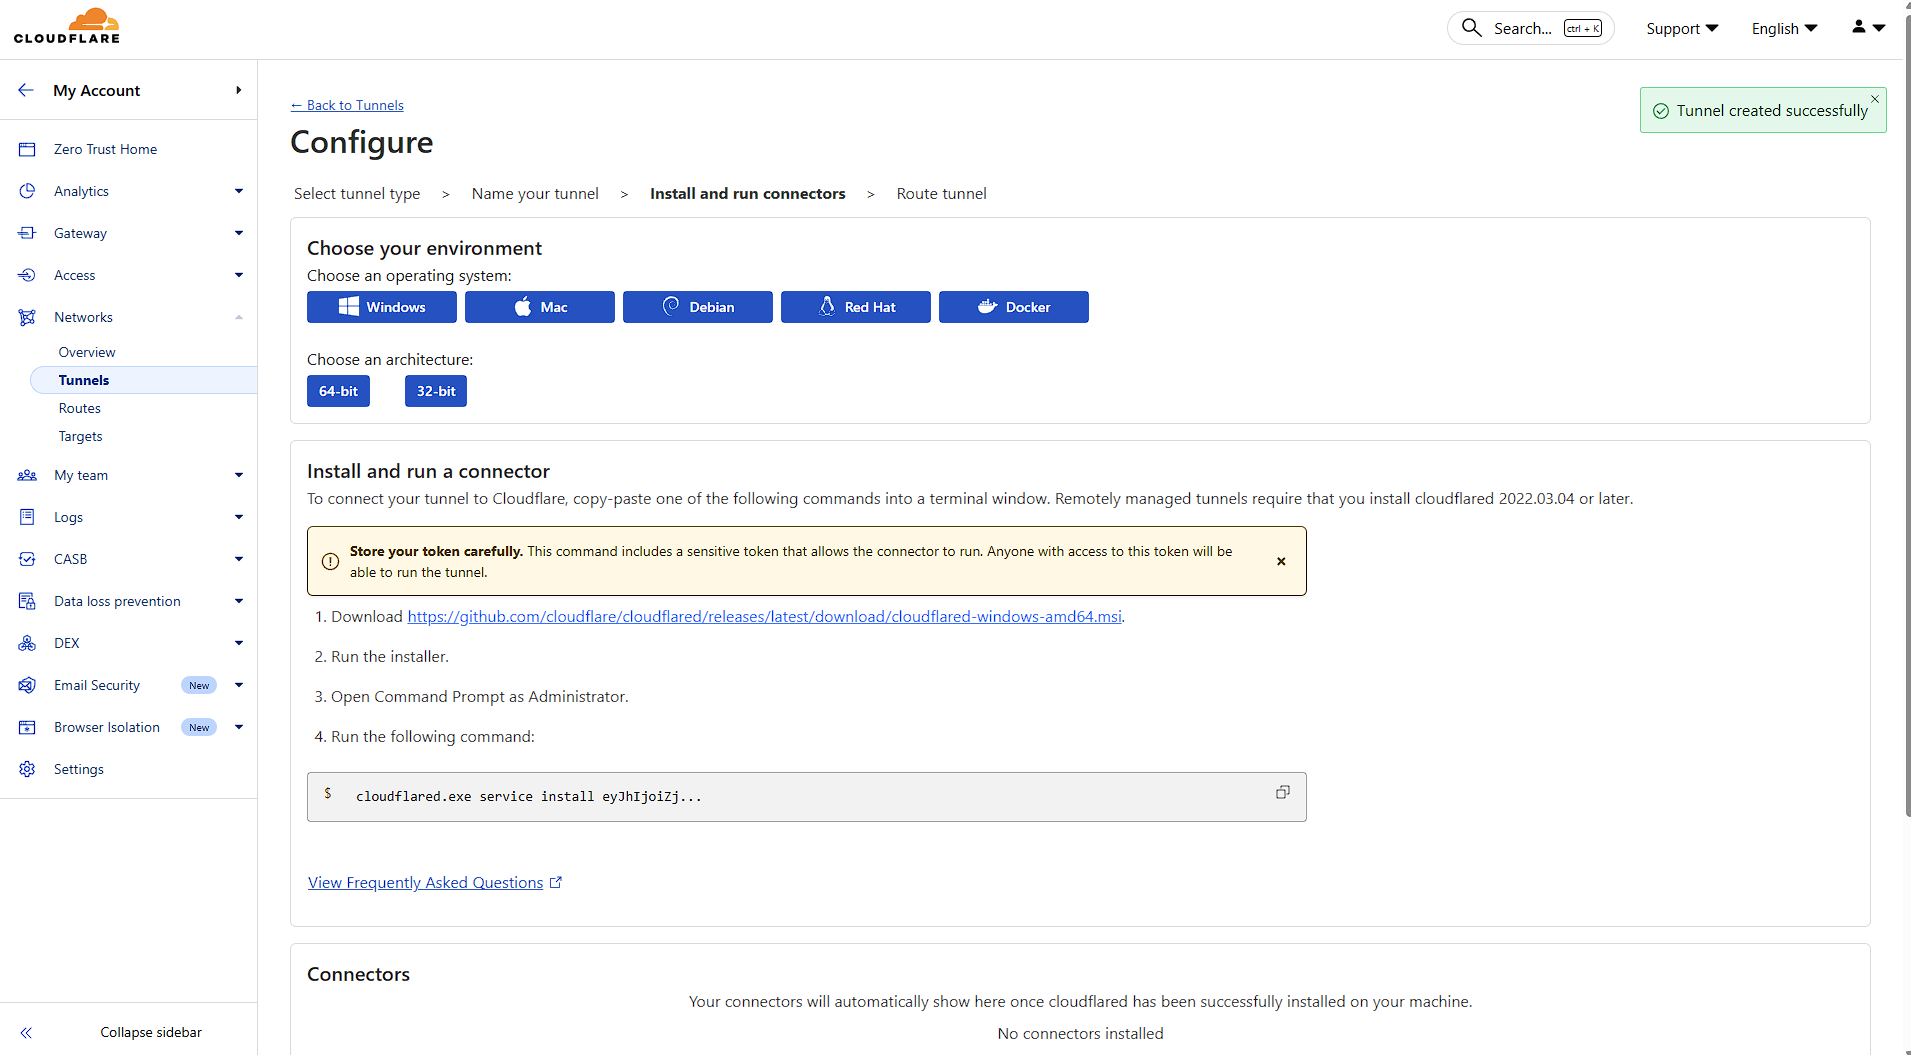
When installing on your Elestio service, select Debian as the operating system. Then open your Elestio Terminal and run the install commands Cloudflare provides to set up the tunnel service.
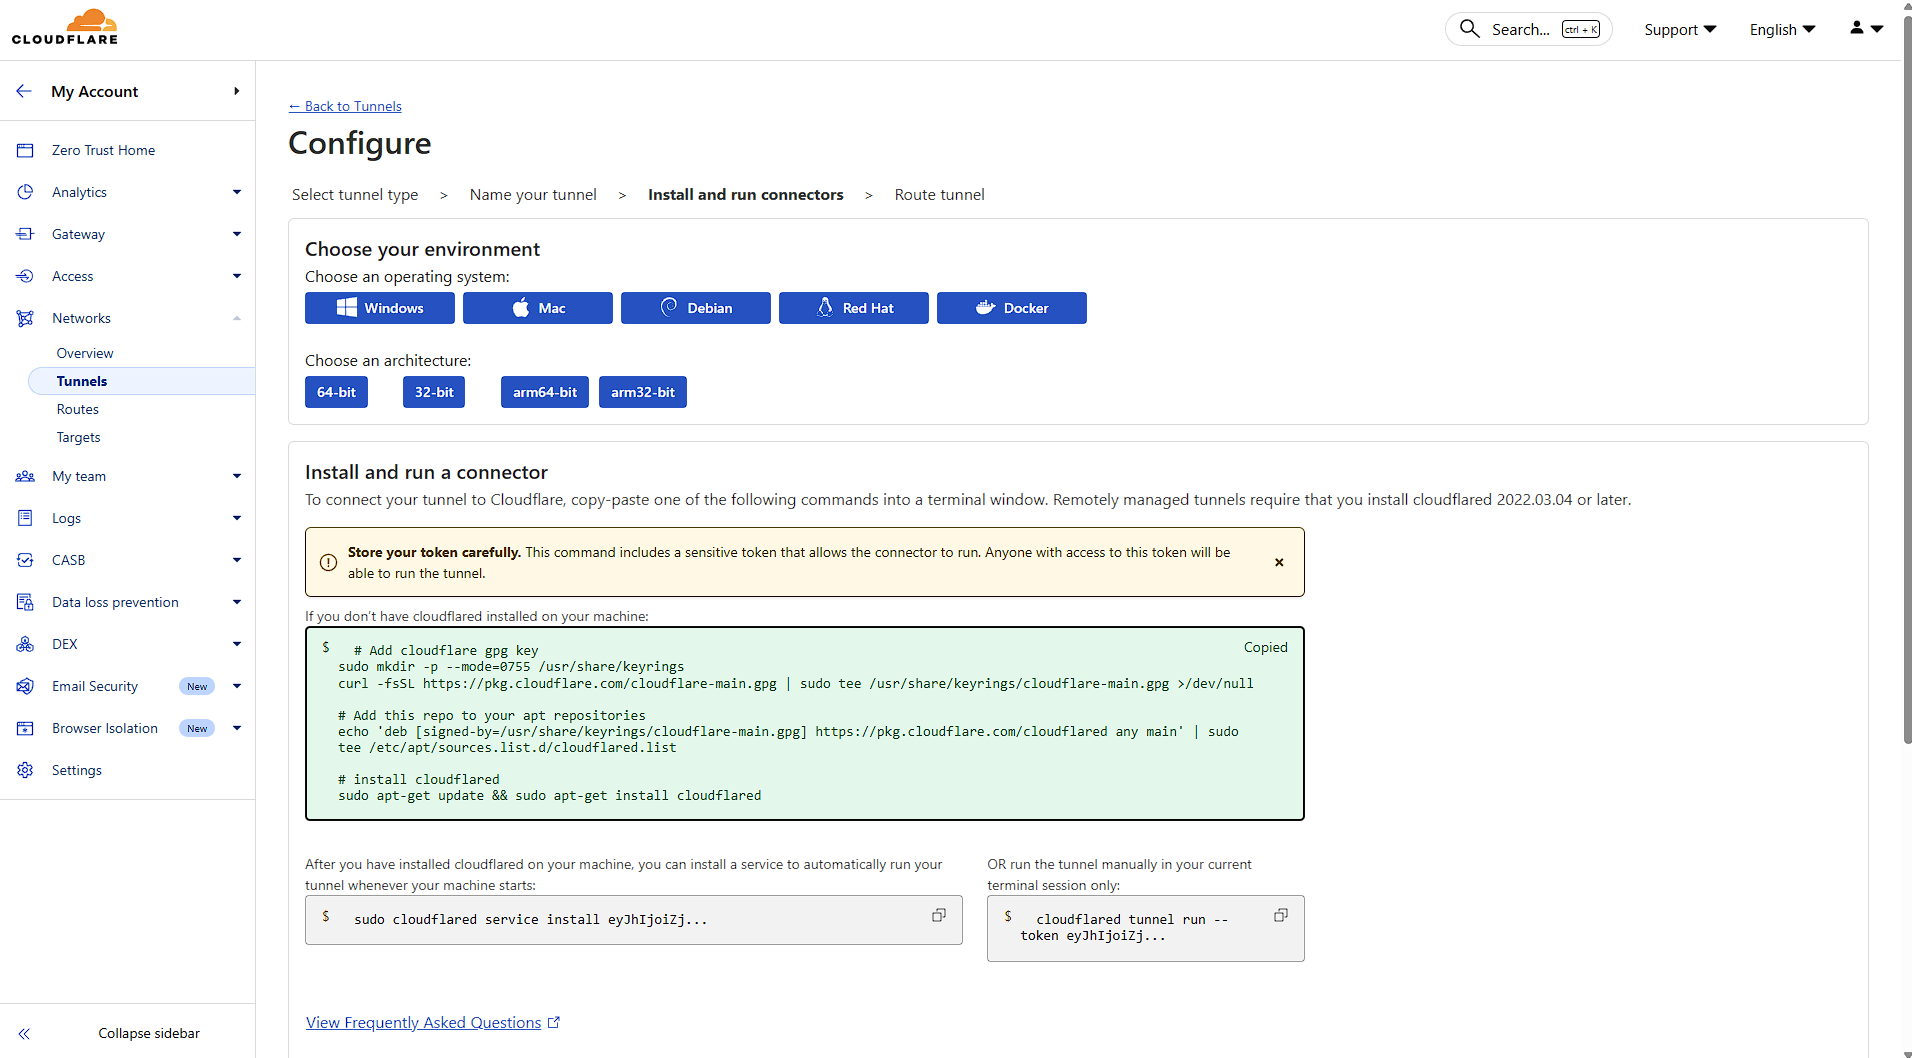
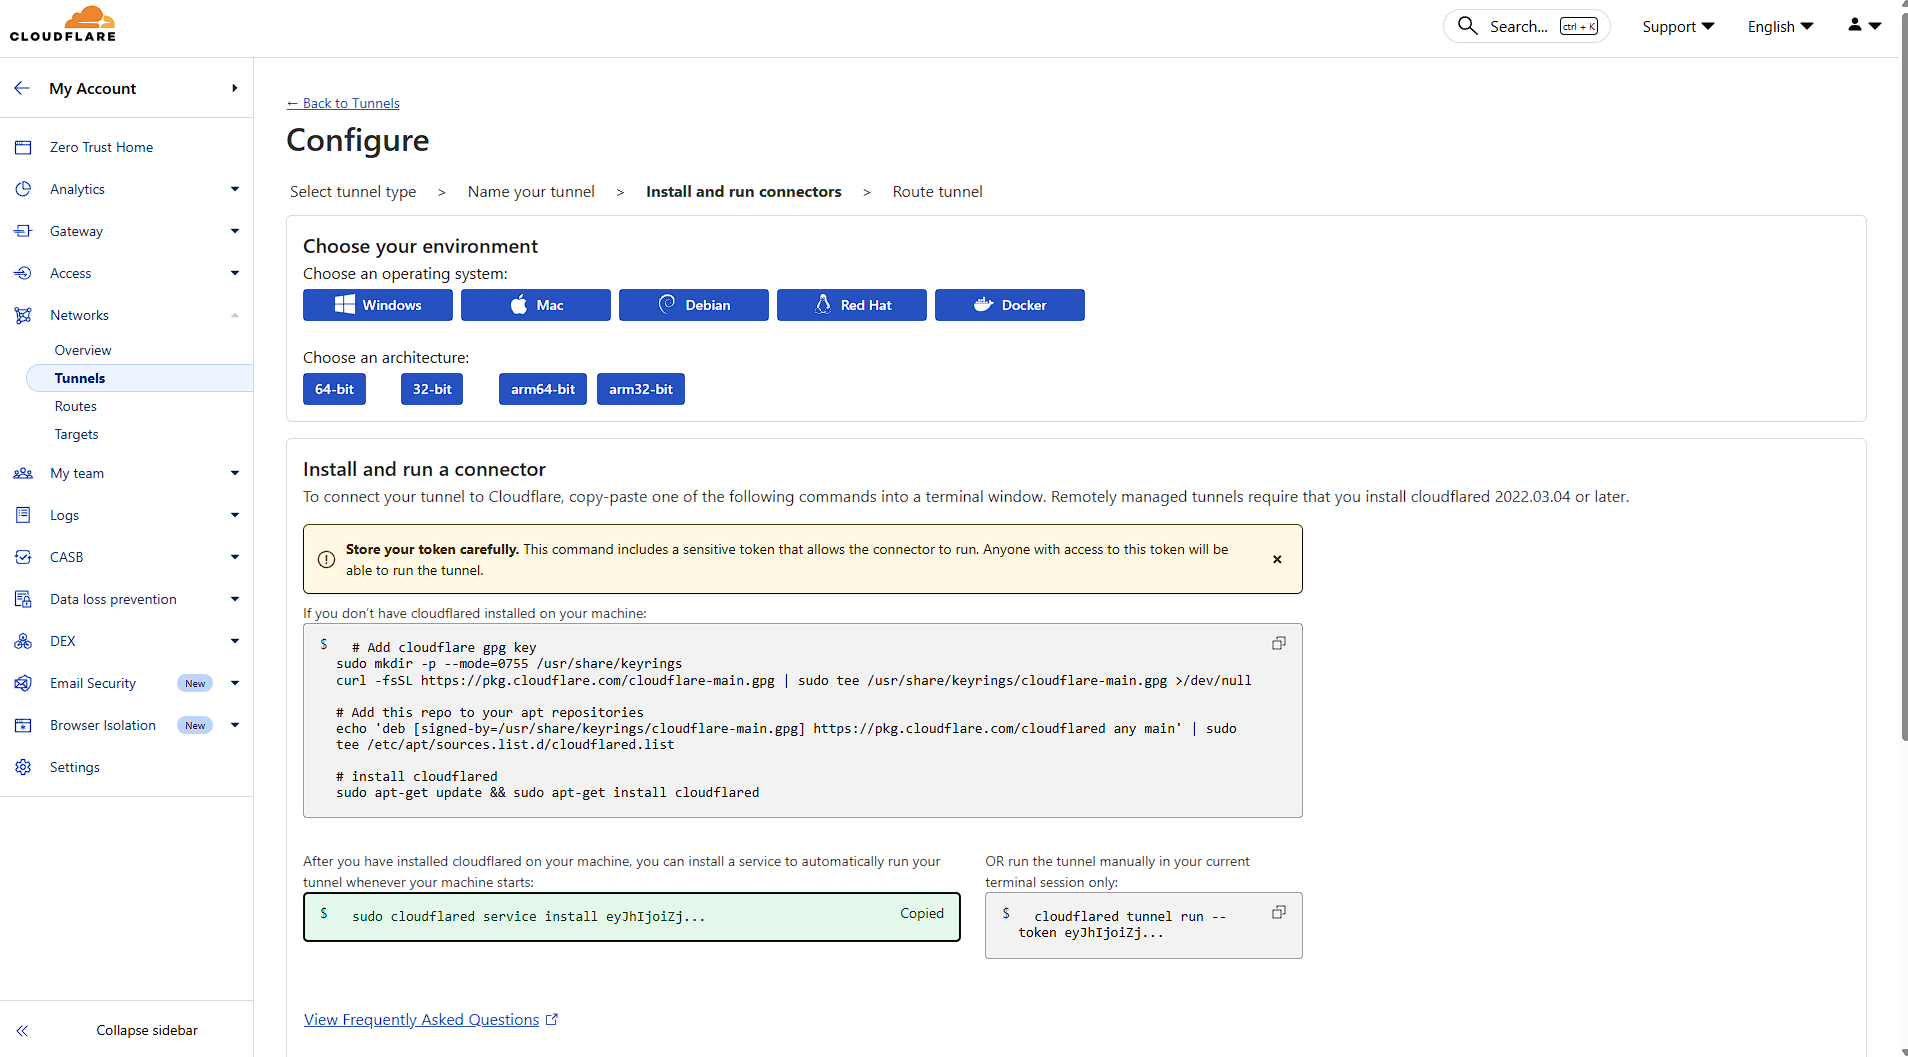
Step 2: Create a tunnel
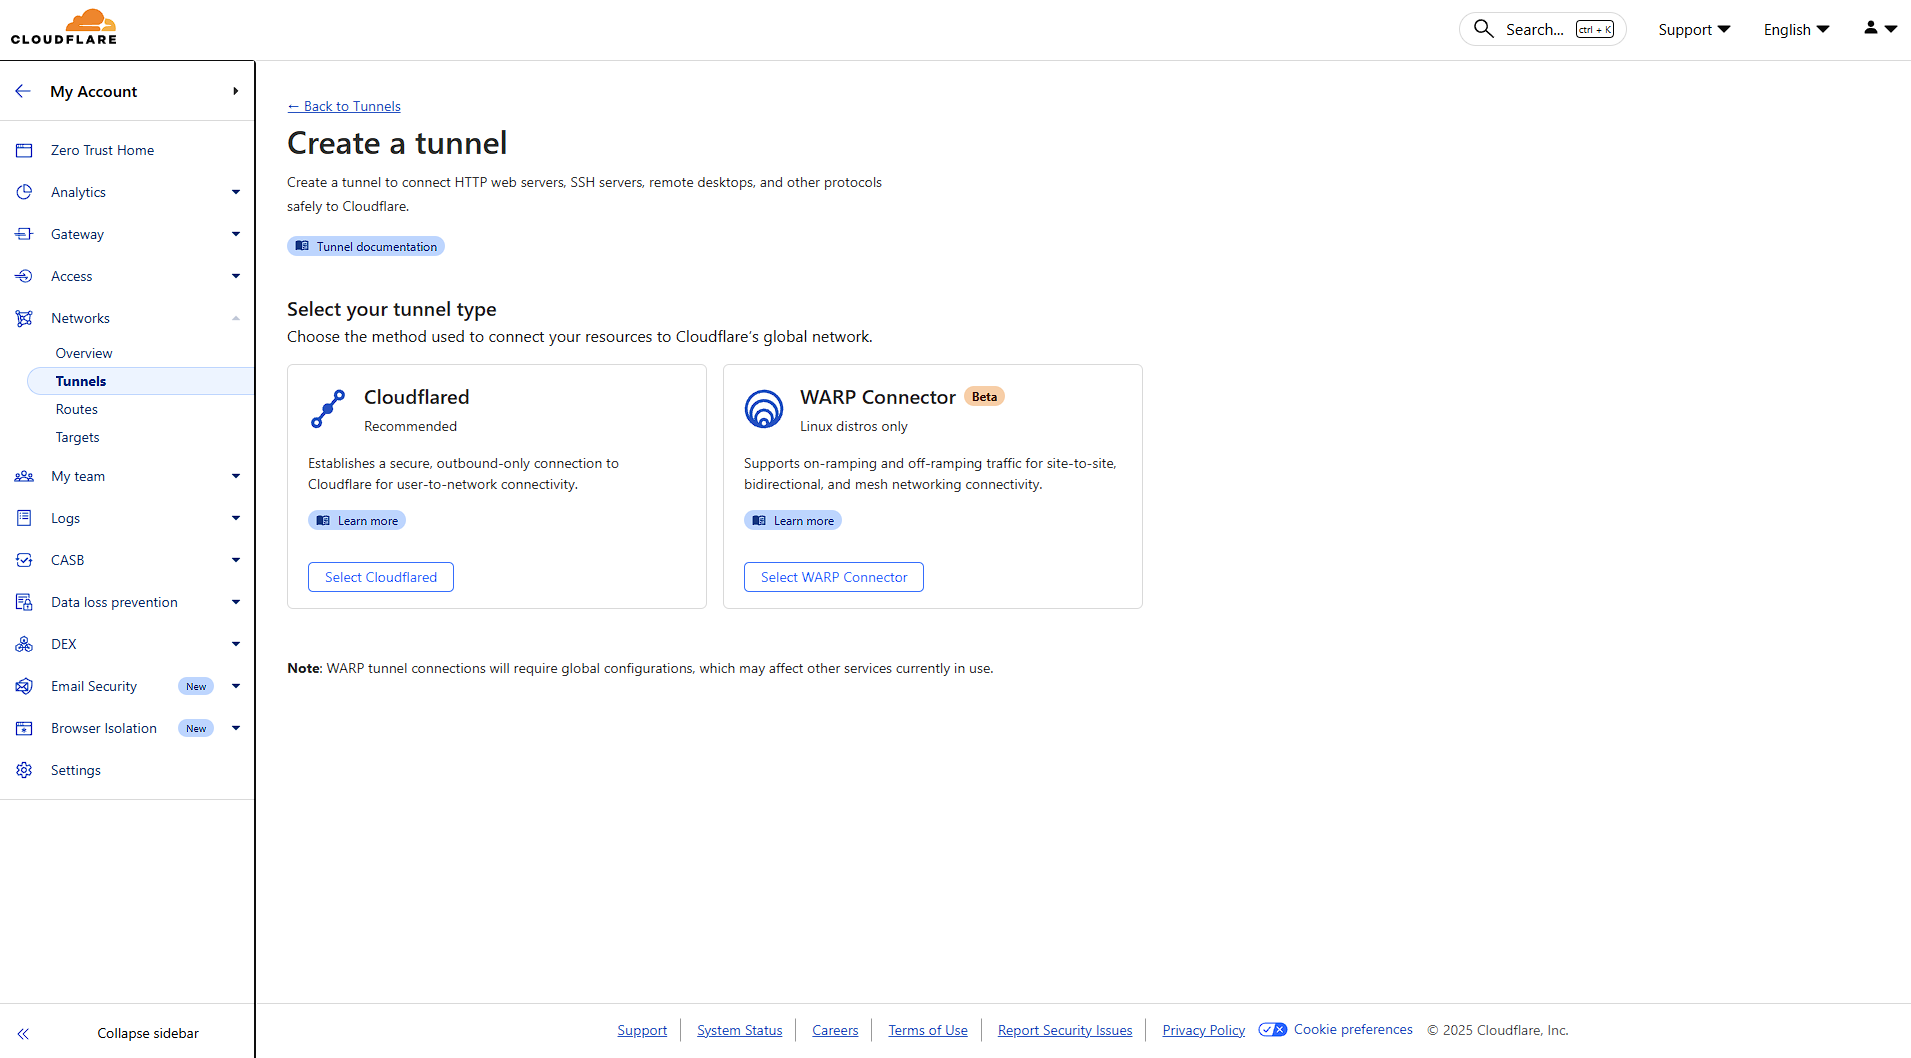
Under Networks, click Tunnels, then Create a tunnel. You will be offered two options:
- Cloudflared (recommended) — Standard for most use cases.
- WARP Connector — For advanced networking.
Select Cloudflared.
Give the tunnel a descriptive name so you can identify it later.
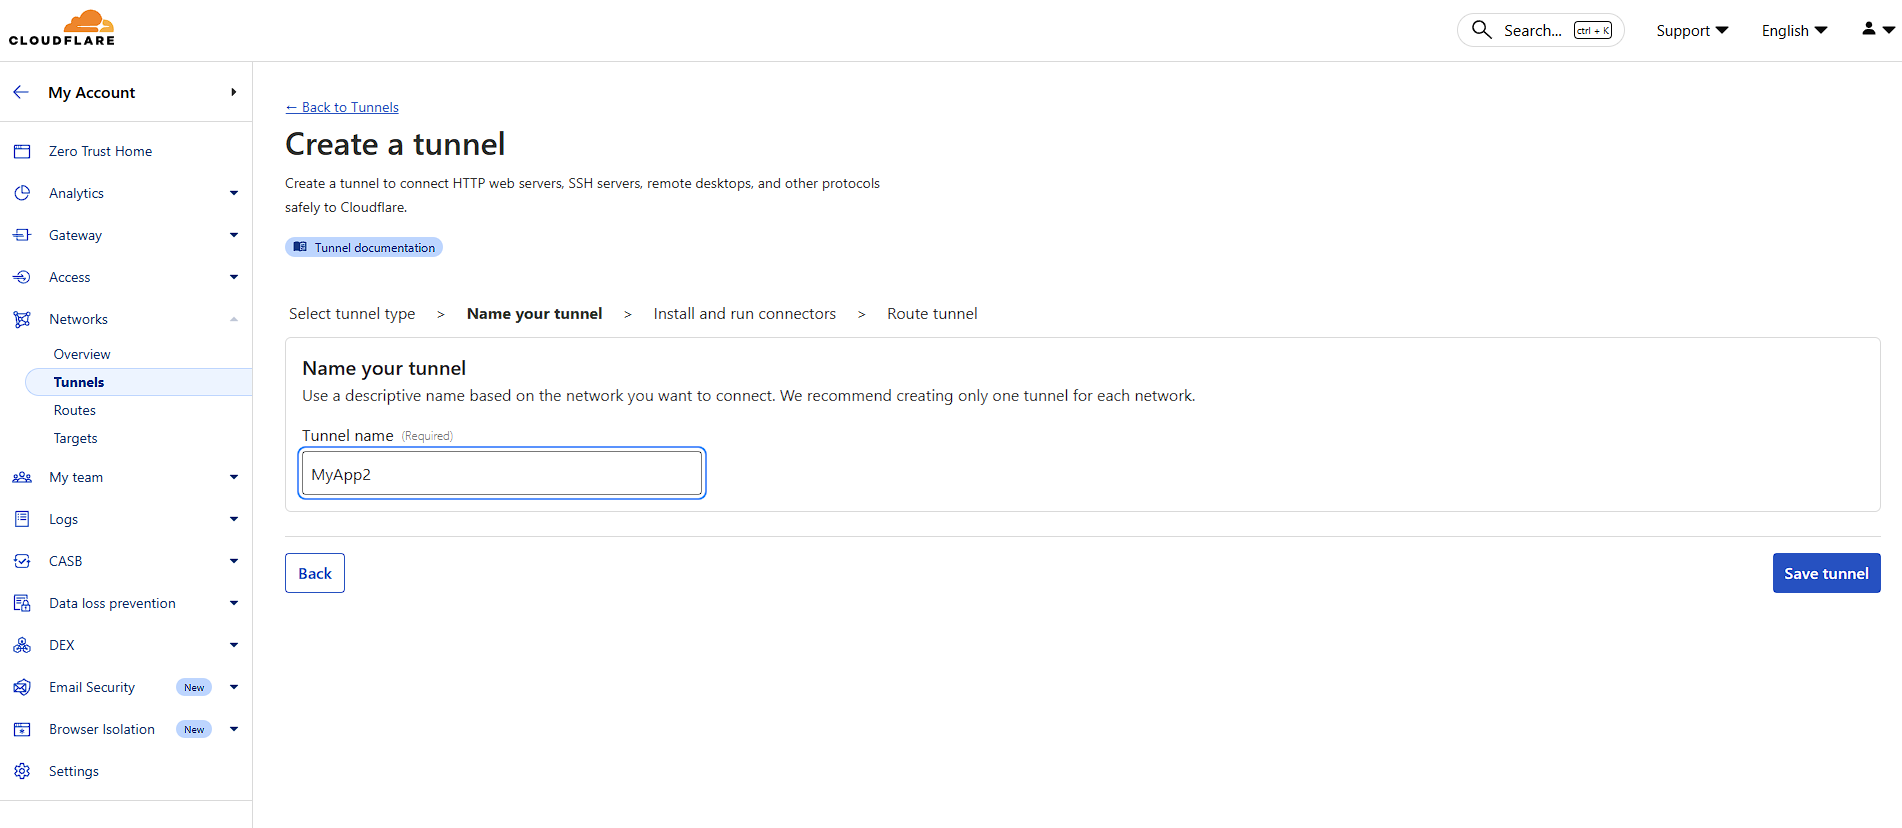
Click Save tunnel.
Step 3: Configure your application route
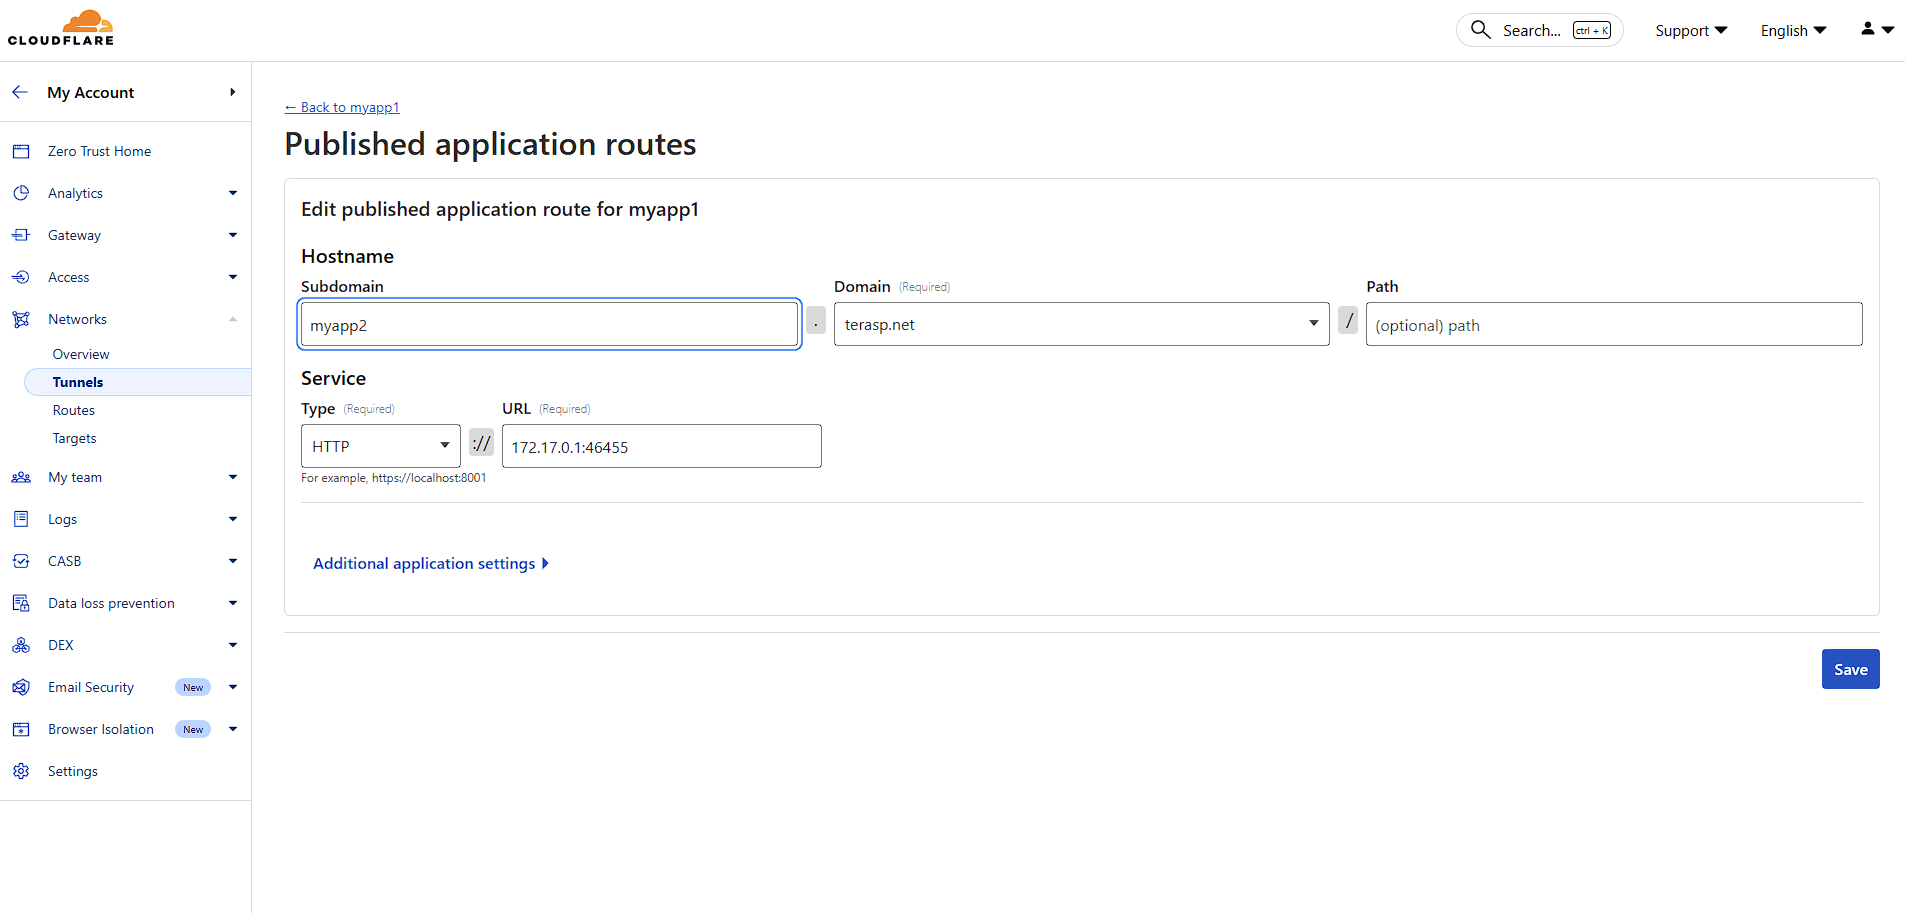
Hostname:
- Subdomain — For example
app,api, orblog. - Domain — One of your Cloudflare-managed domains.
- Path — Optional path prefix.
Service: Find the correct port by clicking Update Config in the Overview tab of your service, then checking the Ports section to see where your app is bound.
Click Save. Your tunnel is now active and routing traffic.
By removing the need for a public IP and open ports, Cloudflare Tunnel cuts your attack surface while adding Cloudflare's performance and security in front of your Elestio service.